
Jira integration with Test Management
Learn how to integrate Jira with Test Management to streamline testing workflows, better tracking, and enhance management.
Jira integration with BrowserStack’s Test Management allows you to create a more efficient workflow by directly linking Test Cases, test results, and Test Runs with the relevant Jira issues. This integration helps streamline your testing process and ensures better issue tracking and test case management from within your Jira environment as you would from Test Management.
As a Test Management user, you must independently integrate the Test Management application with Jira.
Integrate Jira with the Test Management
Depending on your Jira instance type, choose the appropriate procedure for either:
- Jira On Cloud: For Jira instances hosted on the cloud.
- Jira self-hosted: For Jira instances hosted on your own servers.
Prerequisite
This prerequisite applies only if your Jira is self-hosted and not publicly accessible. If your self-hosted Jira is publicly accessible, you can skip this step.
BrowserStack Local Binary
To successfully integrate BrowserStack with your Jira self-hosted instance, you need to set up the BrowserStack Local Binary. Follow these steps to ensure everything is correctly configured.
- Download the latest version of the BrowserStack Local Binary.
- Before running the binary, ensure the file has execute permissions:
chmod +x BrowserStackLocal
- To connect BrowserStack with your Jira self-hosted instance, use the following command:
./BrowserStackLocal --local-identifier integrations-repeater --only <jira-host-url-without-https>,<jira-port>,<ssl 0 or 1> --key <browserstackKey>
| Element | Description | Example |
|---|---|---|
<jira-host-url-without-https> |
Jira server URL (e.g., jira.mycompany.com). |
jira.mycompany.com |
<jira-port> |
The port number on which your Jira instance runs. Replace 8080 with your actual port. |
8080 |
<ssl> |
Indicates whether SSL is enabled (1 for HTTPS, 0 for HTTP). |
0 for HTTP or 1 for HTTPS |
<browserstackKey> |
Replace <browserstackKey> with your actual BrowserStack Access Key, which you can find in your BrowserStack account settings. |
abcd1234efgh5678 |
This will ensure that you have the necessary setup to connect their local environment to BrowserStack before proceeding with the integration steps.
Integrate Jira On Cloud
Follow these steps to integrate Jira on cloud with your Test Management.
-
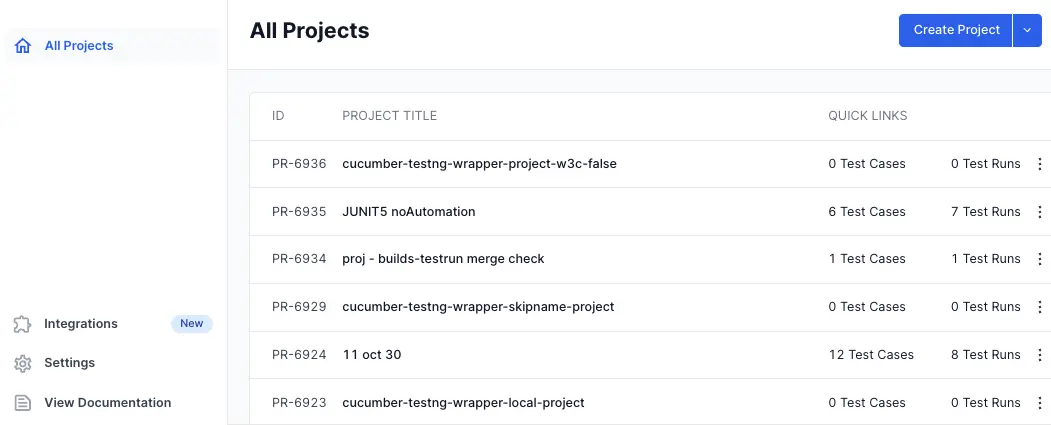
In the left navigation bar of Test Management, click Integrations.
-
Click Connect on the Jira tile.

-
Select Jira On Cloud from the dropdown menu.
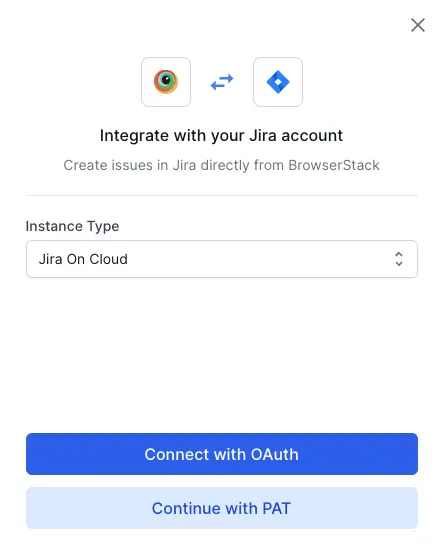
- Choose your authentication method:
- Click Connect with OAuth to log in using OAuth.
- Click Continue with PAT to use a Personal Access Token (PAT).
- Follow the on-screen instructions to complete the authentication.
After successful authentication, the Jira tile should indicate a connected status. Your Jira On Cloud instance is now integrated with the Test Management, allowing you to create and track issues directly from the tool.
Integrate Jira self-hosted
Follow these steps to integrate Jira self hosted with your Test Management.
-
In the left navigation bar of Test Management, click Integrations.
-
Click Connect on the Jira tile.
-
Select Self Hosted from the dropdown menu.
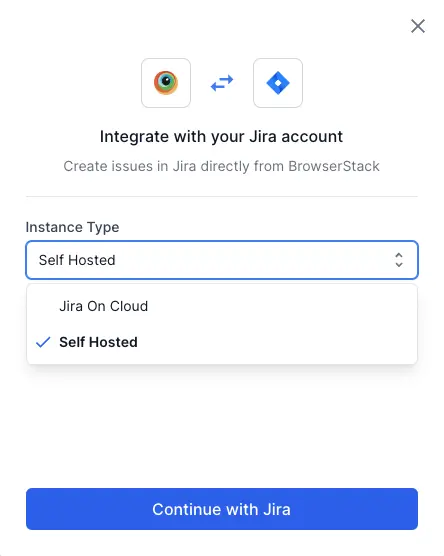
- Click Continue with Jira.
-
Enter your Atlassian host URL and API token to complete the integration.
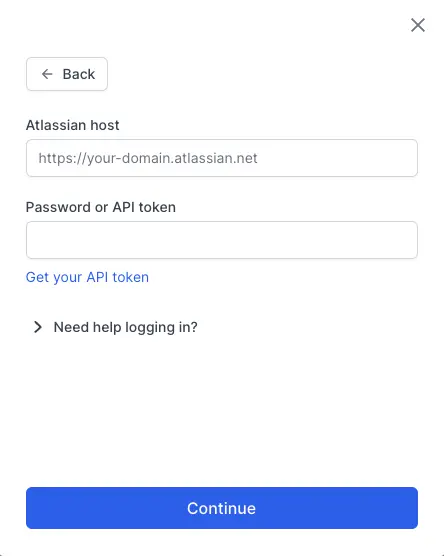
- Click Continue.
After successful authentication, the Jira tile should indicate a connected status. Your Jira Self-Hosted instance is now integrated with the Test Management, allowing you to create and track issues directly from the tool.
Link Jira issues in Test Management
First, Integrate Jira with Test Management to connect Jira issues to test cases and test runs from Test Management.
Link Test Cases with Jira requirement issues
You can connect Jira requirement issues to a test case while creating a test case in the Create Test Case form.
- Log in to Test Management.
- In the Test case dashboard, click Create Test Case.

- Enter the required details, including the Title and Test Case Fields.
- In the Requirements field, click the downward arrow and select Jira.
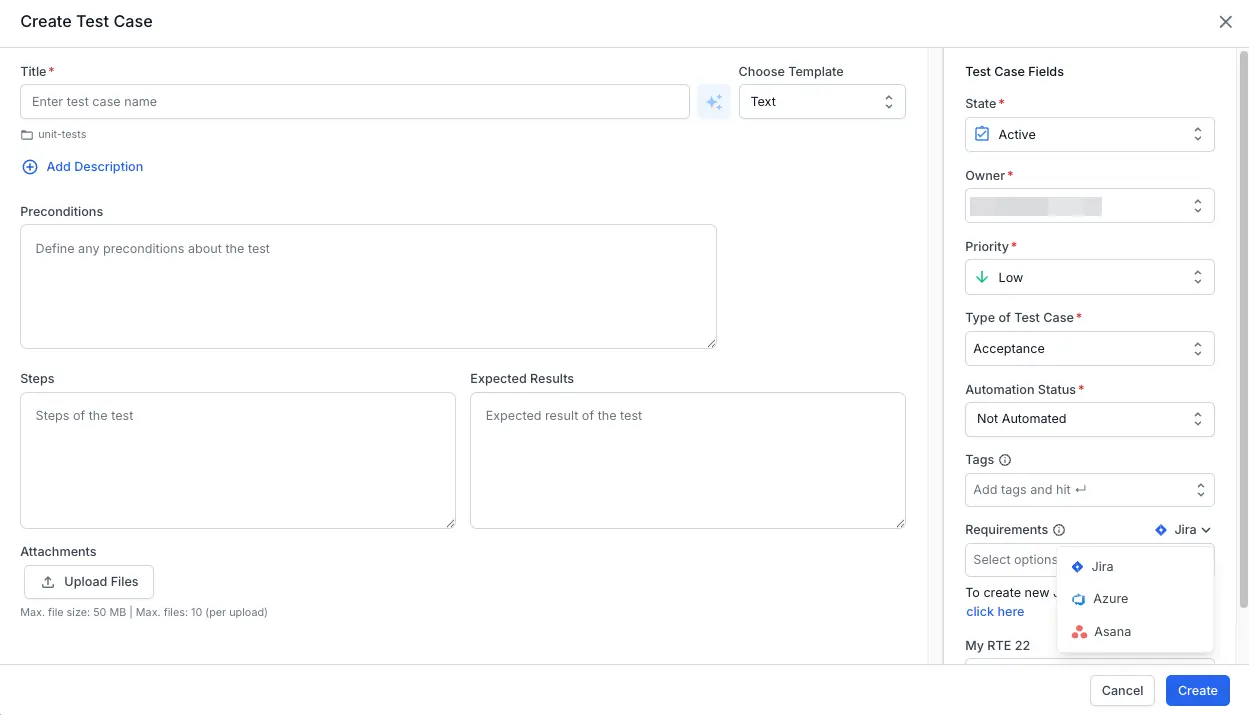
- Click Select options to link existing issues or select click here to open the Jira Issue linking dialog.

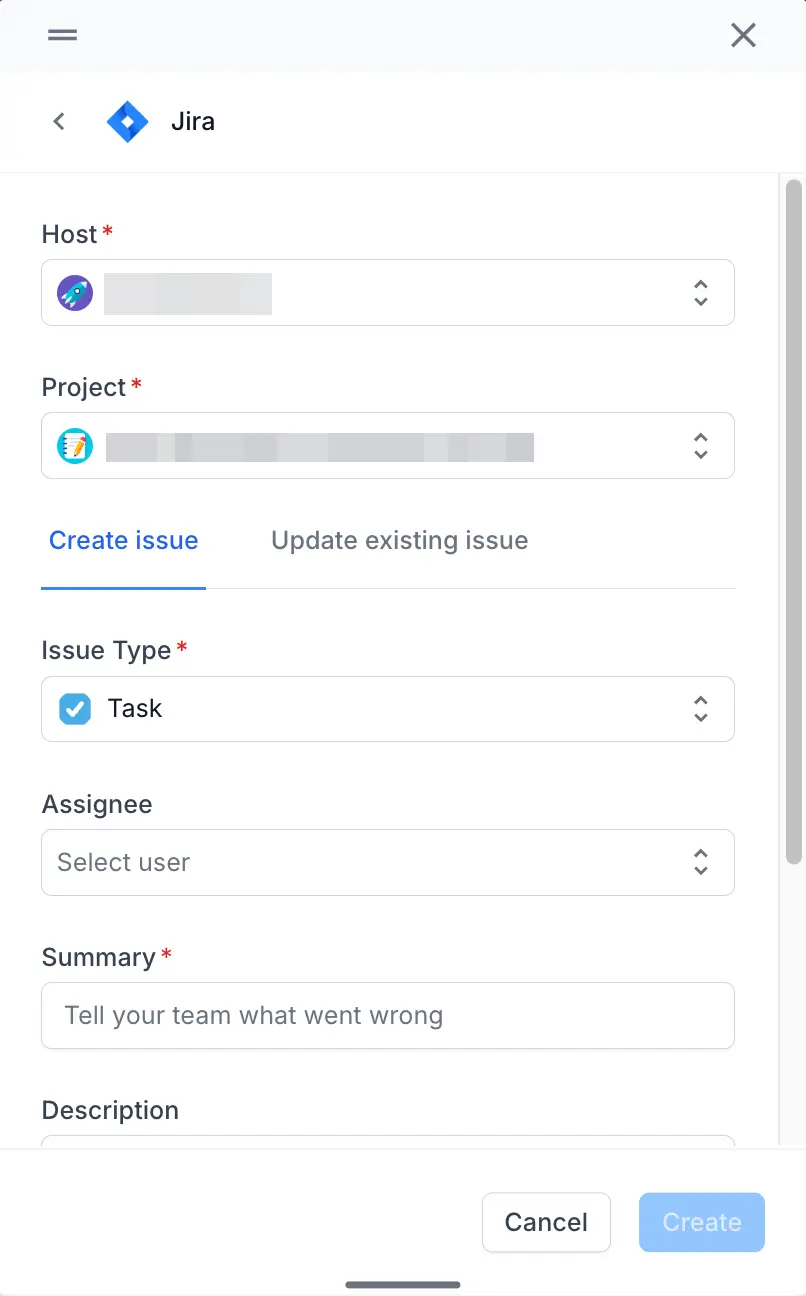
- In the dialog, you can:
- Create a new Jira requirement issue.
- Select the Host and Project.
- Select the Issue Type and enter the relevant fields.
- Click Create.
- Update an existing Jira requirement issue.
- Select the Issue from the dropdown.
- Update the relevant fields.
- Click Update.

- Create a new Jira requirement issue.
- Click Create to create the test case linked to the Jira Issue.
Link Test Case results with Jira defect issues
You can link the Jira defect issues with failed or passed test case results.
- Log in to Test Management.
- In the left navigation bar, click Test Runs.
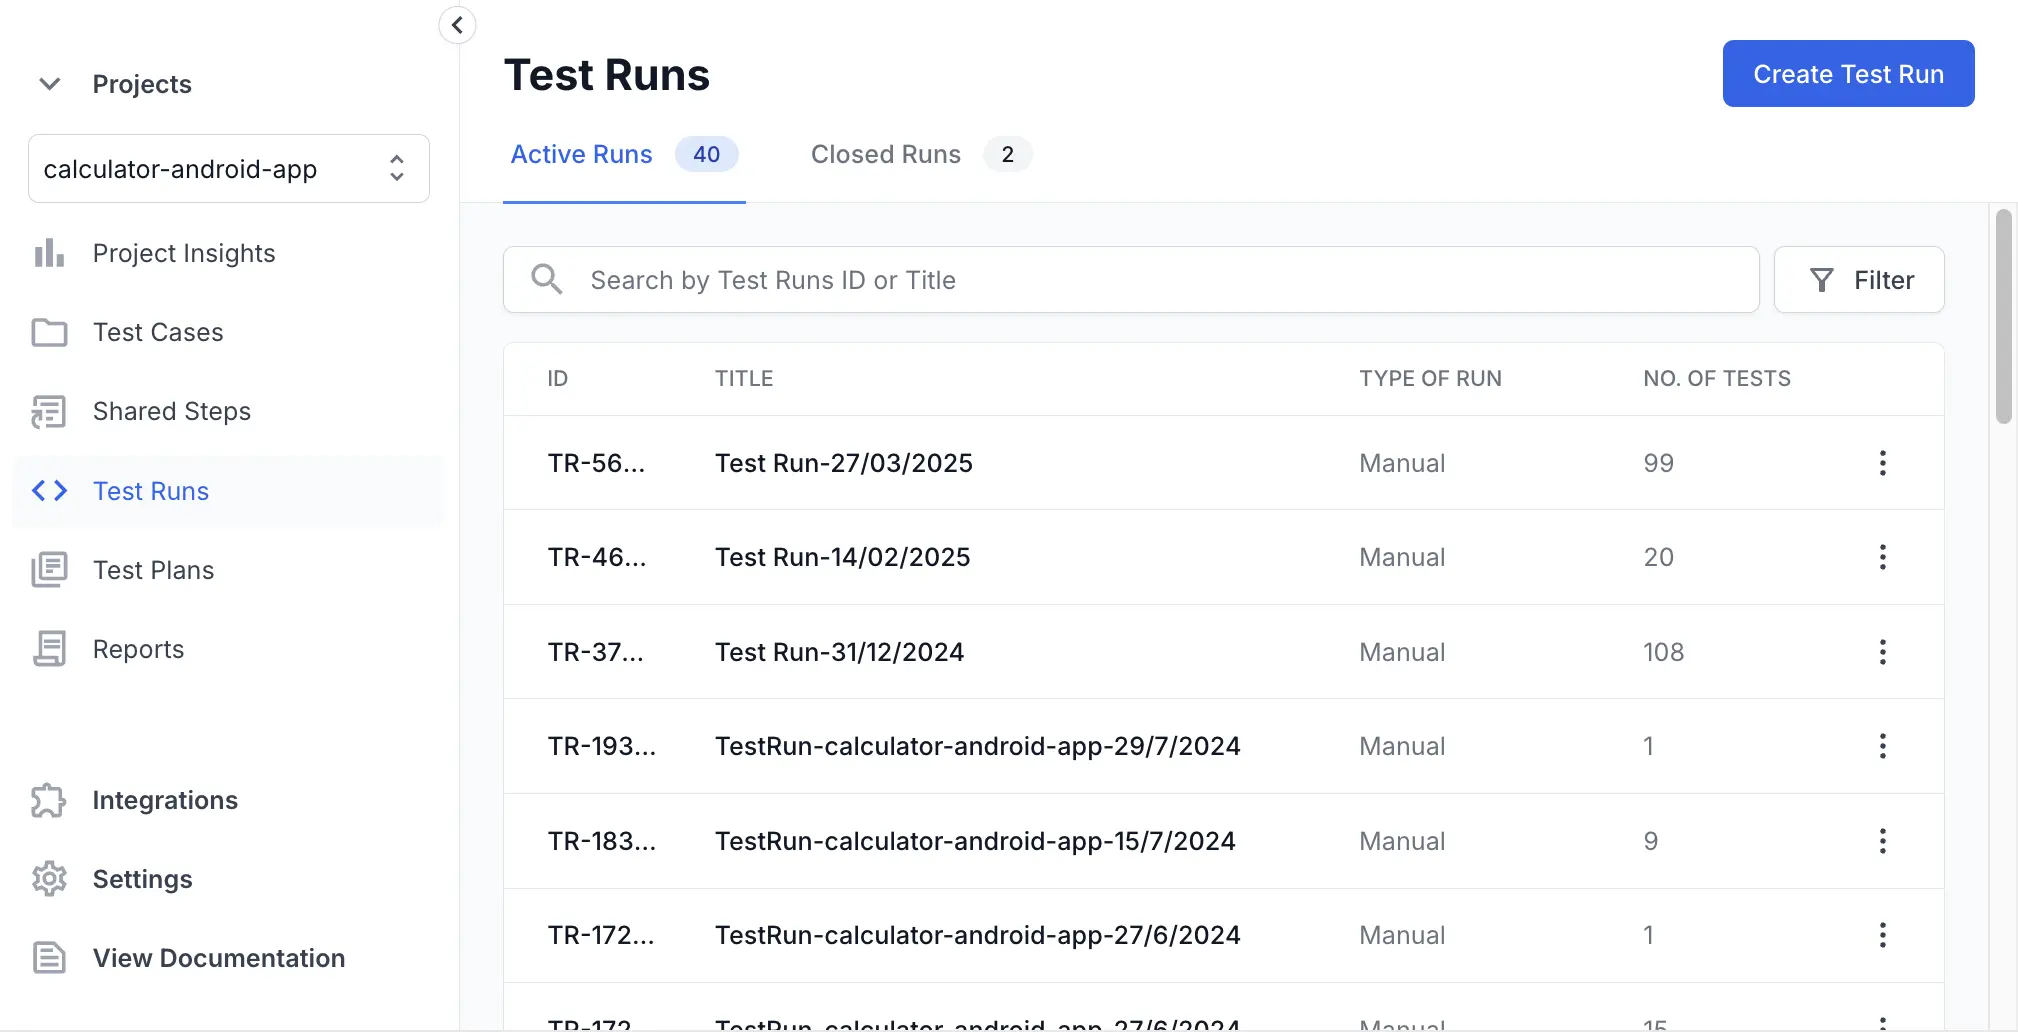
- Select the desired test run and test case within the test run to add the result.
- At the bottom of the test case details view, click Add Result.
- Add the Status and Defects.
- Click Select options to link existing defects (issues) or select click here to open the Jira defect Issue linking dialog.

- In the dialog, you can:
- Create a new Jira issue.
- Select the Host and Project.
- Select the Issue Type and enter the relevant fields.
- Click Create.
- Update an existing Jira issue.
- Select the Issue from the dropdown.
- Update the relevant fields.
- Click Update.
- Create a new Jira issue.
- Click Add Result to add the defect issue to the test run.
Link Test Runs with Jira requirement issues
You can link a Jira requirement issue while creating the Test Run. Select or enter a Jira Issue, you can select or enter multiple Jira Issues in the Jira Issues field.
You can connect a Jira requirement issue while creating the Test Run. Follow these steps:
- Log in to Test Management.
- In the left navigation bar, click Test Runs.
- Enter the required details, including the Test Run Name.
- In the Requirements field, click the downward arrow and select Jira.

- Click Select options to link existing issues or select click here to open the Jira Issue linking dialog.
- In the dialog, you can:
- Create a new Jira requirement issue.
- Select the Host and Project.
- Select the Issue Type and enter the relevant fields.
- Click Create.
- Update an existing Jira requirement issue.
- Select the Issue from the dropdown.
- Update the relevant fields.
- Click Update.
- Create a new Jira requirement issue.
- Click Create to create the test run connected with the Jira Issue.
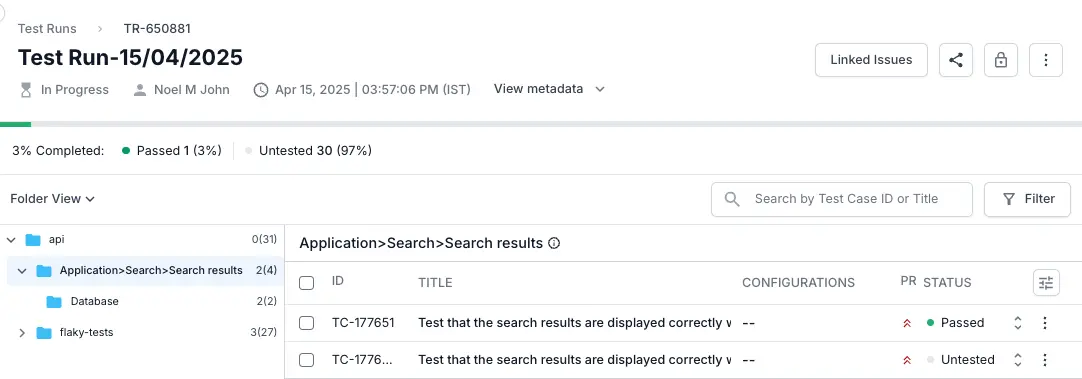
Check linked requirements issues in a test run
To view requirements linked to a specific test run, follow these steps:
- In the left navigation bar, click Test Runs.
- Select the test run you want to check.
- From the test run details page, click Linked Issues.
- Ensure the Requirements linked to Test Run tab is active.
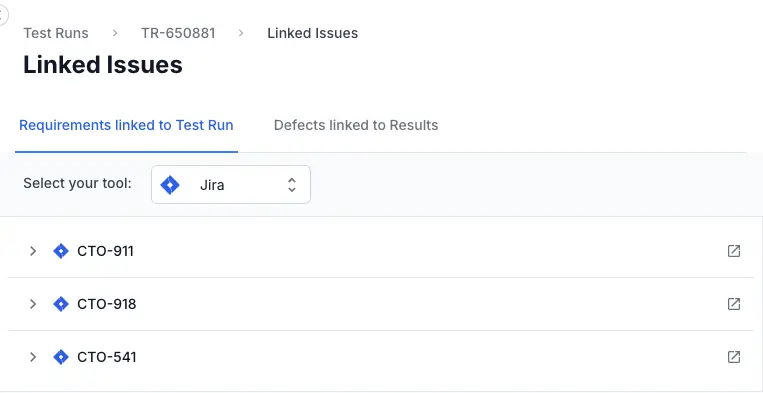
- From the Select your tool dropdown, choose Jira to view issues linked from Jira.
The linked requirement issues from Jira will display here. You can also switch to Defects linked to Results tab and view the linked defect issues.
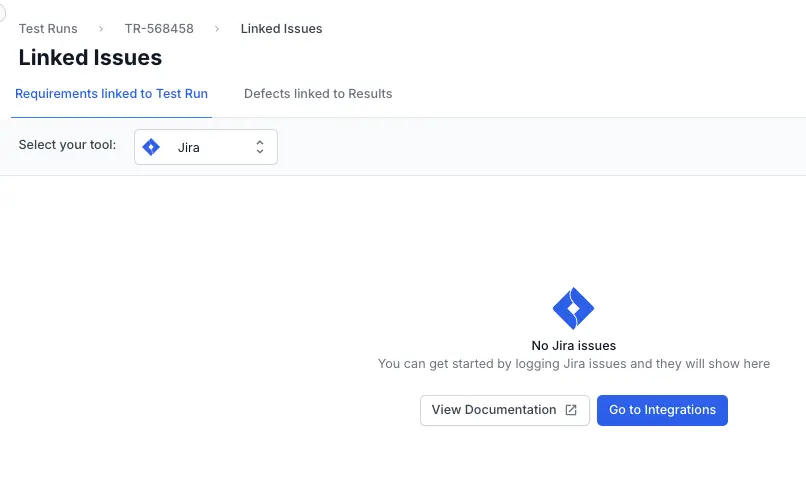
If no linked issues appear:
- Click Go to Integrations to connect or troubleshoot your Jira integration.
We're sorry to hear that. Please share your feedback so we can do better
Contact our Support team for immediate help while we work on improving our docs.
We're continuously improving our docs. We'd love to know what you liked
We're sorry to hear that. Please share your feedback so we can do better
Contact our Support team for immediate help while we work on improving our docs.
We're continuously improving our docs. We'd love to know what you liked
Thank you for your valuable feedback!