
Test email workflows in Low Code Automation
Learn how to test email workflows seamlessly within Low Code Automation.
Testers often create dummy email addresses or rely on third-party email services to validate email workflows. Low Code Automation’s Email Workflow Testing feature allows you to test email workflows directly within the platform, eliminating the need for external services or manual setups. This feature allows you to easily test processes like account sign-ups, password resets, and OTP-based logins. Low Code Automation provides a dedicated email testing environment, ensuring a smooth and complete testing experience.
Email Workflow Testing in Low Code Automation enables you to:
- Test account sign-ups
- Verify OTP-based logins
- Check if an email has been received
- Validate the content of an email
- Navigate links provided within the email
- Verify confirmation emails
BrowserStack-provided email IDs
Low Code Automation provides the following email IDs for testing:
- Permanent email ID: A single email address used across multiple test executions. For example, abc@bstackinbox.com.
- Temporary email ID: A unique and one-time email address created for each test. This is ideal for testing sign-ups or specific user actions. Once the test is executed, the email address is no longer accessible, and a new one is generated for each test run.
Test email workflow for account sign-up
The following is a sample email workflow test for signing up an Amazon account.
Add email IDs
- In the email field, both temporary and permanent email IDs are automatically suggested. You can choose one, and this selection is recorded as a step.
- Alternatively, you can click the ︙ icon and select Open/Validate email to copy the email ID and paste it into the email fields.
Open emails
After you entered the email ID, password and click Continue, you’ll receive an OTP or confirmation email. Wait for the email to arrive on the recorder panel. Then, follow these steps:
- Click the Open Email button on the email notification.
- Alternatively, use the Open/Validate email option to access the email. Select the relevant tab to open it. Select the email you want to open.

The email opens in a new tab.
Verify your email
After opening the email, you can validate it. Depending on the flow, this may include clicking a link, extracting a value, or other custom verification steps.
Extract OTP
Follow these steps to extract an OTP from the email:
- Extract the OTP from the email using the Extract Value feature. A notification appears on the recorder panel with the two options:
- Extract OTP: Click to automatically extract the OTP.
- Open Email: Open the email manually, click Extract value and then select the content to get the OTP.
- Select one of the following options in the Select extracted value dialog and click Create.
- Entire text: Inserts the entire text as the variable.
-
Filter specific text using Regex: Allows you to define a pattern to find and extract specific text from your content.
For example, to extract a 6-digit OTP, use the following pattern:\b\d{6}\b. This is useful when your OTP is part of a sentence and cannot be selected directly.
- Enter
OTPin the field to use the saved OTP variable and complete the verification process during testing.
For more details on regex and advanced patterns, refer to the Regular Expressions and Regex cheat sheet document.
Other validations
Besides extracting OTPs, you can perform additional validations within the email body, such as:
- Validate links by clicking them.
- Validate specific text by extracting values, matching patterns, or applying custom checks.
Add filters and validations to open email step
Low Code Automation email environment may contain multiple emails in the inbox. To ensure the correct email is selected during the replay, you can set specific filters and validations for the email sender, recipient, and subject line.
- In the test step configuration page, select the open email step.
- Set filters to narrow down the emails that should be selected during replay. You can filter based on:
- Sender: The sender’s email ID can be set to a fixed value or a variable. For example, registration@company.com.
- Receiver: The recipient’s email address can be defined by the temporary or permanent email ID.
-
Subject: You can define the subject line with a specific value. For example, Verify your email.
- Choose the filter criteria:
- equals: Matches the exact text you specify.
- contains: Matches part of the text.
- starts with: Matches the beginning of the text.
- If needed, you can uncheck any filters. This ensures emails are filtered only based on the selected filters.
- Click Add validations on the text of the sender, receiver and subject.
For example, if the subject contains dynamic text, usecontainsto match a part of the text. - Click Save recording.

Execute an email test workflow
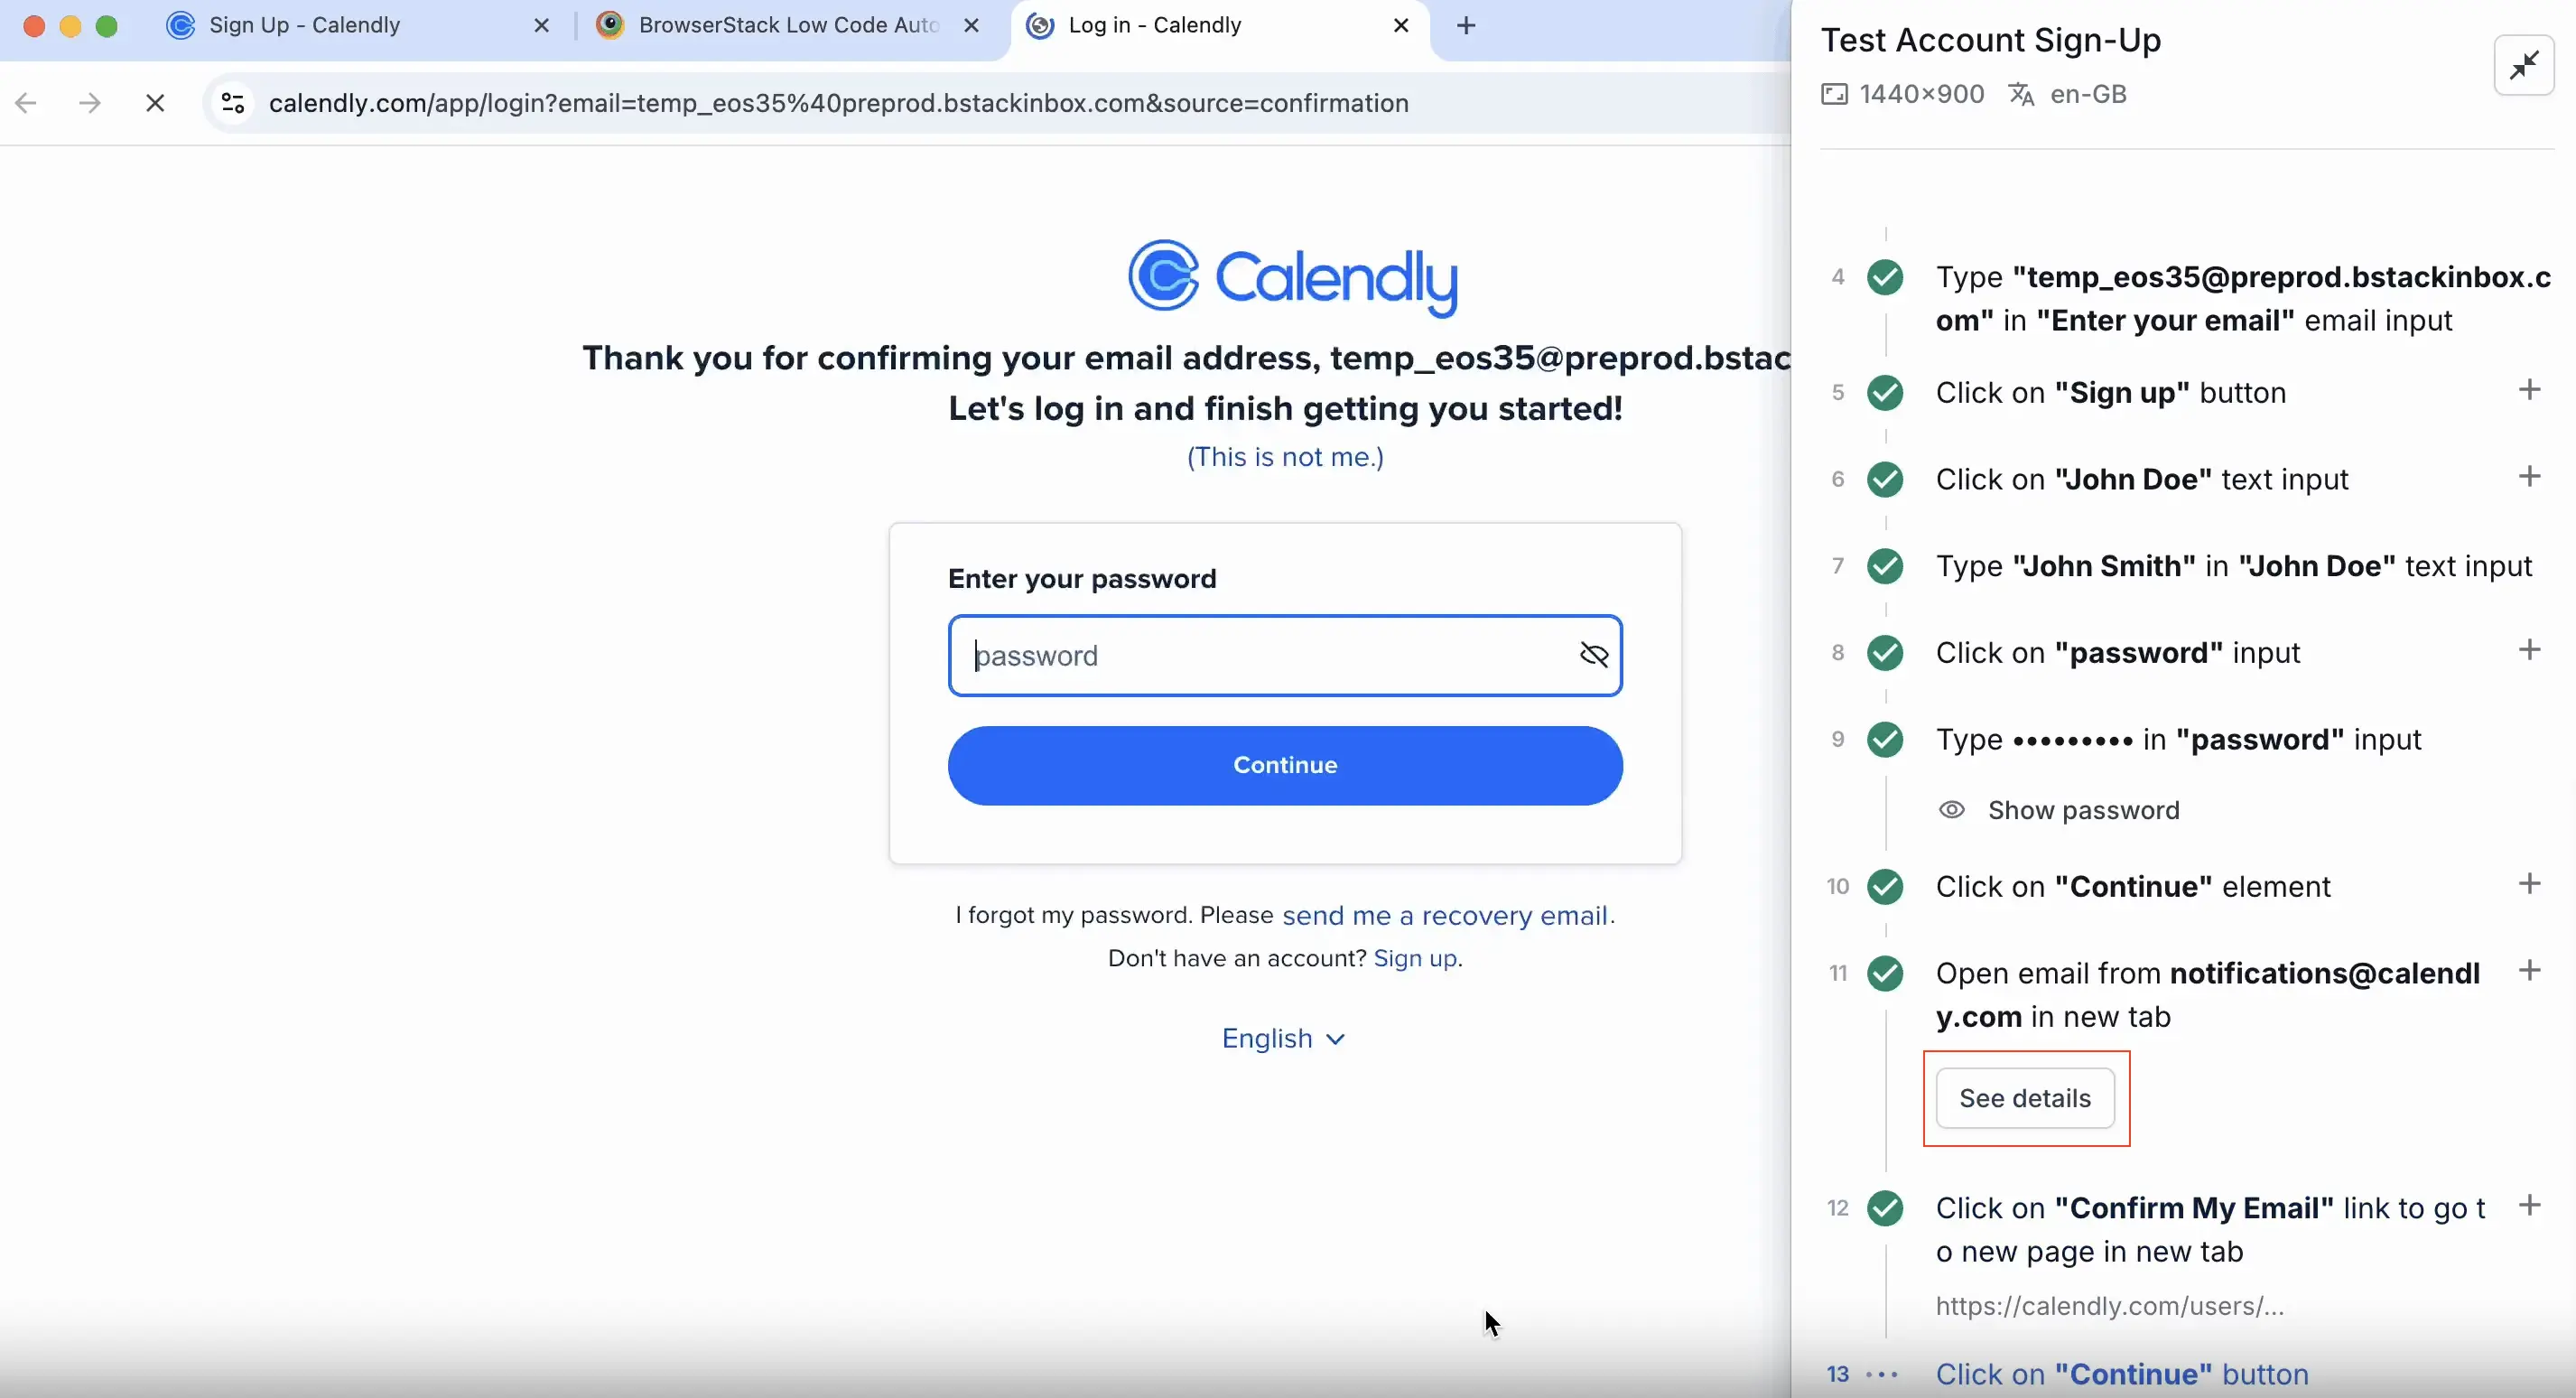
The following is a sample account sign-up flow that demonstrates how to test email workflows.
When replaying the test, click See details on the Open email step to view the email received during execution.
We're sorry to hear that. Please share your feedback so we can do better
Contact our Support team for immediate help while we work on improving our docs.
We're continuously improving our docs. We'd love to know what you liked
We're sorry to hear that. Please share your feedback so we can do better
Contact our Support team for immediate help while we work on improving our docs.
We're continuously improving our docs. We'd love to know what you liked
Thank you for your valuable feedback!