Create and run your first test
Learn how to automate tests using low code automation recorder without coding.
Low Code Automation offers both a web-based application and a desktop application. The web application allows you to view tests, manage test suites, trigger test suites, and view the build reports. The desktop application helps you to create the tests and execute them on a local browser.
Say goodbye to the complexities of coding and get started with BrowserStack Low Code Automation for automating tests with low learning curve. Create & maintain resilient tests with no test execution infrastructure hassles.
Start automating now!
Set up requirements
- Ensure that you have Google Chrome installed on your machine. If not, you can download it from here.
- Low Code Automation Desktop Application.
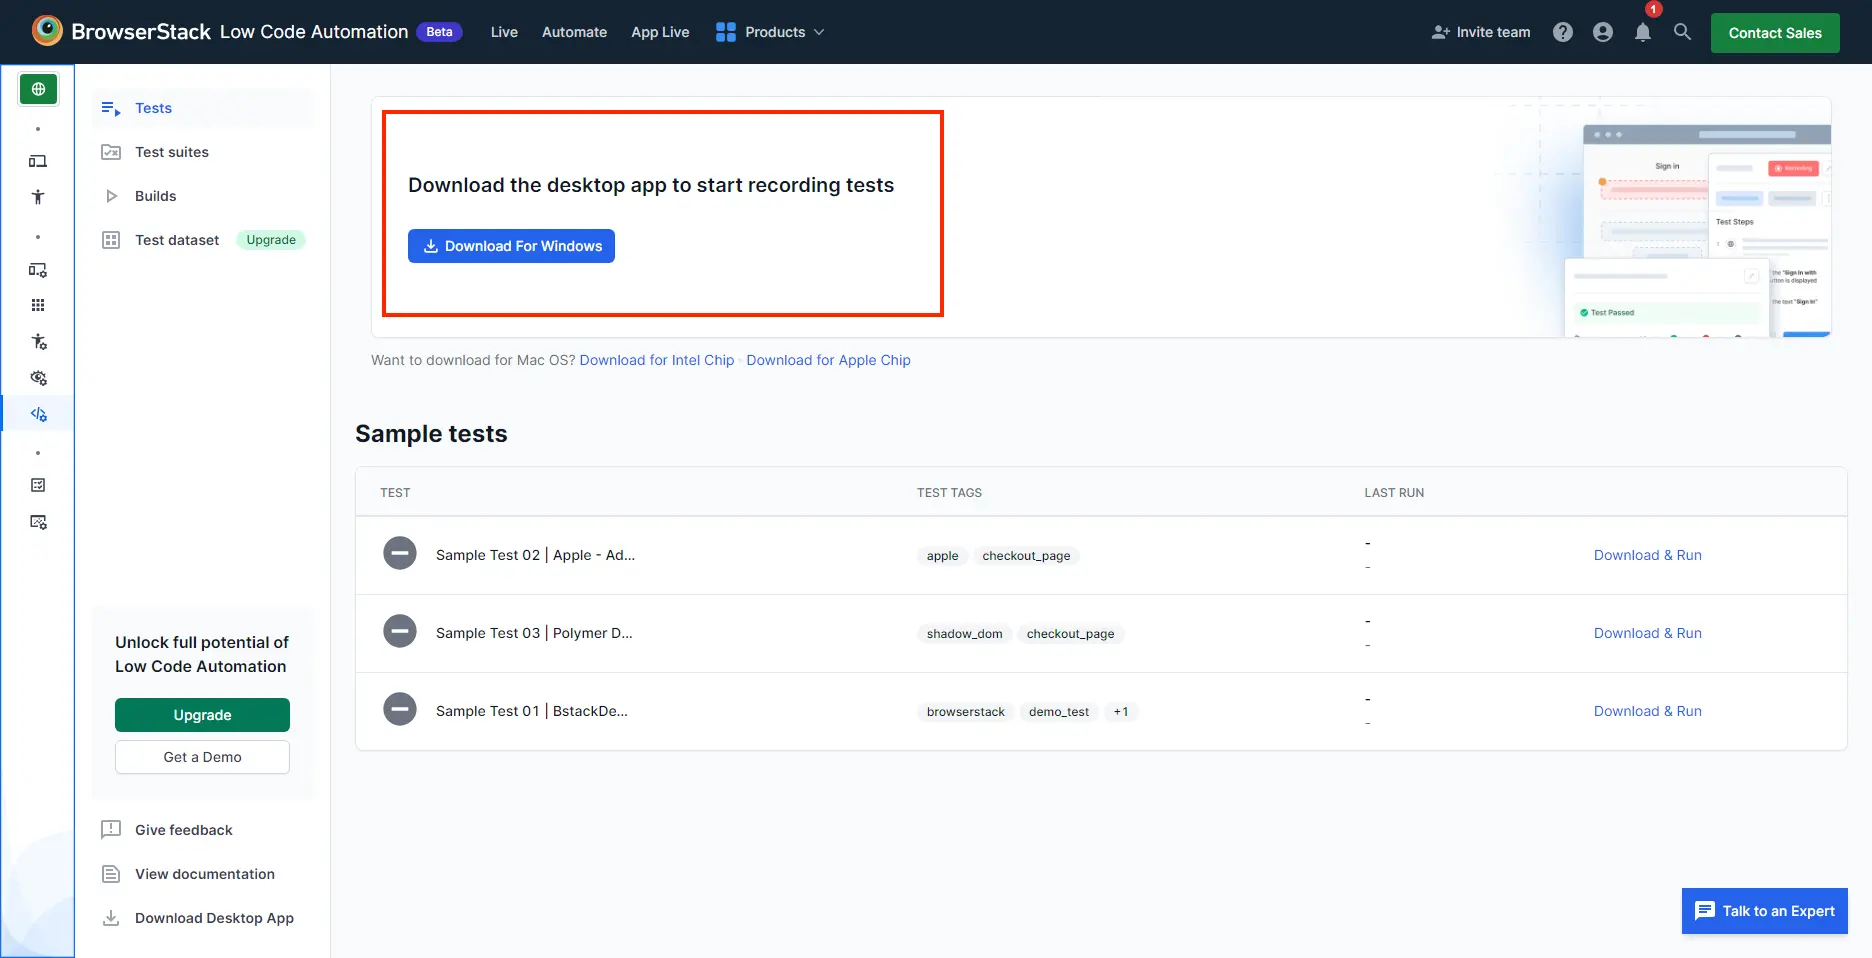
Download and install the Low Code Automation Desktop application
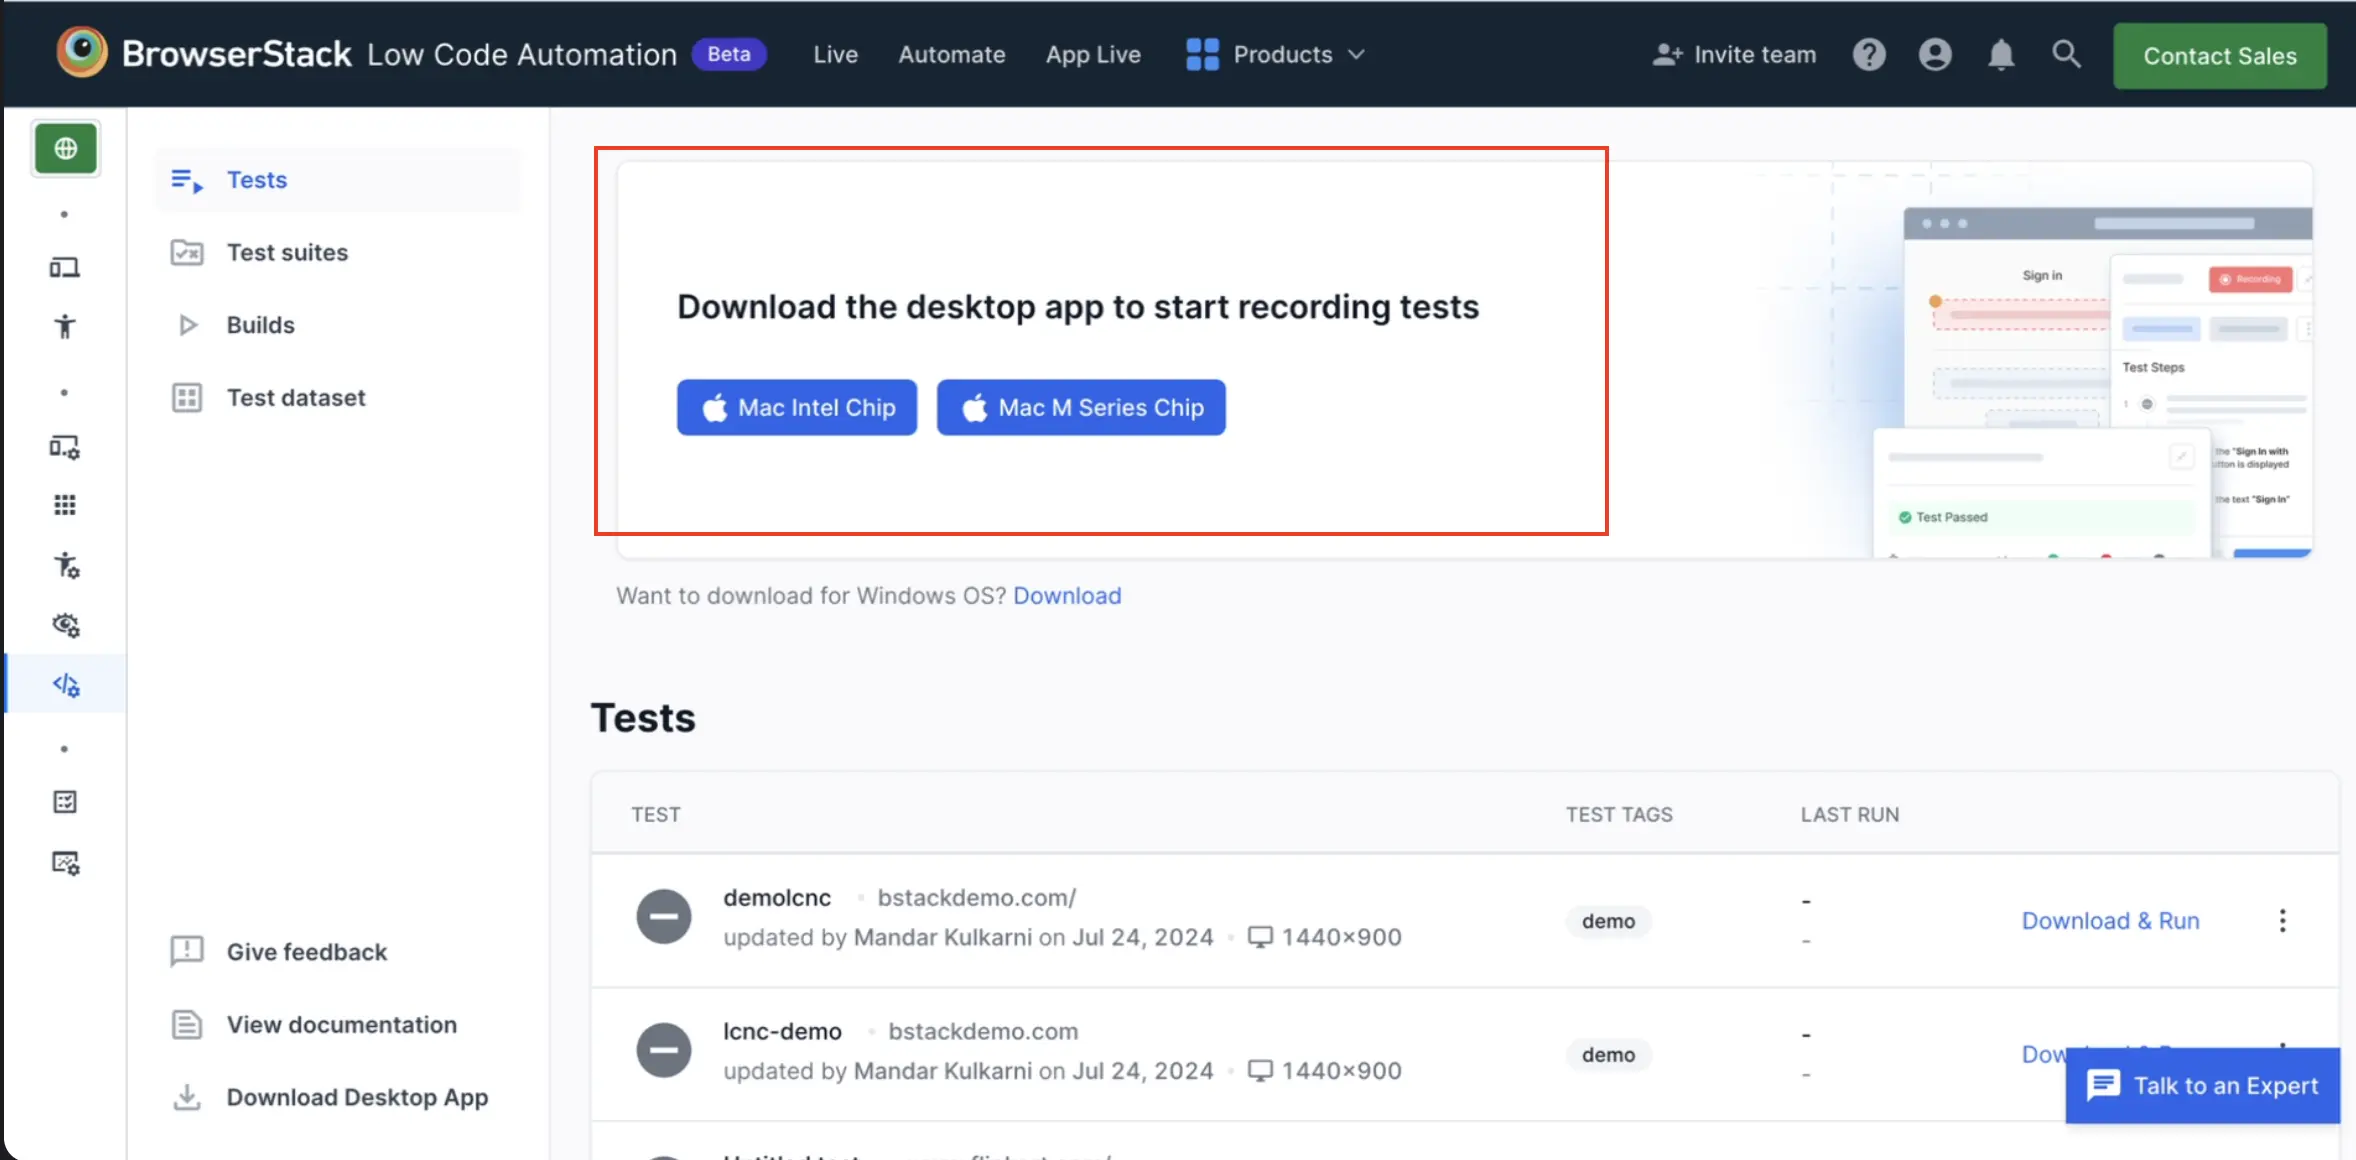
Download the Mac Intel Chip or Mac M Series Chip app. You can find your chip details from About This Mac option.
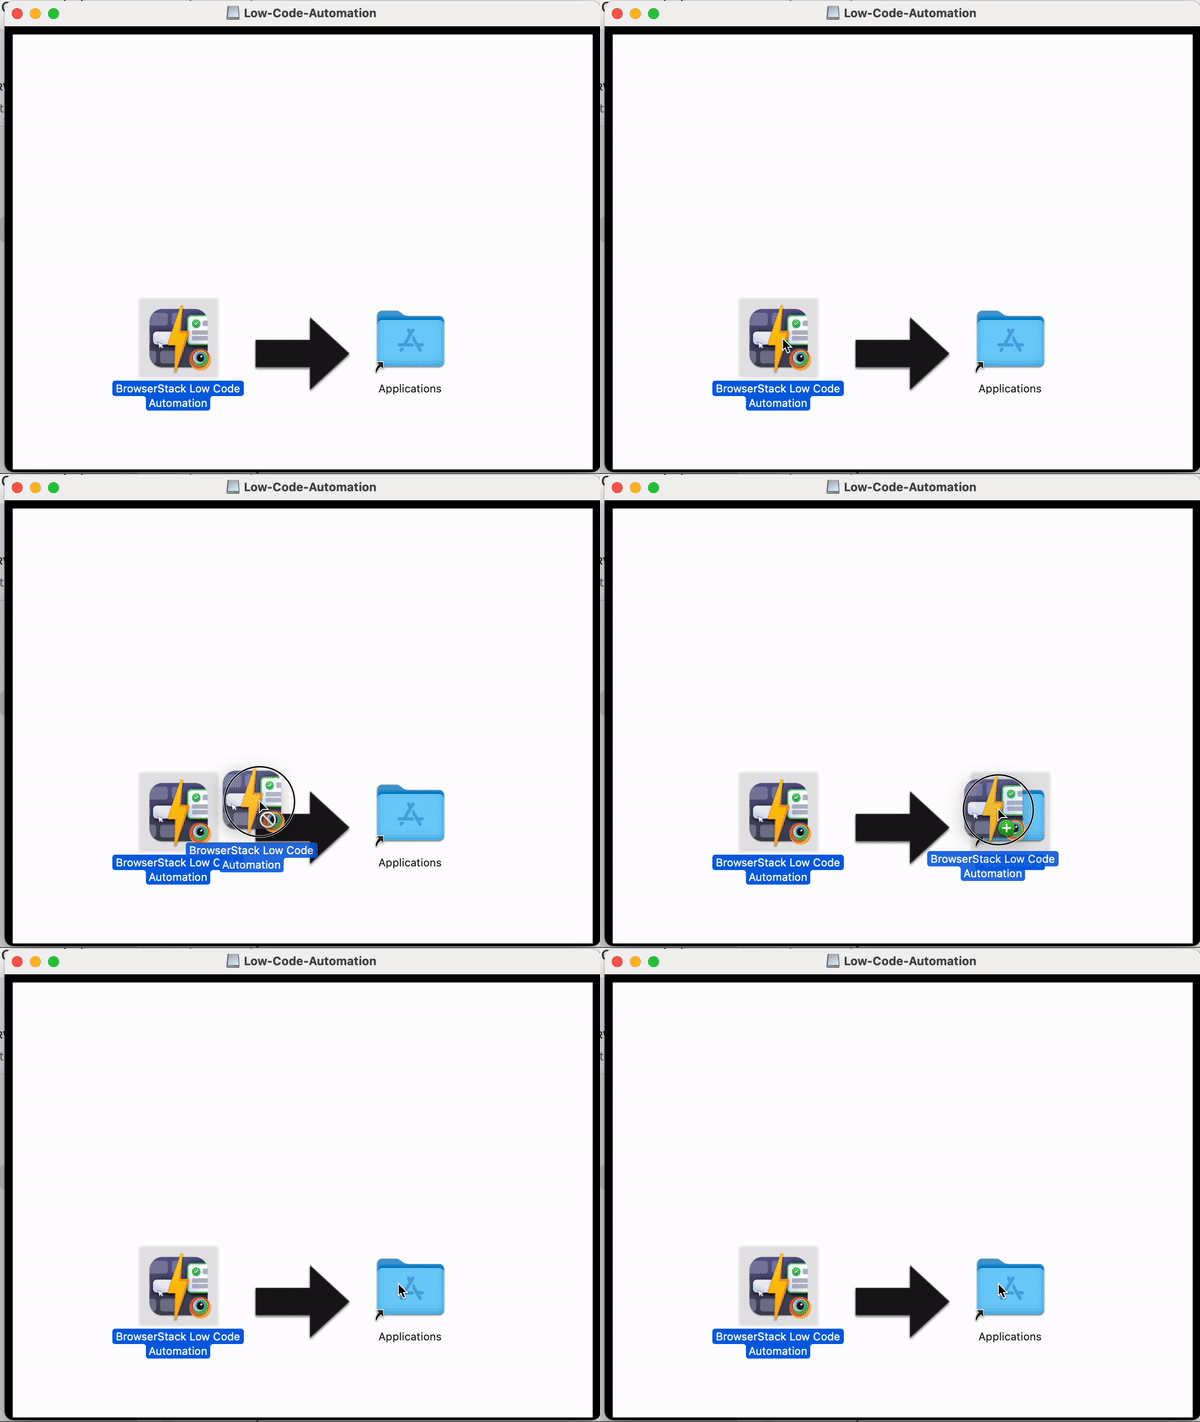
- Go to downloads, and click on the downloaded .dmg file
- Drag the BrowserStack Low Code Automation application to your system’s Applications folder.
You can verify the downloaded app information by right-clicking on the Low Code Automation app in the Applications folder. Then, click on Get Info and check the value of the Kind field. It should be Application (Apple Silicon) for Apple M Series chips and Application (Intel) for Intel chip machines.
Launch the Low Code Automation application.
Record your first test
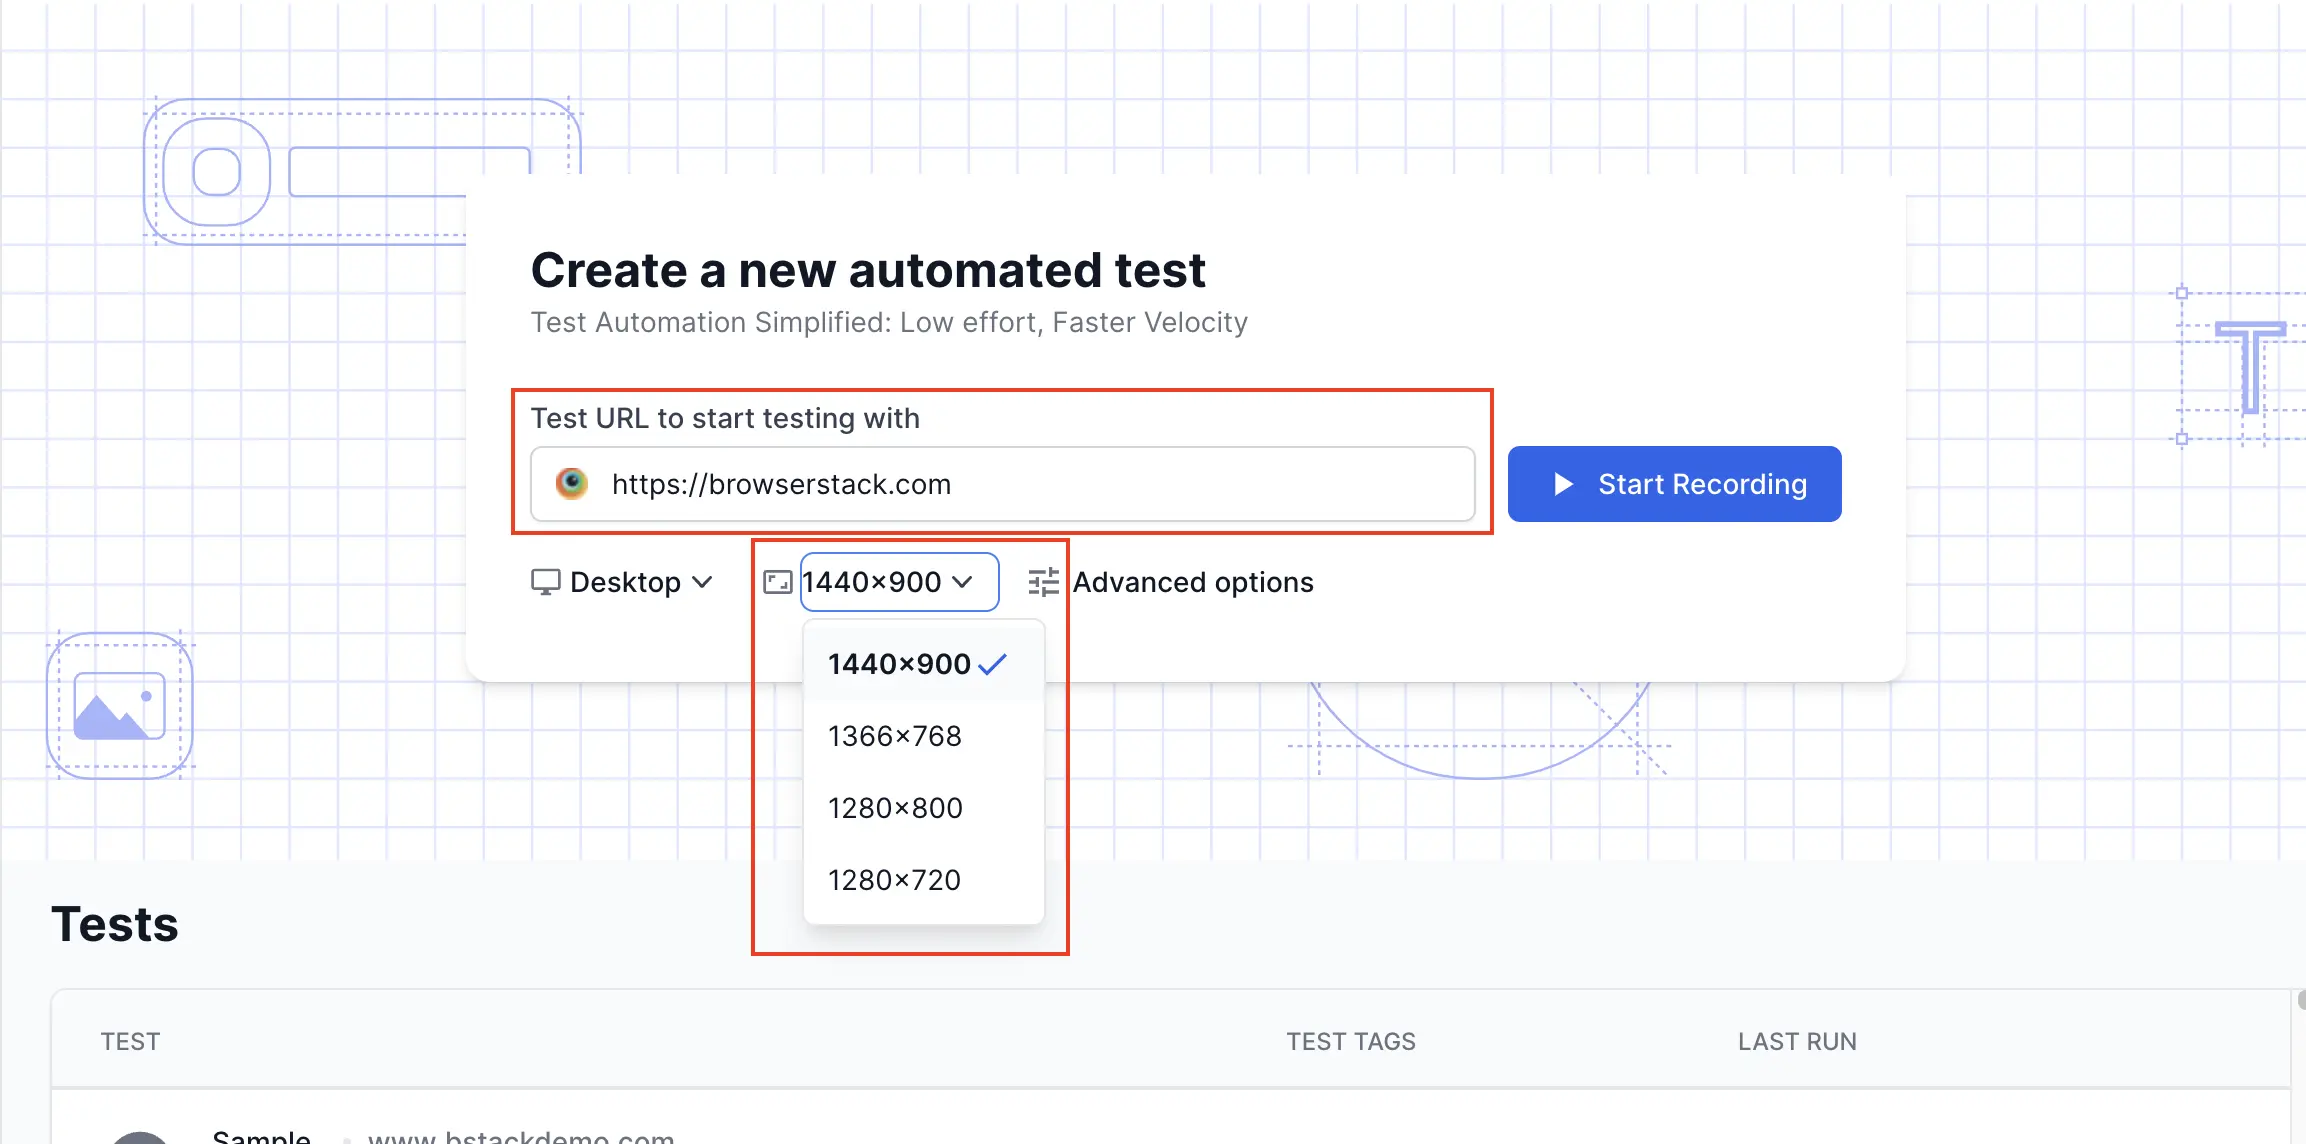
Once you launch the Low Code Automation application, enter the application URL under test, select the appropriate resolution for desktop and mobile, and click Start Recording. A new Chrome session will be launched along with a recorder panel.
Performing actions on the browser
- When you start recording, a Chrome browser launches along with a recorder panel. Each test recording initiates a fresh browser instance to ensure that your ongoing test recording remains unaffected by cookies, cached data, or user sessions from your regular browser use.
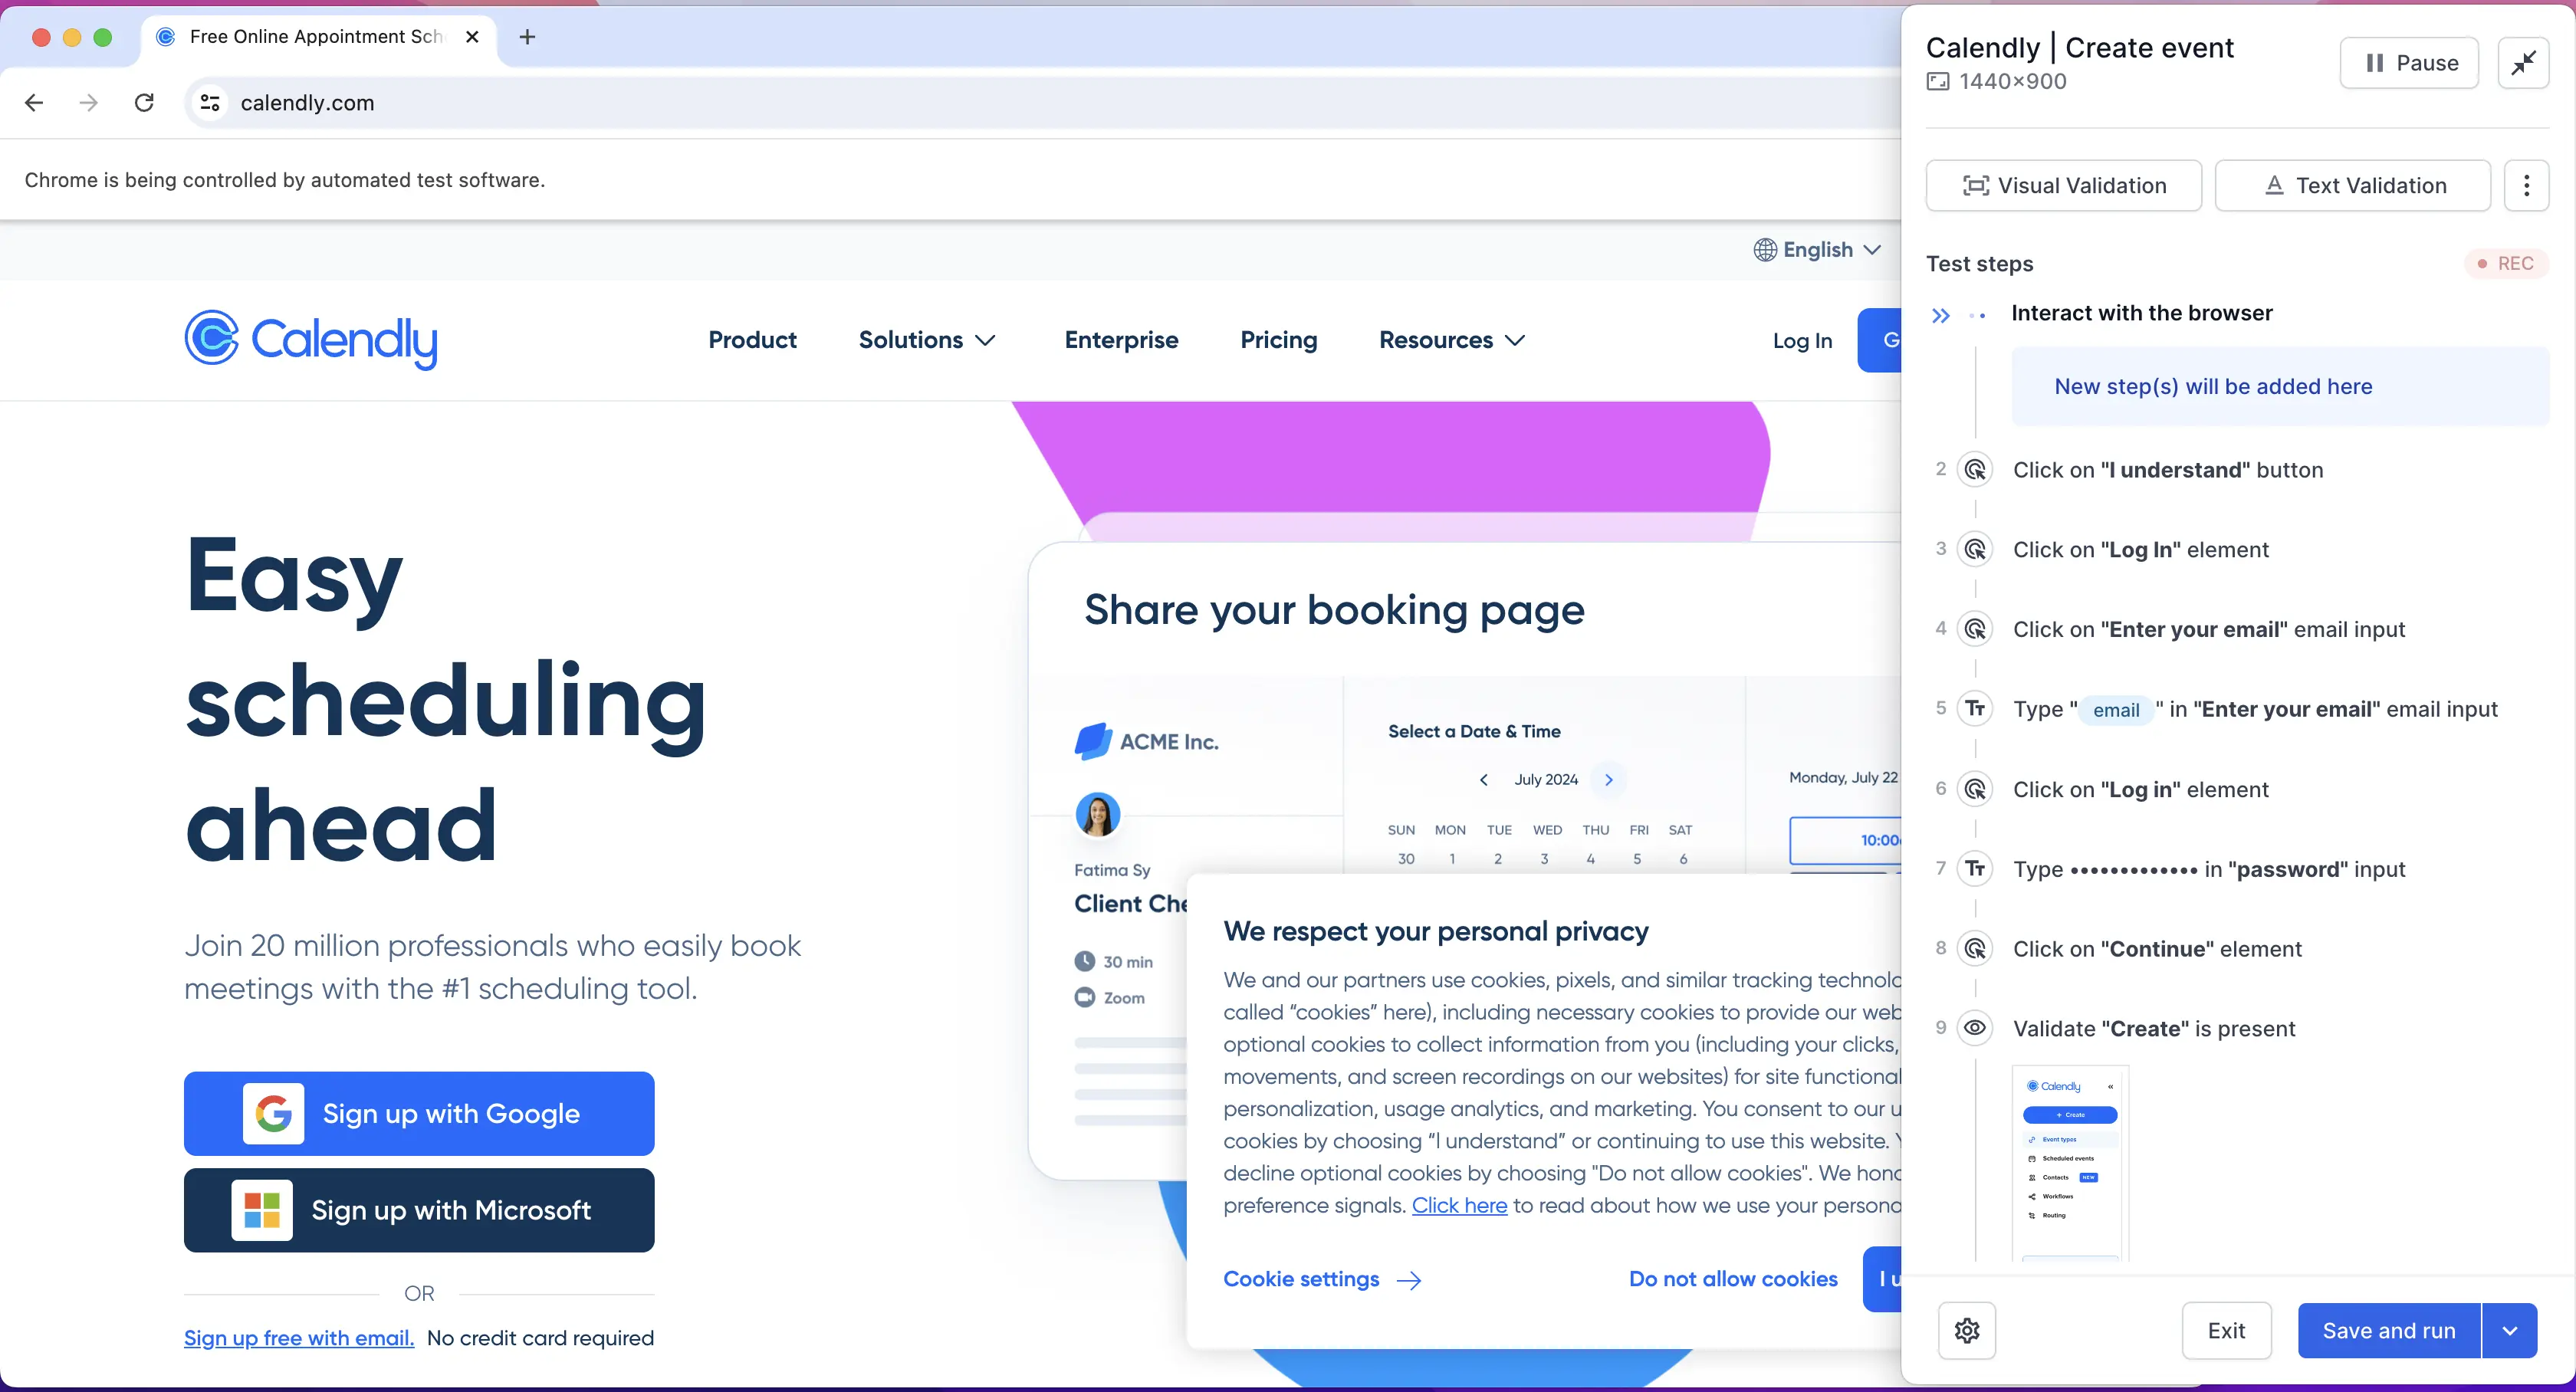
- Simply perform actions on the browser, and the recorder automatically records these actions and converts them into steps. It captures various user interactions, such as clicking, selecting options from dropdowns, key presses, and interacting with form elements, including actions like hover without any additional input.
-
Additionally, the recorder can also capture interactions with elements inside iframes and the Shadow DOM without requiring extra input.
Meaningful step descriptions
The recorder automatically captures your actions and translates them into plain, easy-to-understand English, making the descriptions accessible even to non-technical users. Additionally, you can edit the step descriptions to better suit your needs.
Adding Validations
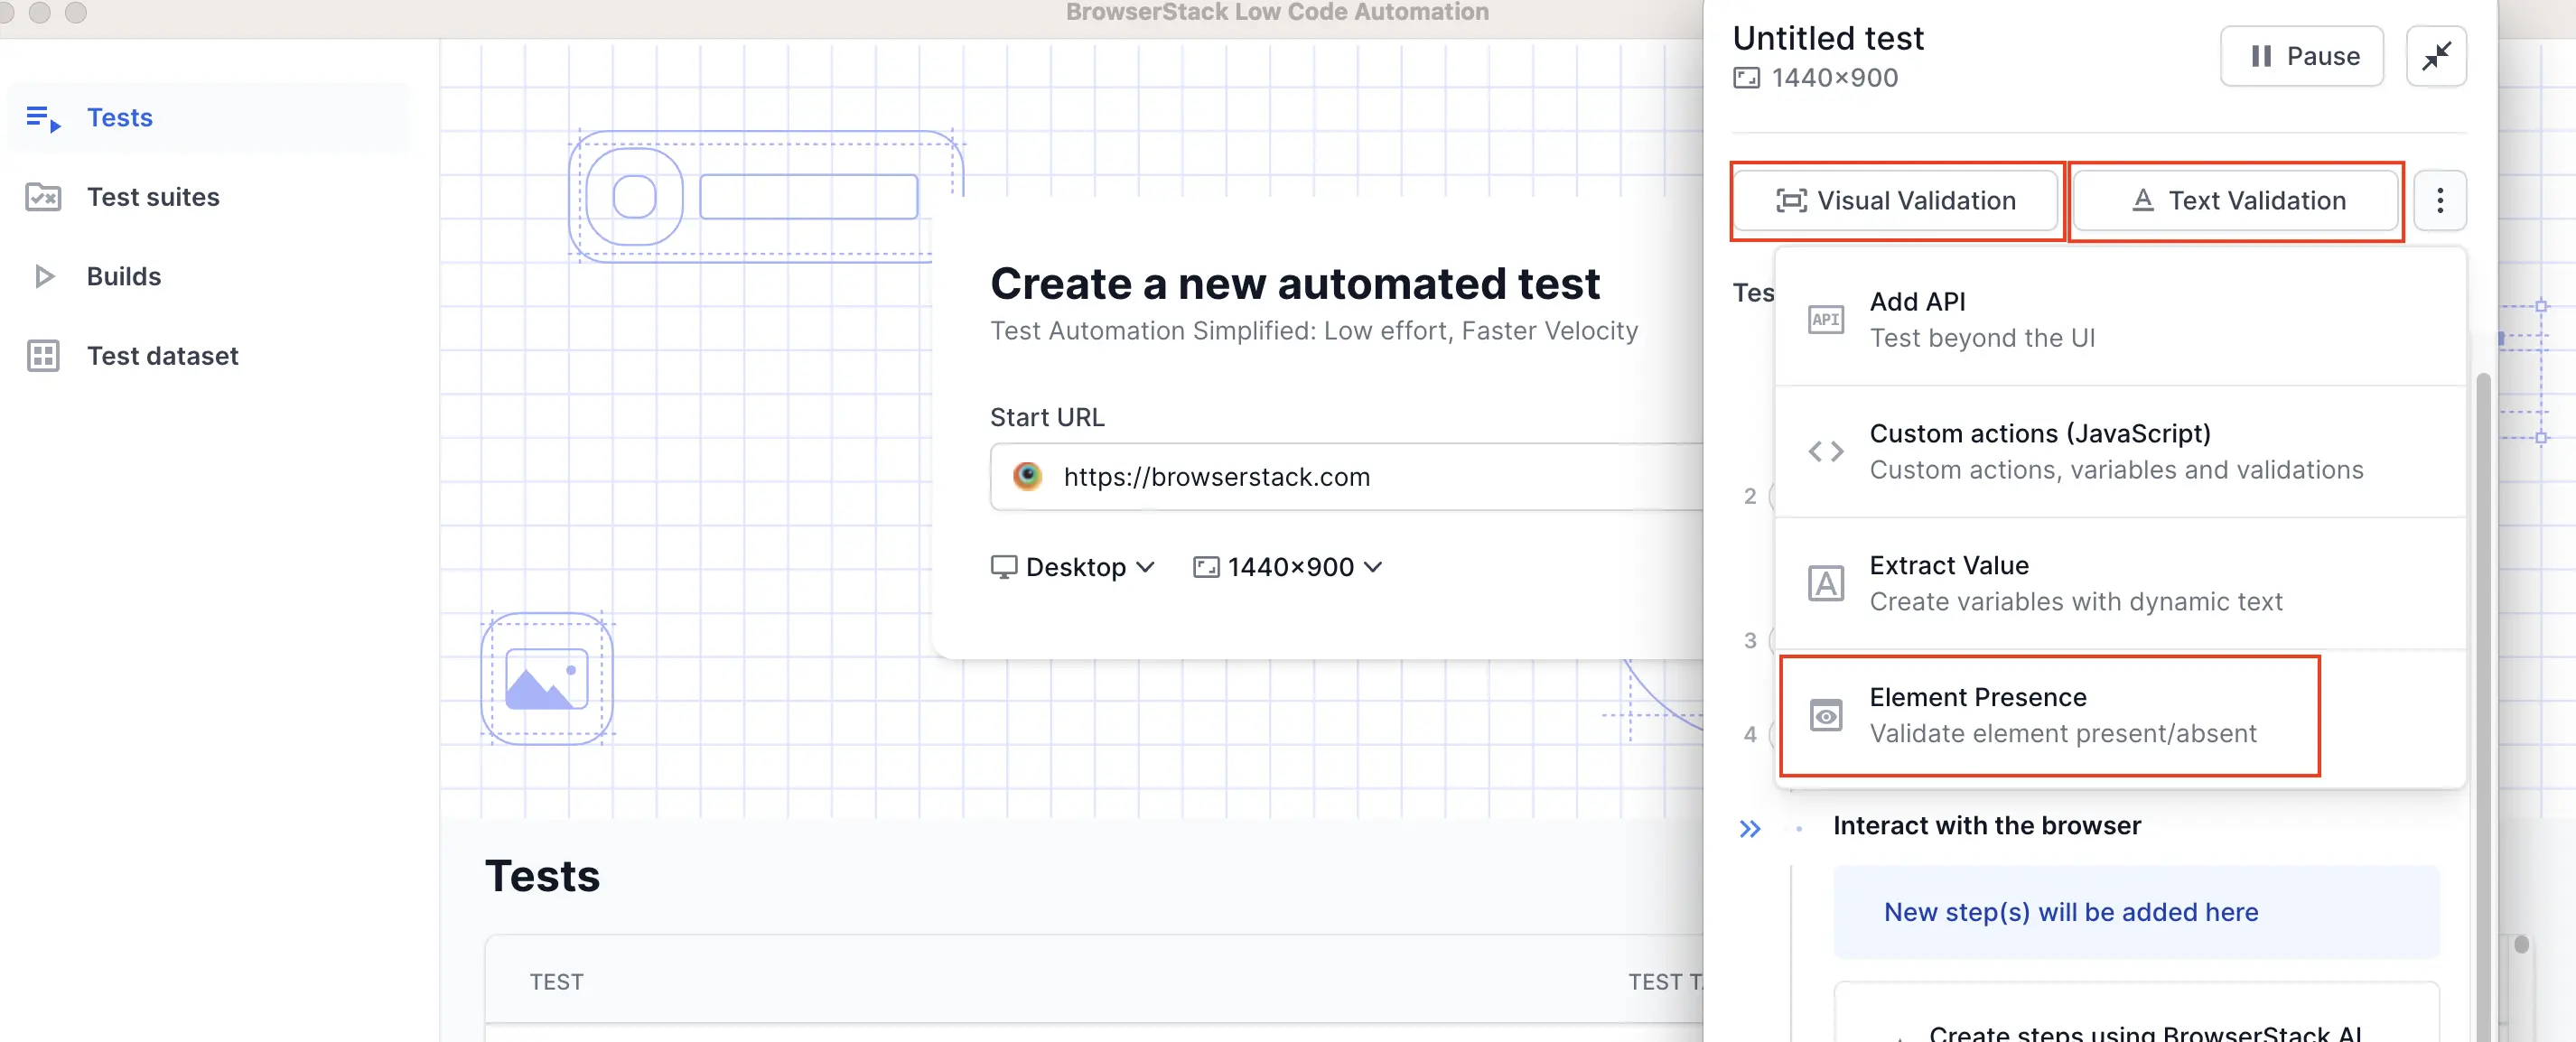
Add visual checkpoints to validate UI elements during test recordings. You can use the built-in validation features to ensure UI elements function correctly and capture visual evidence through screenshots.
We offer three types of validations:
- Element presence validation: Select the element you want to validate. This validates whether the element is present on the UI or not.
- Visual validation: Select the element to capture the screenshot to validate it visually. During replay, the screenshot of the element is taken and compared against this baseline.
- Text validation: Validate the text content of an element.
Validate locally
Review and edit the steps if needed, and then click Save recording to execute tests and validate your changes locally.
- With local test executions, you can instantly get feedback of your tests, offering the ability to swiftly diagnose issues and expedite the development process.
- Every local run executes with a clean browser instance mimicking the exact behavior of the test at the time of recording.
-
Local test executions are completely independent and does not affect the status of the test runs on the Tests page.
Running on cloud
BrowserStack Low Code Automation handles the infrastructure and environment provisioning, allowing you to focus solely on your testing efforts. You also have the flexibility to initiate scheduled test executions on cloud effortlessly.
Create a test suite and run on cloud
Every test suite is set to run on BrowserStack’s cloud infrastructure by default when executed.
- Create a test suite from the Test Suites page to execute it instantly on demand or set up scheduled runs for cloud execution. Check here for detailed information on creating a suite and configuring a scheduler.
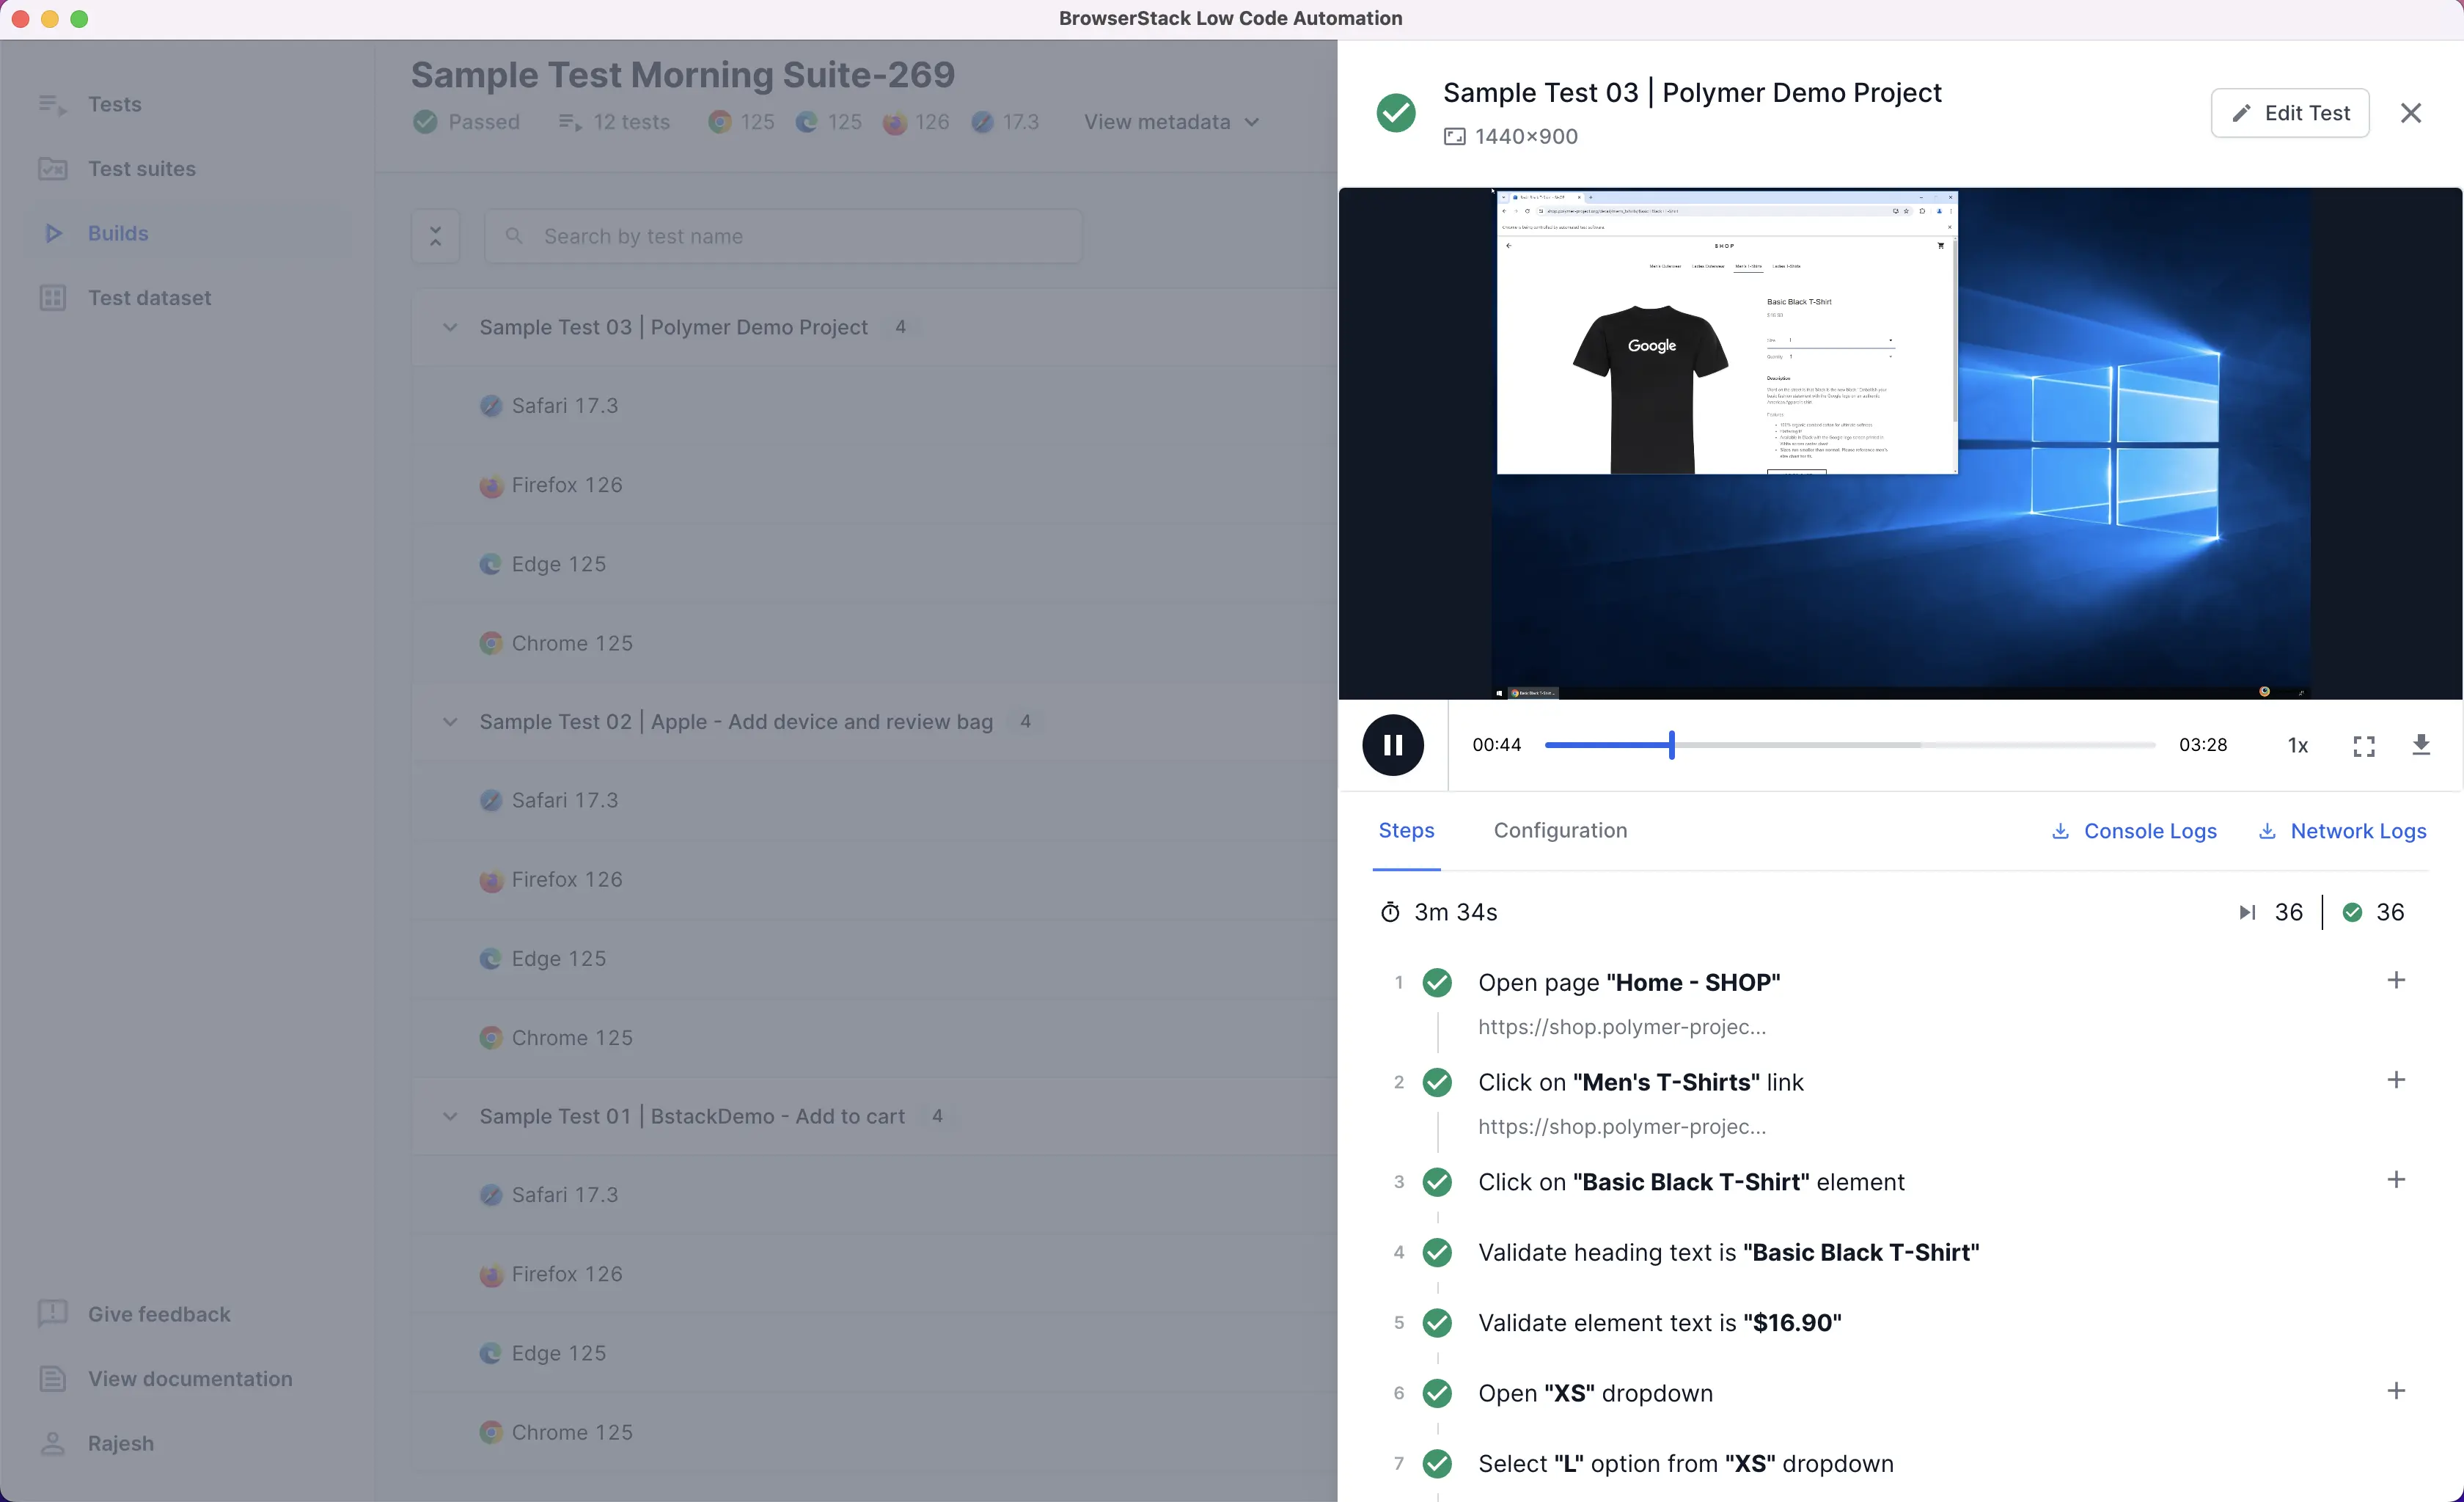
- Navigate to Builds page to view the test suite run status upon completion.
- On demand builds can be differentiated from the scheduled builds using the “Triggered by” field under Build Name.

- Each build can be uniquely identified based on the build number that gets auto incremented upon every test suite run.
- You can even share the build link with your team members in the same BrowserStack organization by clicking on the Copy Build URL button from the Build details page.
Build reports
You can view video logs, screenshots, and other test logs in the reports. For more information, see our Debugging logs page.
Test configuration settings
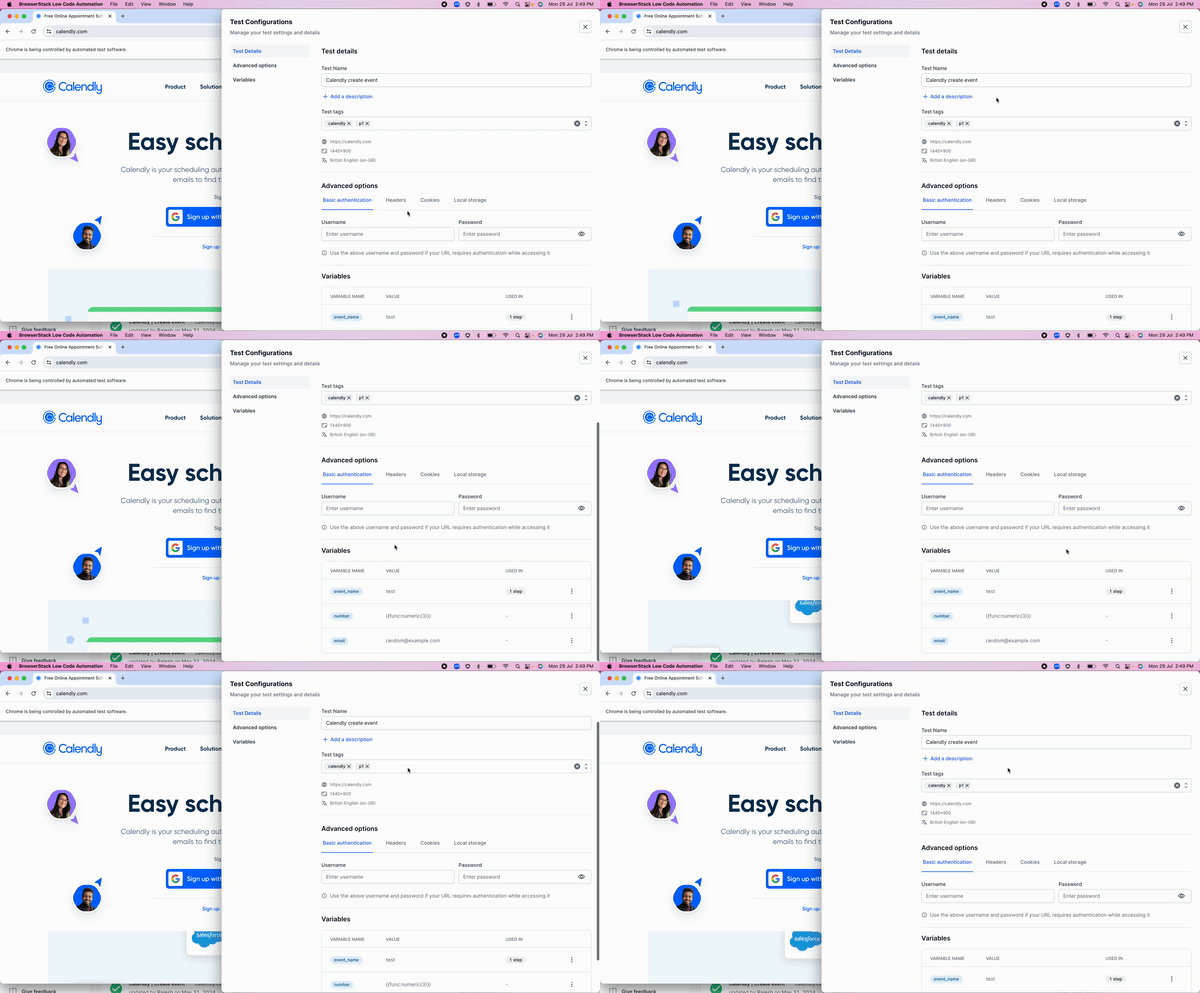
Manage your test settings and details by clicking the Settings icon. You can edit test details, and add test tags and variables for the created test.
Related topic
- Minimum requirements for recording tests on Low Code Automation.
- Best practices for recording tests on low code automation
We're sorry to hear that. Please share your feedback so we can do better
Contact our Support team for immediate help while we work on improving our docs.
We're continuously improving our docs. We'd love to know what you liked
We're sorry to hear that. Please share your feedback so we can do better
Contact our Support team for immediate help while we work on improving our docs.
We're continuously improving our docs. We'd love to know what you liked
Thank you for your valuable feedback!

