
Azure Test Plan
This document explains how to connect your Low Code Automation tests with Azure Test Plan test cases. With this integration, you can easily link and manage your tests in one place, improving test tracking, boosting collaboration, and providing better visibility into your testing process.
Integration with Test Management tools is available only in the Low Code Automation Pro plan. For more details, contact us.
Link Azure Test Plan to Low Code Automation
To link Azure Test Plan with Low-Code Automation:
- Open Low Code Automation and record a test.
- Click the Map test case IDs button while saving the test.

- In the Map test case IDs dialog, select Azure Test Plan from the Test management tool menu.
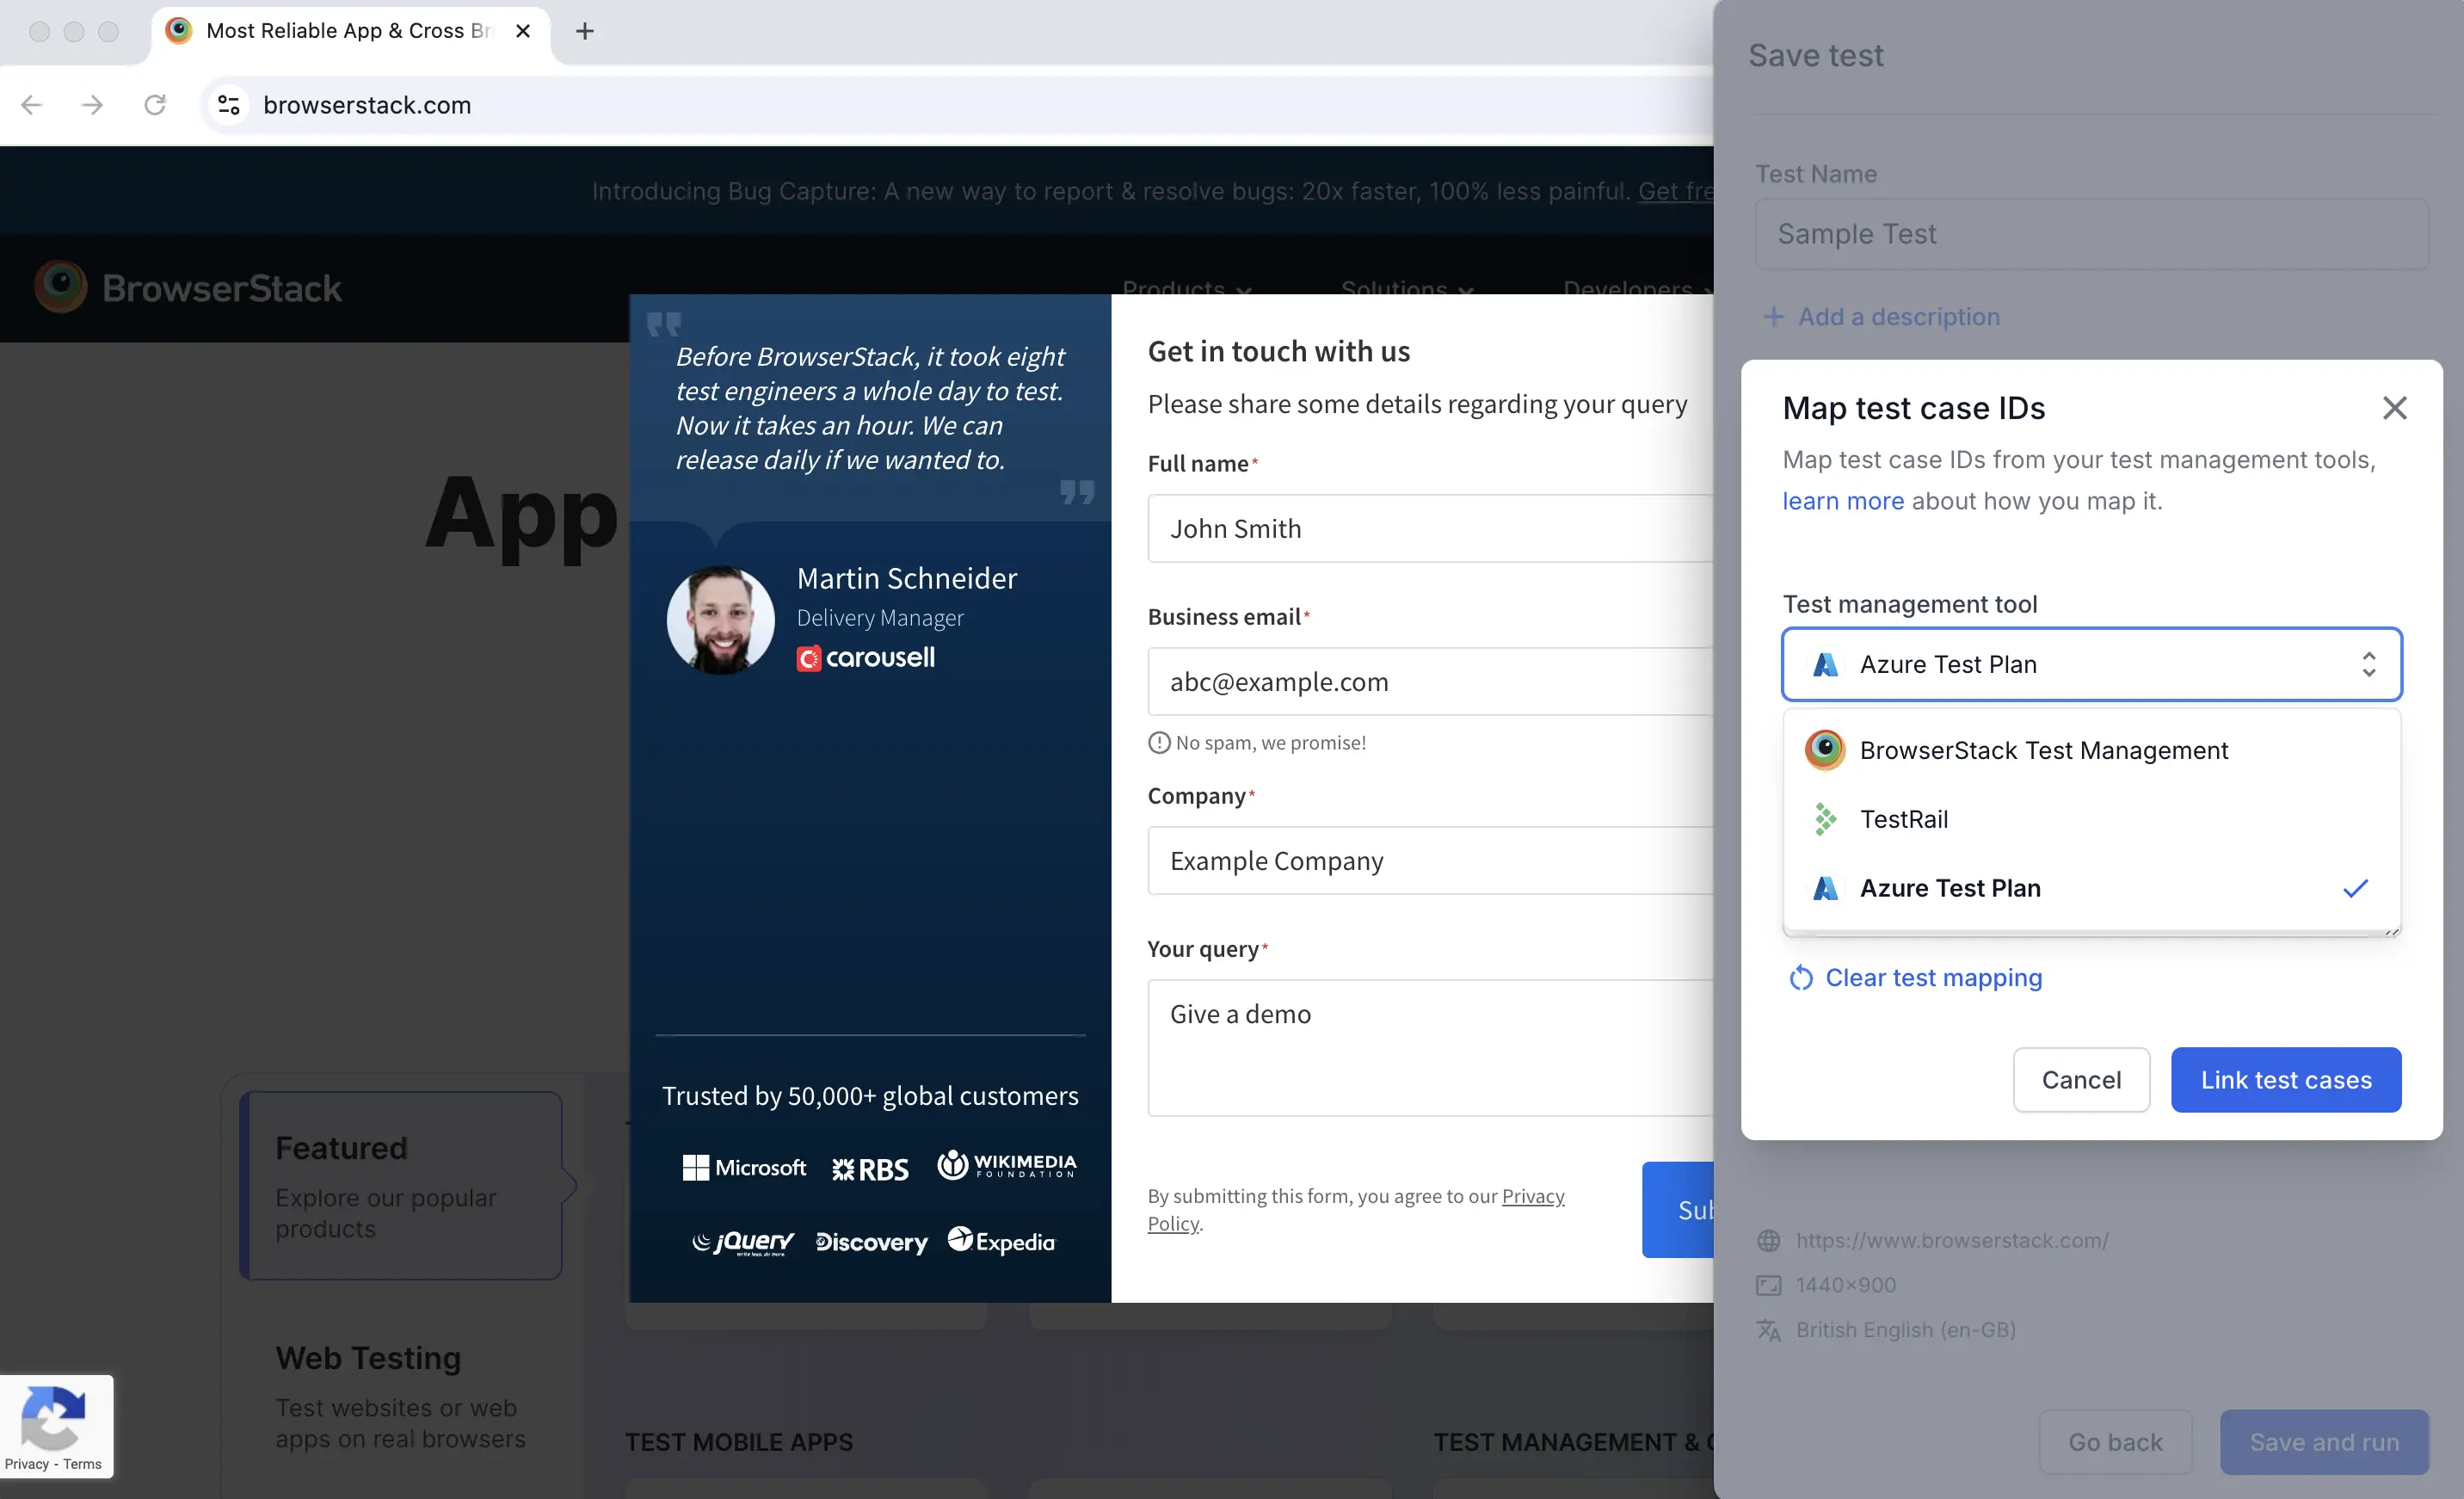
- Enter the test case IDs in the Test case IDs field, separated by commas. Click Link test cases.
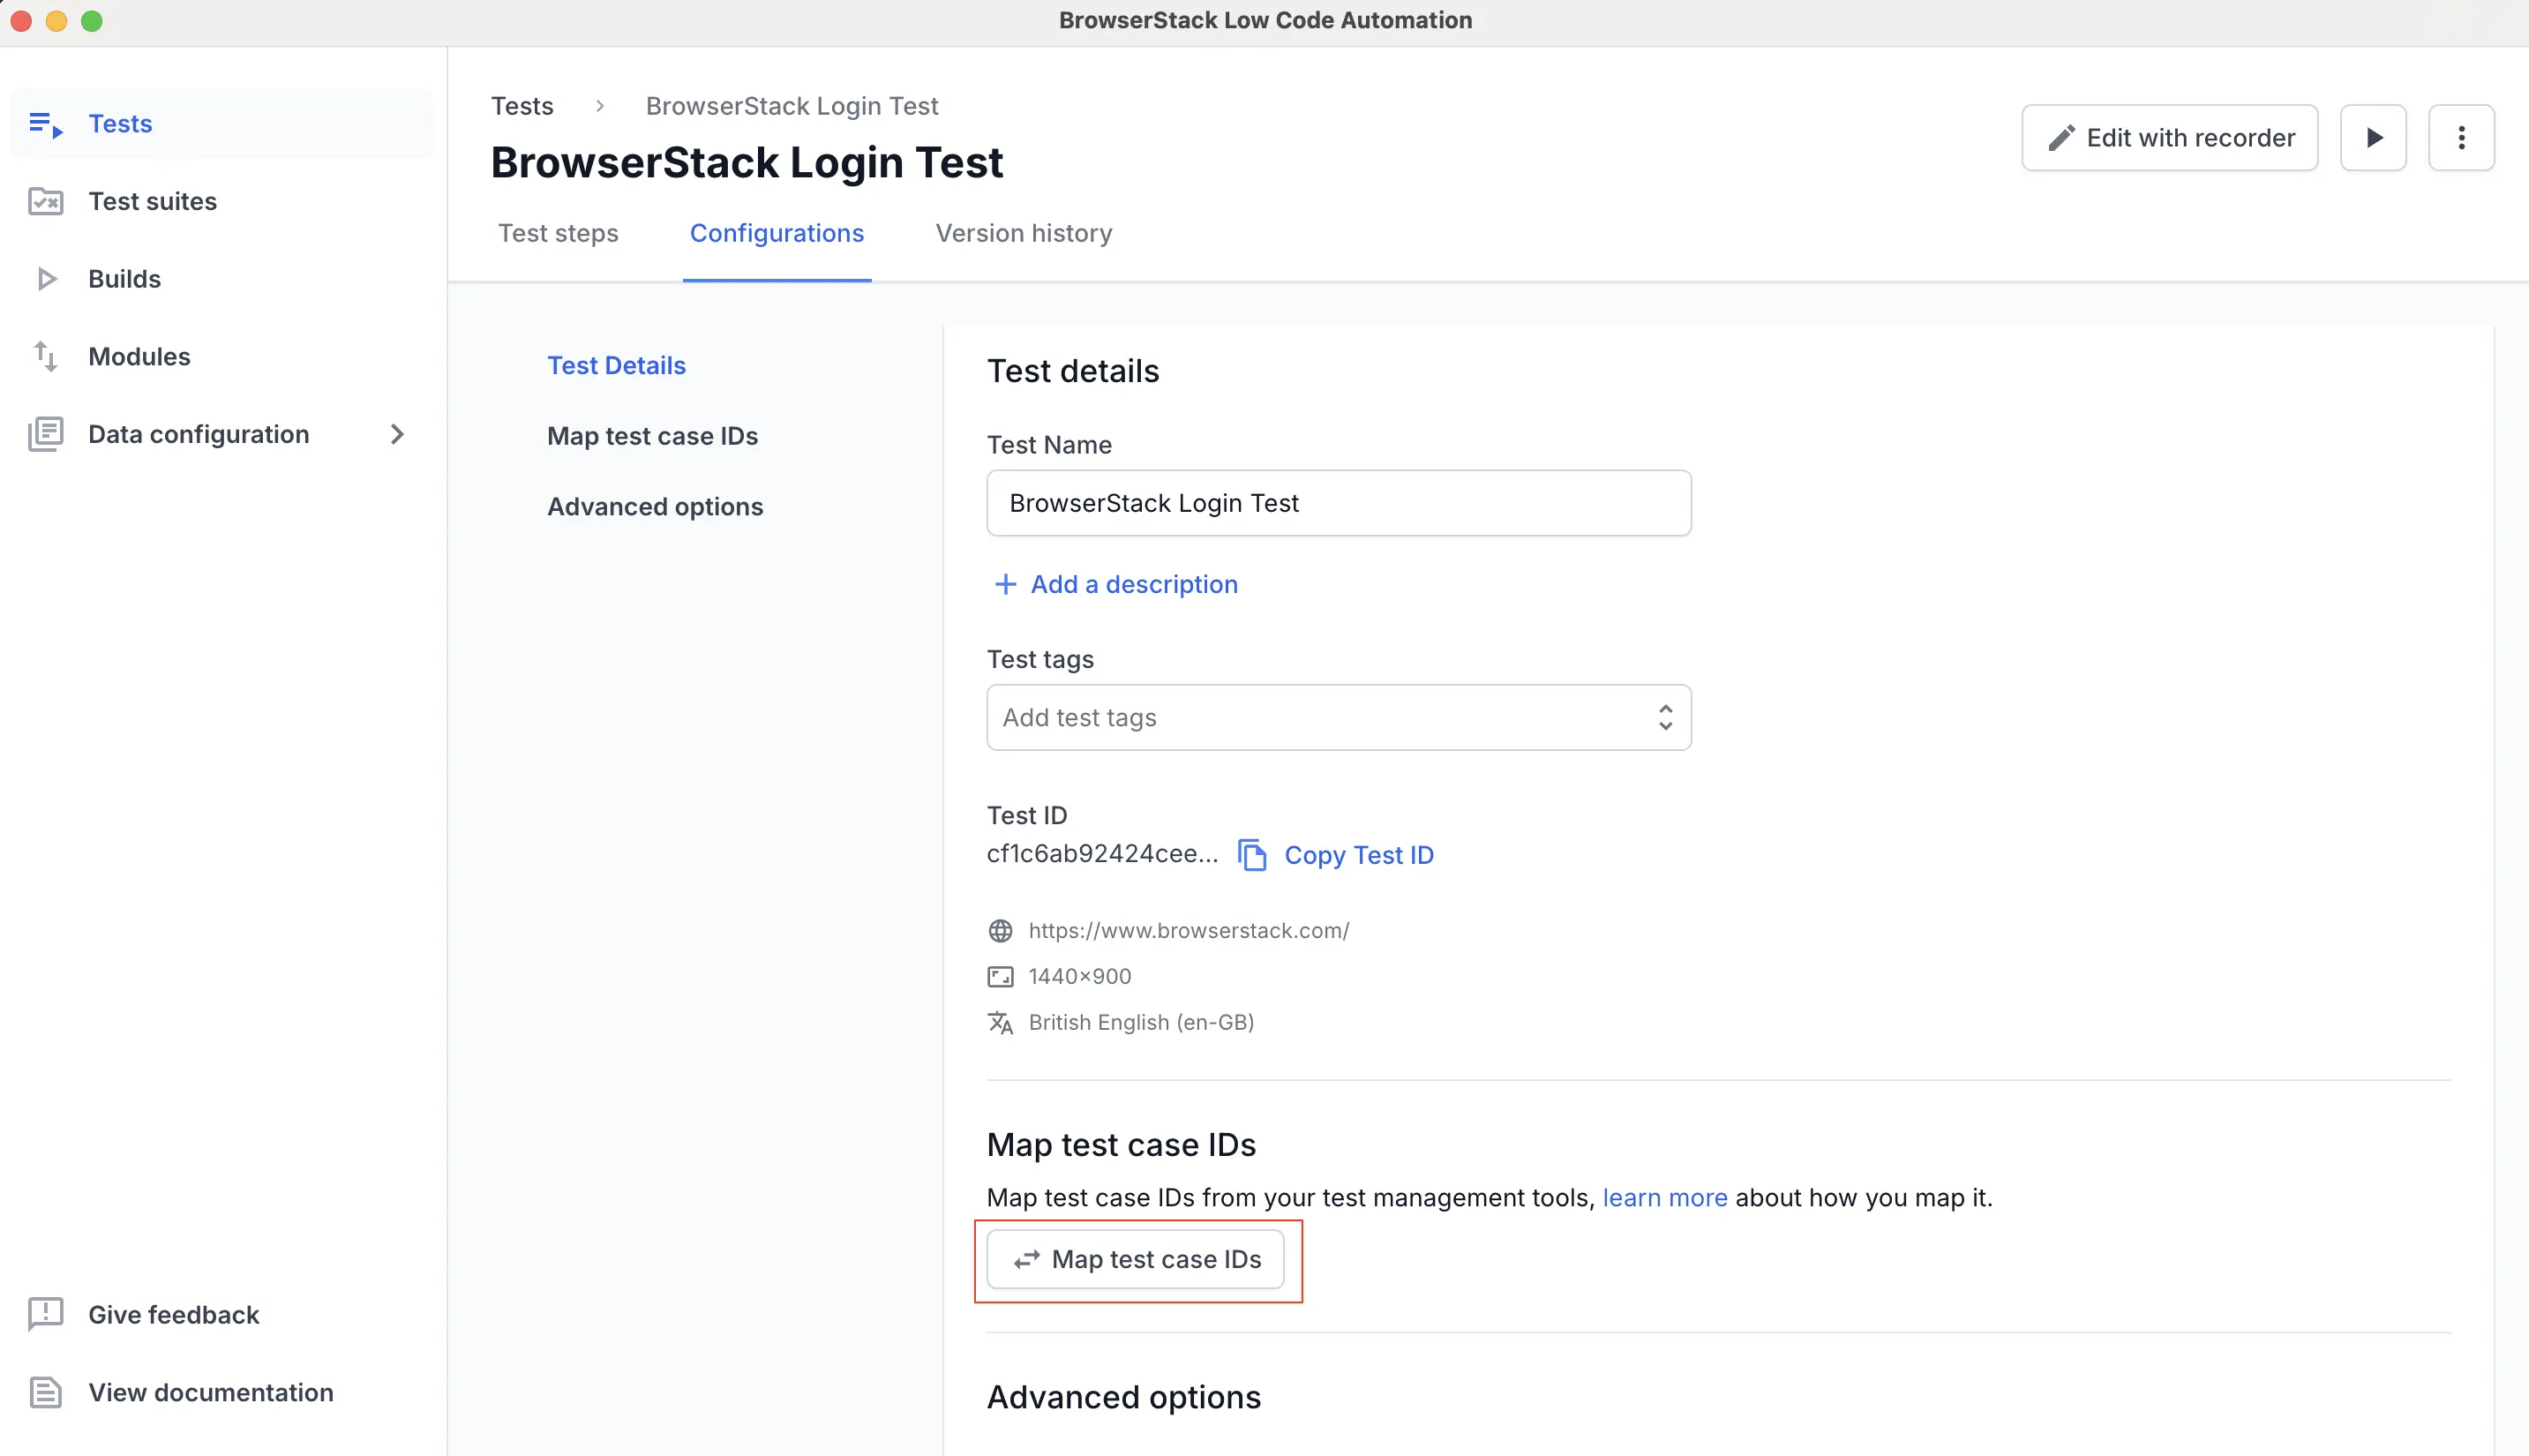
- Alternatively, link the test cases while editing the test. Click the Configurations tab. Under the Map Test Case IDs section, click the Map Test Case IDs button, then repeat Steps 3 and 4.
- Enter the name and click Save changes.
Export the test data in XML format
After test execution, go to the Builds section, select the desired build, and click the Download icon in the top right.
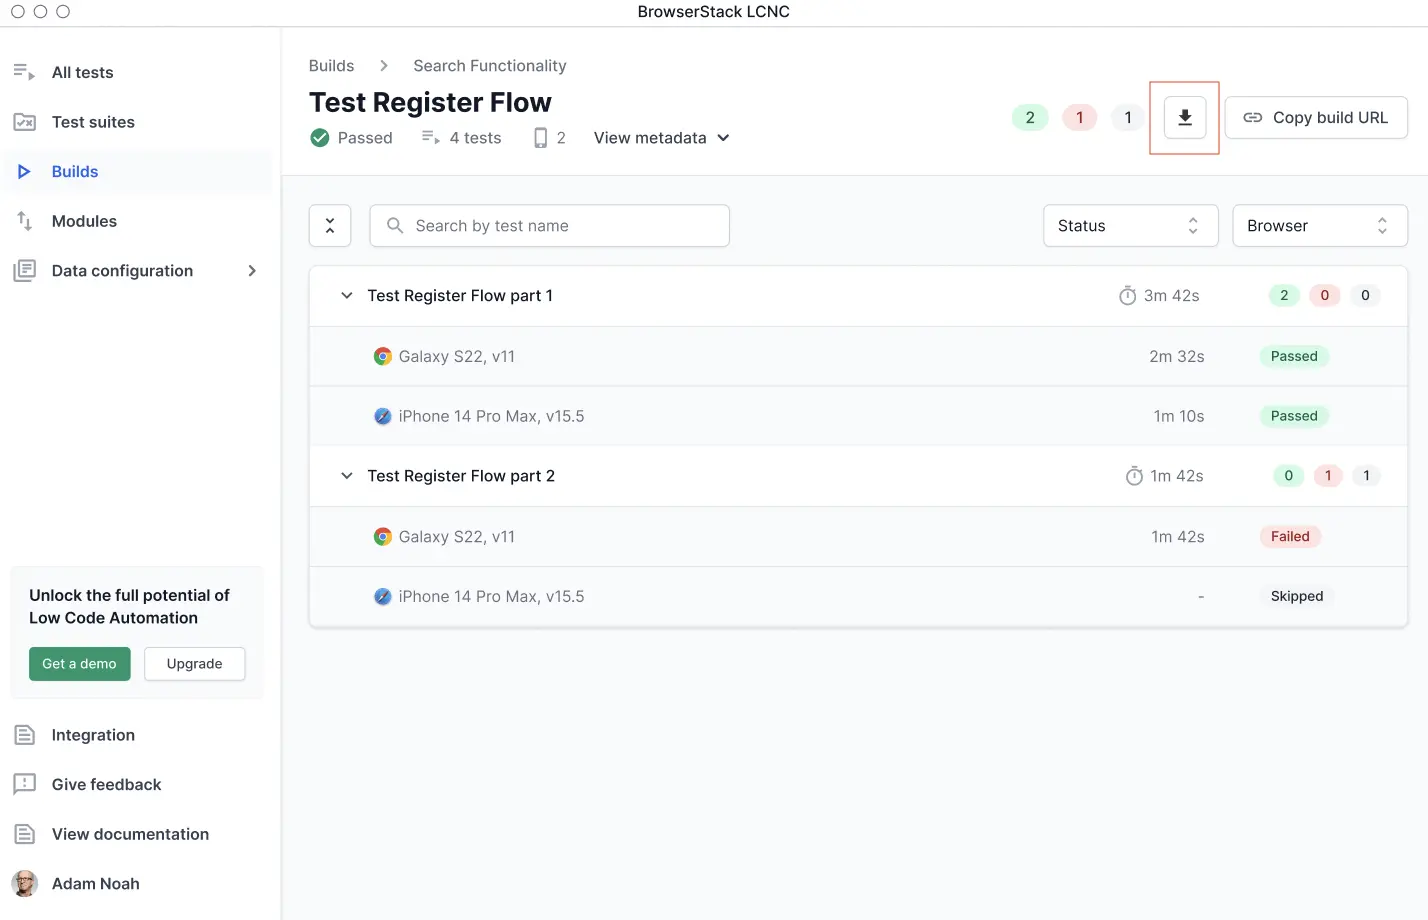
The XML file will be saved to your system in the following format:
<!-- Test Case 1 -->
<testcase name="Sample Test 1 - Apple | Add product to cart and checkout" time="124.6">
    <!-- Test Case Properties -->
    <properties>
        <property name="Resolution" value="1920x1080" />
        <property name="Browser" value="chrome" />
        <property name="Browser version" value="127.0" />
        <property name="Device name" value="" />
        <property name="Real device" value="" />
        <property name="Scenario name" value="" />
        <property name="testCaseId" value="234" />
    </properties>
    <failure message="One or more steps failed in this test">
        Click on "Get a demo" button: Could not find the element on the page. Please raise a bug or re-record the step.
        Validate element text equals 'Hello world': Could not find the element on the page. Please raise a bug or re-record the step.
        Validate screenshot of logo element: Captured screenshot does not match expected screenshot. Difference between screenshots is 25%, exceeding threshold value of 10%.
    </failure>
</testcase>
<!-- Test Case 2 -->
<testcase name="Sample Test 2 - Flipkart | Add product to cart and checkout" time="183.6">
    <properties>
        <property name="Resolution" value="1366x768" />
        <property name="Browser" value="firefox" />
        <property name="Browser version" value="127.0" />
        <property name="Device name" value="" />
        <property name="Real device" value="" />
        <property name="Scenario name" value="" />
        <property name="testCaseId" value="123" />
    </properties>
    <failure message="One or more steps failed in this test">
        Click on "Get a demo" button: Could not find the element on the page. Please raise a bug or re-record the step.
    </failure>
</testcase>
Import test data XML into Azure Test Plan
After the test execution is complete and the XML file has been exported, you can import it into your Azure Test Plan tool.
Create an Azure pipeline and add script to:
- Fetch the XML using the Reports endpoint and store it in a specific path in the workspace.
- Publish the test result using the
Publish Test Resulttask. For more information, see how to configure and use the Publish Test Results task.
trigger:
- main
pool:
  vmImage: 'ubuntu-latest'
steps:
# Step 1: Fetch XML from API Endpoint using curl with Basic Auth
- script: |
    # Define the API endpoint URL
    url="https://lcnc-api.browserstack.com/api/v1/builds/BUILD_ID/report?type=azure"

    # Fetch the XML content with basic auth and save it to a file
    curl -f -u "YOUR_USERNAME:YOUR_ACCESS_KEY" -o "$(System.DefaultWorkingDirectory)/test-results.xml" "$url"

    # Verify the file exists
    if [ ! -s "$(System.DefaultWorkingDirectory)/test-results.xml" ]; then
        echo "Failed to fetch XML from API endpoint or the file is empty."
        exit 1
    fi
  displayName: 'Fetch XML from API Endpoint using curl with Basic Auth'
# Step 2: Publish the XML Report
- task: PublishTestResults@2
  displayName: 'Publish Test Results'
  inputs:
    testResultsFormat: 'JUnit' # Adjust format based on your XML structure, e.g., NUnit, JUnit, etc.
    testResultsFiles: '$(System.DefaultWorkingDirectory)/test-results.xml'
    failTaskOnFailedTests: false
    testRunTitle: 'Sample Test Run'
In the cURL request, replace the YOUR_USERNAME and YOUR_ACCESS_KEY variables with your account’s username and access key.
We're sorry to hear that. Please share your feedback so we can do better
Contact our Support team for immediate help while we work on improving our docs.
We're continuously improving our docs. We'd love to know what you liked
We're sorry to hear that. Please share your feedback so we can do better
Contact our Support team for immediate help while we work on improving our docs.
We're continuously improving our docs. We'd love to know what you liked
Thank you for your valuable feedback!