If you are using CLI for running tests, ensure that Maven is installed on your machine, Maven environment variables are set, and Maven bin is added to the system path, $PATH.
Integration steps
Based on the method you use to build your project, complete the steps in the following tabs to integrate with BrowserStack.
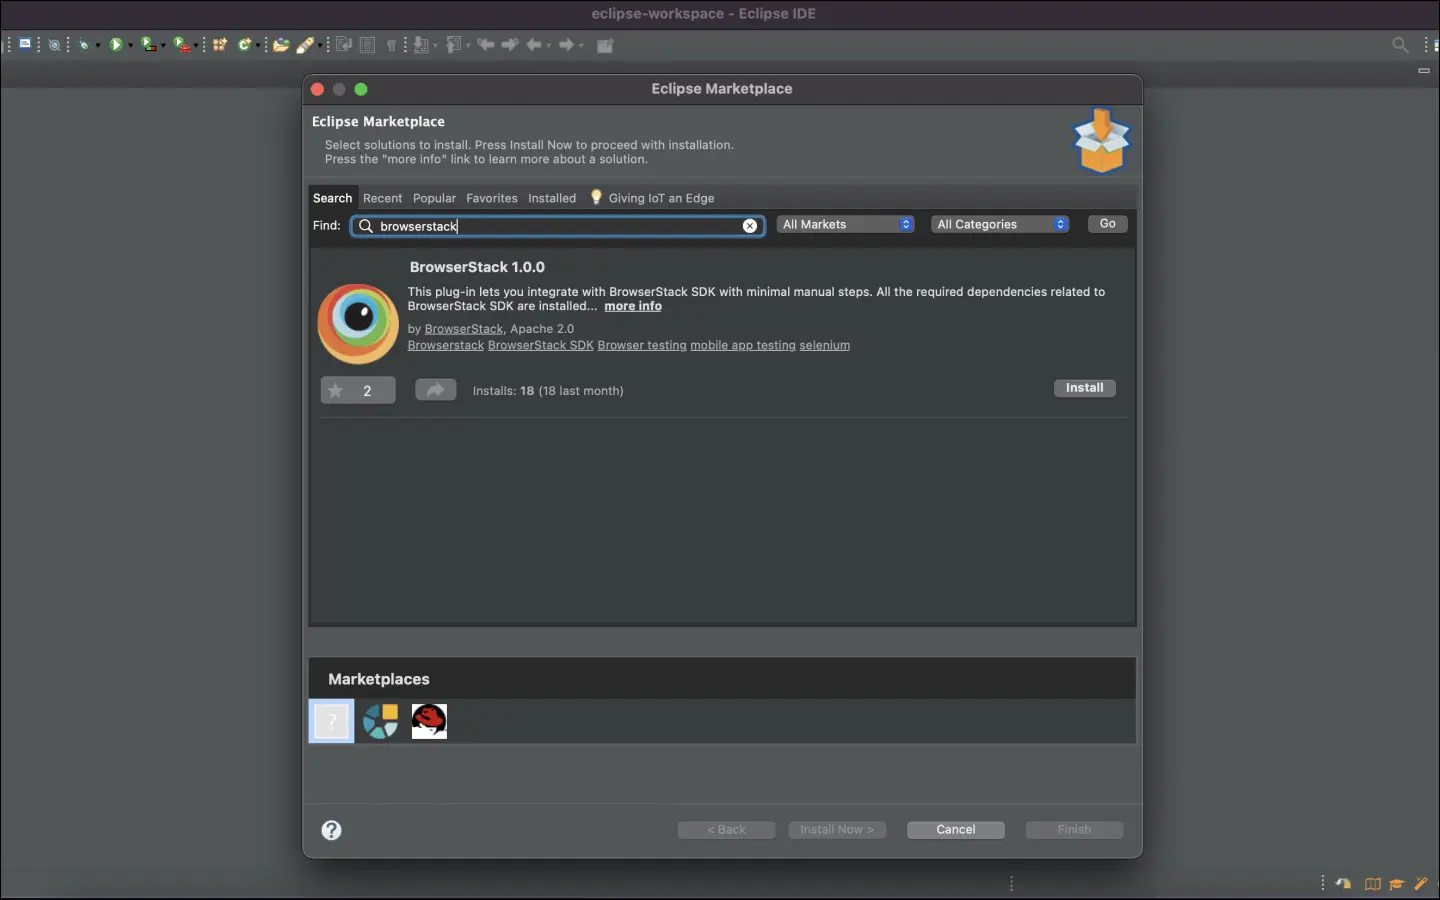
On the Eclipse toolbar, click Help > Eclipse Marketplace.
In the Eclipse Marketplace, search for BrowserStack > click Install > Finish.
Configure your test suite with BrowserStack SDK
BrowserStack plugin automatically adds the browserstack-java-sdk dependency to your pom.xml file and generates a browserstack.yml configuration file.
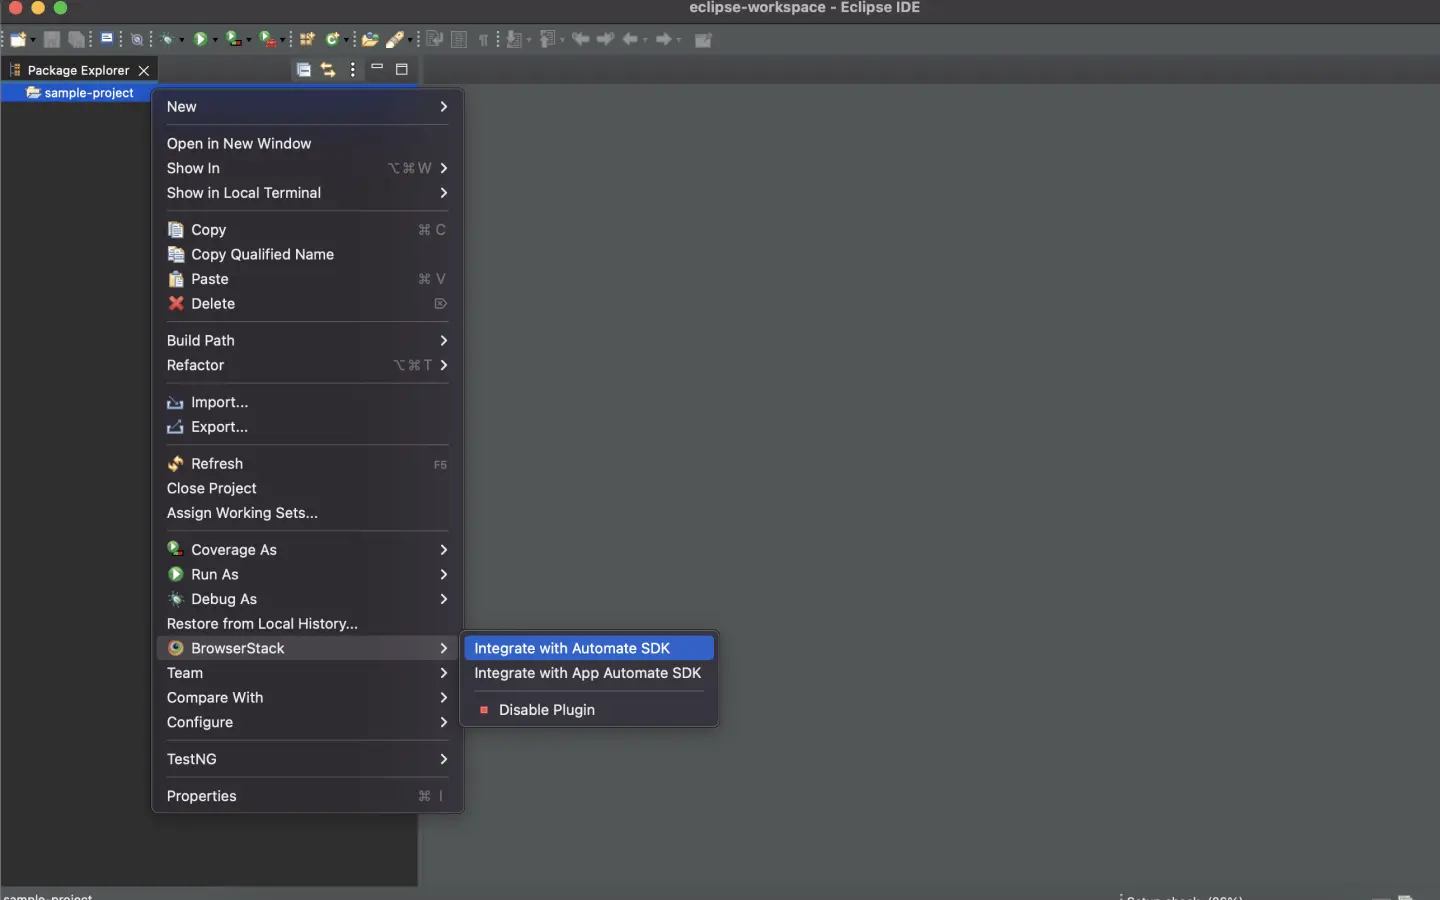
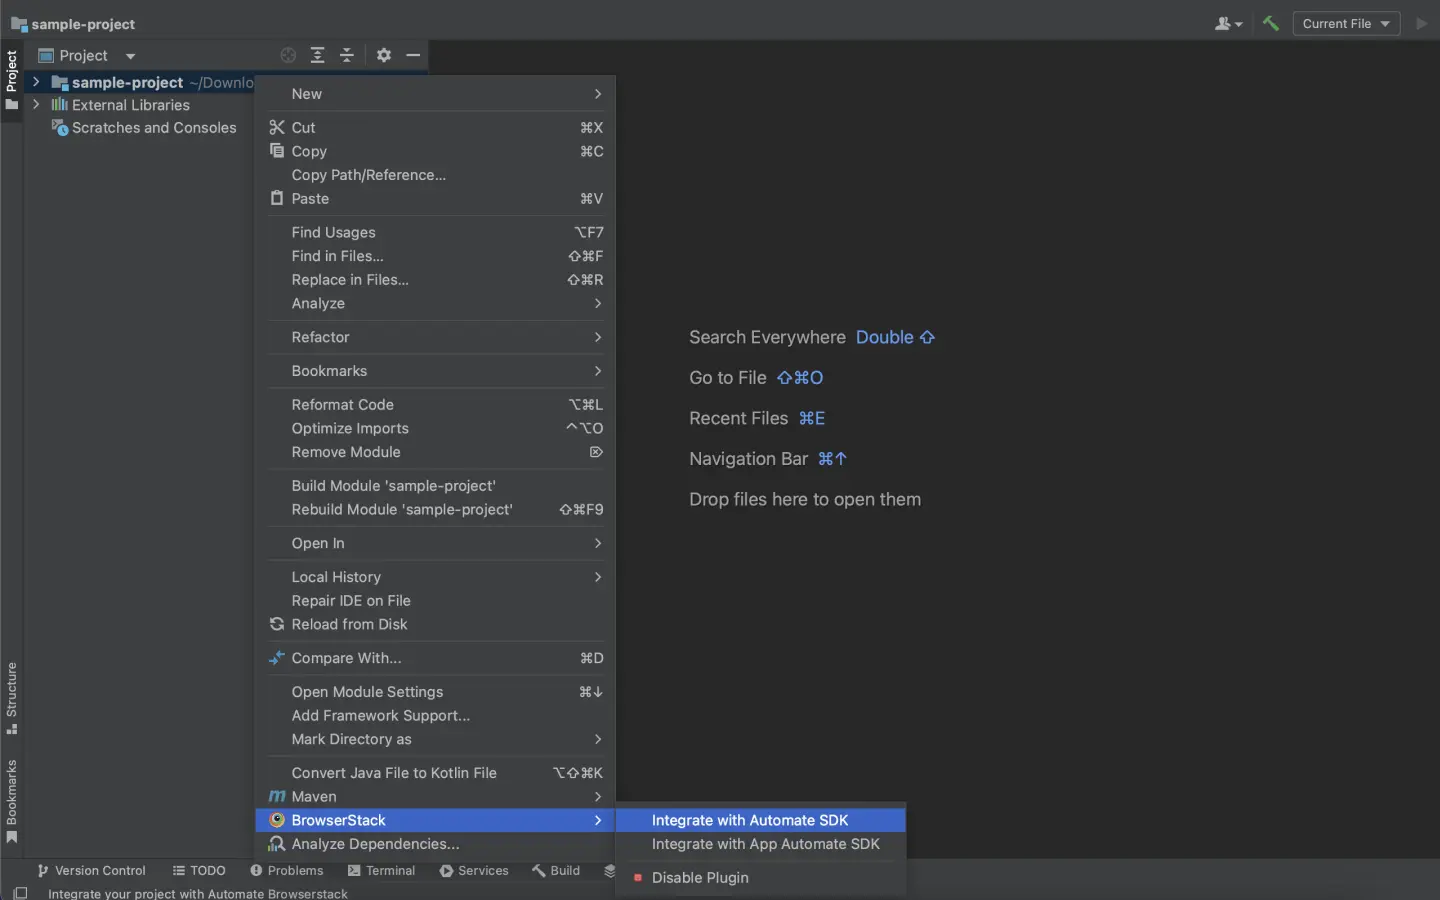
Right-click on your project folder > BrowserStack > select Integrate with Automate SDK.
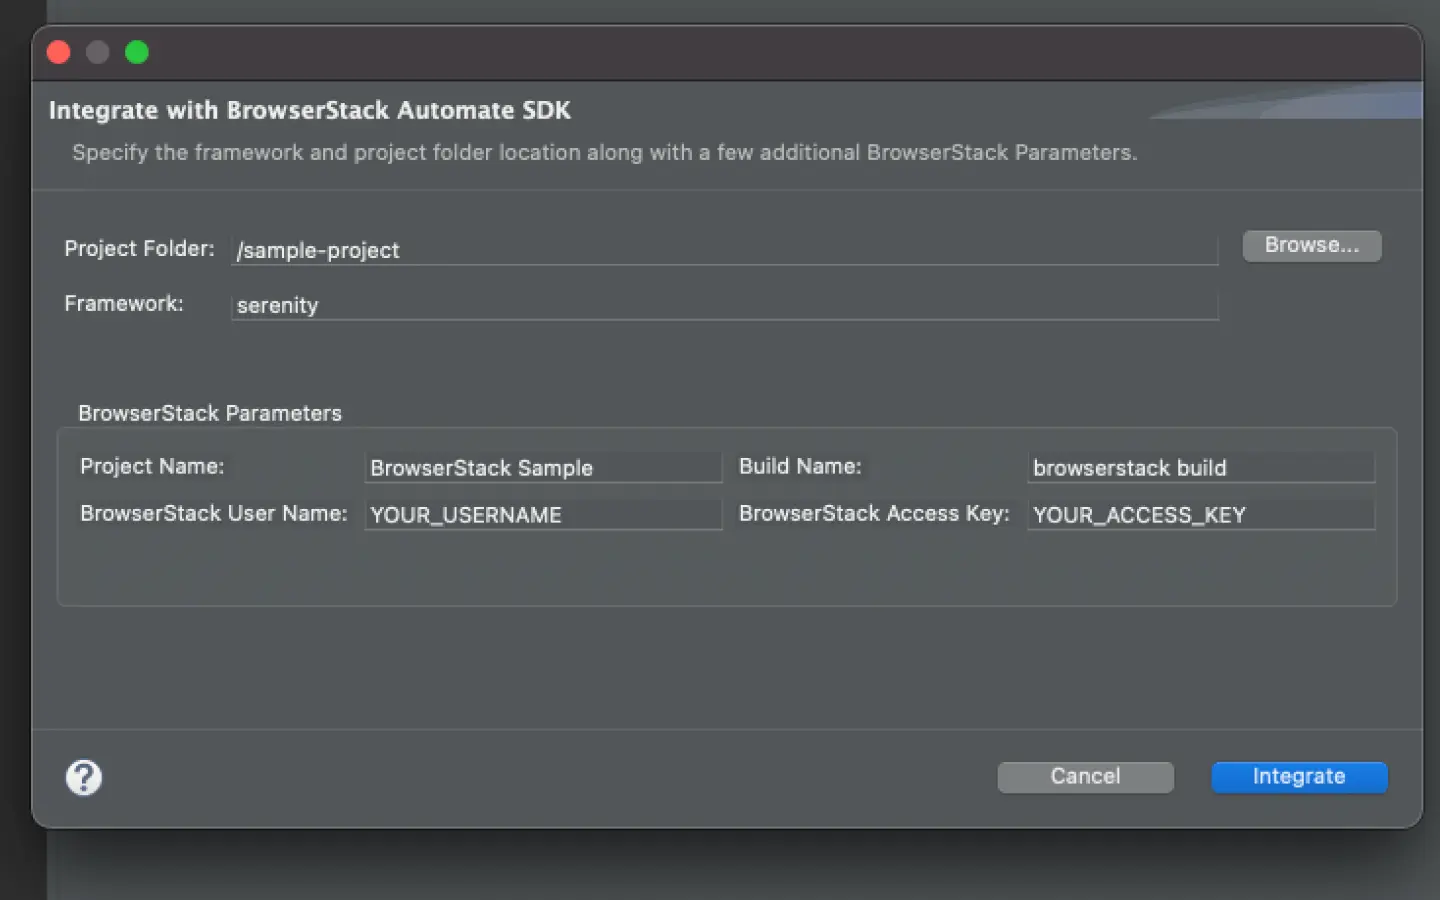
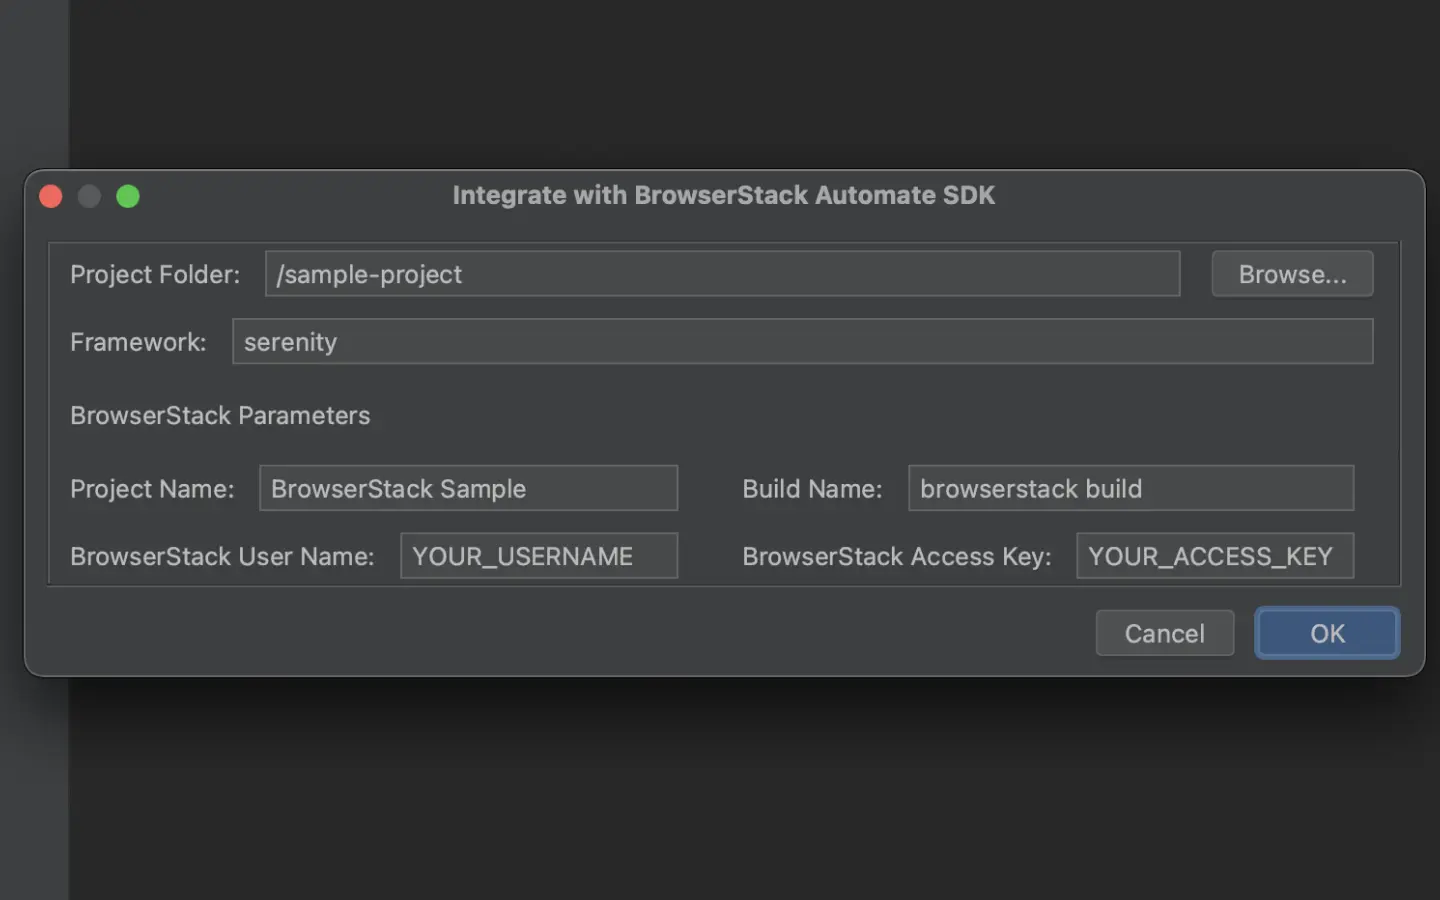
Select your Project Folder, Framework, and other BrowserStack Parameters, and then click Integrate.
Framework: serenity
BrowserStack User Name: YOUR_USERNAME
BrowserStack Access Key: YOUR_ACCESS_KEY
Set up serenity.conf file
Since project uses the Serenity BrowserStack plugin, set the remote URL and add your BrowserStack credentials in the serenity.conf file of your project.
Use the Framework URL from Automation Console > click your Grid > Framework URLs.
Avoid hardcoding generic URLs like hub.browserstack.com in the config file. The Framework URL contains a unique Grid identifier for correct routing.
Update your BrowserStack config file
Update your browserstack.yml config file at the root level of your project. This file holds all the required capabilities to run tests on BrowserStack.
Set platforms on which to test
Set the browsers/devices you want to test under the platforms object. Our configuration follows W3C-formatted capabilities.
Platform
Browser
Linux
Firefox
Linux
Chrome
Linux
Edge
Enable BrowserStack Local
Test localhost/internal servers in your network
True
False
Test localhost/staging websites that are not publicly accessible
BrowserStack’s Local Testing feature connects with test suites pointing to your localhost URL
BrowserStack Local supports all advanced use cases and restricted networks. Contact our support team for assistance in configuring BrowserStack Local for your enterprise.
Use additional debugging features
BrowserStack offers session logs, screenshots of failed commands, and a video of the entire test, with additional options to enable.
Test Observability
Enables Test Observability, an advanced test reporting and debugging tool that helps you analyze test failures much faster. If enabled, Test Observability collects test data using the SDK. This capability is enabled (set to true) by default.
True
False
Visual logs
Enables screenshots for every selenium command ran
True
False
Video logs
Enables accurate video recording of execution
True
False
Network logs
Enables network capture for the session in HAR format. Reduces session performance slightly
True
False
Console logs
Set the remote browser’s console log levels. Currently supported only on Chrome browsers (Desktop and Android)
Info
Info
Verbose
Debug
Warn
Error
Use Automate Turboscale
Turboscale
Enables Turboscale
True
False
Grid Name
Set grid name as the name of the Turboscale grid. Accepted characters: A-Z, a-z, 0-9, ., :, -, [], /, @, &, ‘, _. All other characters are ignored. Character limit: 255
Update browserstack.yml file
Copy the given code snippet and replace contents of browserstack.yml file in the root folder of your test suite.
You can continue running your tests as you have been previously.
Install BrowserStack Plugin
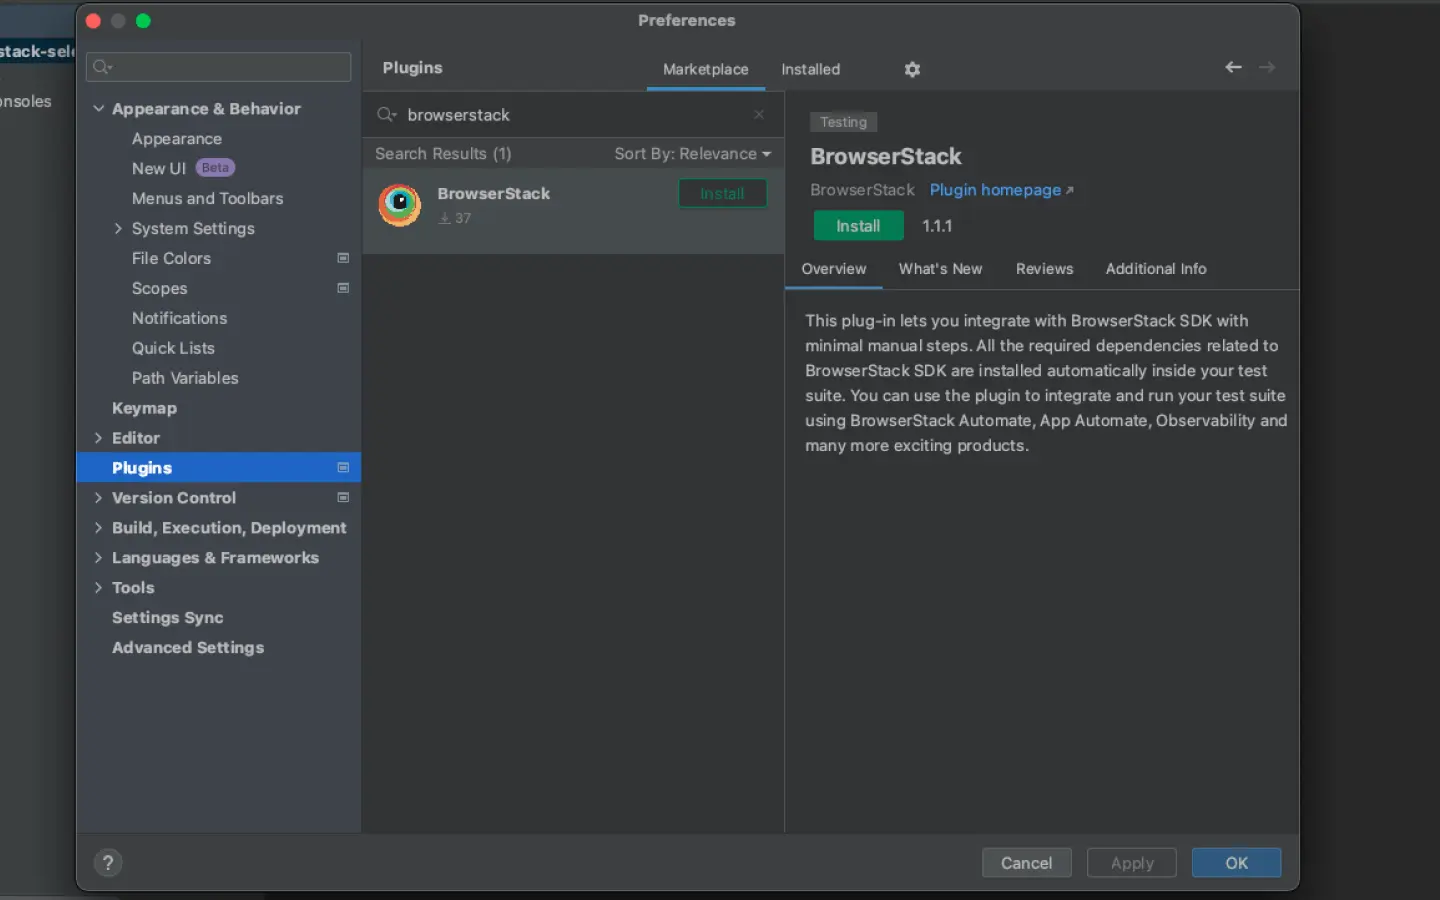
Click IntelliJ IDEA > Preferences > Plugins.
Search for BrowserStack and click Install.
Configure your test suite with BrowserStack SDK
BrowserStack plugin automatically adds the browserstack-java-sdk dependency to your pom.xml file and generates a browserstack.yml configuration file.
Right-click on your project folder > BrowserStack > select Integrate with Automate SDK.
Select your Project Folder, add Framework and other BrowserStack Parameters then click OK.
Framework: serenity
BrowserStack User Name: YOUR_USERNAME
BrowserStack Access Key: YOUR_ACCESS_KEY
Set up serenity.conf file
Since project uses the Serenity BrowserStack plugin, set the remote URL and add your BrowserStack credentials in the serenity.conf file of your project.
Use the Framework URL from Automation Console > click your Grid > Framework URLs.
Avoid hardcoding generic URLs like hub.browserstack.com in the config file. The Framework URL contains a unique Grid identifier for correct routing.
Update your BrowserStack config file
Update your browserstack.yml config file at the root level of your project. This file holds all the required capabilities to run tests on BrowserStack.
Set platforms on which to test
Set the browsers/devices you want to test under the platforms object. Our configuration follows W3C-formatted capabilities.
Platform
Browser
Linux
Firefox
Linux
Chrome
Linux
Edge
Enable BrowserStack Local
Test localhost/internal servers in your network
True
False
Test localhost/staging websites that are not publicly accessible
BrowserStack’s Local Testing feature connects with test suites pointing to your localhost URL
BrowserStack Local supports all advanced use cases and restricted networks. Contact our support team for assistance in configuring BrowserStack Local for your enterprise.
Use additional debugging features
BrowserStack offers session logs, screenshots of failed commands, and a video of the entire test, with additional options to enable.
Test Observability
Enables Test Observability, an advanced test reporting and debugging tool that helps you analyze test failures much faster. If enabled, Test Observability collects test data using the SDK. This capability is enabled (set to true) by default.
True
False
Visual logs
Enables screenshots for every selenium command ran
True
False
Video logs
Enables accurate video recording of execution
True
False
Network logs
Enables network capture for the session in HAR format. Reduces session performance slightly
True
False
Console logs
Set the remote browser’s console log levels. Currently supported only on Chrome browsers (Desktop and Android)
Info
Info
Verbose
Debug
Warn
Error
Use Automate Turboscale
Turboscale
Enables Turboscale
True
False
Grid Name
Set grid name as the name of the Turboscale grid. Accepted characters: A-Z, a-z, 0-9, ., :, -, [], /, @, &, ‘, _. All other characters are ignored. Character limit: 255
Update browserstack.yml file
Copy the given code snippet and replace contents of browserstack.yml file in the root folder of your test suite.
Since project uses the Serenity BrowserStack plugin, set the remote URL and add your BrowserStack credentials in the serenity.conf file of your project.
Use the Framework URL from Automation Console > click your Grid > Framework URLs.
Avoid hardcoding generic URLs like hub.browserstack.com in the config file. The Framework URL contains a unique Grid identifier for correct routing.
Update your BrowserStack config file
Once you have installed the SDK, a browserstack.yml config file will be created at the root level of your project. This file contains all the required capabilities to run tests on BrowserStack.
Set platforms on which to test
Set the browsers/devices you want to test under the platforms object. Our configuration follows W3C-formatted capabilities.
Platform
Browser
Linux
Firefox
Linux
Chrome
Linux
Edge
Enable BrowserStack Local
Test localhost/internal servers in your network
True
False
Test localhost/staging websites that are not publicly accessible
BrowserStack’s Local Testing feature connects with test suites pointing to your localhost URL
BrowserStack Local supports all advanced use cases and restricted networks. Contact our support team for assistance in configuring BrowserStack Local for your enterprise.
Use additional debugging features
BrowserStack offers session logs, screenshots of failed commands, and a video of the entire test, with additional options to enable.
Test Observability
Enables Test Observability, an advanced test reporting and debugging tool that helps you analyze test failures much faster. If enabled, Test Observability collects test data using the SDK. This capability is enabled (set to true) by default.
True
False
Visual logs
Enables screenshots for every selenium command ran
True
False
Video logs
Enables accurate video recording of execution
True
False
Video logs
Enables accurate video recordings of execution
True
False
Network logs
Enables network capture for the session in HAR format. Reduces session performance slightly
True
False
Console logs
Set the remote browser’s console log levels. Currently supported only on Chrome browsers (Desktop and Android)
Info
Info
Verbose
Debug
Warn
Error
Use Automate Turboscale
Turboscale
Enables Turboscale
True
False
Grid Name
Set grid name as the name of the Turboscale grid. Accepted characters: A-Z, a-z, 0-9, ., :, -, [], /, @, &, ‘, _. All other characters are ignored. Character limit: 255
Update browserstack.yml file with selected capabilities
Copy the following code snippet and replace contents of the browserstack.yml file in the root folder of your test suite.