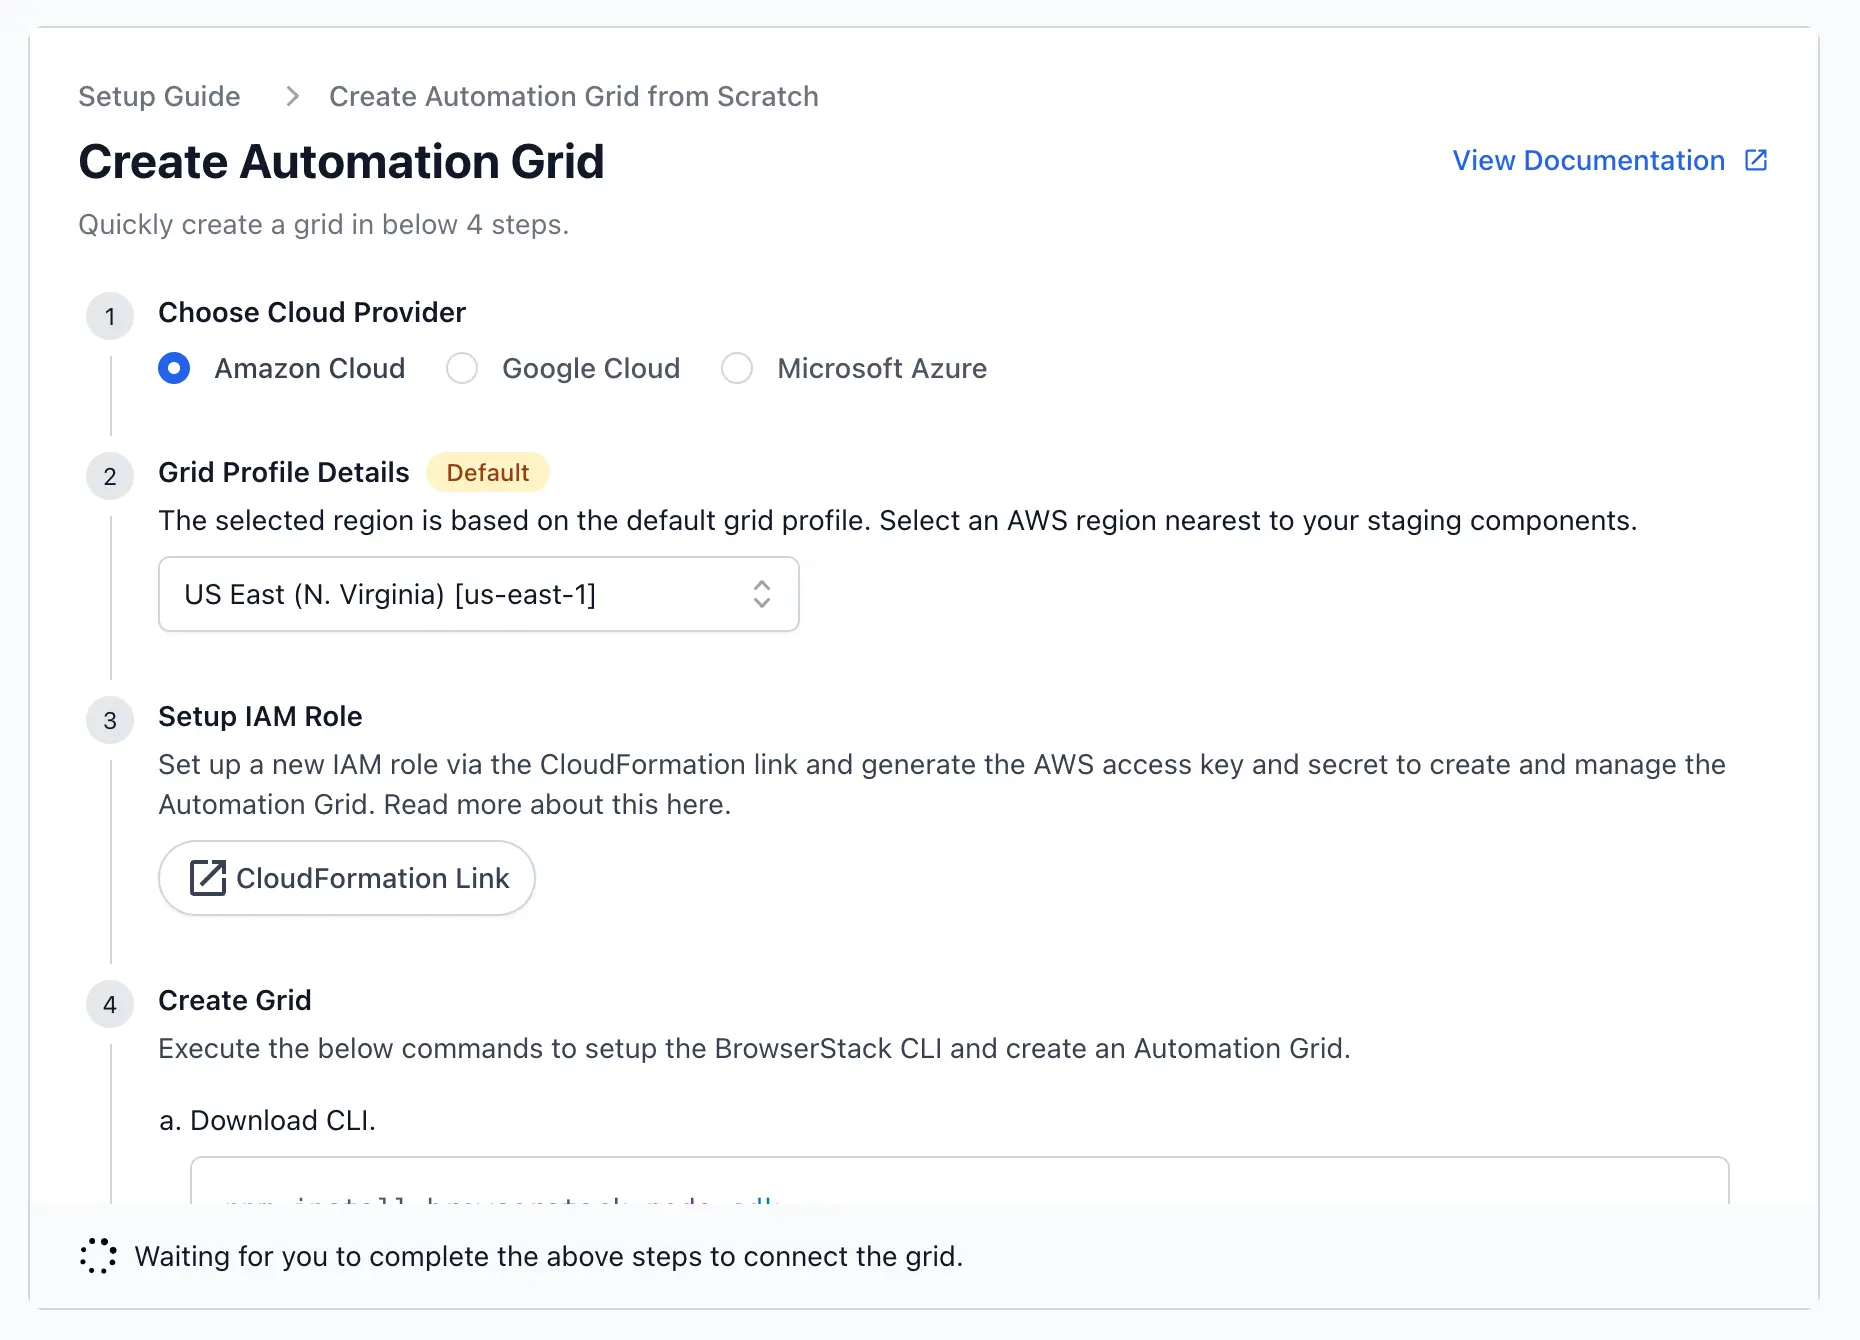
Create and integrate new grid
Automate TurboScale helps you create an on-demand browser automation grid that supports popular testing frameworks like selenium on your cloud.
With Automate TurboScale, you can create a browser automation grid either in your existing Kubernetes setup or you can use BrowserStack’s CLI to set up a fully functional grid from scratch.
We recommend the latter approach because it supports the end-to-end needs of creating a scalable automation grid, that involves managing all the services with a cloud provider. If you are re-using your Kubernetes cluster, cloud platform configuration about auto-scaling or other dependencies like tests storage need to be managed separately using the cloud provider console/utilities.
Create a fully-functional Automation grid
This option helps you create a fully-functional auto-scaling Automation grid on AWS. You can customize the grid with different parameters like instance type, VPC, etc. By default, we create an internal Grid with the configuration best suited for running automation.

-
Choosing a Cloud provider: With Automate TurboScale, you can create a browser automation grid on the cloud provider of your choice. Currently, we support only AWS for setting up a fully functional grid from scratch. GCP and Azure will be supported soon.
-
Grid profile details: With Automate TurboScale, you can select the cloud provider region of your choice. By default, we select the most popular region on the cloud provider.
-
Setup IAM role: To set up a grid on your cloud, you need to create a new IAM user with appropriate access to use AWS resources to create a new Grid. For more information on how to set up your AWS account, refer to this documentation
-
Create grid using CLI: Once you have the IAM access credentials, download and install BrowserStack CLI and create Grid using
createcommand. For more information on how to use CLI, refer to this documentation
The region selected along with your selected cloud provider and other details configured during the creation of the first grid automatically becomes part of your default Grid profile. The Grid profile is useful to create multiple Grids with the same cloud configuration and avoids repeated manual configuration.
Create Automation grid in the existing setup
This option helps you create a browser automation grid in your existing Kubernetes cluster on AWS, GCP or Azure. When the Grid is created using this option, the cloud platform configuration like auto-scaling, machine configuration or other dependencies like test artifact storage need to be managed separately using the cloud provider console.
Automate TurboScale supports creating a grid in an existing cluster from the following tools currently:
- When an existing Kubernetes cluster is used for creating a new grid, the storage of test artifacts needs to be configured separately. For Ex. On AWS, you need to add the S3 access policy to the IAM role used for creating the NodeGroup attached to the EKS cluster.
- The automation grid created relies on Cluster’s NodeGroup policy for auto-scaling. You need to ensure that NodeGroup is set according to the concurrency configured on the Grid to avoid queueing due to limited resources.
Integrate new Automation grid
Once the Automation Grid is created using either of the setup options, you can check your Grid-related information in Automation Console. You can set BrowserStack credentials and Framework URL from the Grid Overview page to initialize your remote Webdriver instance.
For example, create a new instance of selenium WebDriver using BrowserStack access credentials and the Framework URLs as shown in the following snippet:
// declare remote URL in a variable
public static final String URL = "https://YOUR_USERNAME:YOUR_ACCESS_KEY@" + <RANDOM_HASH> + "-hub.browserstack-ats.com/wd/hub";

// intialize selenium WebDriver
MutableCapabilities capabilities = new MutableCapabilities();
Webdriver driver = new RemoteWebDriver(new URL(URL), capabilities);
Now create an automation grid in an internal network where the staging components are set up and access the internal staging or development URLs directly on this Grid without any additional setup.
Troubleshooting
Need help? Contact us.
We're sorry to hear that. Please share your feedback so we can do better
Contact our Support team for immediate help while we work on improving our docs.
We're continuously improving our docs. We'd love to know what you liked
We're sorry to hear that. Please share your feedback so we can do better
Contact our Support team for immediate help while we work on improving our docs.
We're continuously improving our docs. We'd love to know what you liked
Thank you for your valuable feedback!
