
Map test cases
Learn how to add a test case name to map snapshots with test cases.
You can map snapshots associated with a test case to a Figma design. Once you map your design to a snapshot name for comparison, you can optionally add a test case name and map it with your design.
Example
Assume your automation already includes test cases TC1, TC2, and TC3 and their associated snapshots as mentioned below:
- TC1: Snapshots ‘A’, ‘C’
- TC2: Snapshots ‘A’, ‘C’, ‘D’
- TC3: Snapshots ‘V’, ‘F’, ‘A’
Mapping Design to test case:
- If you upload Design 1, which corresponds to Snapshot ‘A’ in TC1, you can map it to this snapshot. Rename the design as ‘A’ and add test case TC1 with this design.
- If you upload Design 2, which corresponds to Snapshot ‘A’ in TC2, you can map it to this snapshot. Rename the design as ‘A’ and add test case TC2 with this design.
- If TC3 includes Snapshot A, you can update Design 1 to include TC3 alongside TC1, allowing multiple test cases to be mapped to the same design.
The combination of a test case name and a snapshot name must always be unique.
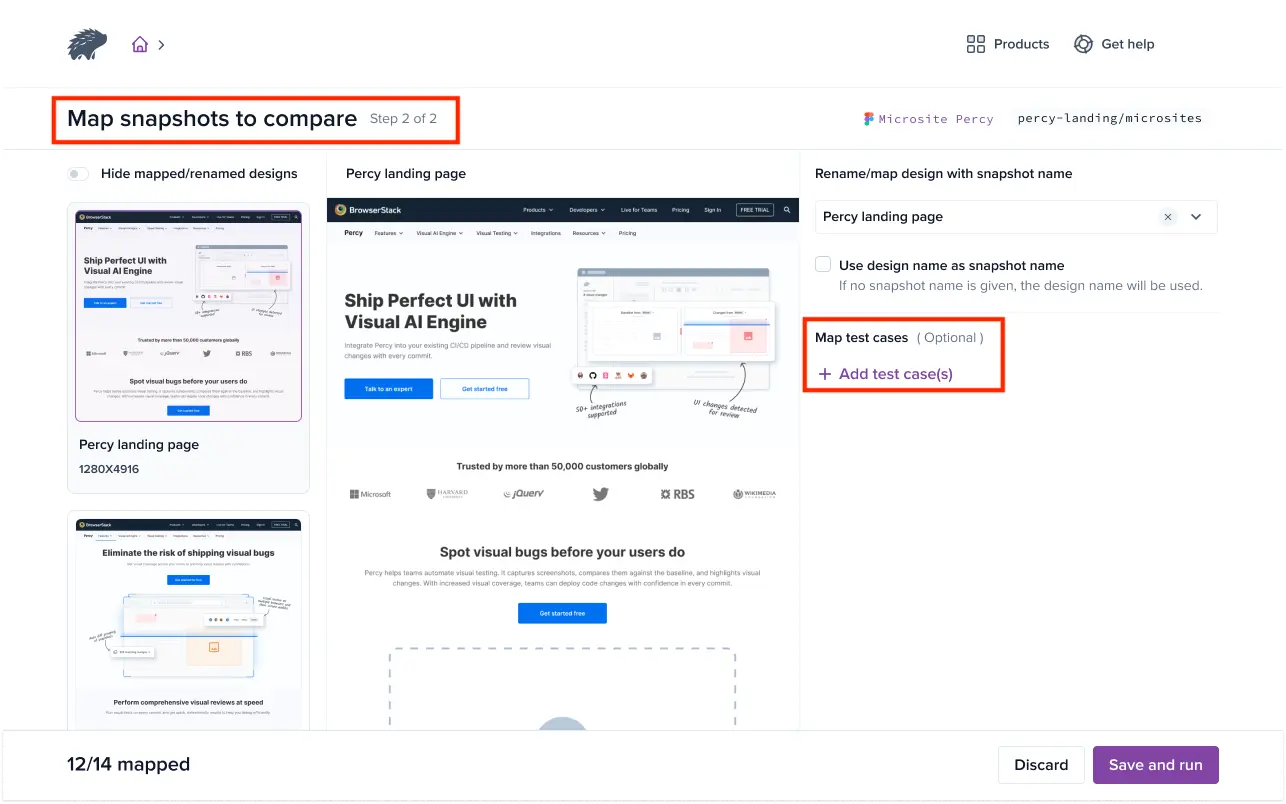
Steps to Map Test Cases
Step 1: Navigate to the Map snapshots to compare UI and click Add test case(s).
Step 2: Manually enter the test case name.
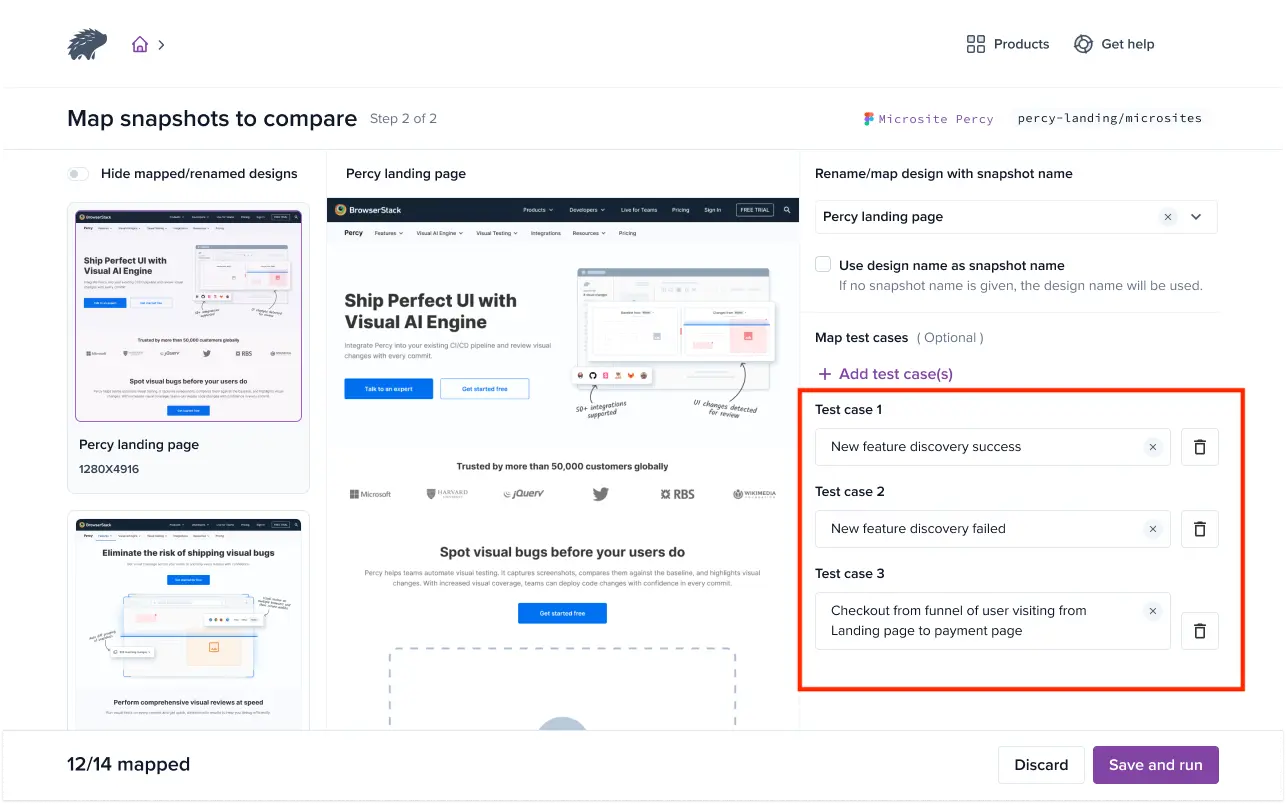
- Use a test case name only if it exists in your original build.
- You can use up to 512 characters for a test case name.
We're sorry to hear that. Please share your feedback so we can do better
Contact our Support team for immediate help while we work on improving our docs.
We're continuously improving our docs. We'd love to know what you liked
We're sorry to hear that. Please share your feedback so we can do better
Contact our Support team for immediate help while we work on improving our docs.
We're continuously improving our docs. We'd love to know what you liked
Thank you for your valuable feedback!