
Configure Figma designs
Learn how to compare Figma designs with Percy for design comparisons and visual testing.
To compare your Figma designs with your Percy build, follow these steps:
Step 1: Go to your project build and click the Compare with designs icon.
- For Percy on Automate projects, you must create at least one successful build before creating a Figma build.

Step 2: Make your Figma project public to allow access via a shared link. If the project must remain restricted, grant “view-only” access to percy.figma@browserstack.com.
Wait for Percy to accept the Figma invite. This may take a few minutes. After waiting, check the invite status in Figma. If the invite has not been accepted, it will appear grayed out. Once accepted, it will be displayed in regular text as Percy.
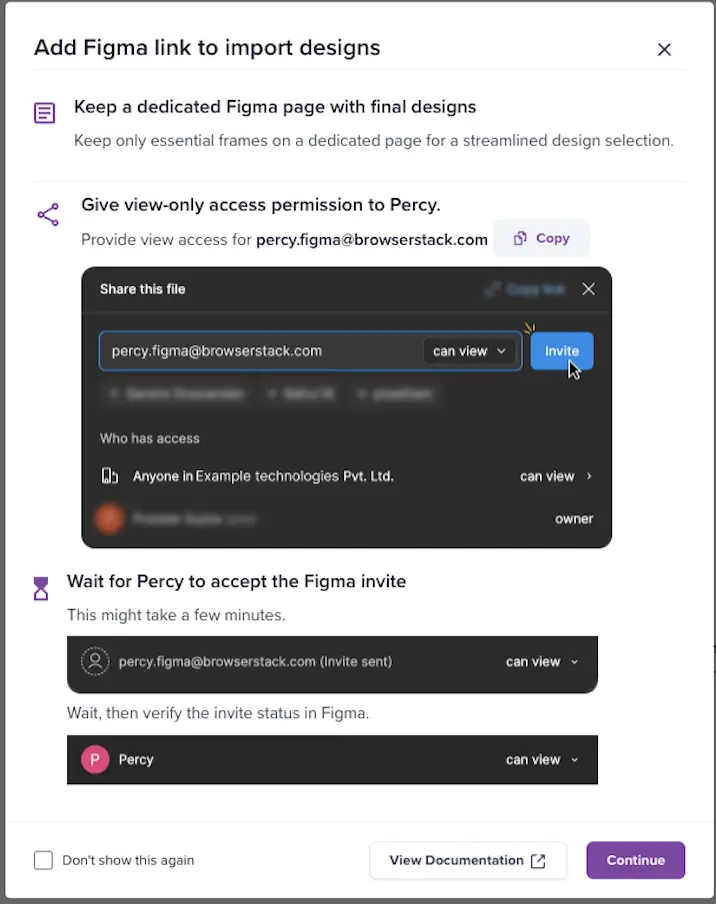
Click Continue.
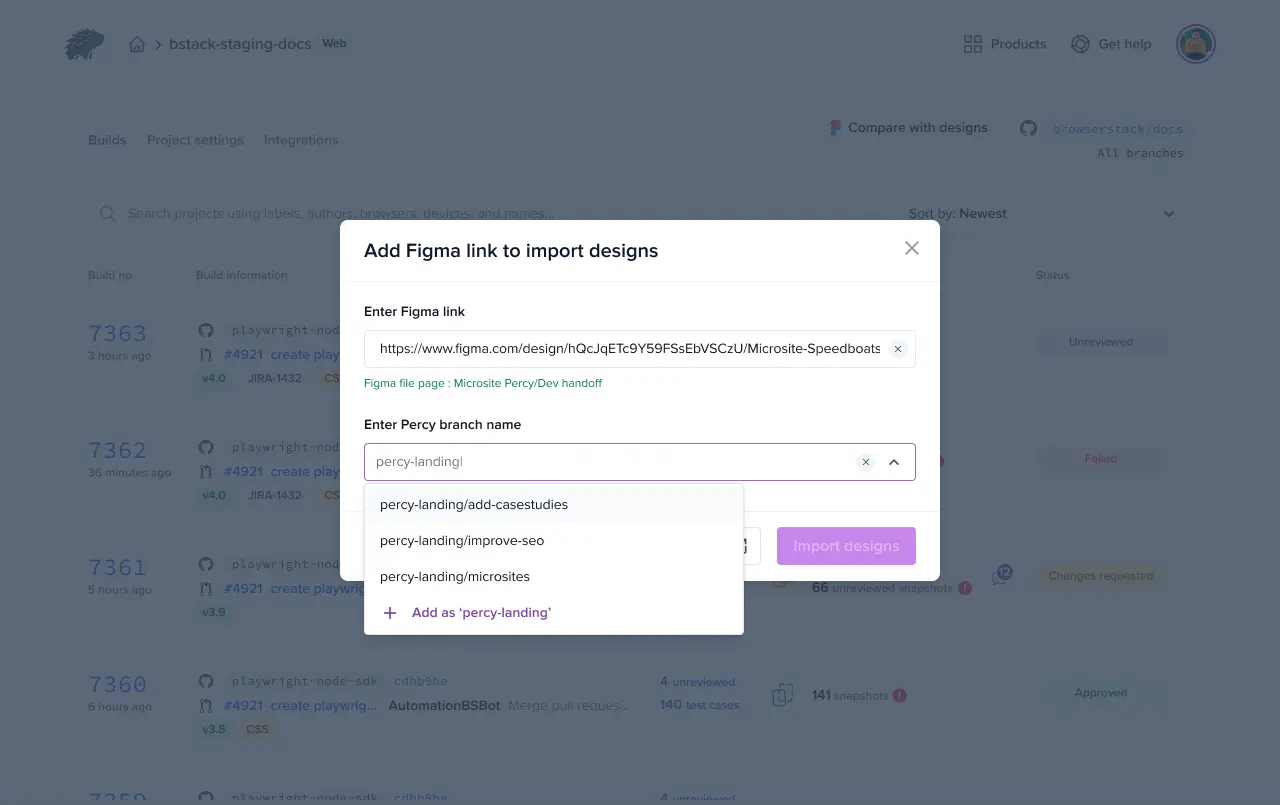
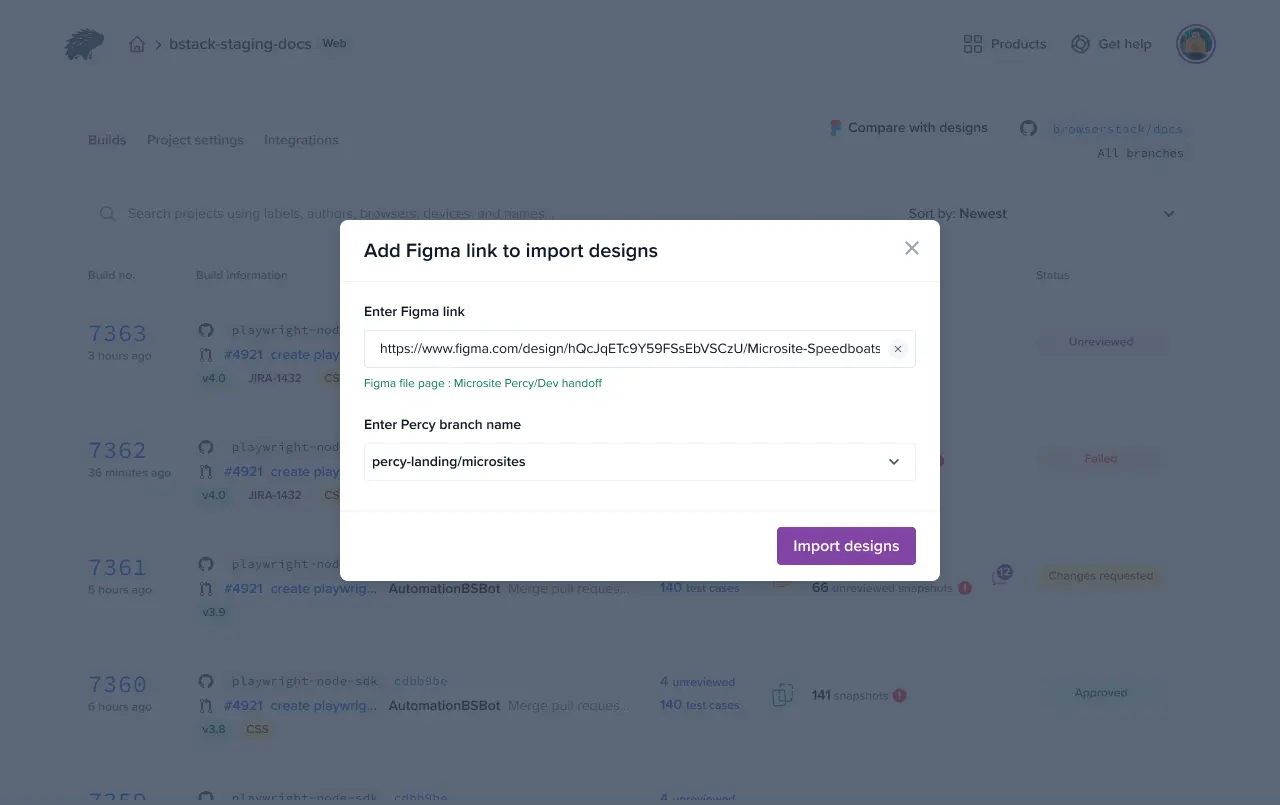
Step 3: Enter the Figma link to import your designs. Enter a Percy branch name. You can select an existing branch name from the drop-down or create a new one.
- The default base branch on Percy cannot be selected as the target branch for Figma builds.
- For Percy on Automate projects, Figma retrieves device, browser, and width details from the last successful build on the specified branch. If no baseline build exists, it falls back to the last successful build on the default base branch. If that also doesn’t exist, it uses the most recent successful build.
- You do not require a branch for your Figma designs inside the Figma tool.
- Share the Figma file directly; do not invite to the project.
Step 4: Click Import designs. Your Figma designs load.
Step 5: Select the desired Figma designs. By default, the system pre-selects the first 50 imported designs.
You can import up to 50 designs per build.
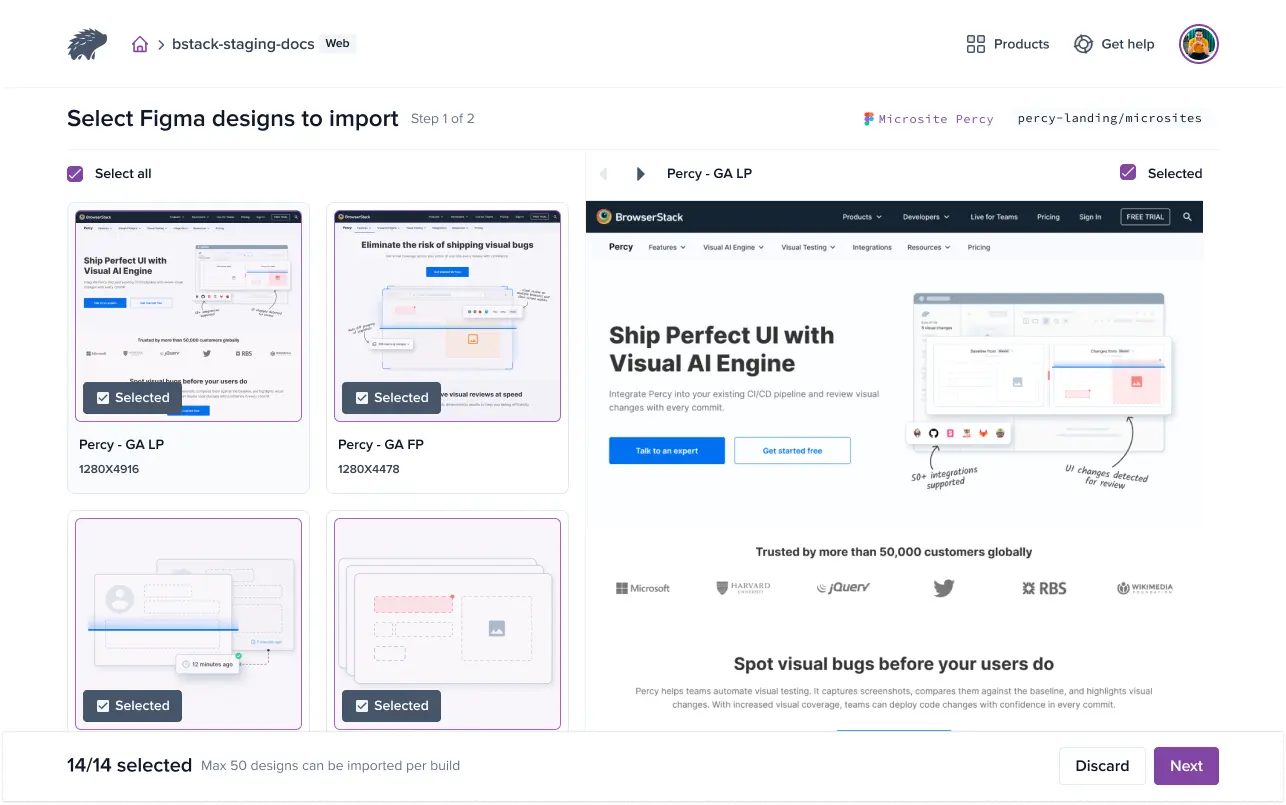
Click Next to continue.
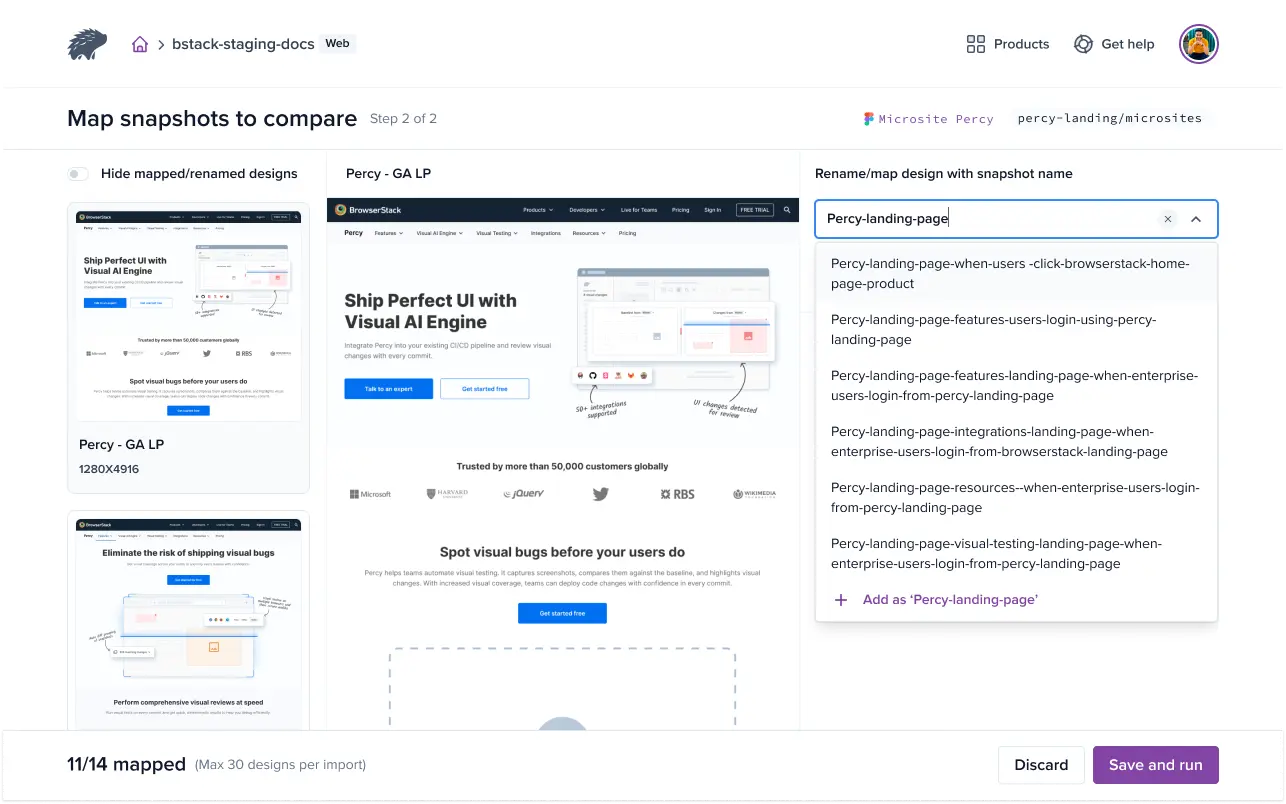
Step 6: Rename or map your design to a snapshot name for comparison. You can either select an existing snapshot name from the list or provide a new one. Optionally, enable the Use design name as snapshot name checkbox to automatically map snapshots. If no snapshot name is provided, Percy defaults to using the design name as the snapshot name.
- Percy does not allow multiple designs with the same dimensions to be mapped to the same snapshot.
- Unmapped designs will use the design name as the snapshot name.
Map the test case name to your design. For more information, see Map test cases.
Step 7: Click Save and run to complete the process.
A new build is triggered for the imported Figma designs. By default, the first Figma build is auto-approved. The next time you trigger a build, the review page displays snapshots for comparison.
Related topic
We're sorry to hear that. Please share your feedback so we can do better
Contact our Support team for immediate help while we work on improving our docs.
We're continuously improving our docs. We'd love to know what you liked
We're sorry to hear that. Please share your feedback so we can do better
Contact our Support team for immediate help while we work on improving our docs.
We're continuously improving our docs. We'd love to know what you liked
Thank you for your valuable feedback!