Run Tricentis Tosca tests with Automate
A step-by-step guide to running Tricentis Tosca tests with BrowserStack Automate
Checkout our AI-enabled and intuitive low-code recorder for scalable, reliable test execution

Tricentis Tosca accelerates testing with a scriptless, no-code approach for test automation. Integrating Tricentis Tosca with BrowserStack helps you run test scripts recorded on Tricentis Tosca on BrowserStack devices and desktop browsers.
Prerequisites
- BrowserStack Username and Access Key to set up the BrowserStack integration. After logging into your BrowserStack account, visit the Settings page and copy your Username and Access Key. You can also sign up for a free trial here.
- A registered account at Tricentis. You can sign up for a demo account here. You need to download Tosca + ARA (Automation Recording Assistant).
Integration steps
To run your test on BrowserStack:
-
Select your test and update the test configuration details. Select PROJECT > Settings > TBox > Engines > XBrowser > WebDriver > BrowserStack and add your BrowserStack
UsernameandAccess keyas specified in your Account Settings.
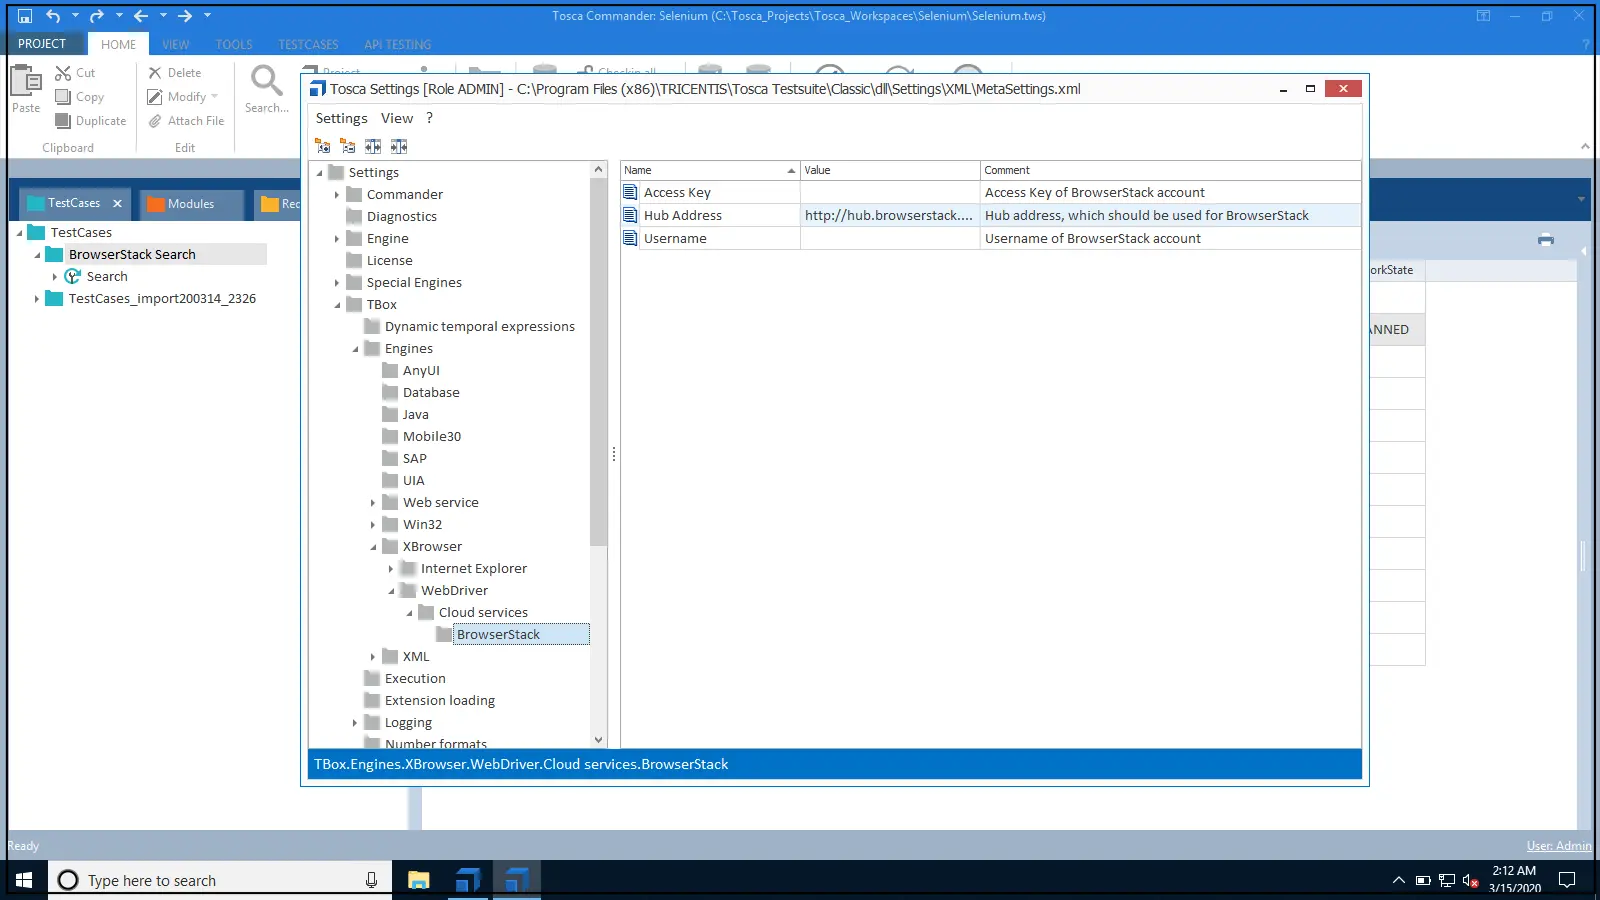
Add HubAddress and set its value toBrowserStackin the Test Configuration.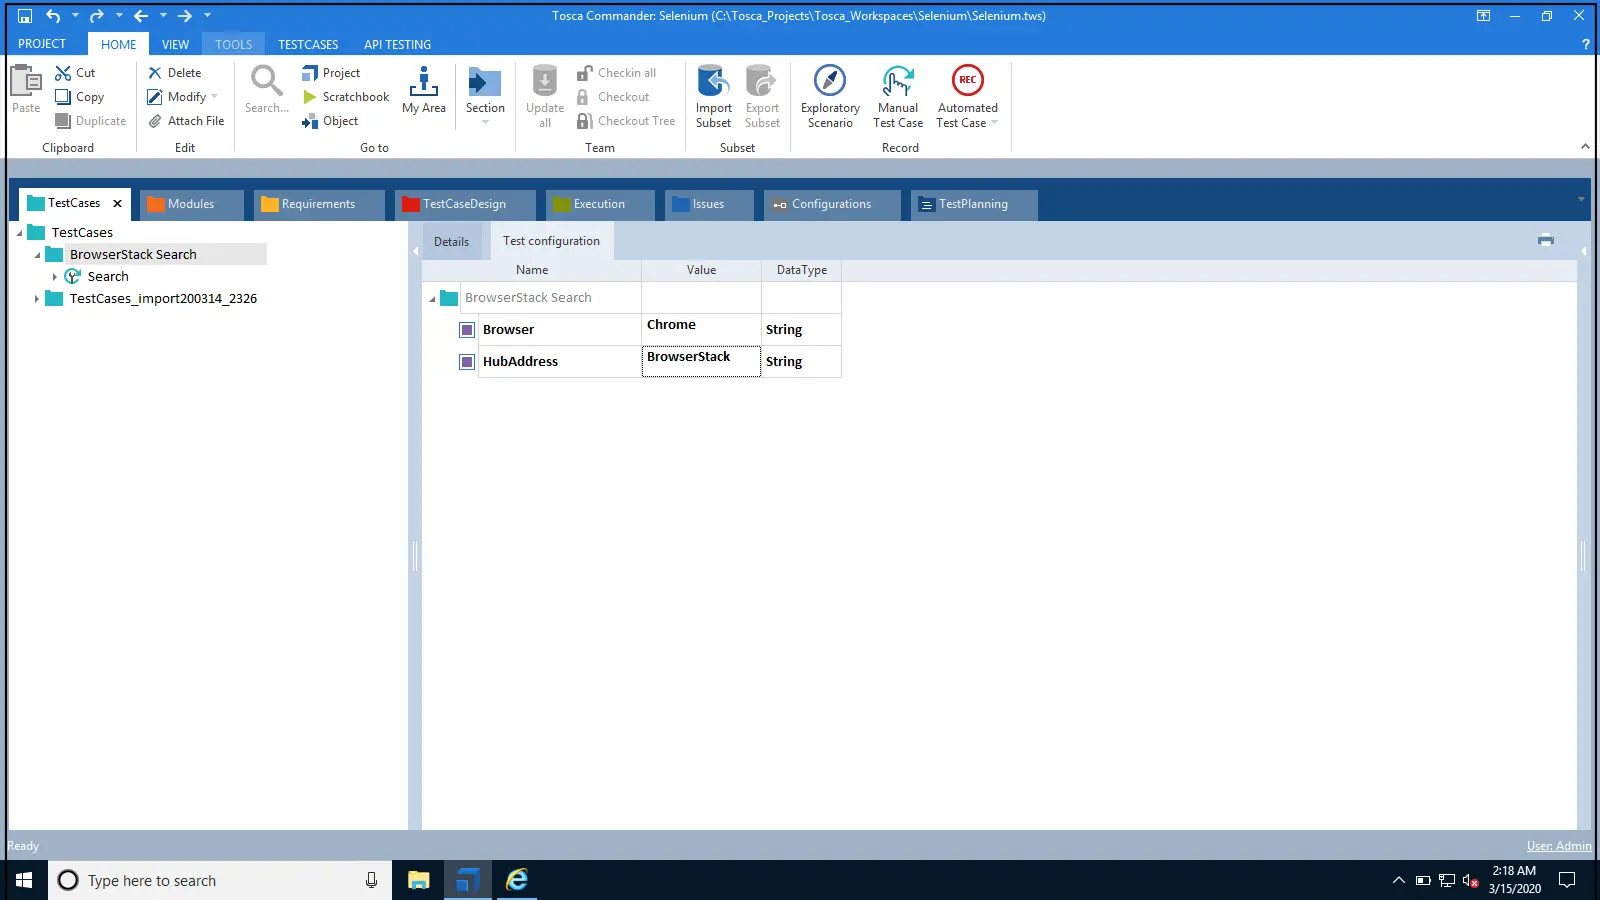
Run the test and view the test execution on BrowserStack’s Automate Dashboard.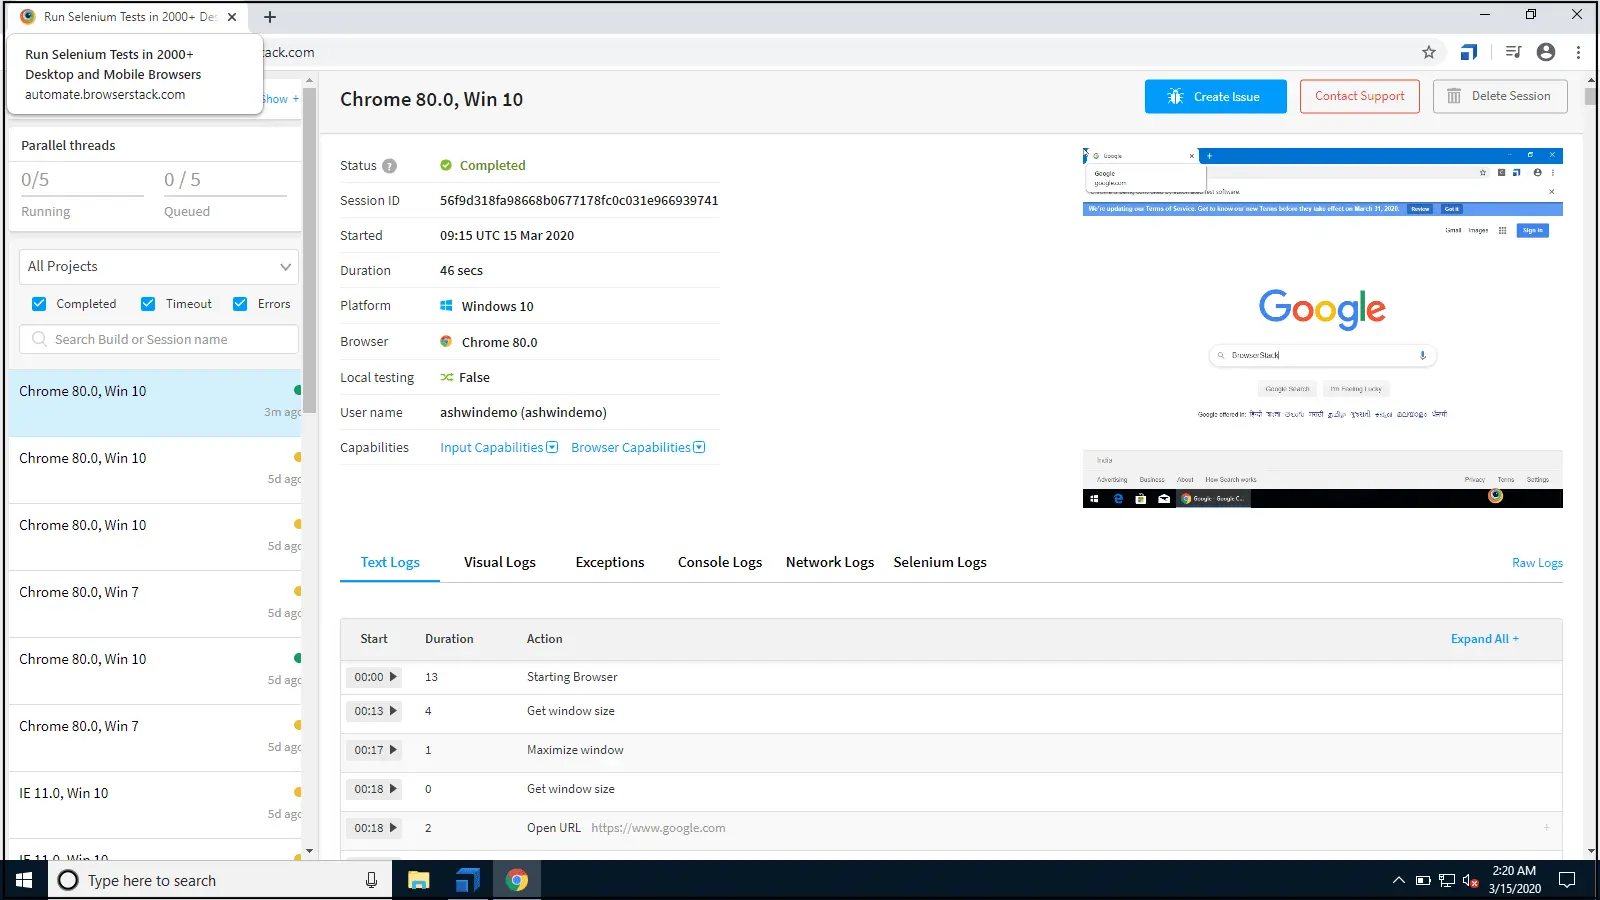
-
Follow these rules while setting the browser and OS capabilities:
- Set the Browser to Chrome (This is the TCP browser, which is a mandatory parameter for the test to be triggered from Tosca).
- Set the other desired capabilities using the format
Webdriver_<capabilityname>. To specify the browser capabilities, you can use our capability generator. - Sample capabilities for Chrome desktop:

- The capabilities that contain a ‘
.’ need to be replaced by a double underscore ‘__’. More details are available on the Tricentis documentation page. For example, useWebdriver_browserstack__localinstead ofbrowserstack.local. - To improve performance, set Fibermode as
TRUEin Tosca. It reduces the non-essential Selenium requests that Tosca otherwise generates.
Enable local testing
-
Refer to these instructions to initiate local testing.
-
Set the browserstack local capability as
truein the desired capabilities:
WebDriver_browserstack__local: `true`
Scan using BrowserStack sessions
To scan with Tosca XScan using a BrowserStack session:
-
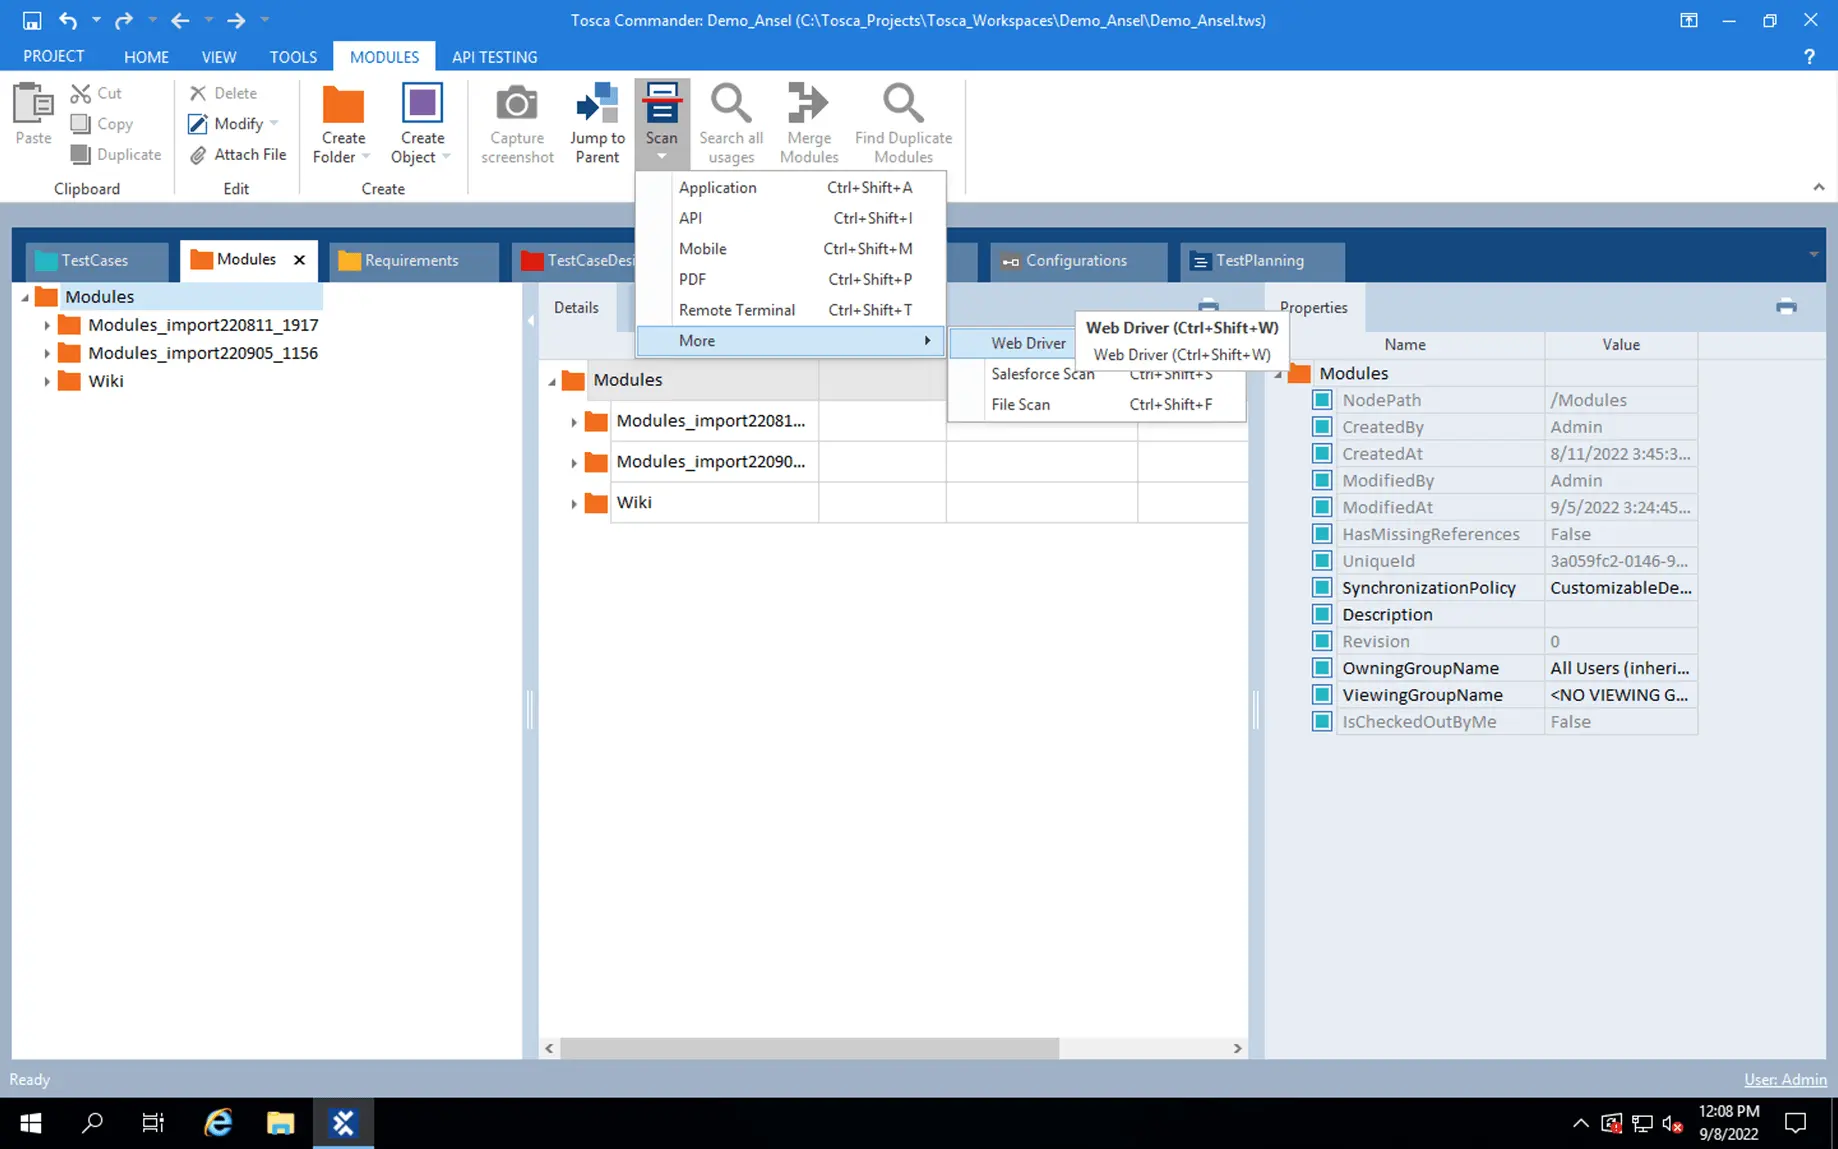
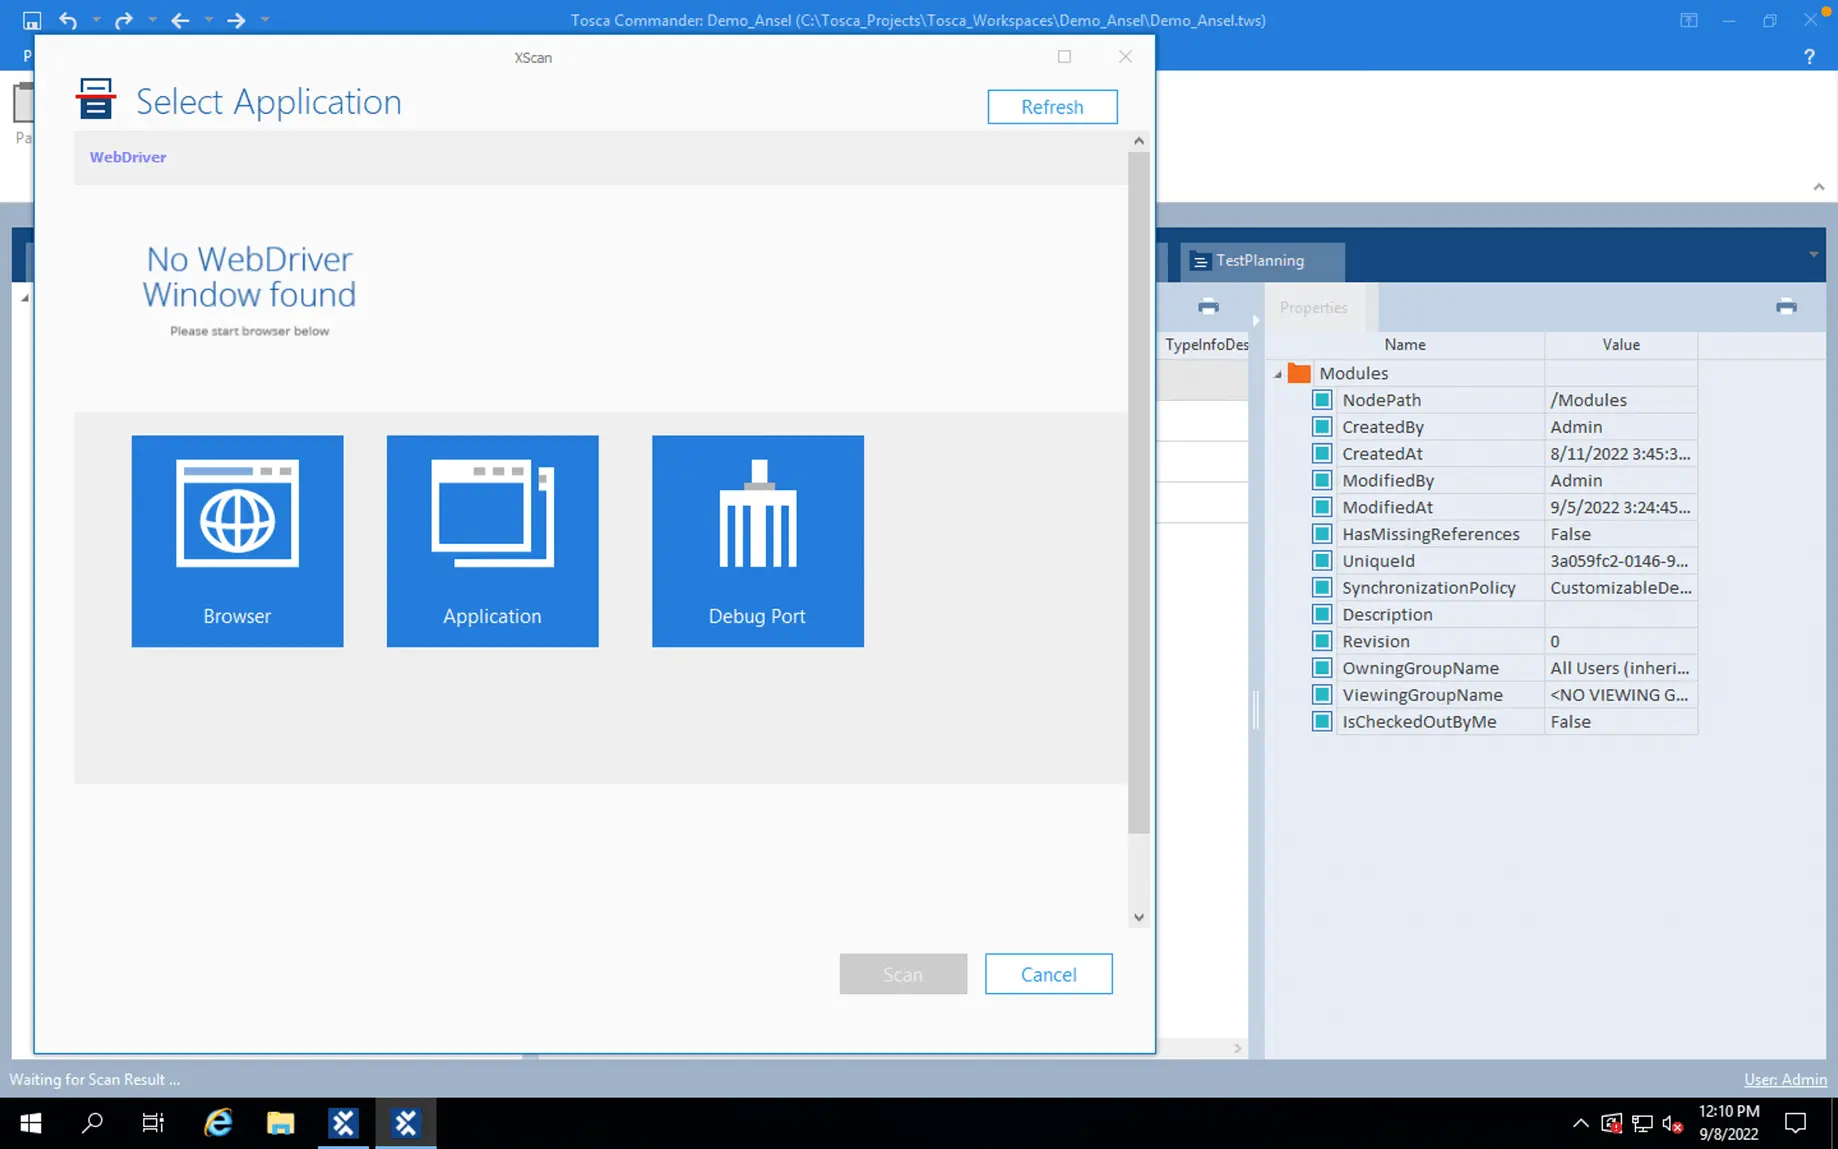
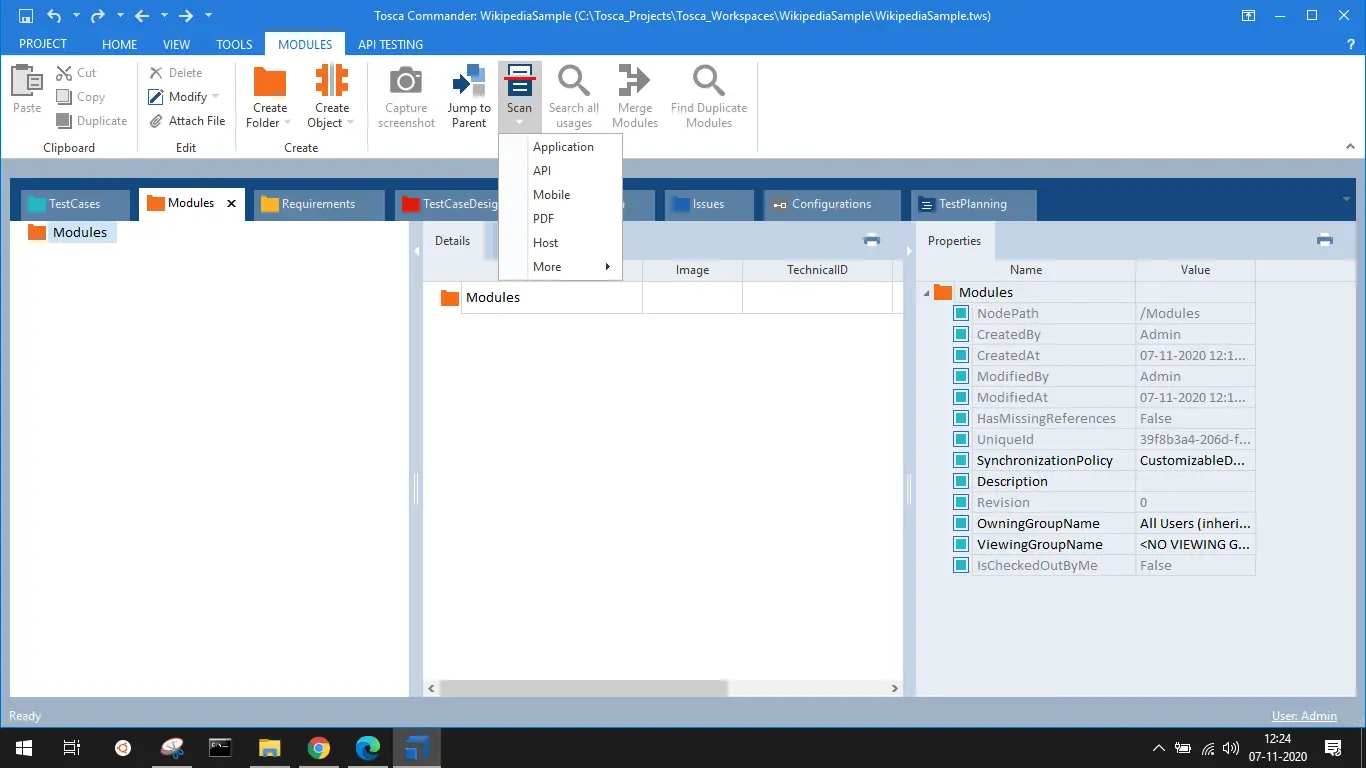
Initiate Tosca XScan to record your actions and create the test steps. Right-click a Module folder or use the dynamic menu Modules and select Scan > More > Web Driver.
-
When the XScan window is visible, click on Browser > Scan.
-
Select
BrowserStackin the hub address. Along with this, you can set thebrowser,browser_version, and theOS. You can also add the URL of the page that you intend to scan. Note that theUsername,access key, andHub URLwere set in Project > Settings.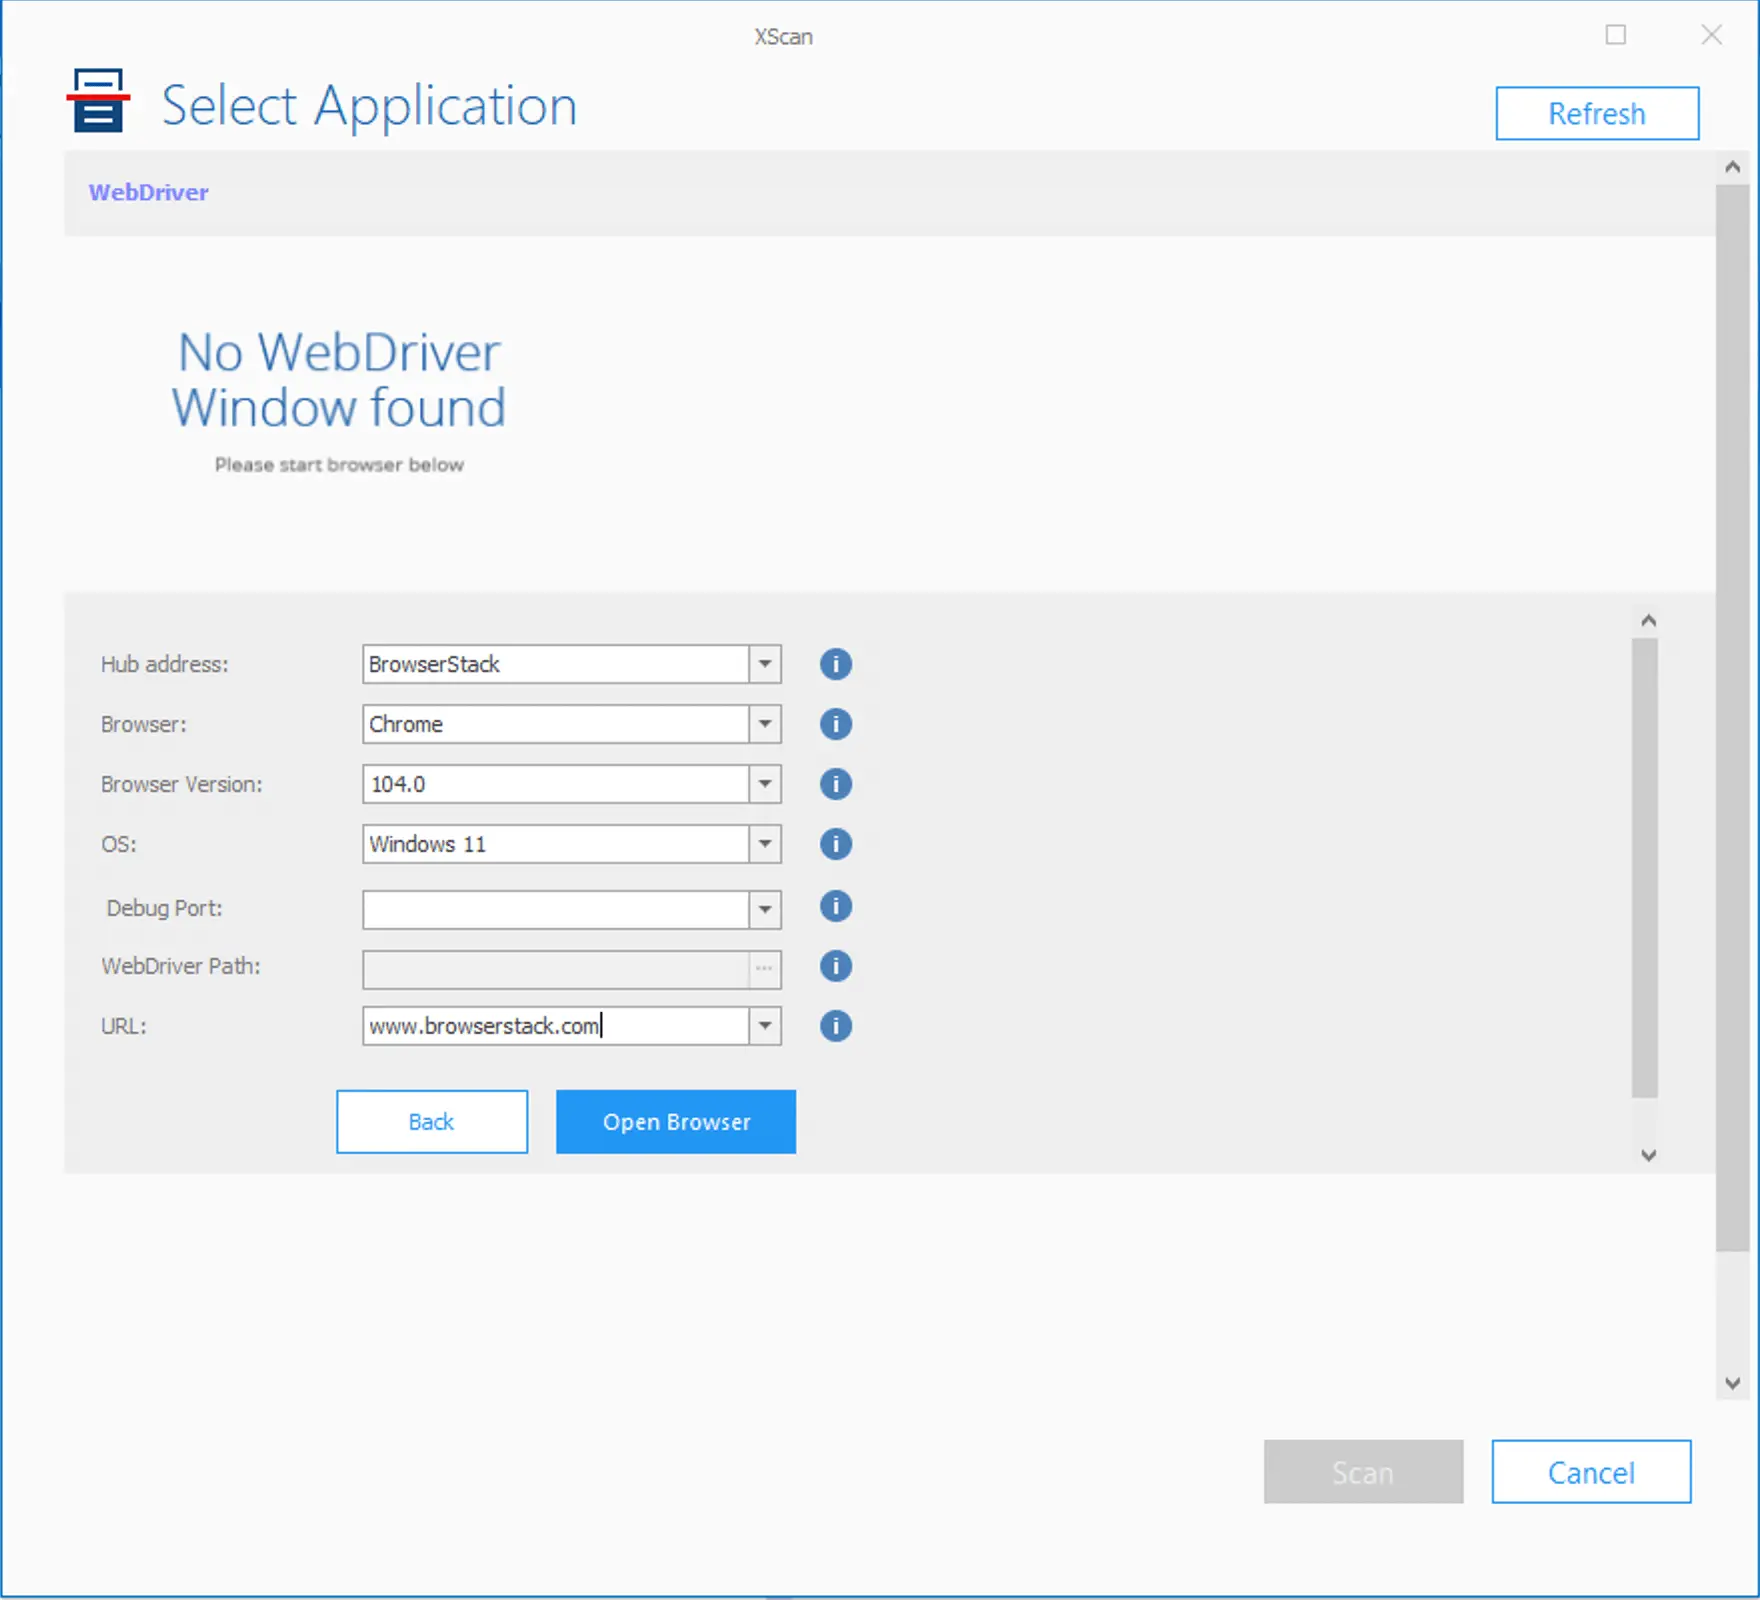
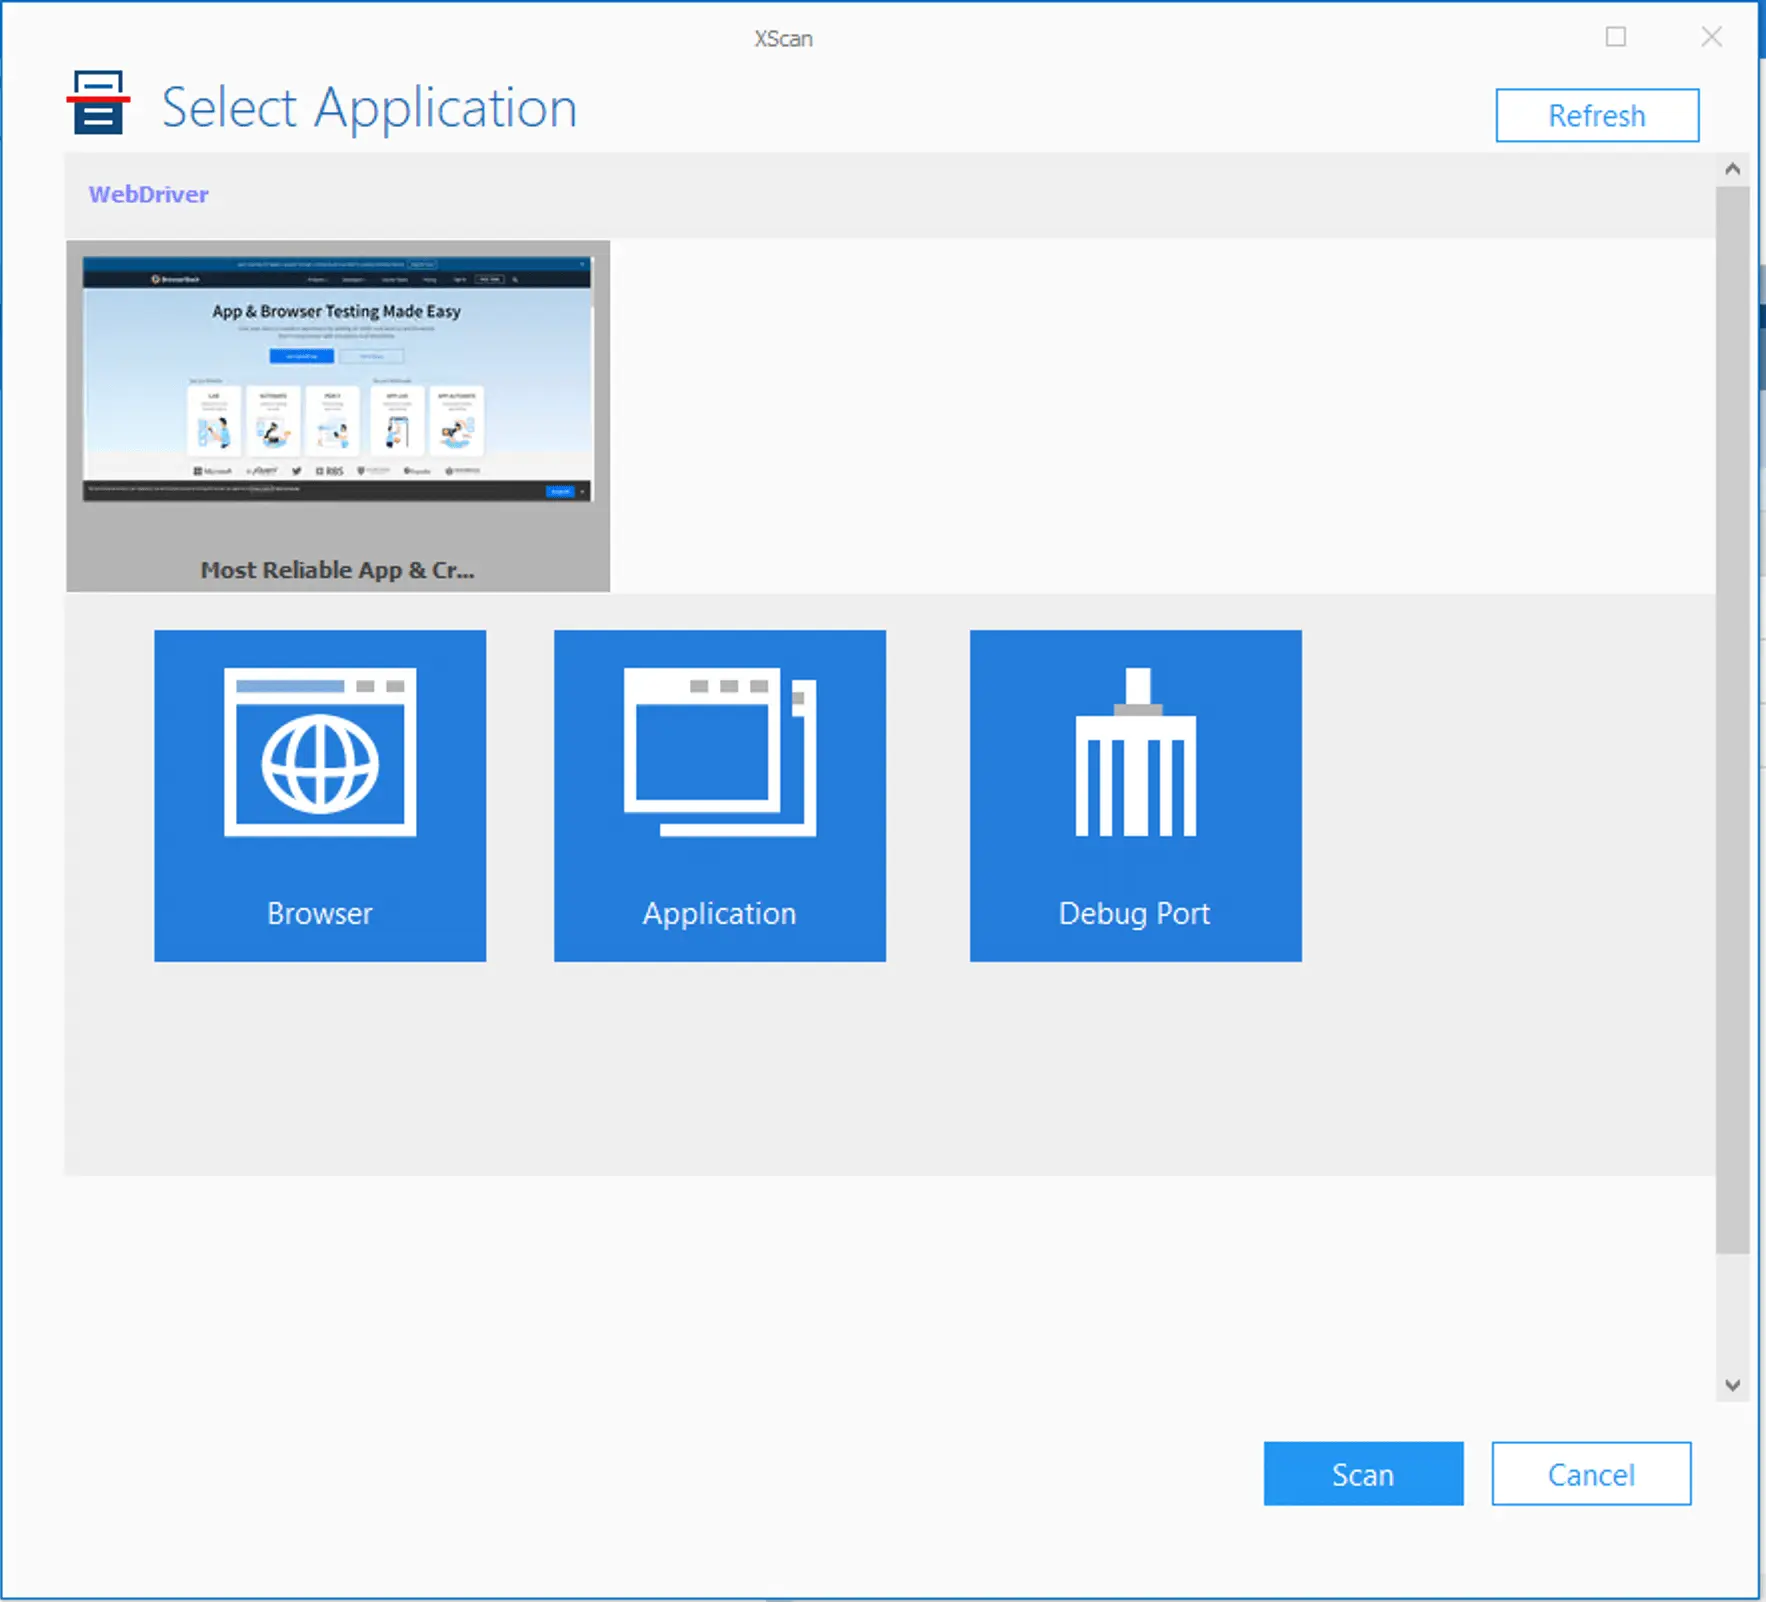
-
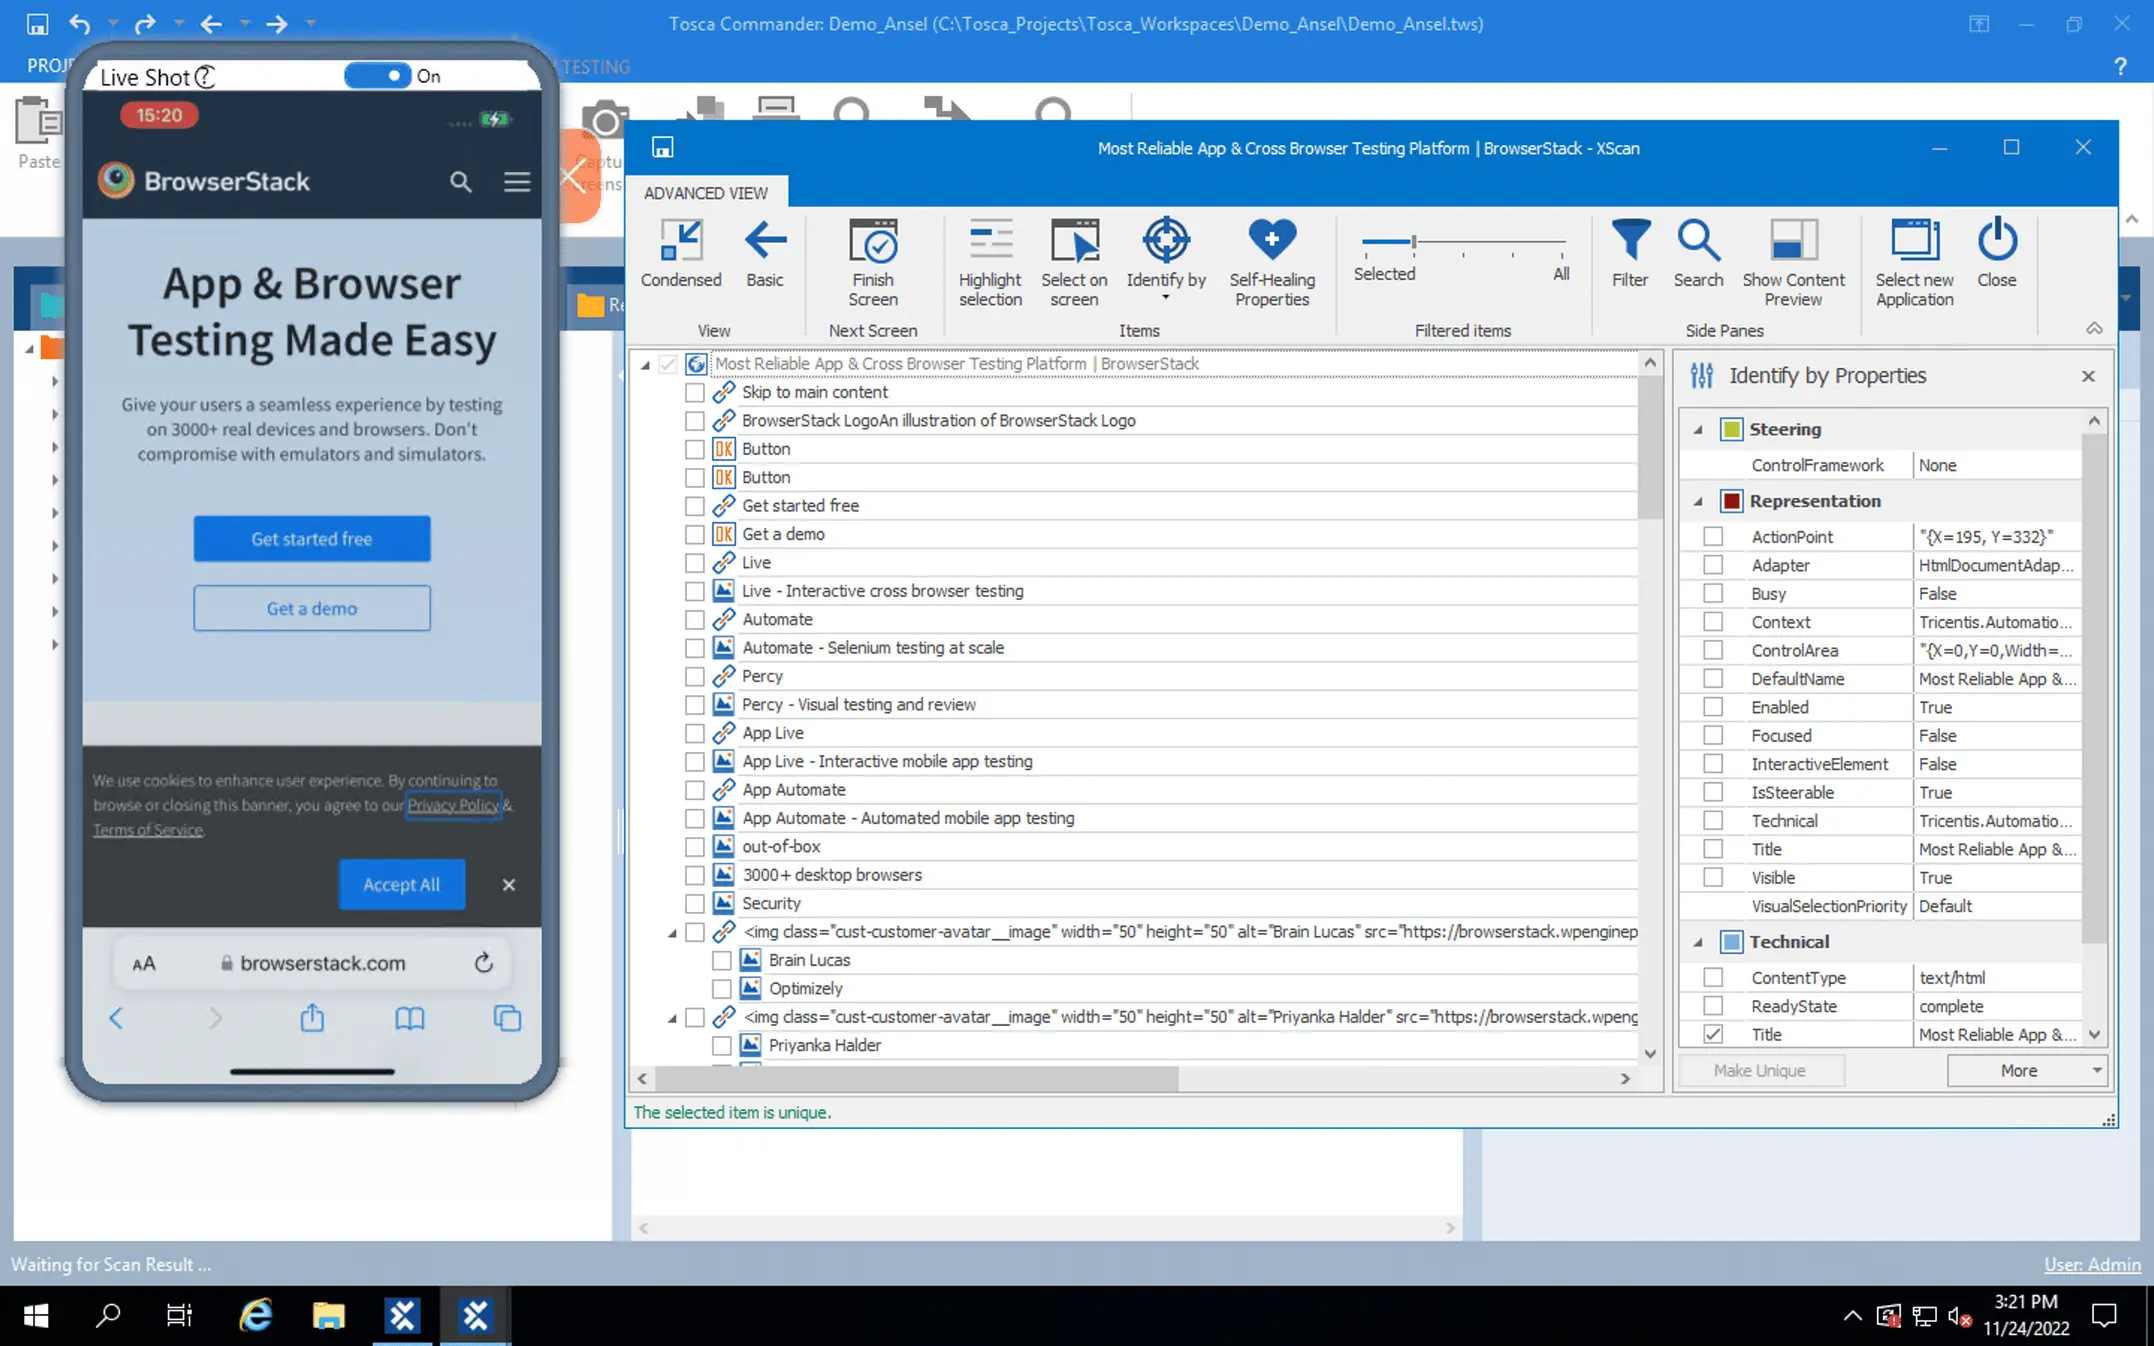
Select the window you want to scan and click the Scan button to start scanning the application.
-
You can see all the items scanned from the web application page. Select these items and save it.
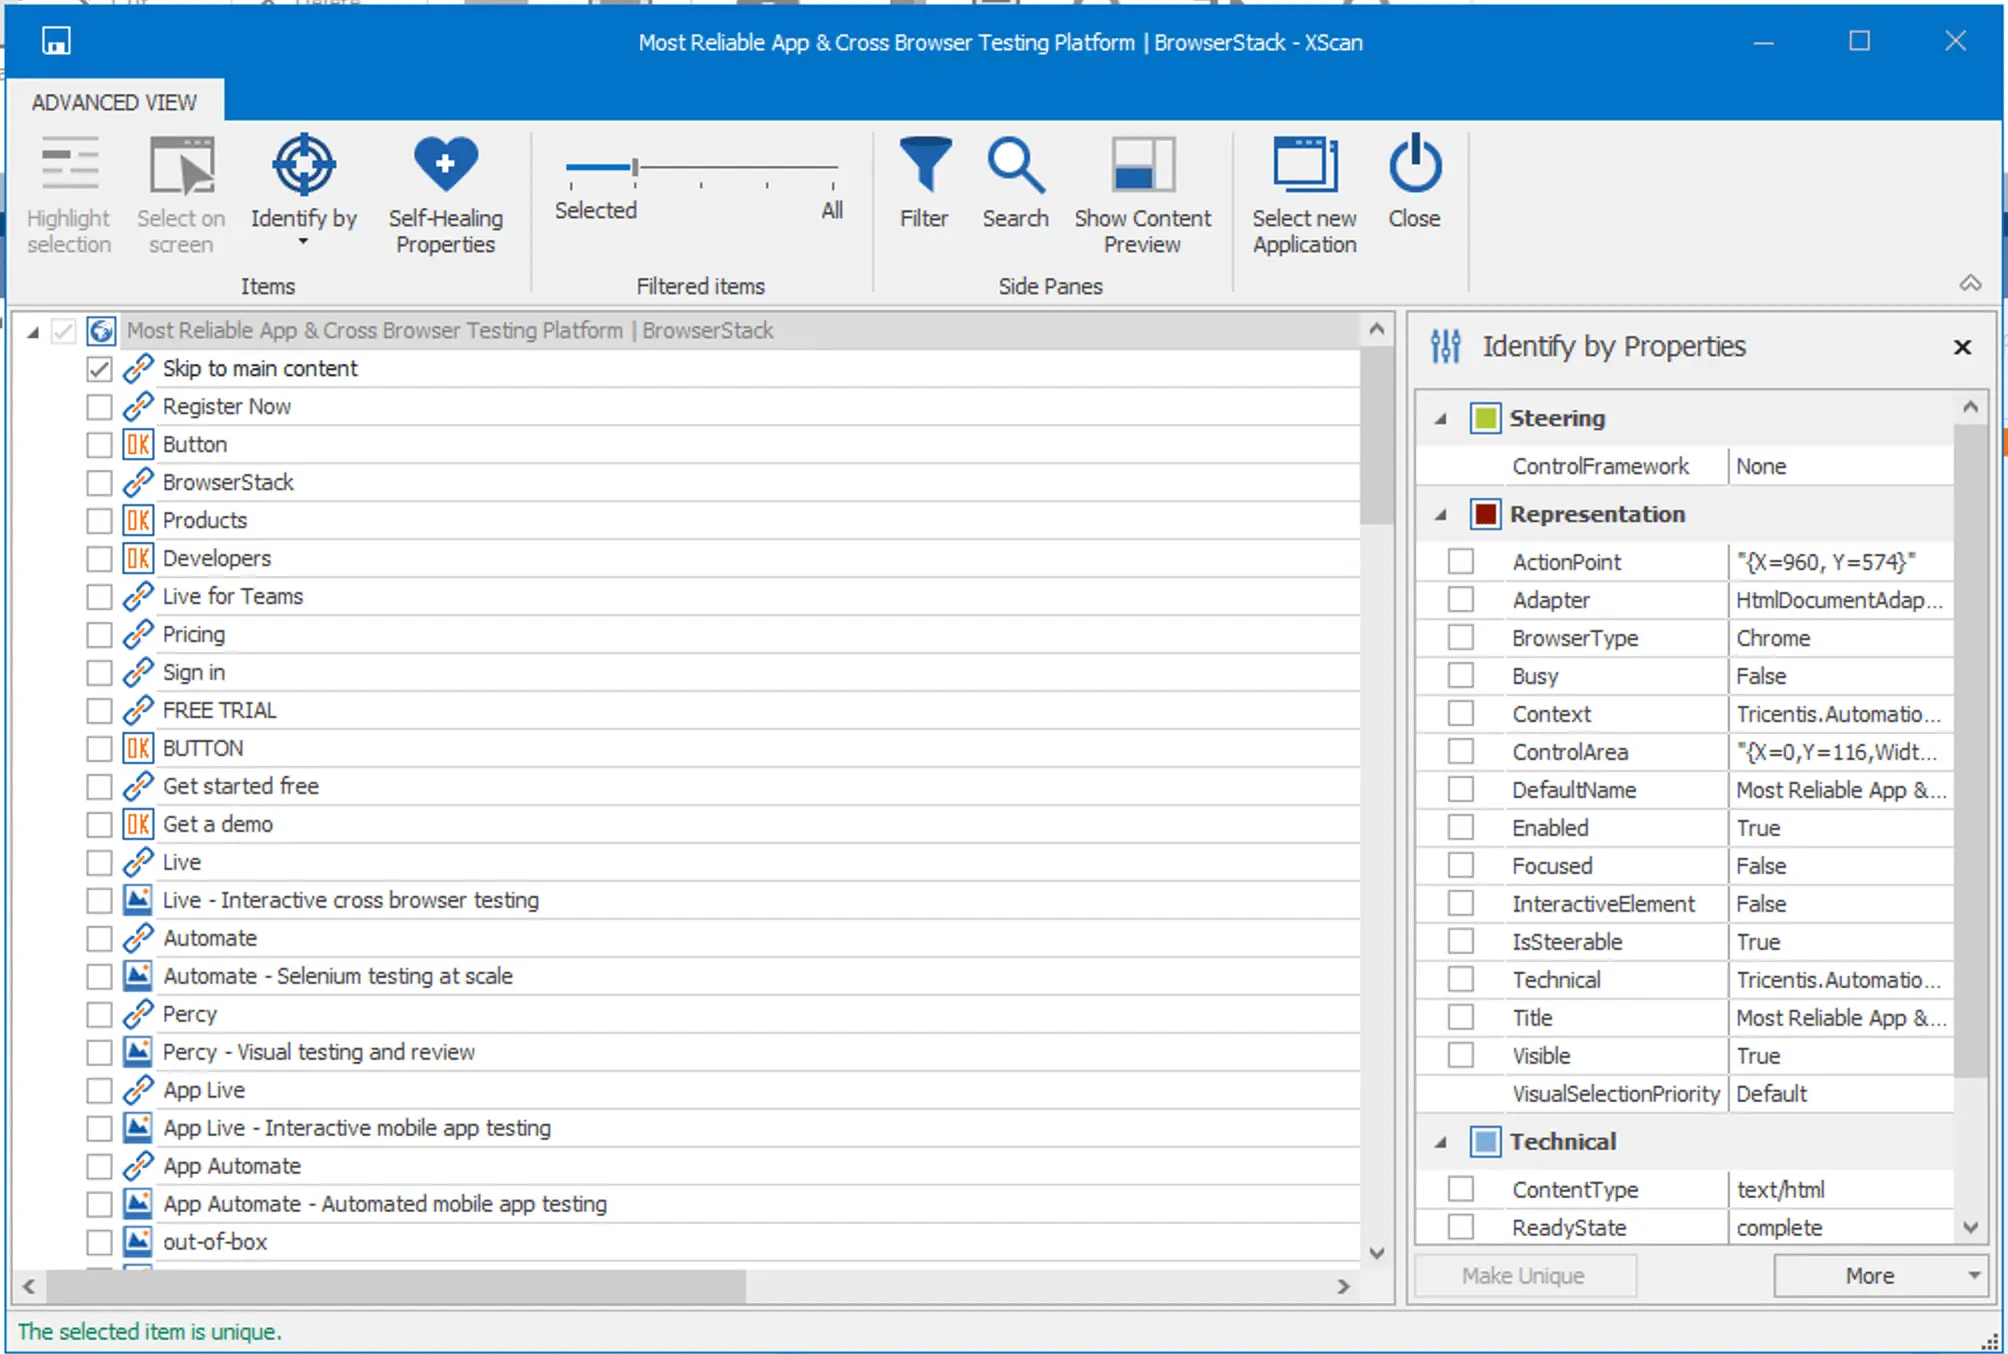
-
You can see the scanned modules that you can use to create your tests.
Run web tests on BrowserStack mobile devices
Follow these steps to run web tests on BrowserStack mobile devices using Tosca:
-
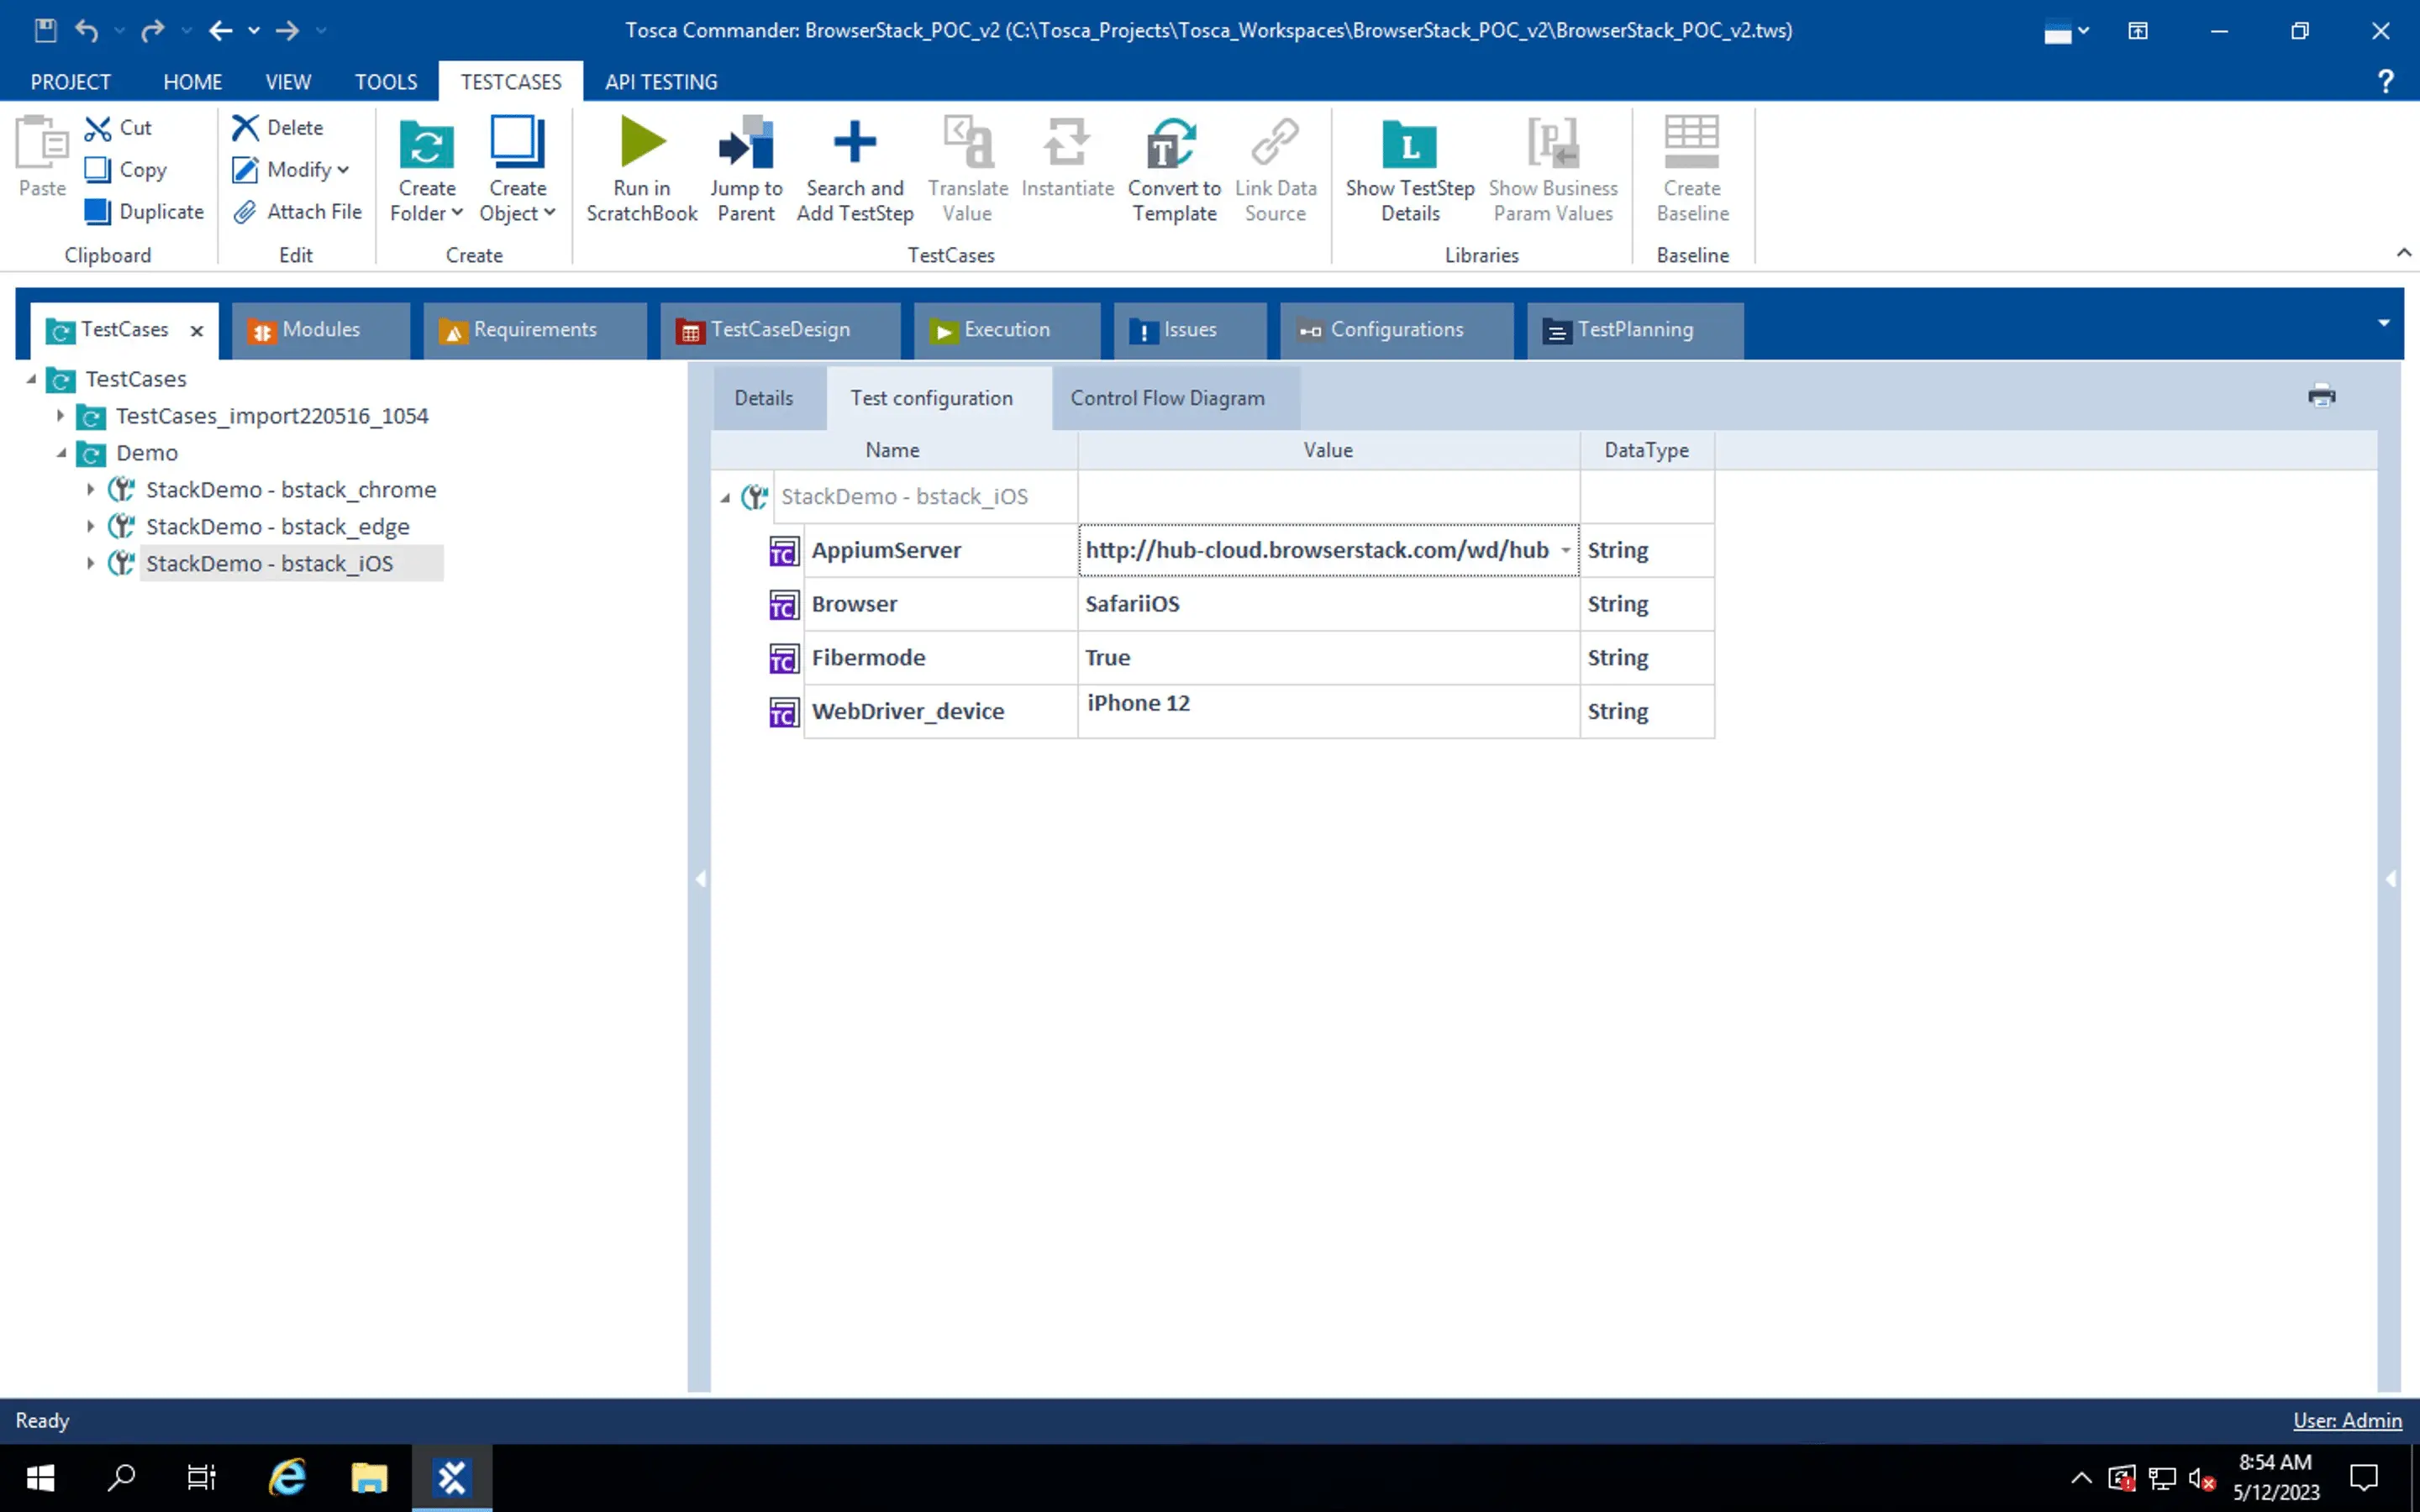
Select the test case and set the Test configuration as shown in the following screenshot.
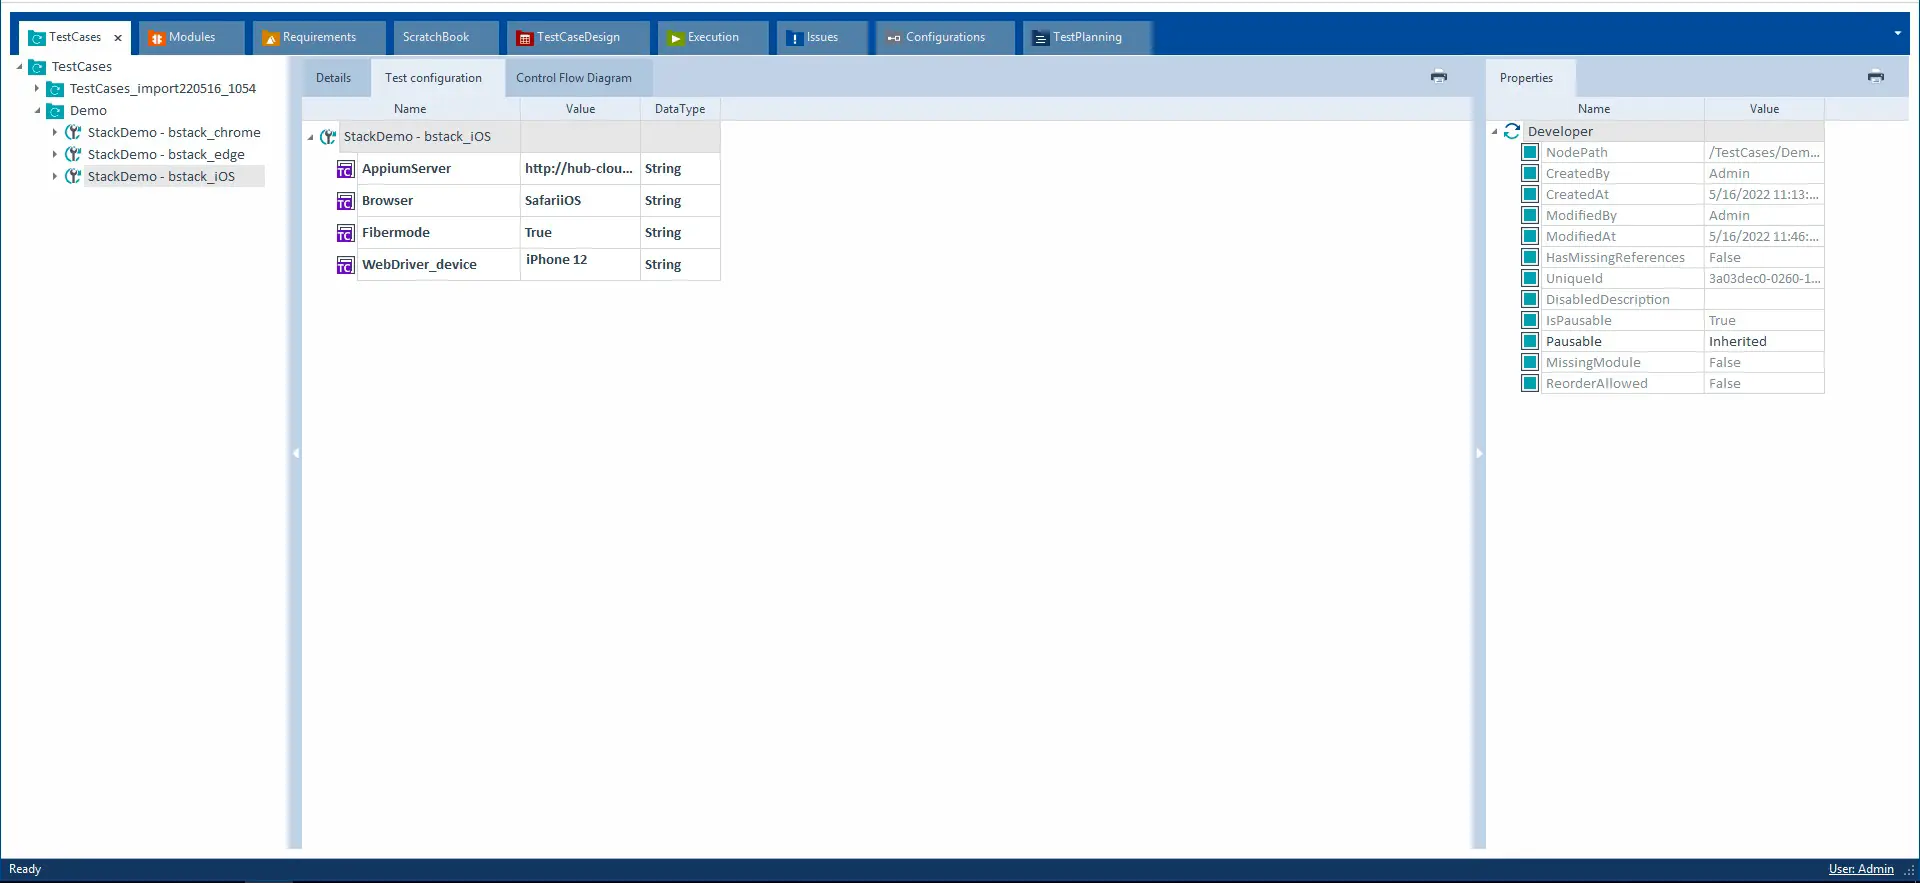
Here is an expanded view of the test configuration.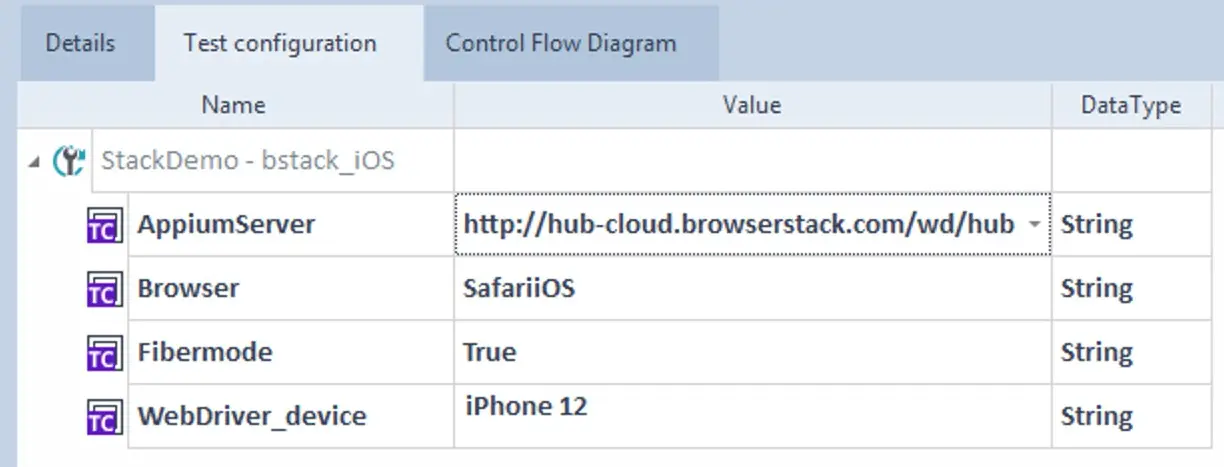
-
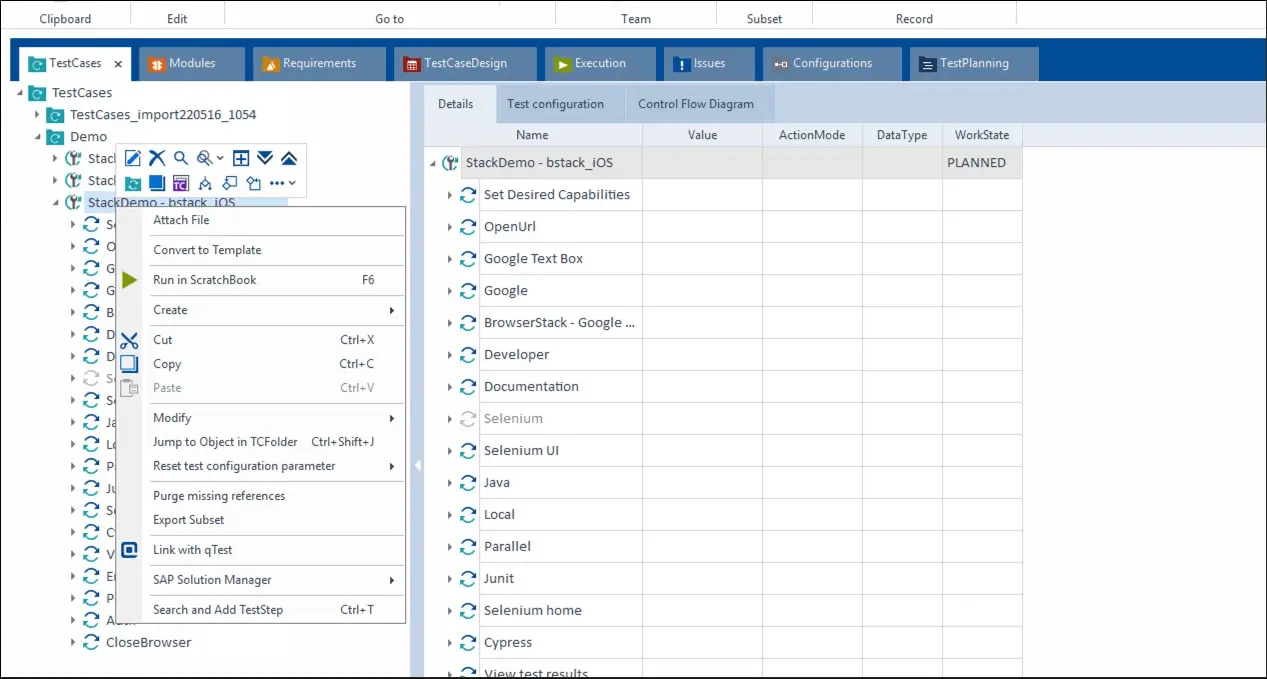
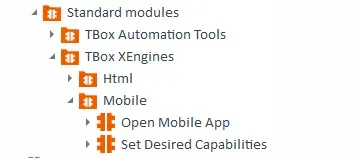
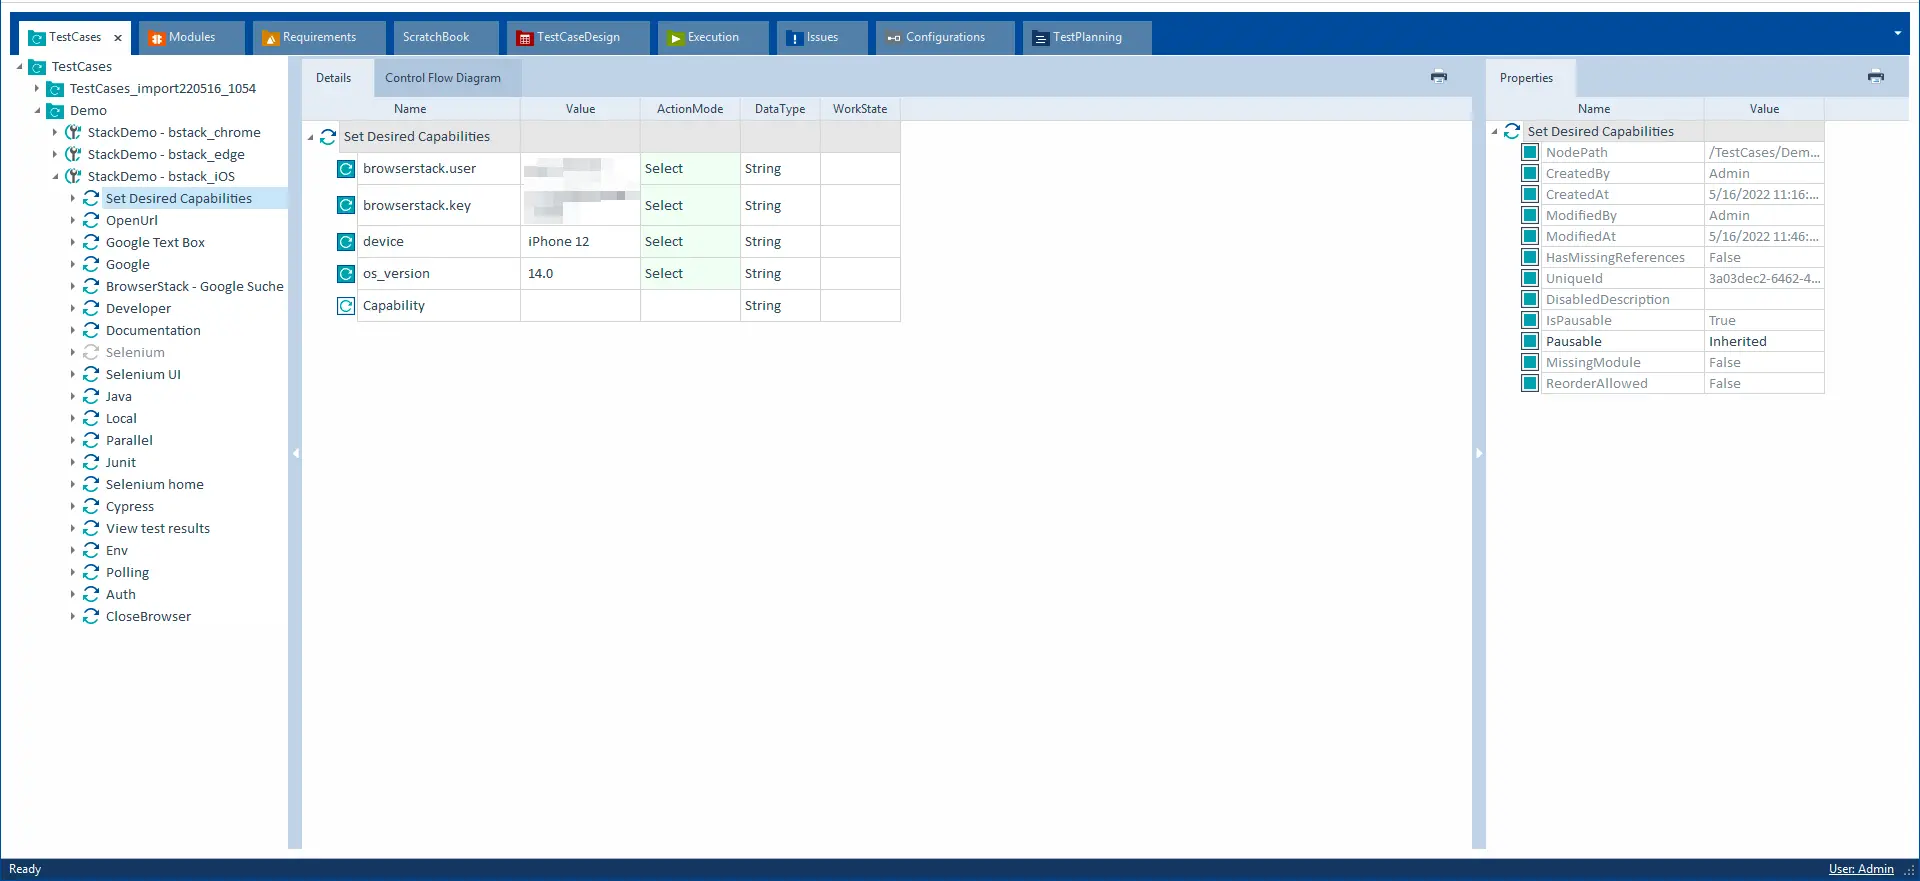
Open the Set Desired Capabilities folder from the following location.

-
Set the parameters in Set Desired Capabilities as follows:

-
Right-click a test case and select Run in ScratchBook.
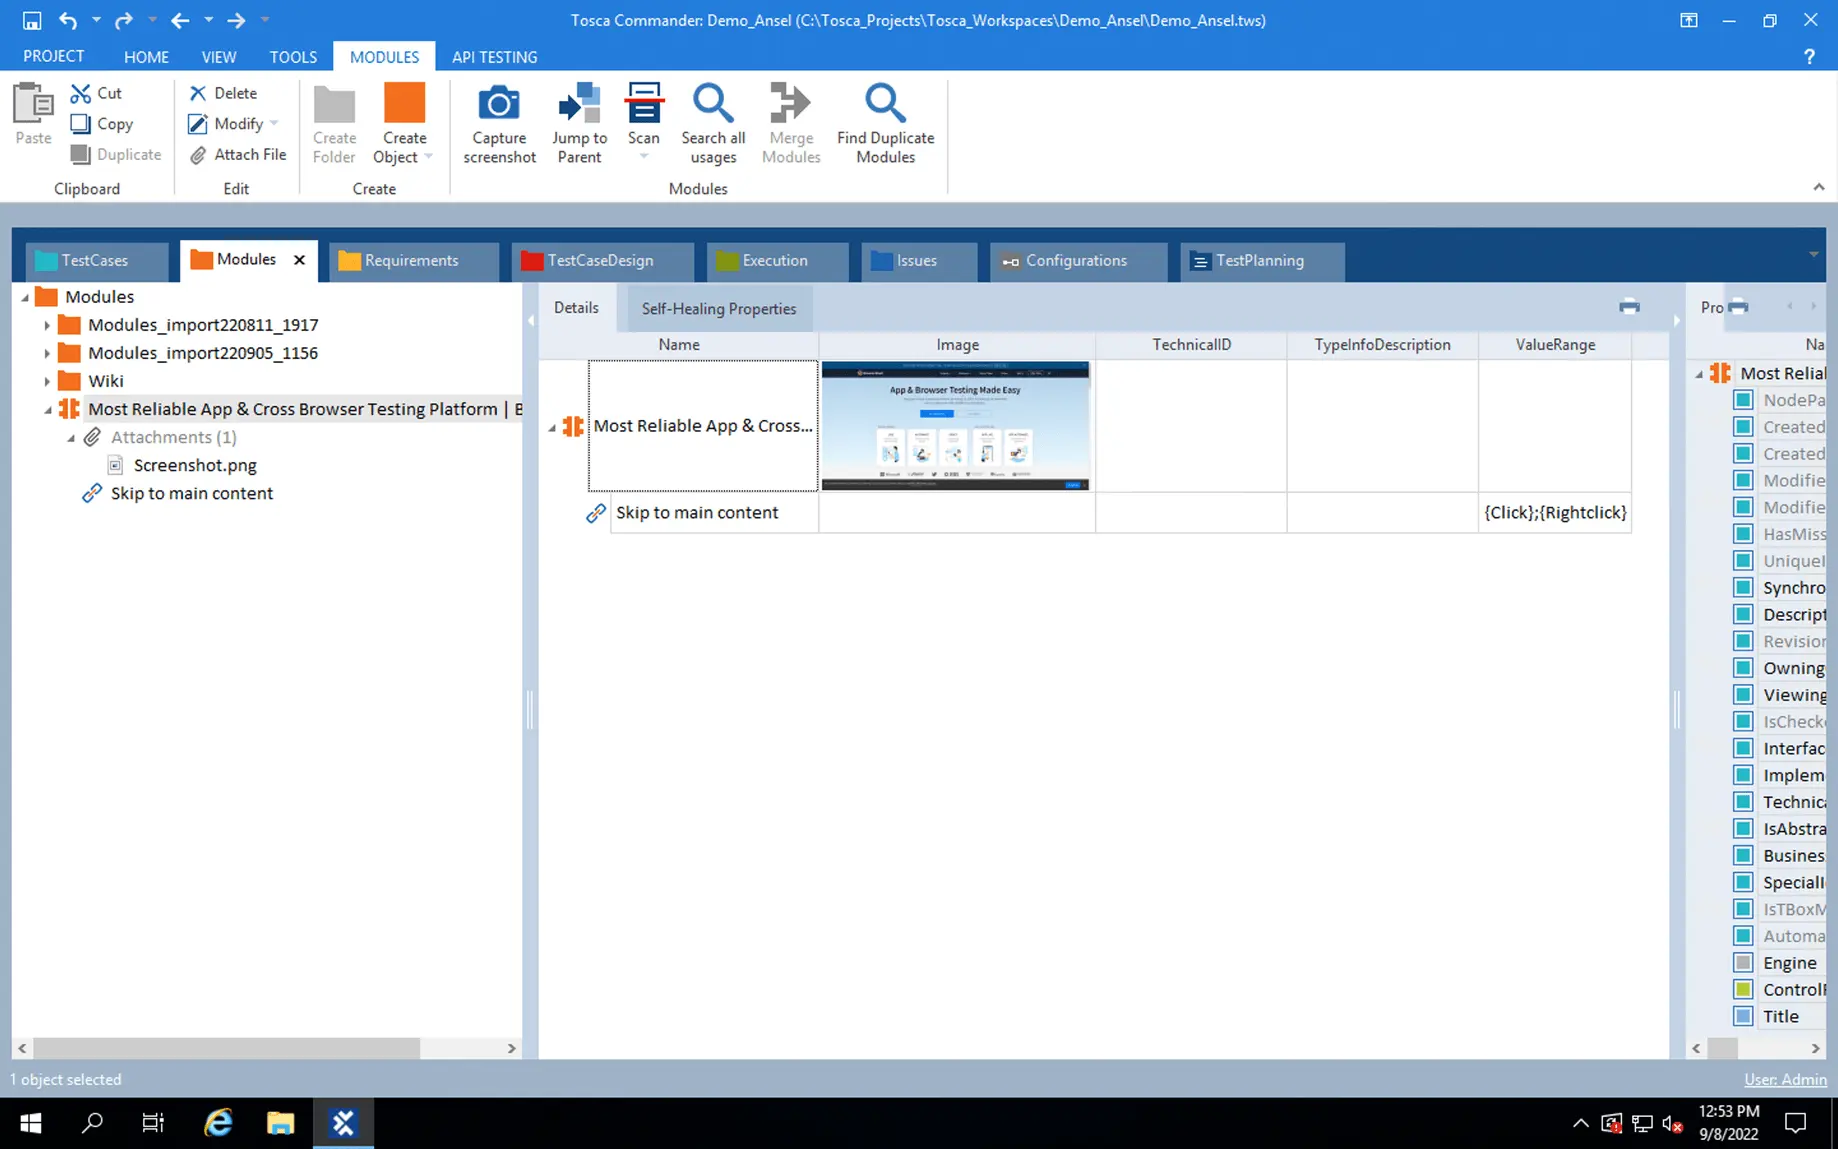
Scan web applications on BrowserStack mobile devices
Use TOSCA 15.2 patch 4 or above to scan web applications.
To scan a web application on BrowserStack mobile devices:
-
Create a
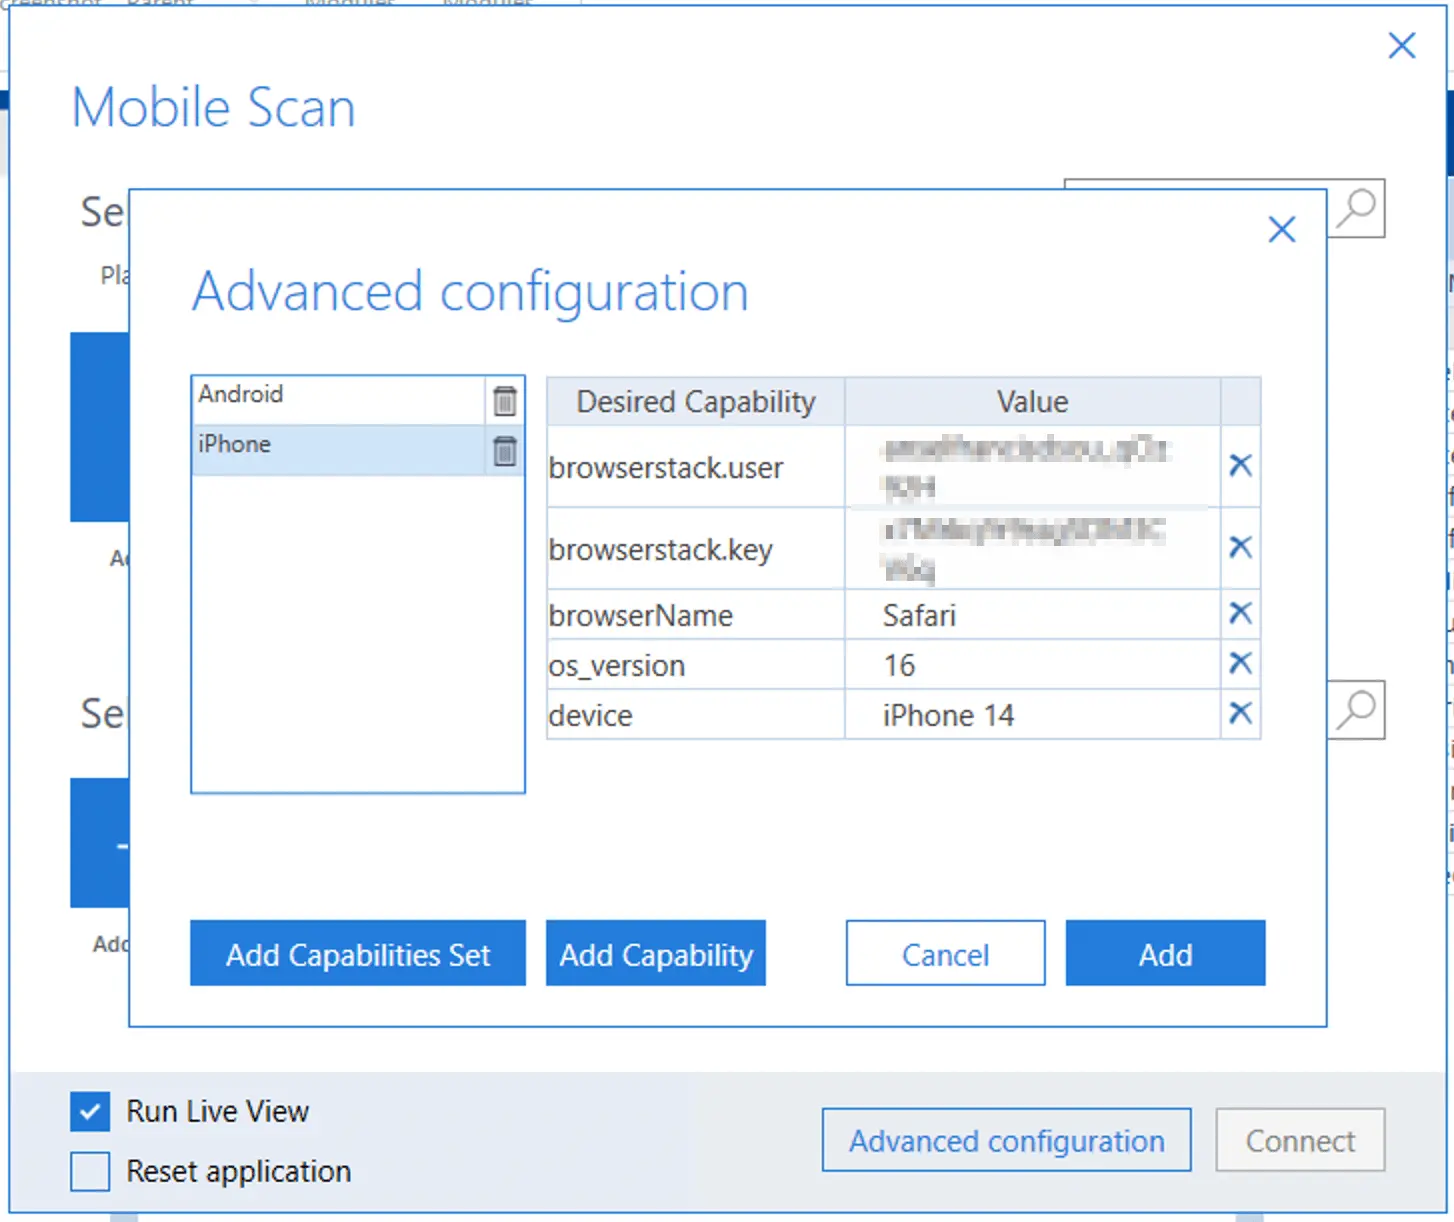
.conffile in the root folder of your project and add the following capabilities:browserstack.user,<USERNAME> browserstack.key,<AUTOMATE_KEY> browserName,Safari device,iPhone 14 os_version,16 PlatformName,iOS -
Go to PROJECT > Settings > TBox > Engines > Mobile30 and set the Value field for Desired capabilities as the path of the folder containing the
.conffile.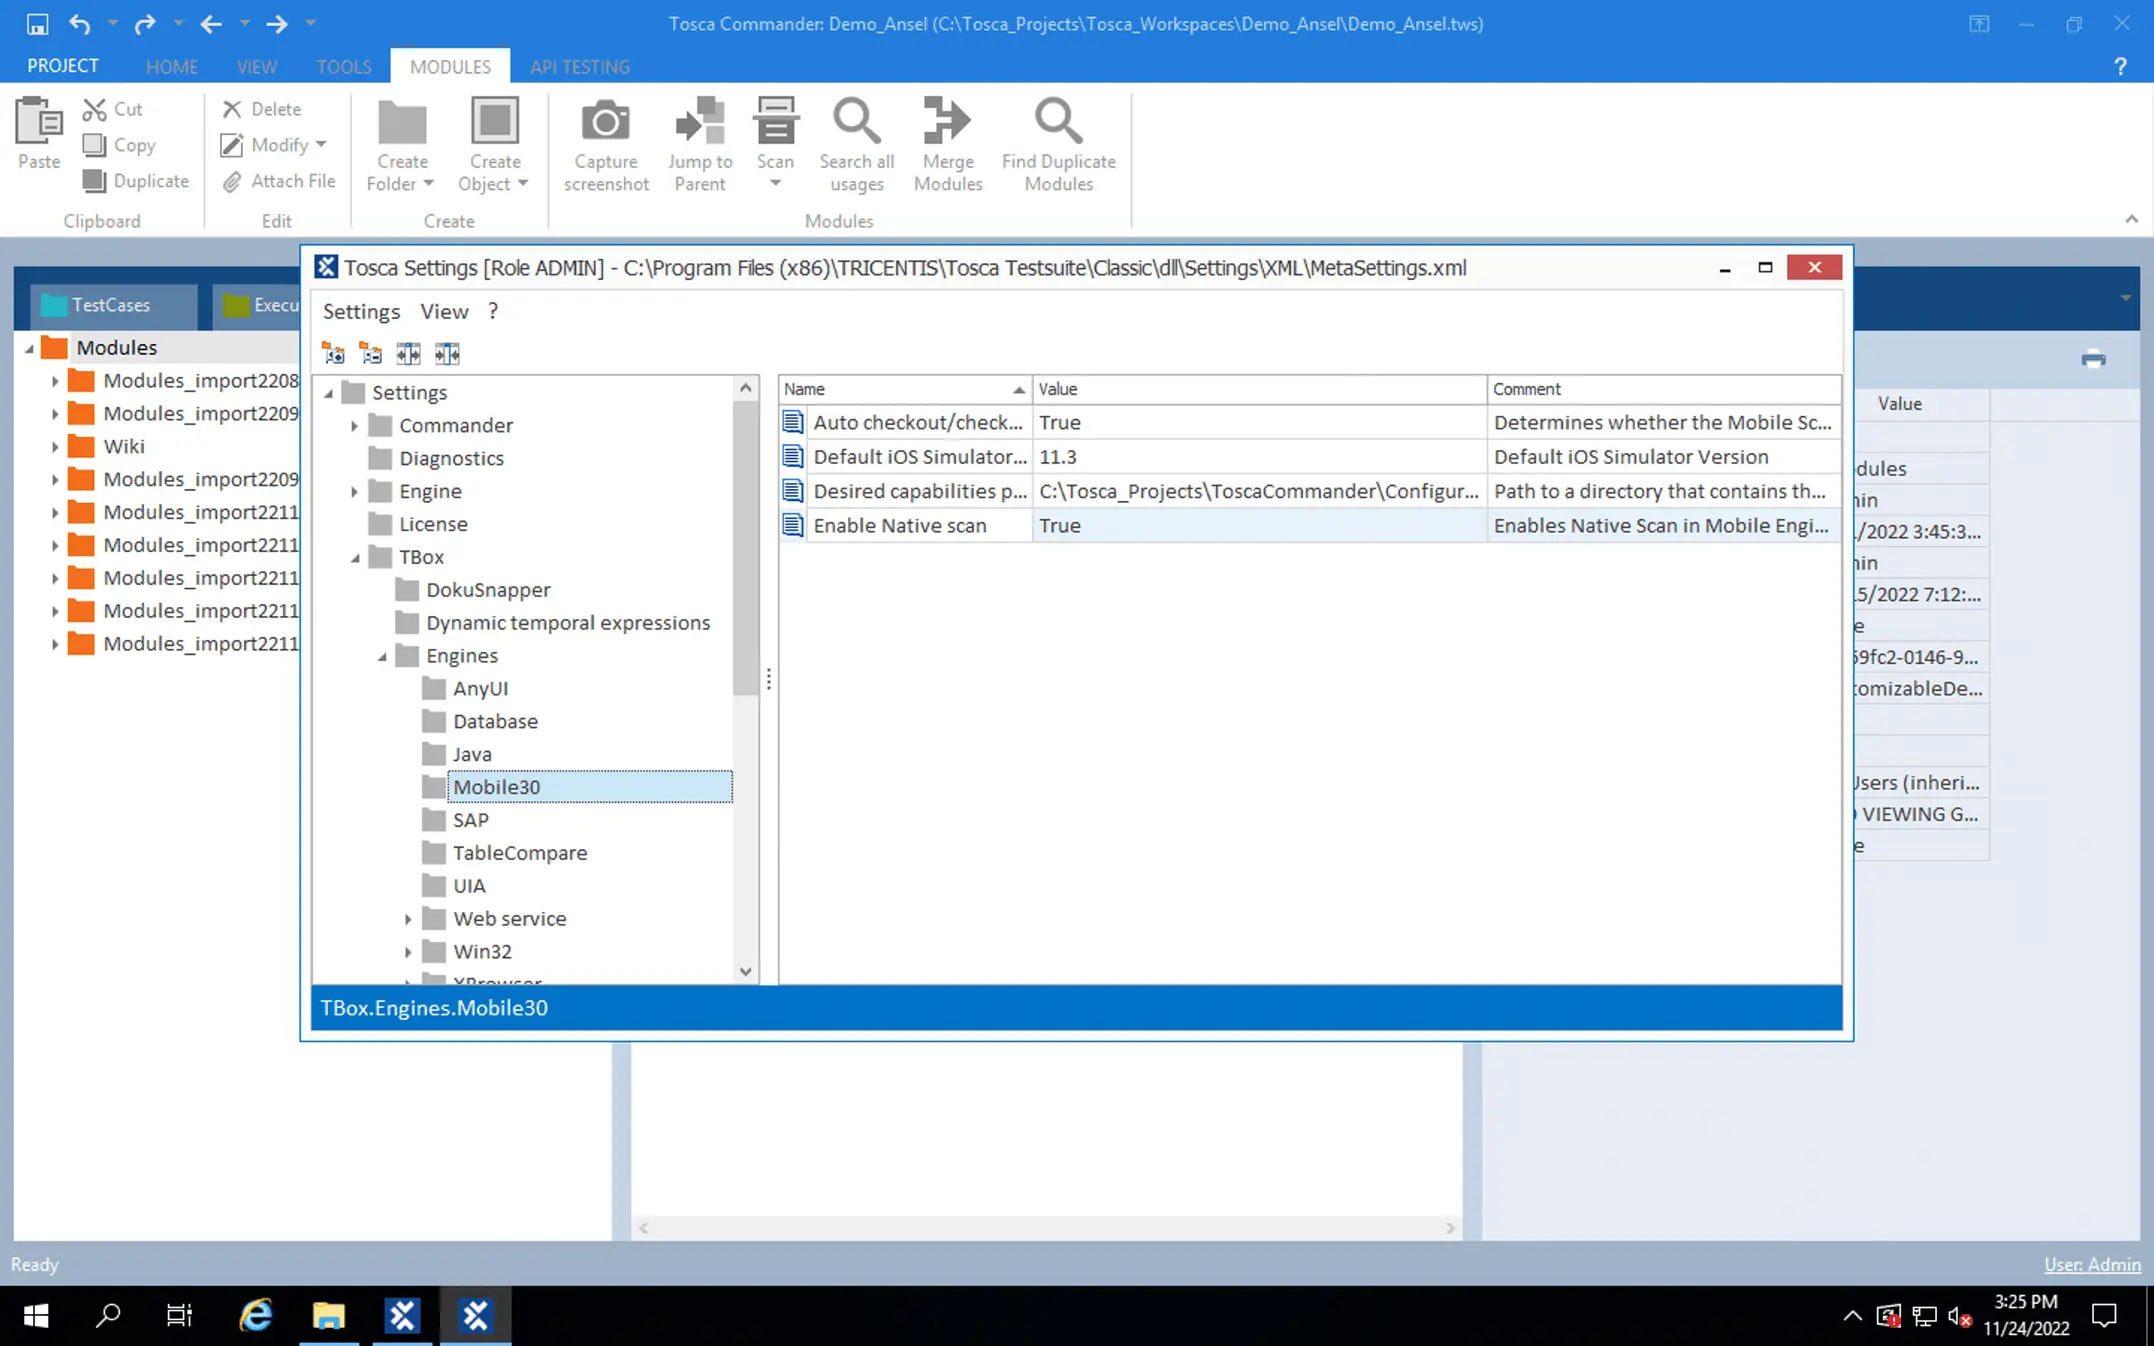
-
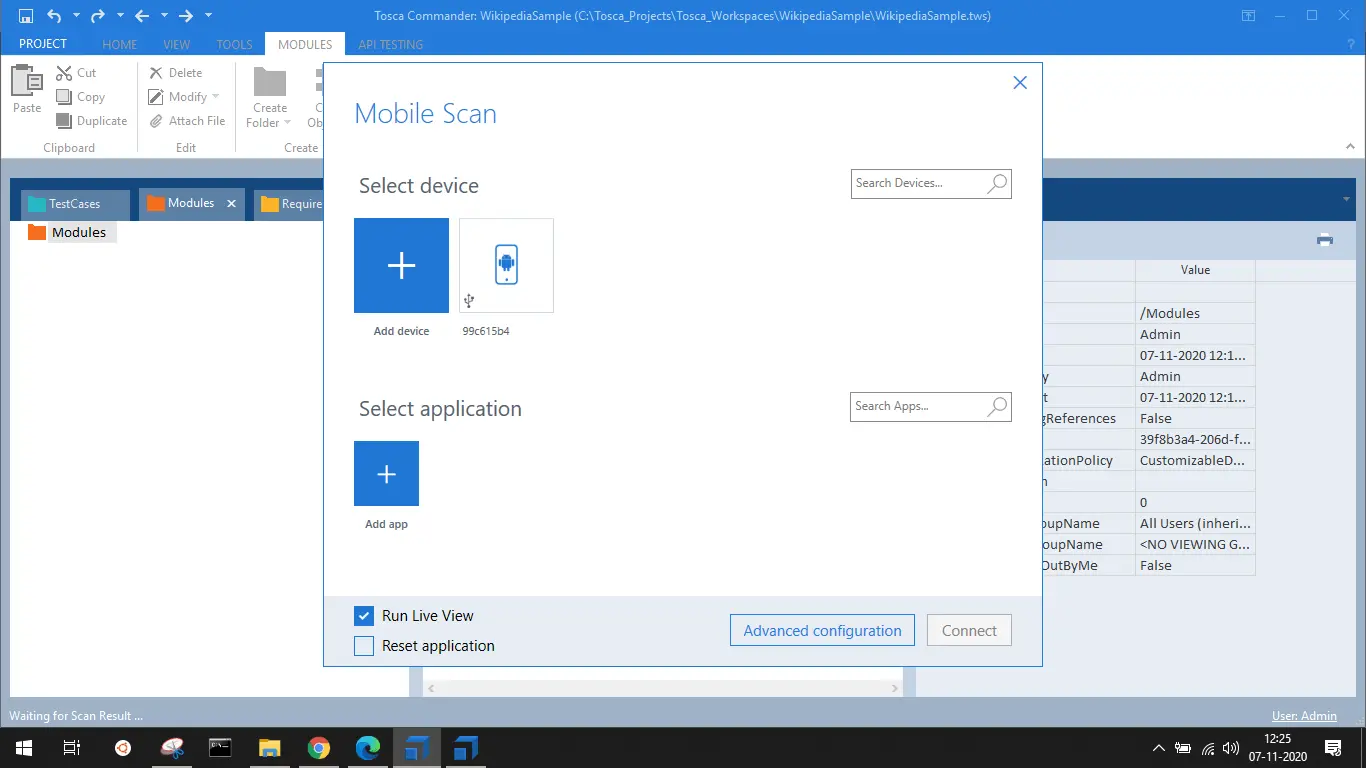
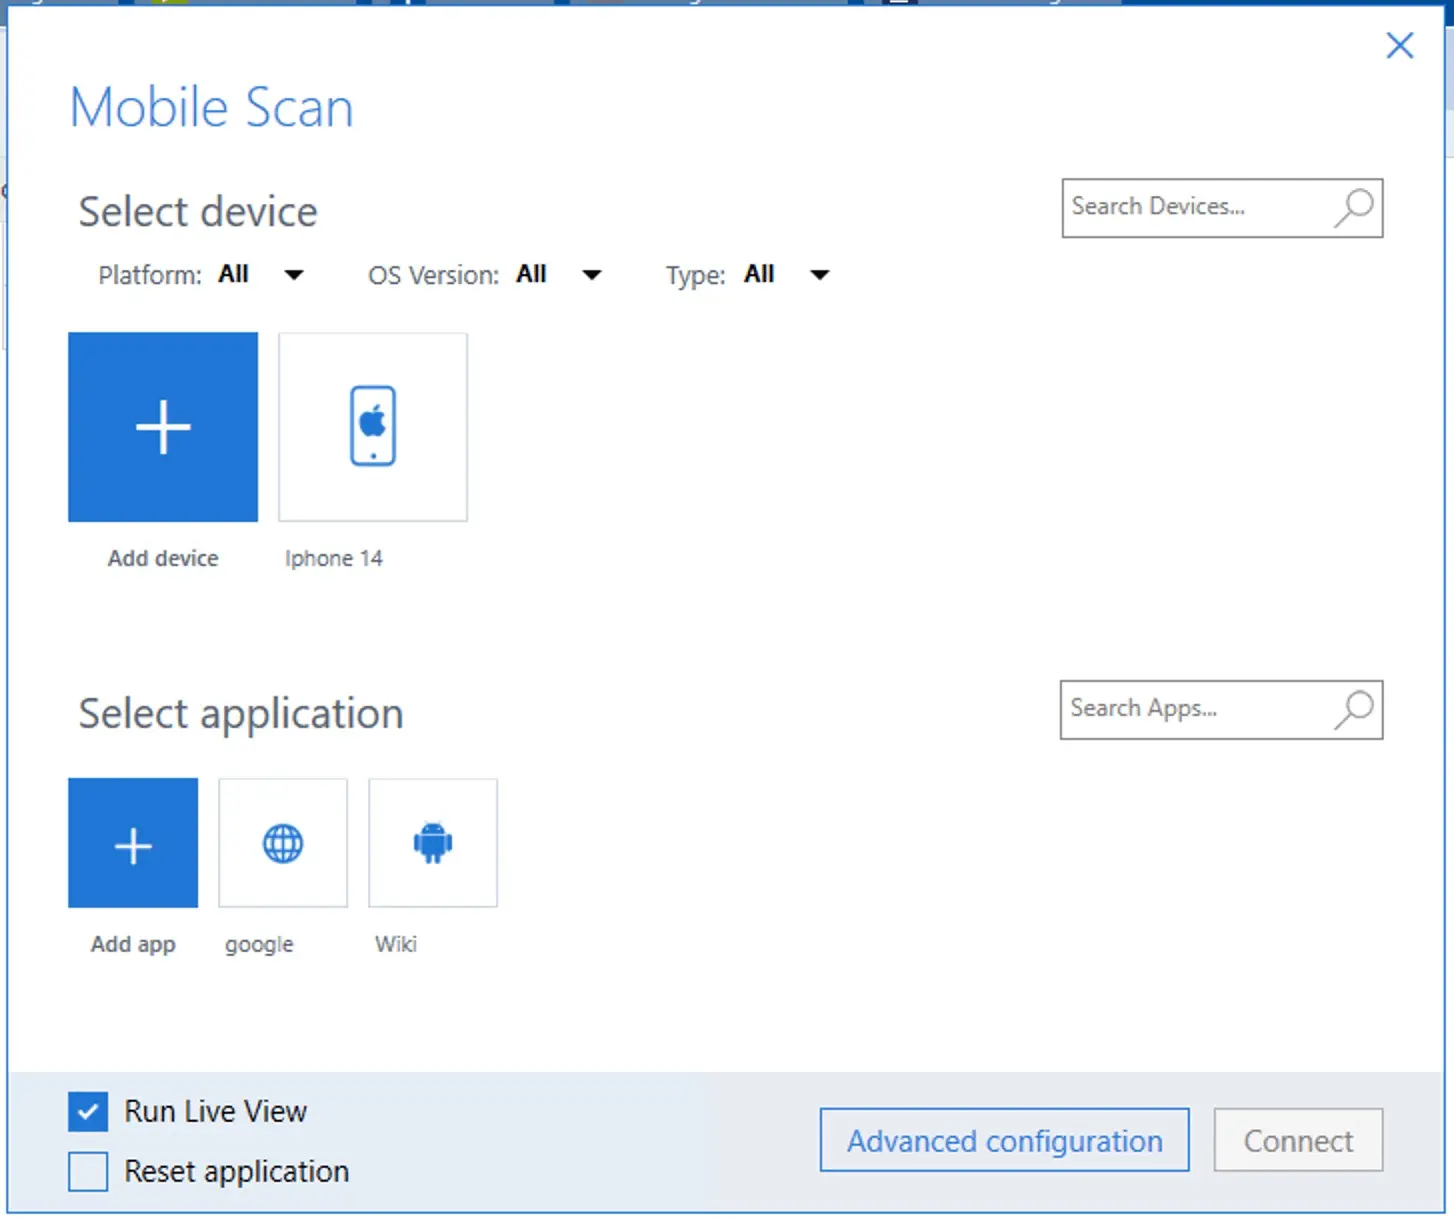
Click the Scan button in the toolbar and select the option Mobile.

-
Add the device and the app to scan. Please note that you need a valid Tosca license to execute this step.
-
Enter the name of the device in the device ID field as specified in the capabilities builder. Note that the device ID should be the same as the name passed in capabilities for other automation tests.

-
Click the Add New button. Enter
Remotein the field Type andhttps://hub.browserstack.com/wd/hubin the field Appium server address. Click the Add button to add the new connection.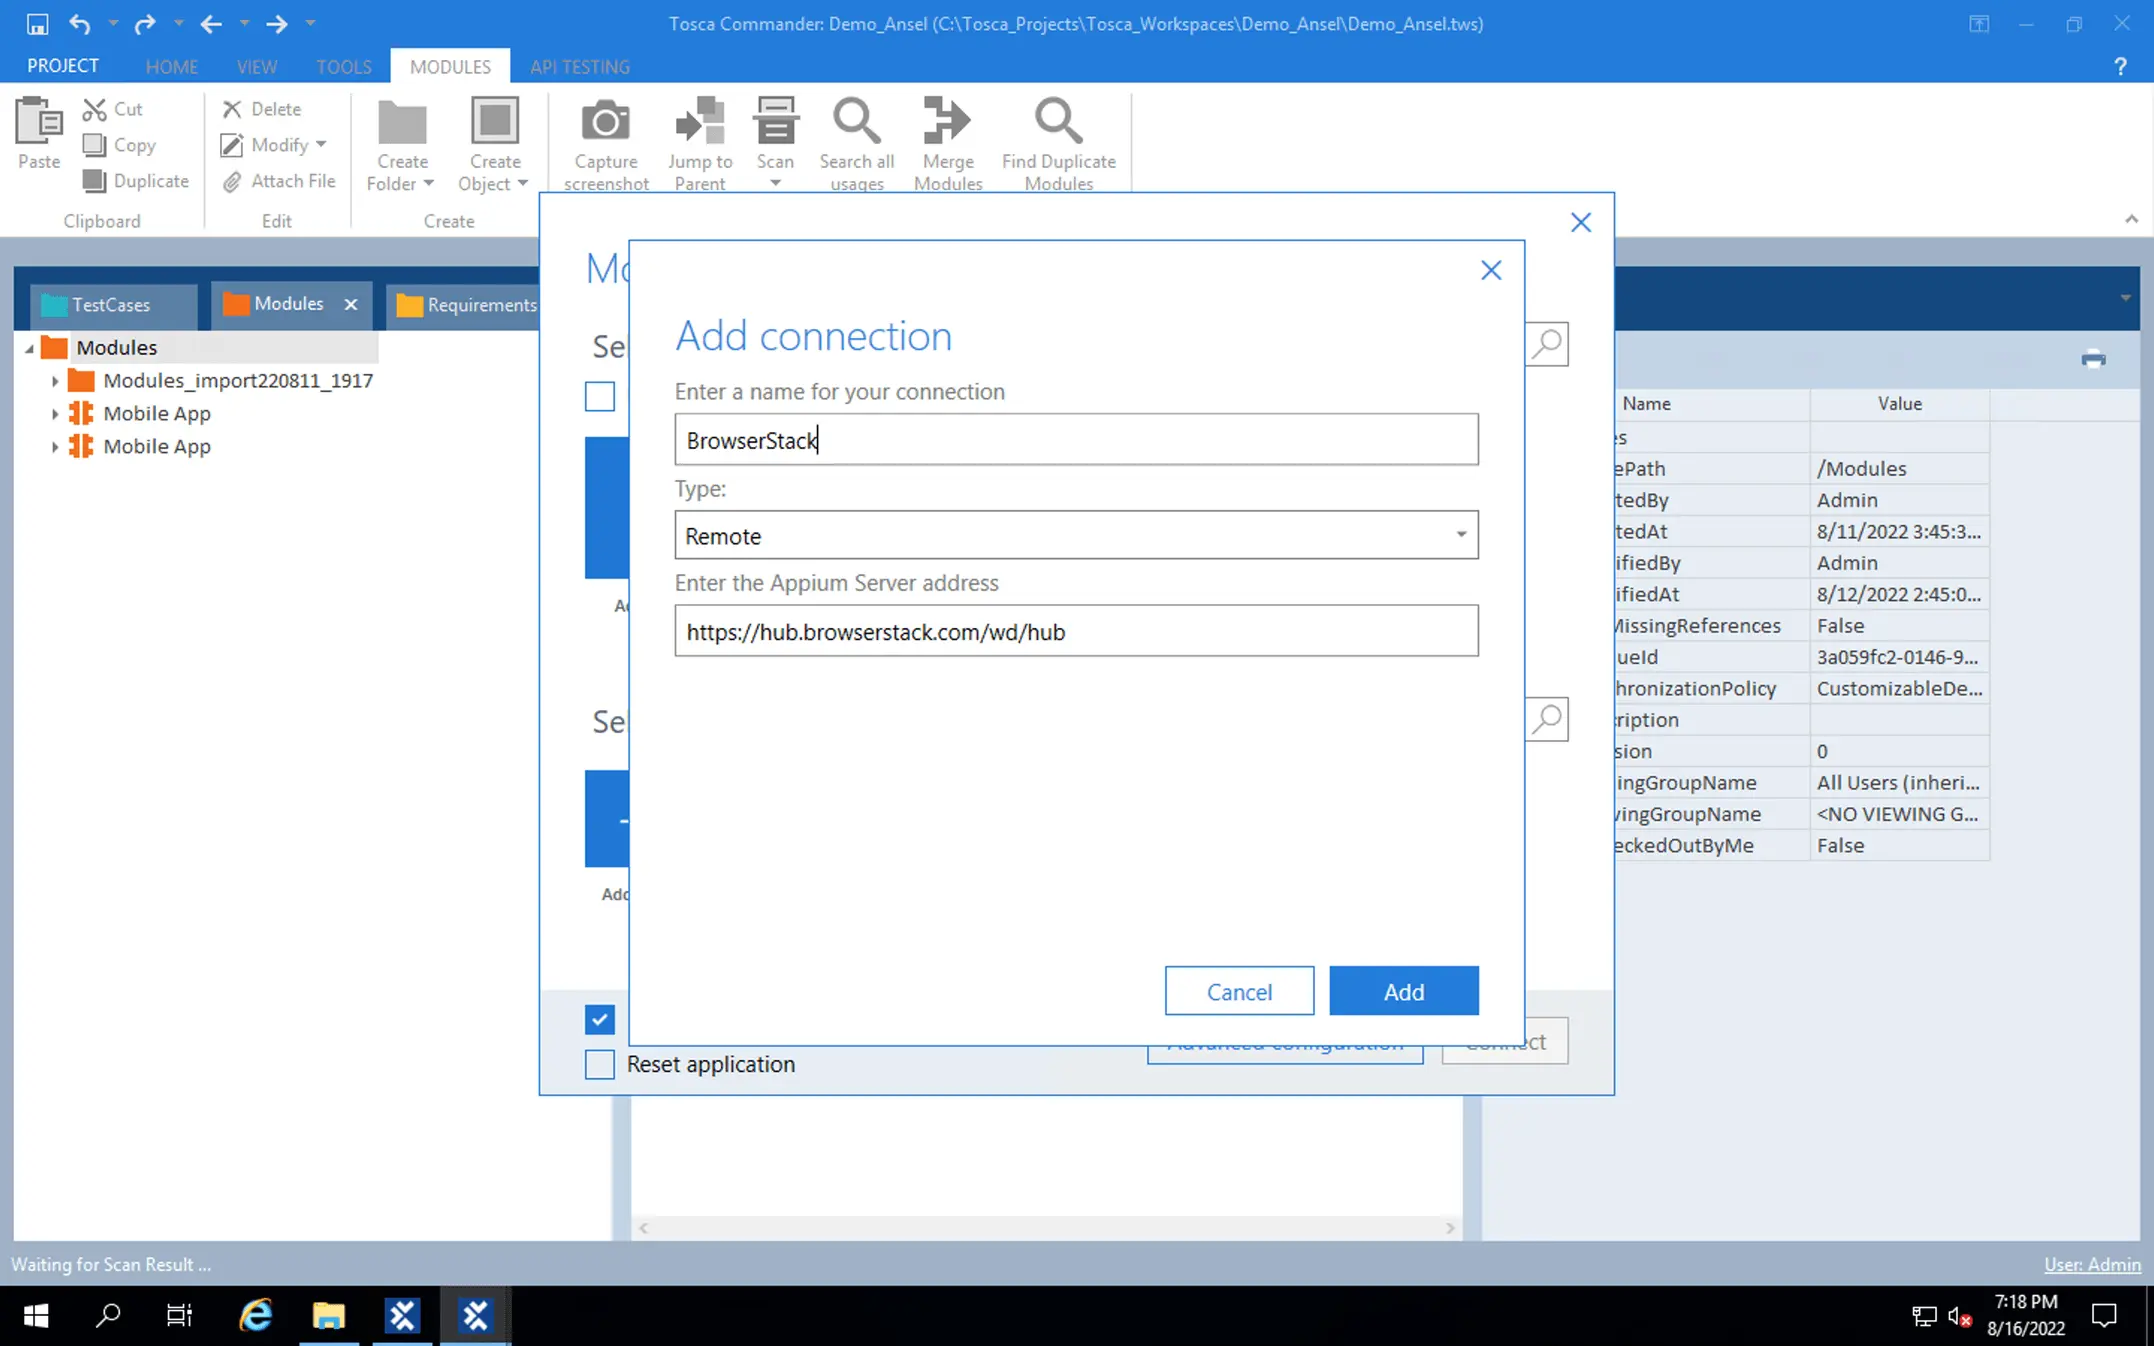
-
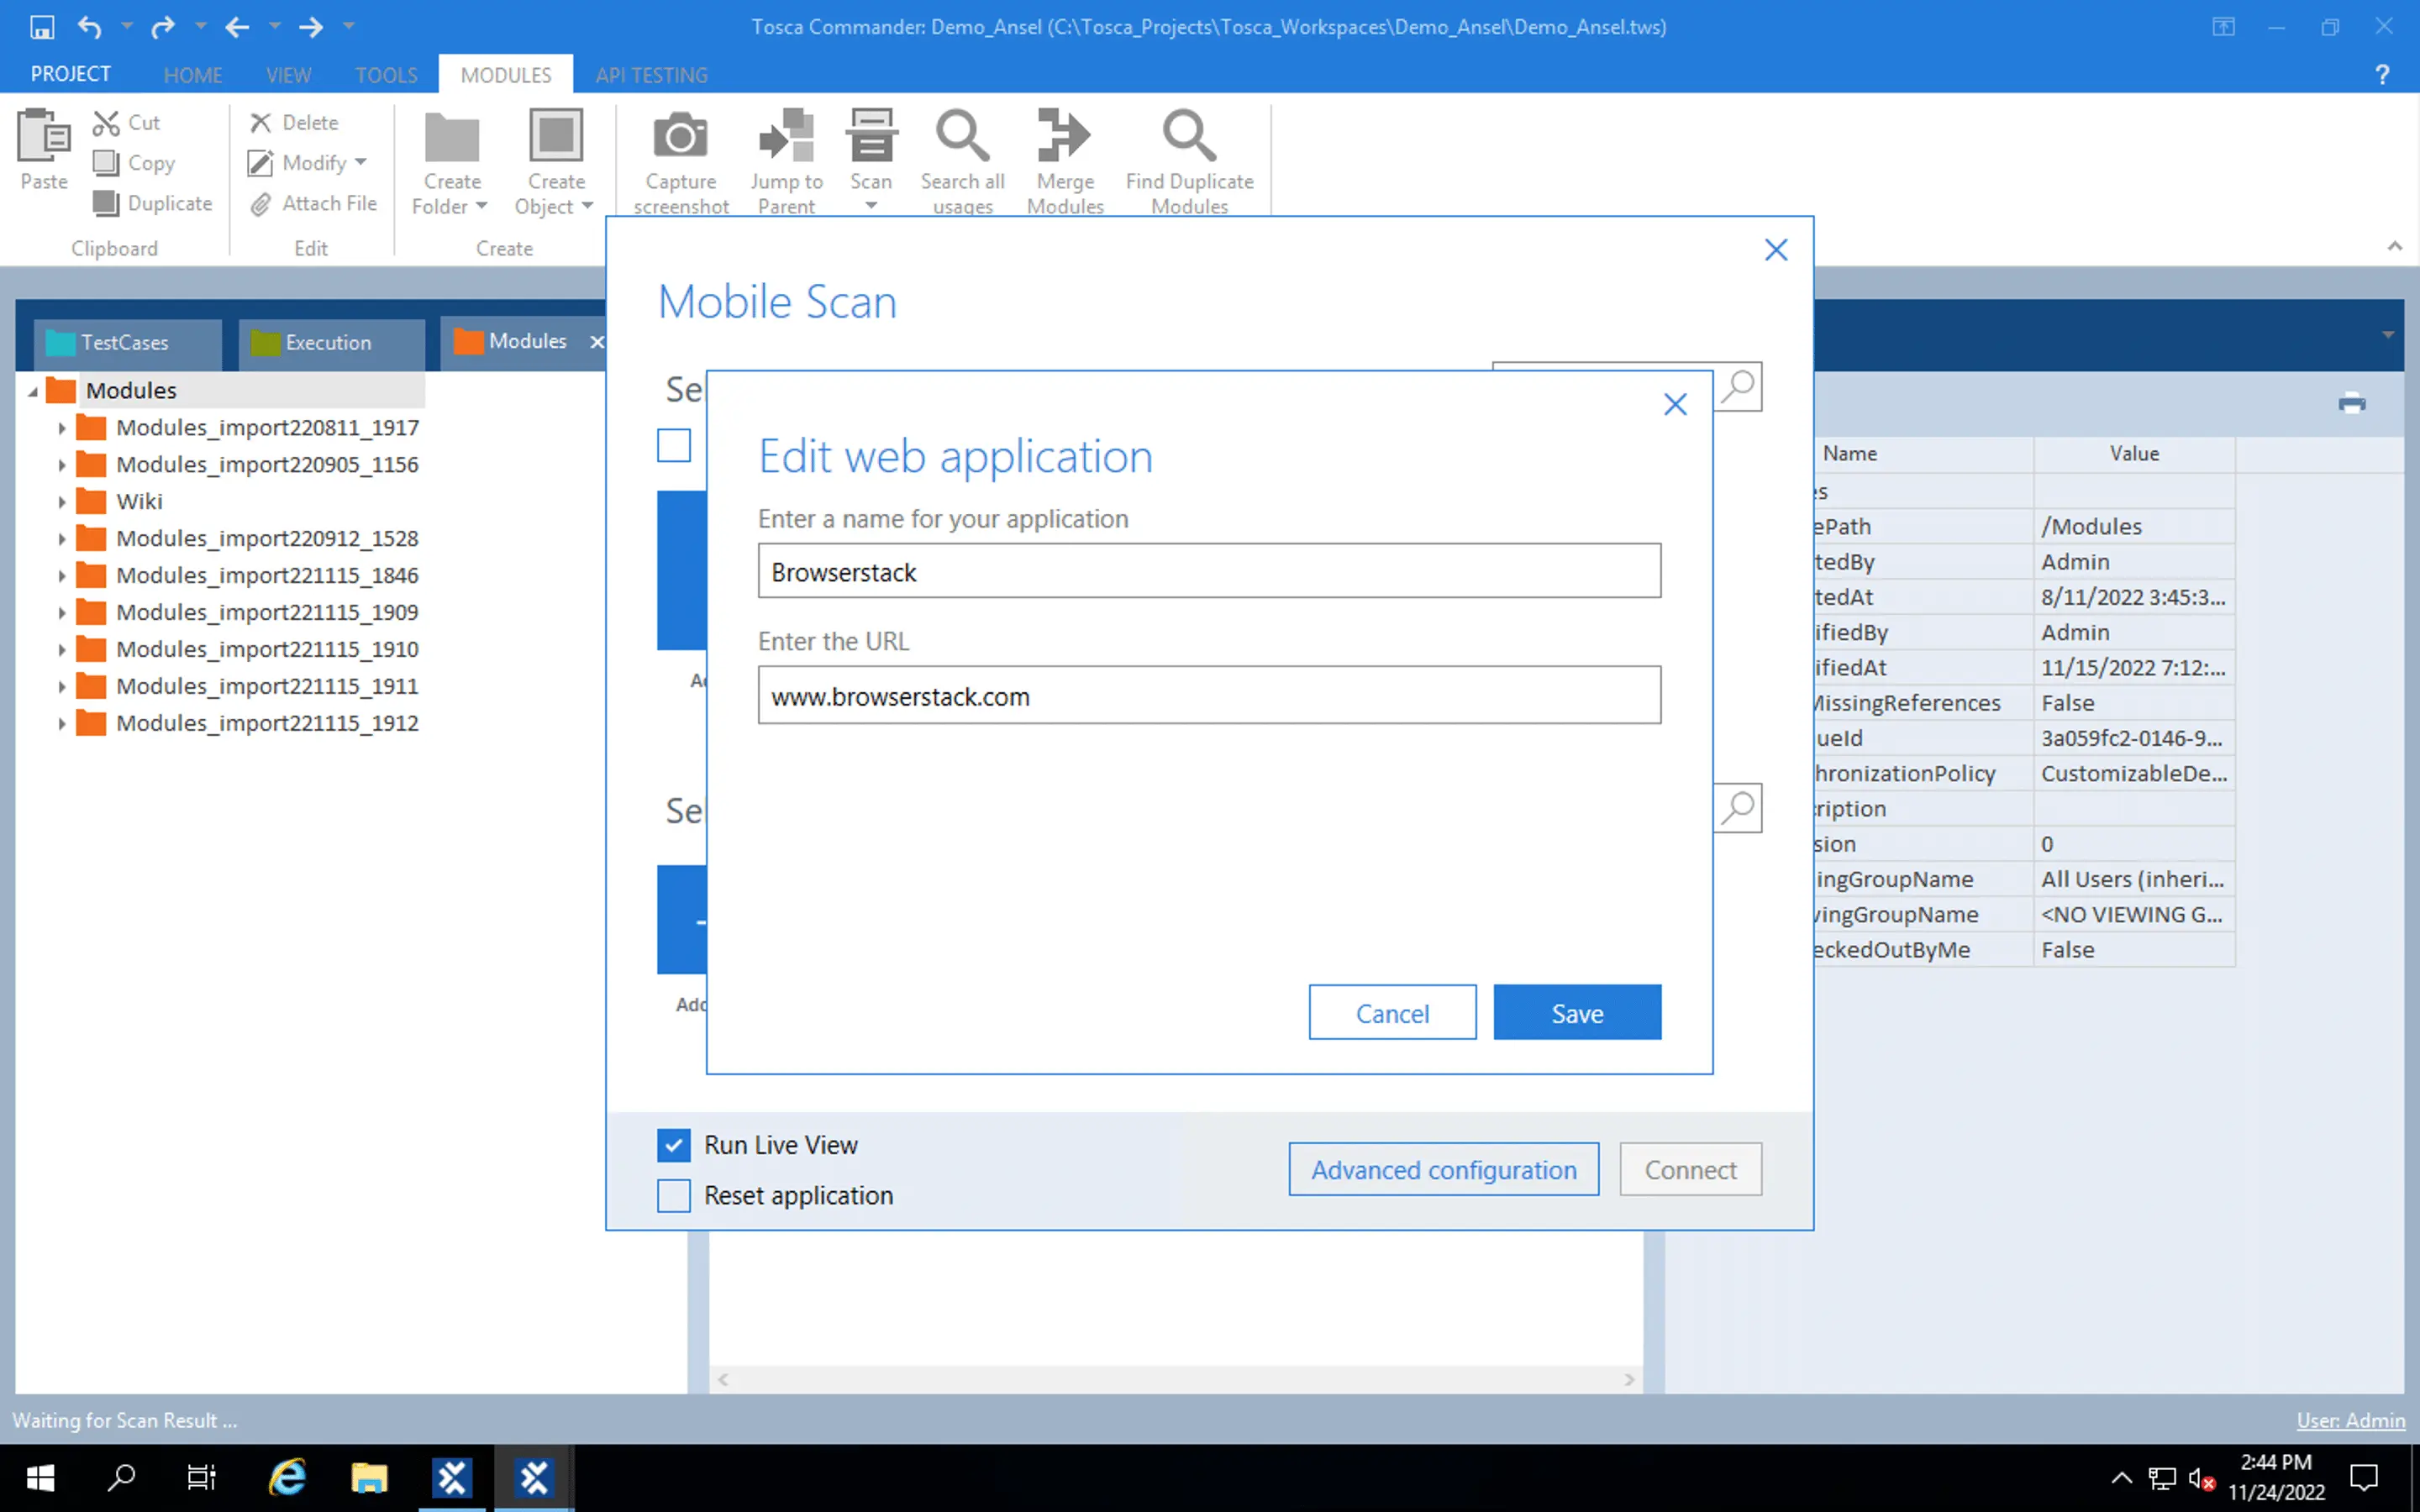
Enter the name and the URL of the web application you need to scan.
-
Click Advanced configuration. Select your
.conffile and add it. Click the Connect button.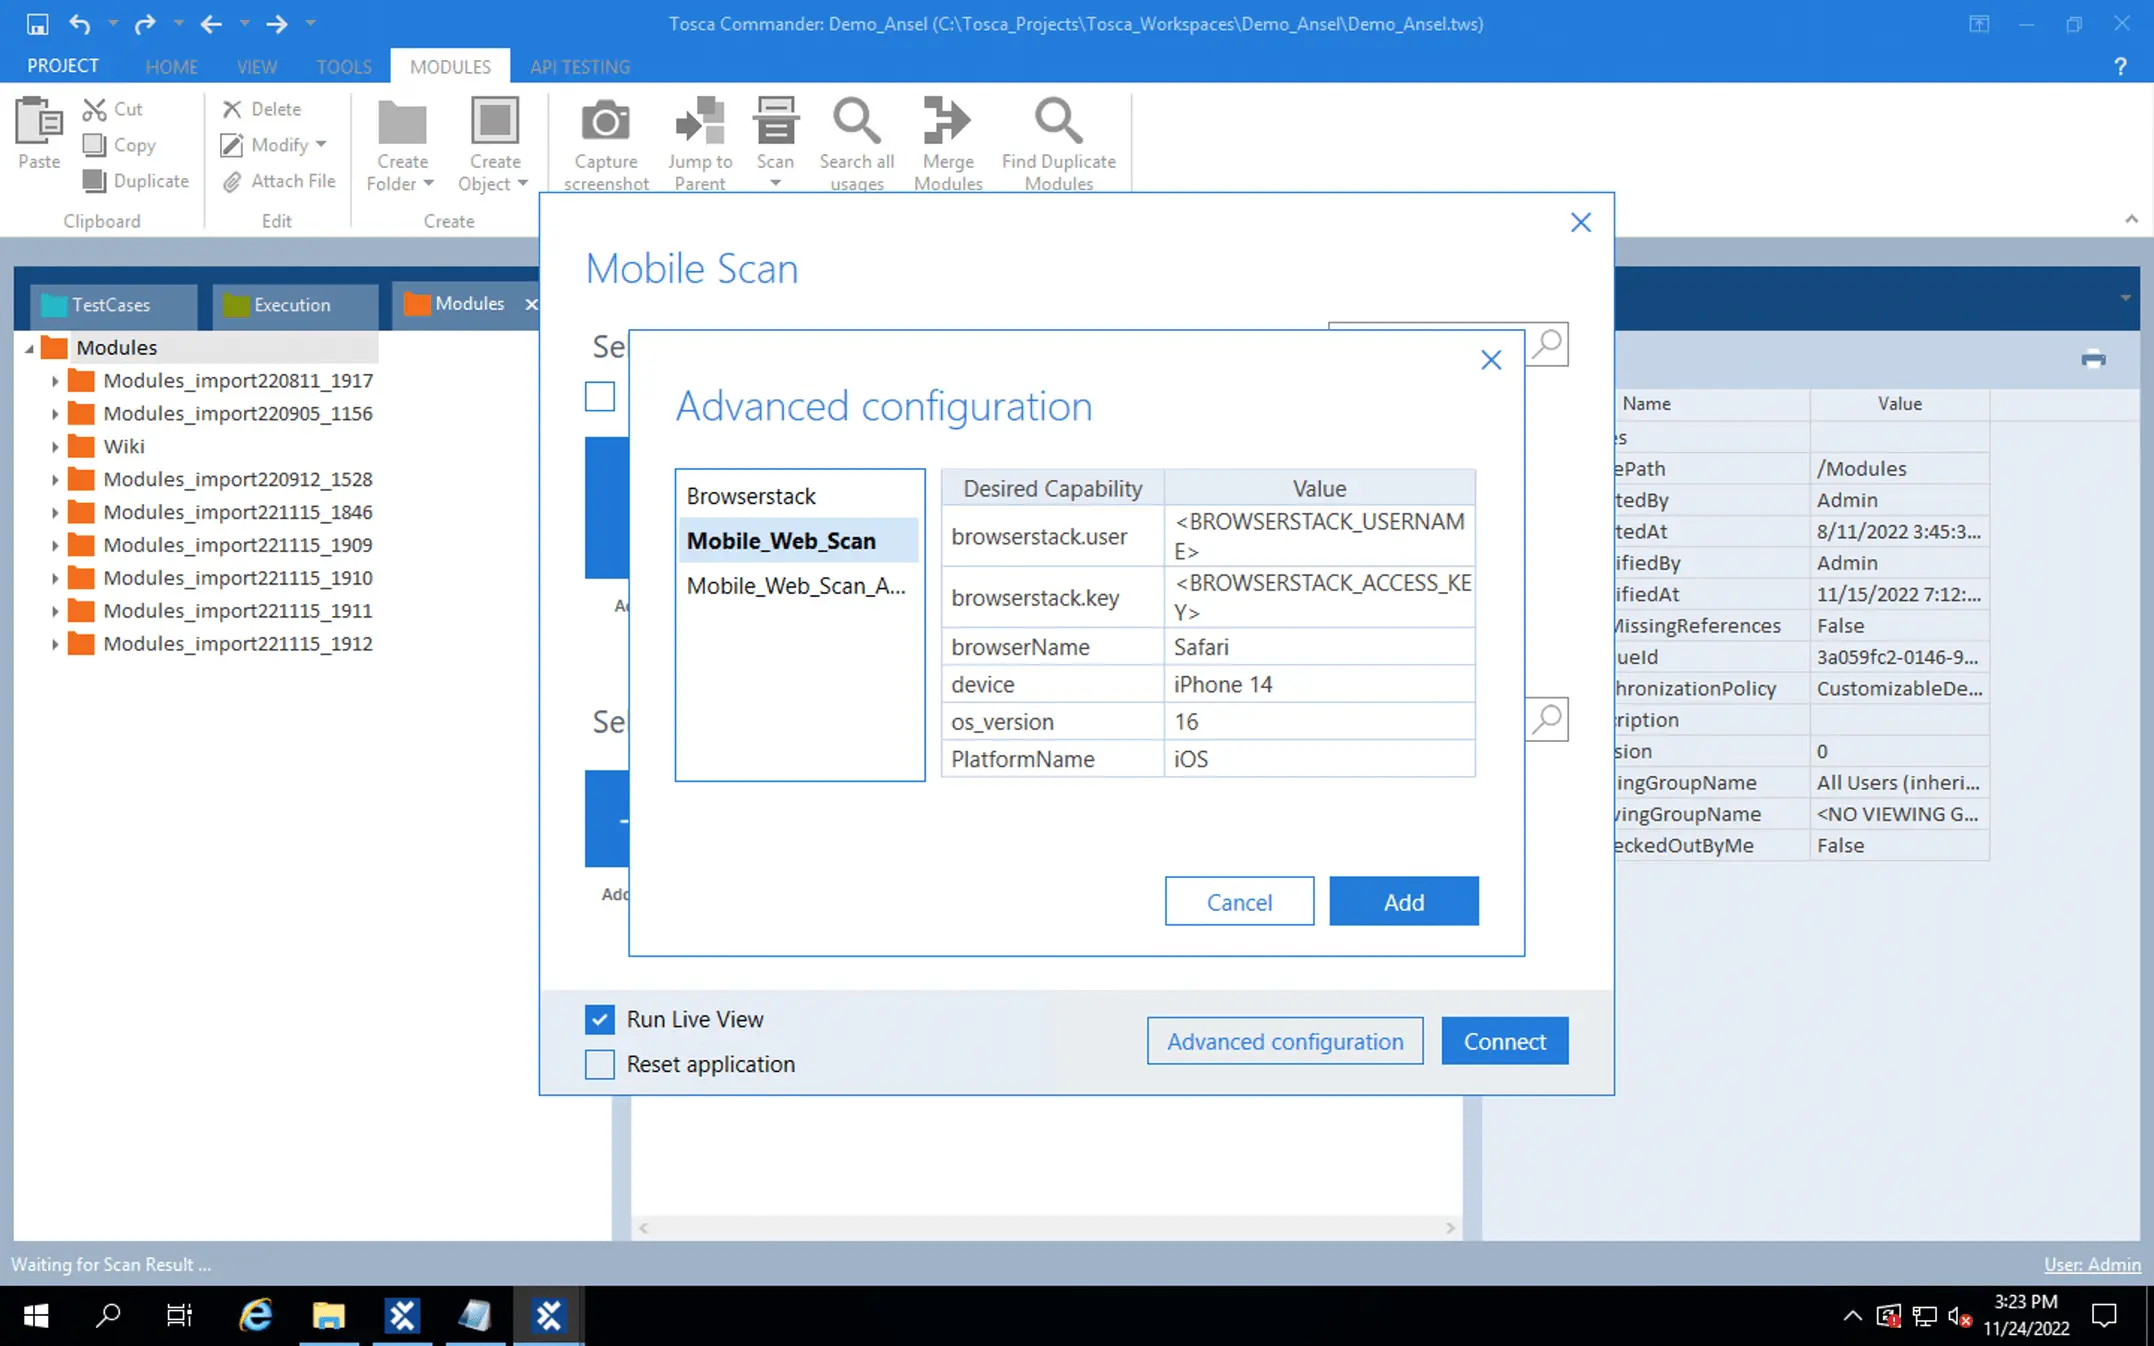
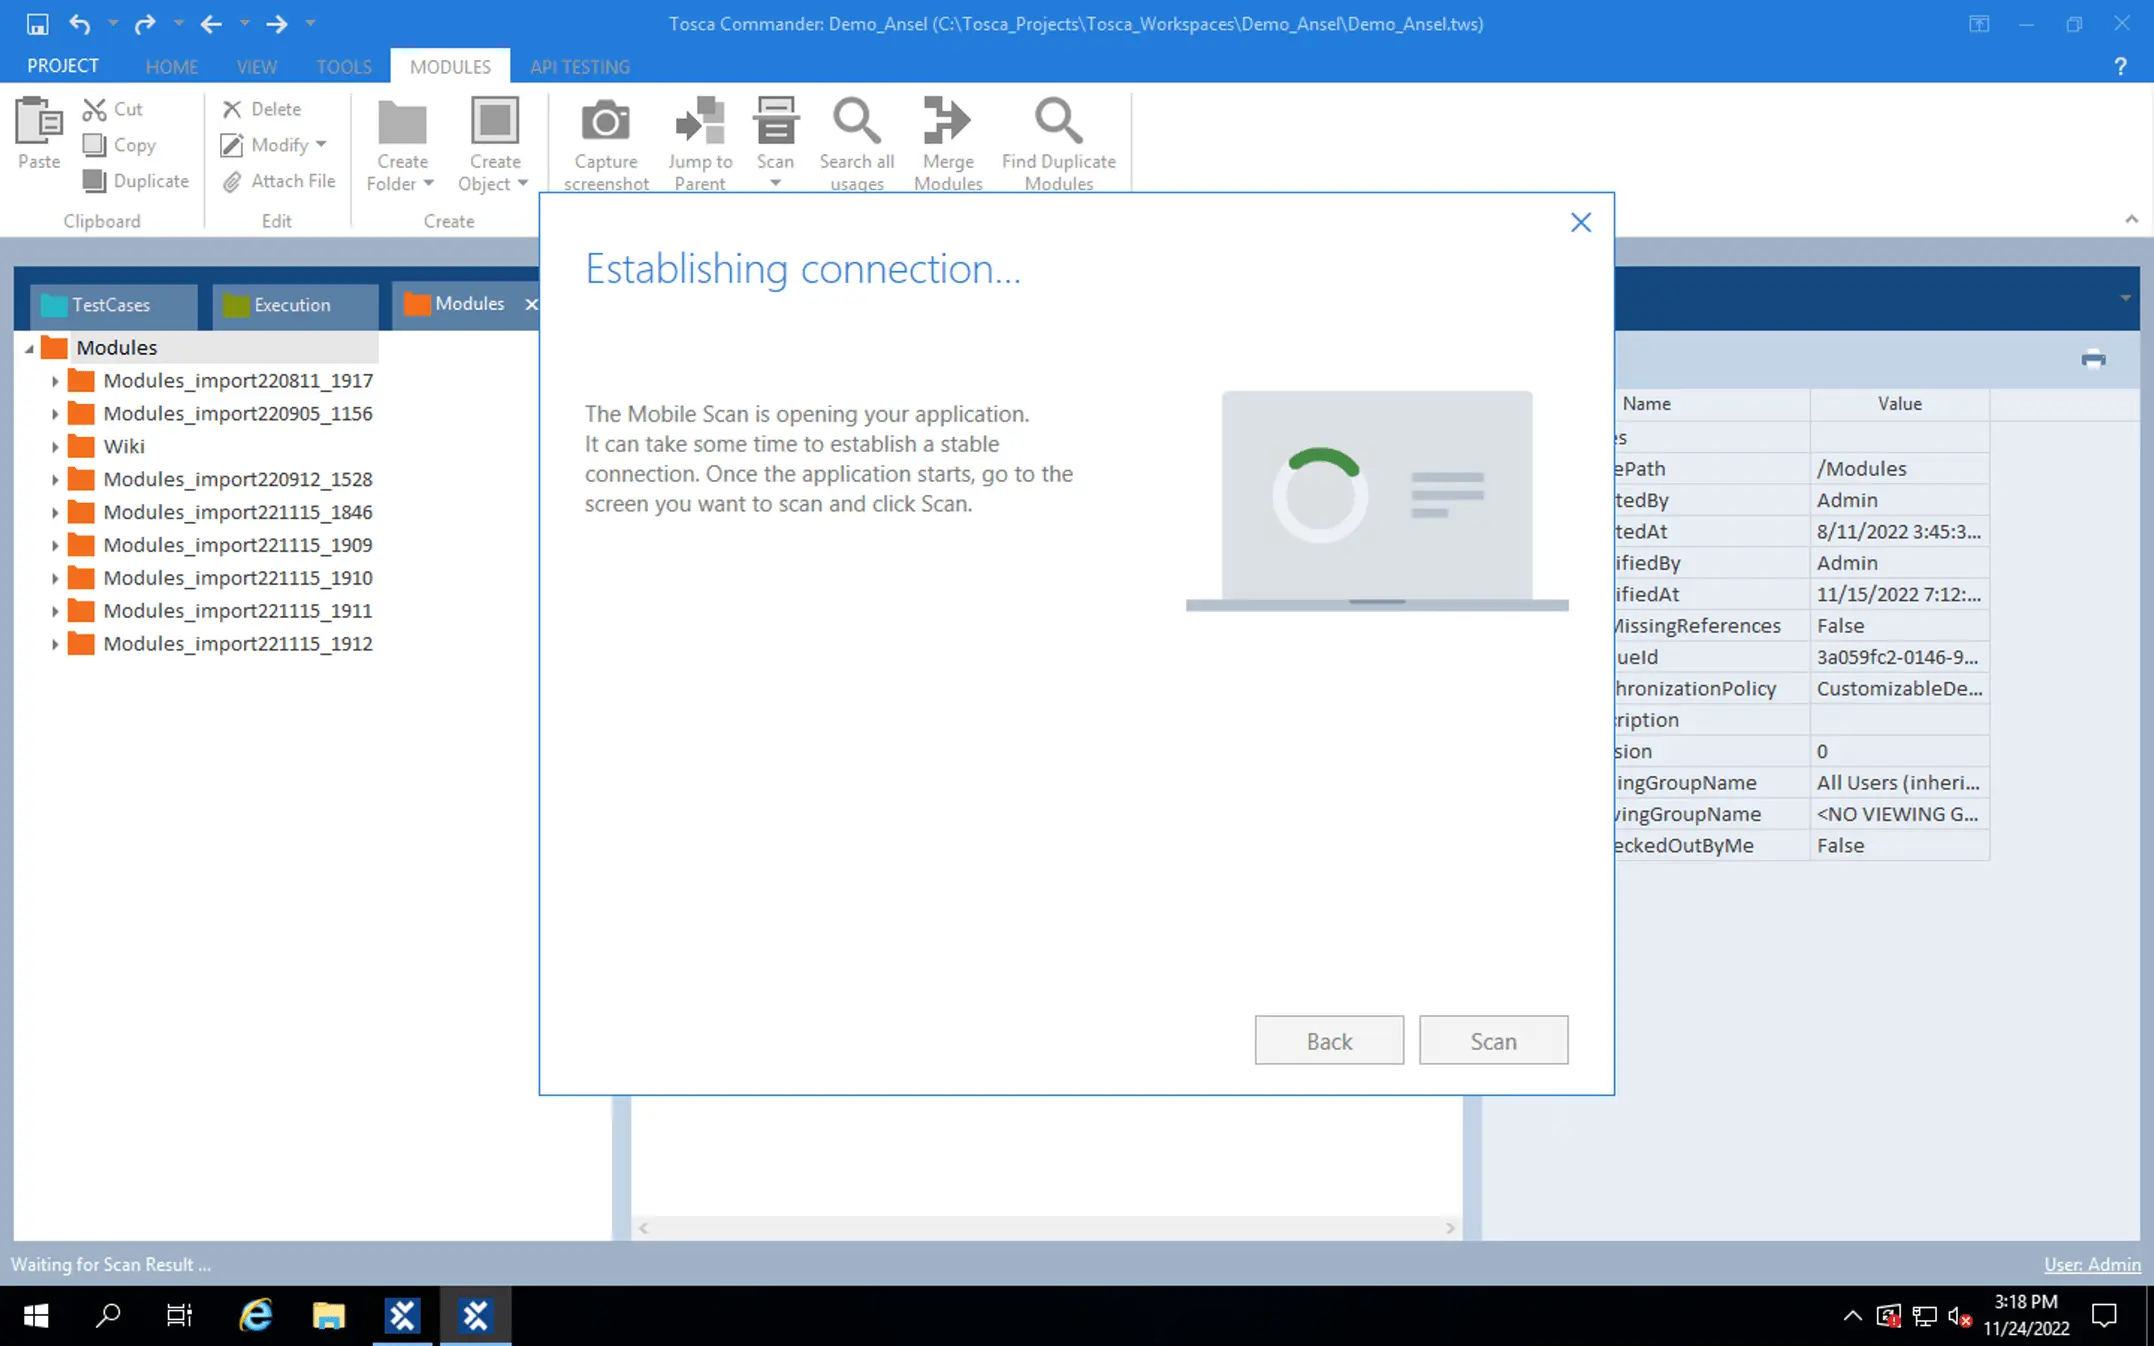
-
The scan begins when you click the Connect button. You can see a corresponding session on the BrowserStack App-Automate dashboard too.
-
If the Mobile scan window is not scaling correctly as per the display, set the display resolution to 100% in the Windows settings.
- You can upload the logs generated in Tosca using the Post terminal logs API.
- To run mobile tests in parallel, you can use Execution Lists.
Run web tests on BrowserStack mobile devices
To run mobile tests in parallel, you can use Execution Lists.
Follow these steps to run web tests on BrowserStack mobile devices using Tosca:
-
Select the test case and set the test configuration as shown in the following screenshot.
 Here is an expanded view of the test configuration.
-
Open the Set Desired Capabilities folder from the following location.
-
Set the parameters in Set Desired Capabilities as follows:
-
Right-click a test case and click Run in ScratchBook.

Scan web applications on BrowserStack mobile devices
Use Tosca 16 patch 1 or higher to avoid errors in scanning Android mobile browsers. The .conf file is not supported in Tosca 16. Instead, you can add the capabilities using the Tosca Commander mobile scanner. Follow these steps to scan web applications on BrowserStack mobile devices using Tosca:
-
Click the Scan button on the toolbar and select Mobile.
-
Add the device and the app. Note that you can proceed further only if you have a valid Tosca license.
-
Set the
device IDto the name of the device. Thisdevice IDis the same as the name passed in capabilities for other automation tests based on the BrowserStack Capabilities builder.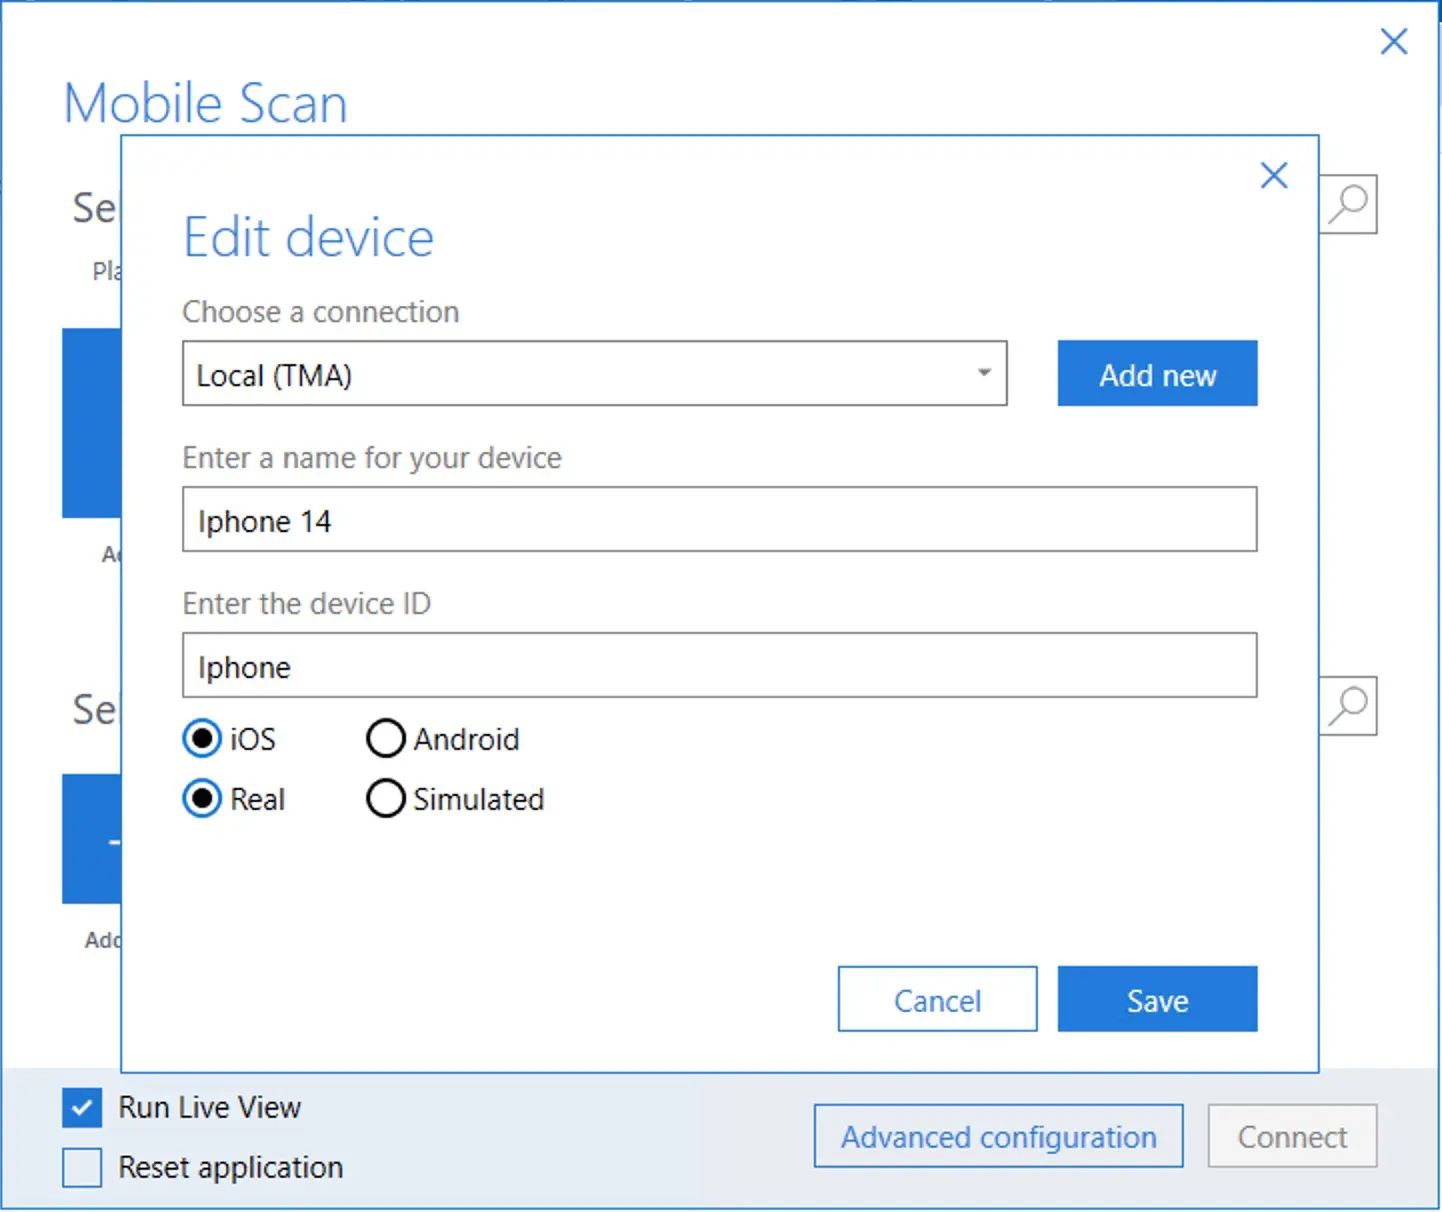
-
Add a new connection. Give it a suitable name. Enter
Remotein the Type field and enter the addresshttps://hub.browserstack.com/wd/hubin the Appium server address field.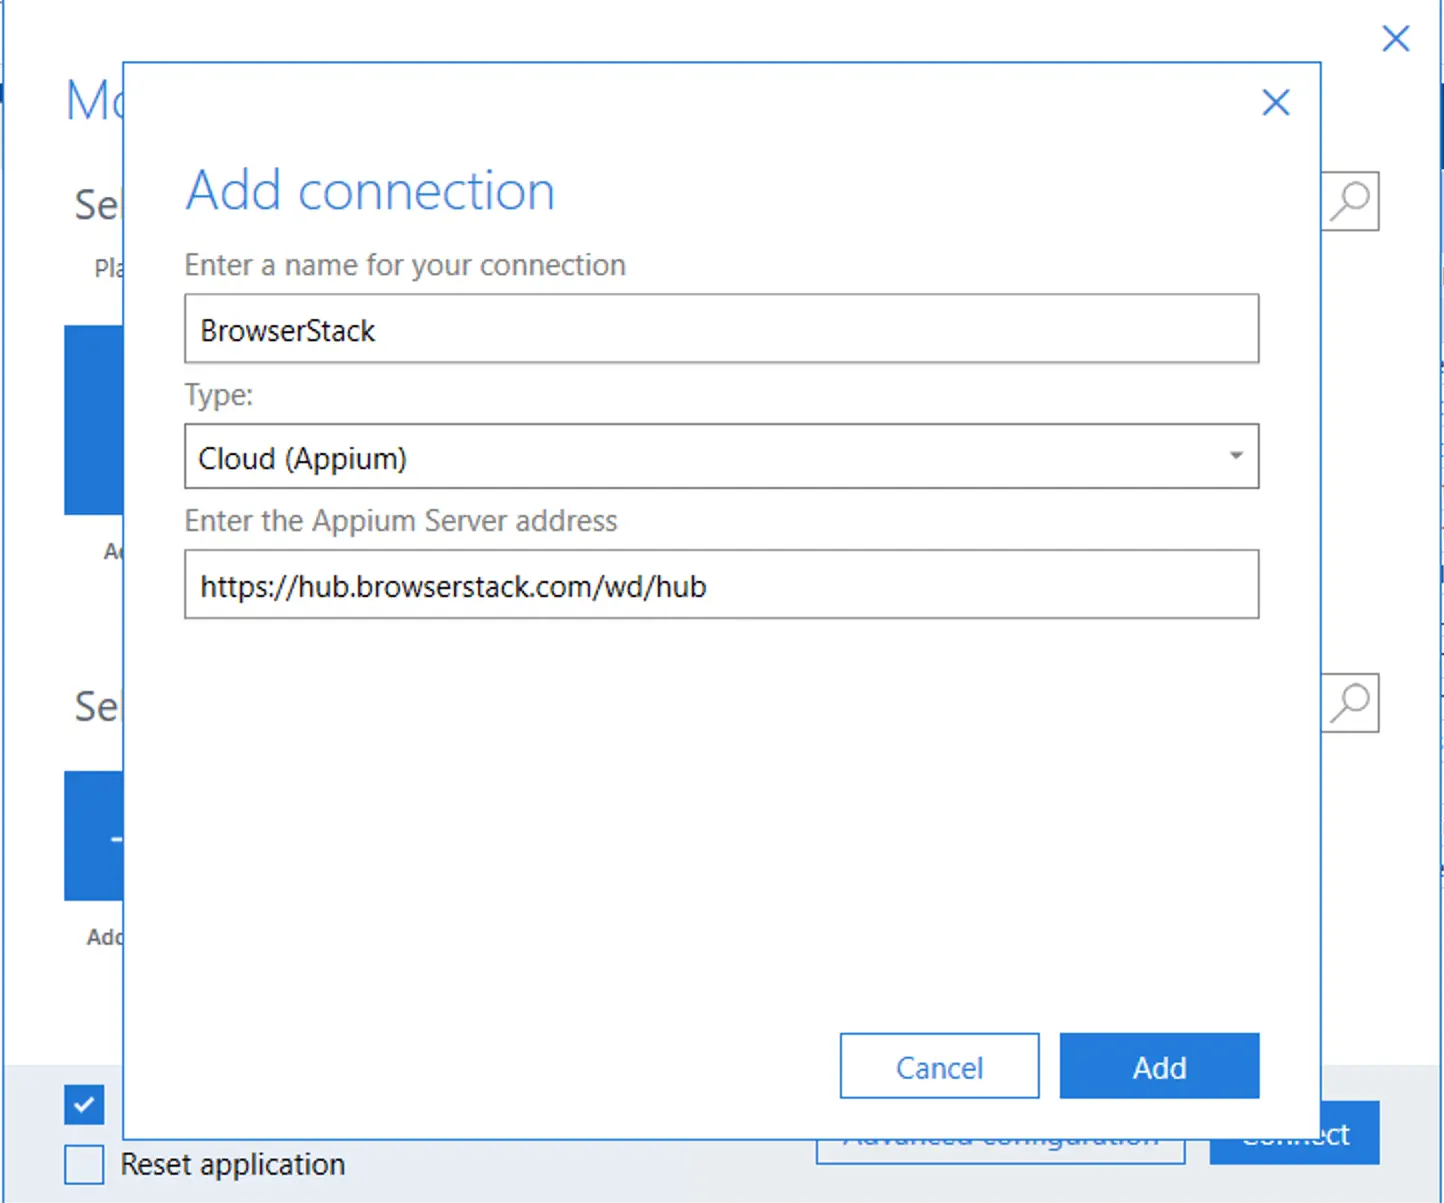
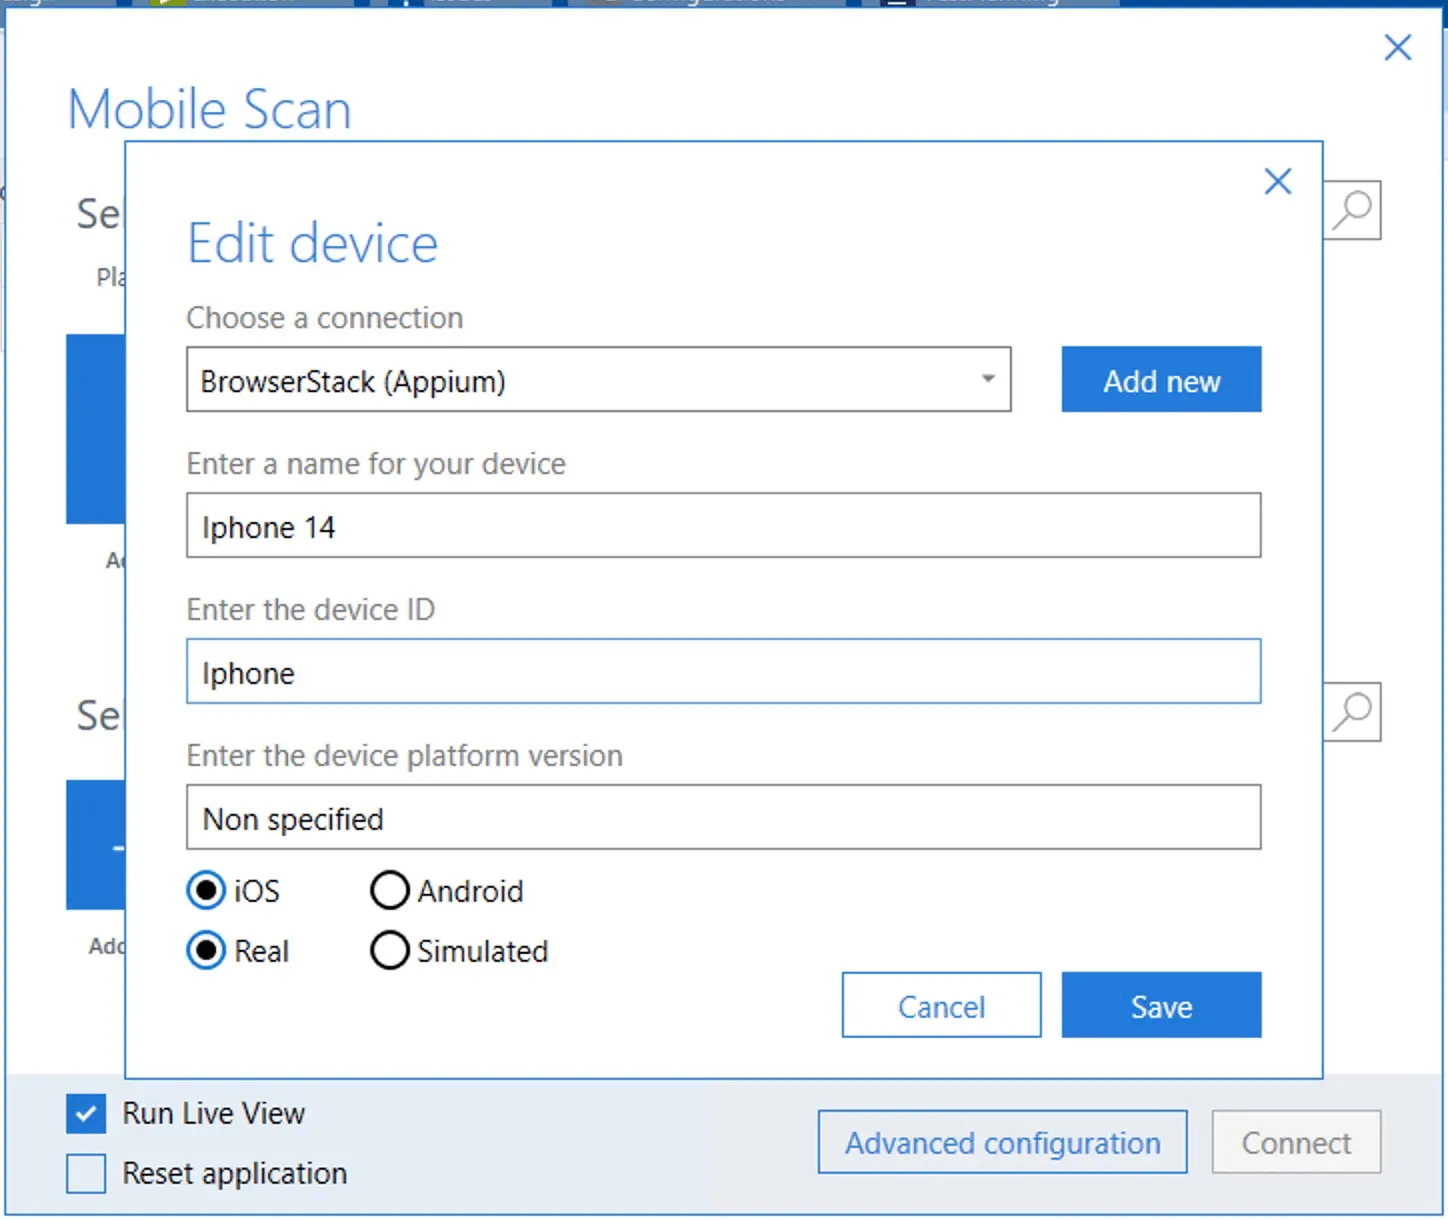
-
Select the connection you created from the drop-down. Select the device platform versions according to your requirement and click Save.
-
Specify the details of the web application you need to scan.

-
Click Advanced configuration, add the desired capabilities as selected in the BrowserStack Capability generator, and then click the Add button.
Enter the PackageName or ActivityName while setting up advanced configurations. Do not enter the full path of the scanned application. You might face BROWSERSTACK_INVALID_APP_CAP error if the full path is added.
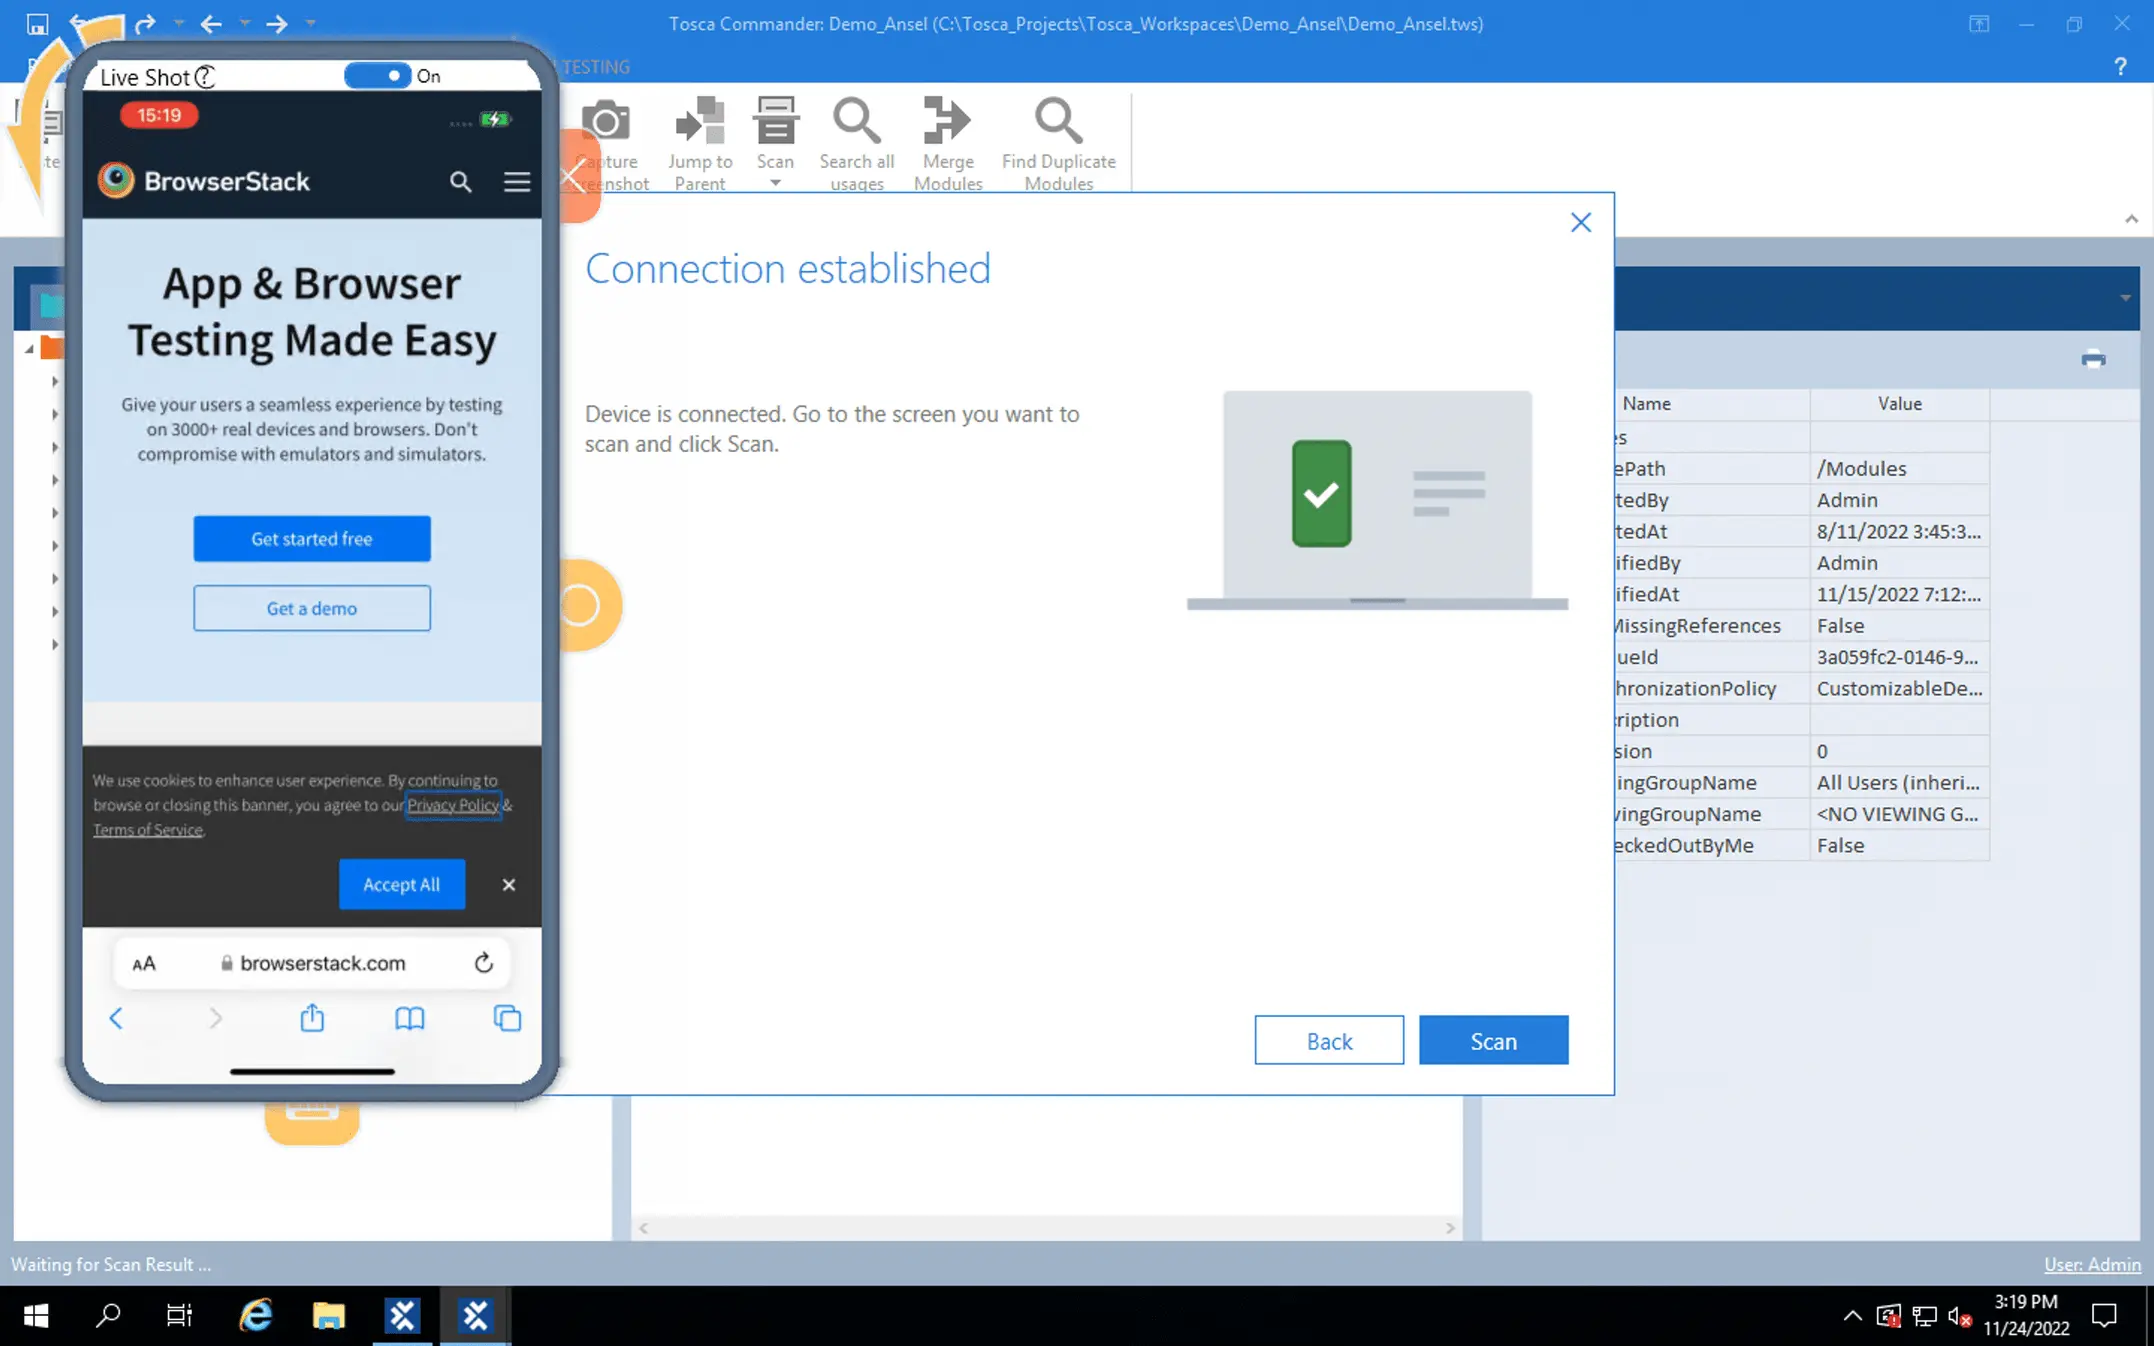
-
When you see the following screen, you can scan your application on BrowserStack cloud devices.

-
If the mobile scan window is not scaling correctly, set the display resolution to 100% in the Windows settings.
-
You can upload the logs from Tosca to BrowserStack using the Post terminal logs API.
Run tests in parallel
To run mobile tests in parallel on BrowserStack:
-
Click the Execution Tab. On the ExecutionLists folder, add the test configuration parameter ExecuteInParallel and set its value to
True.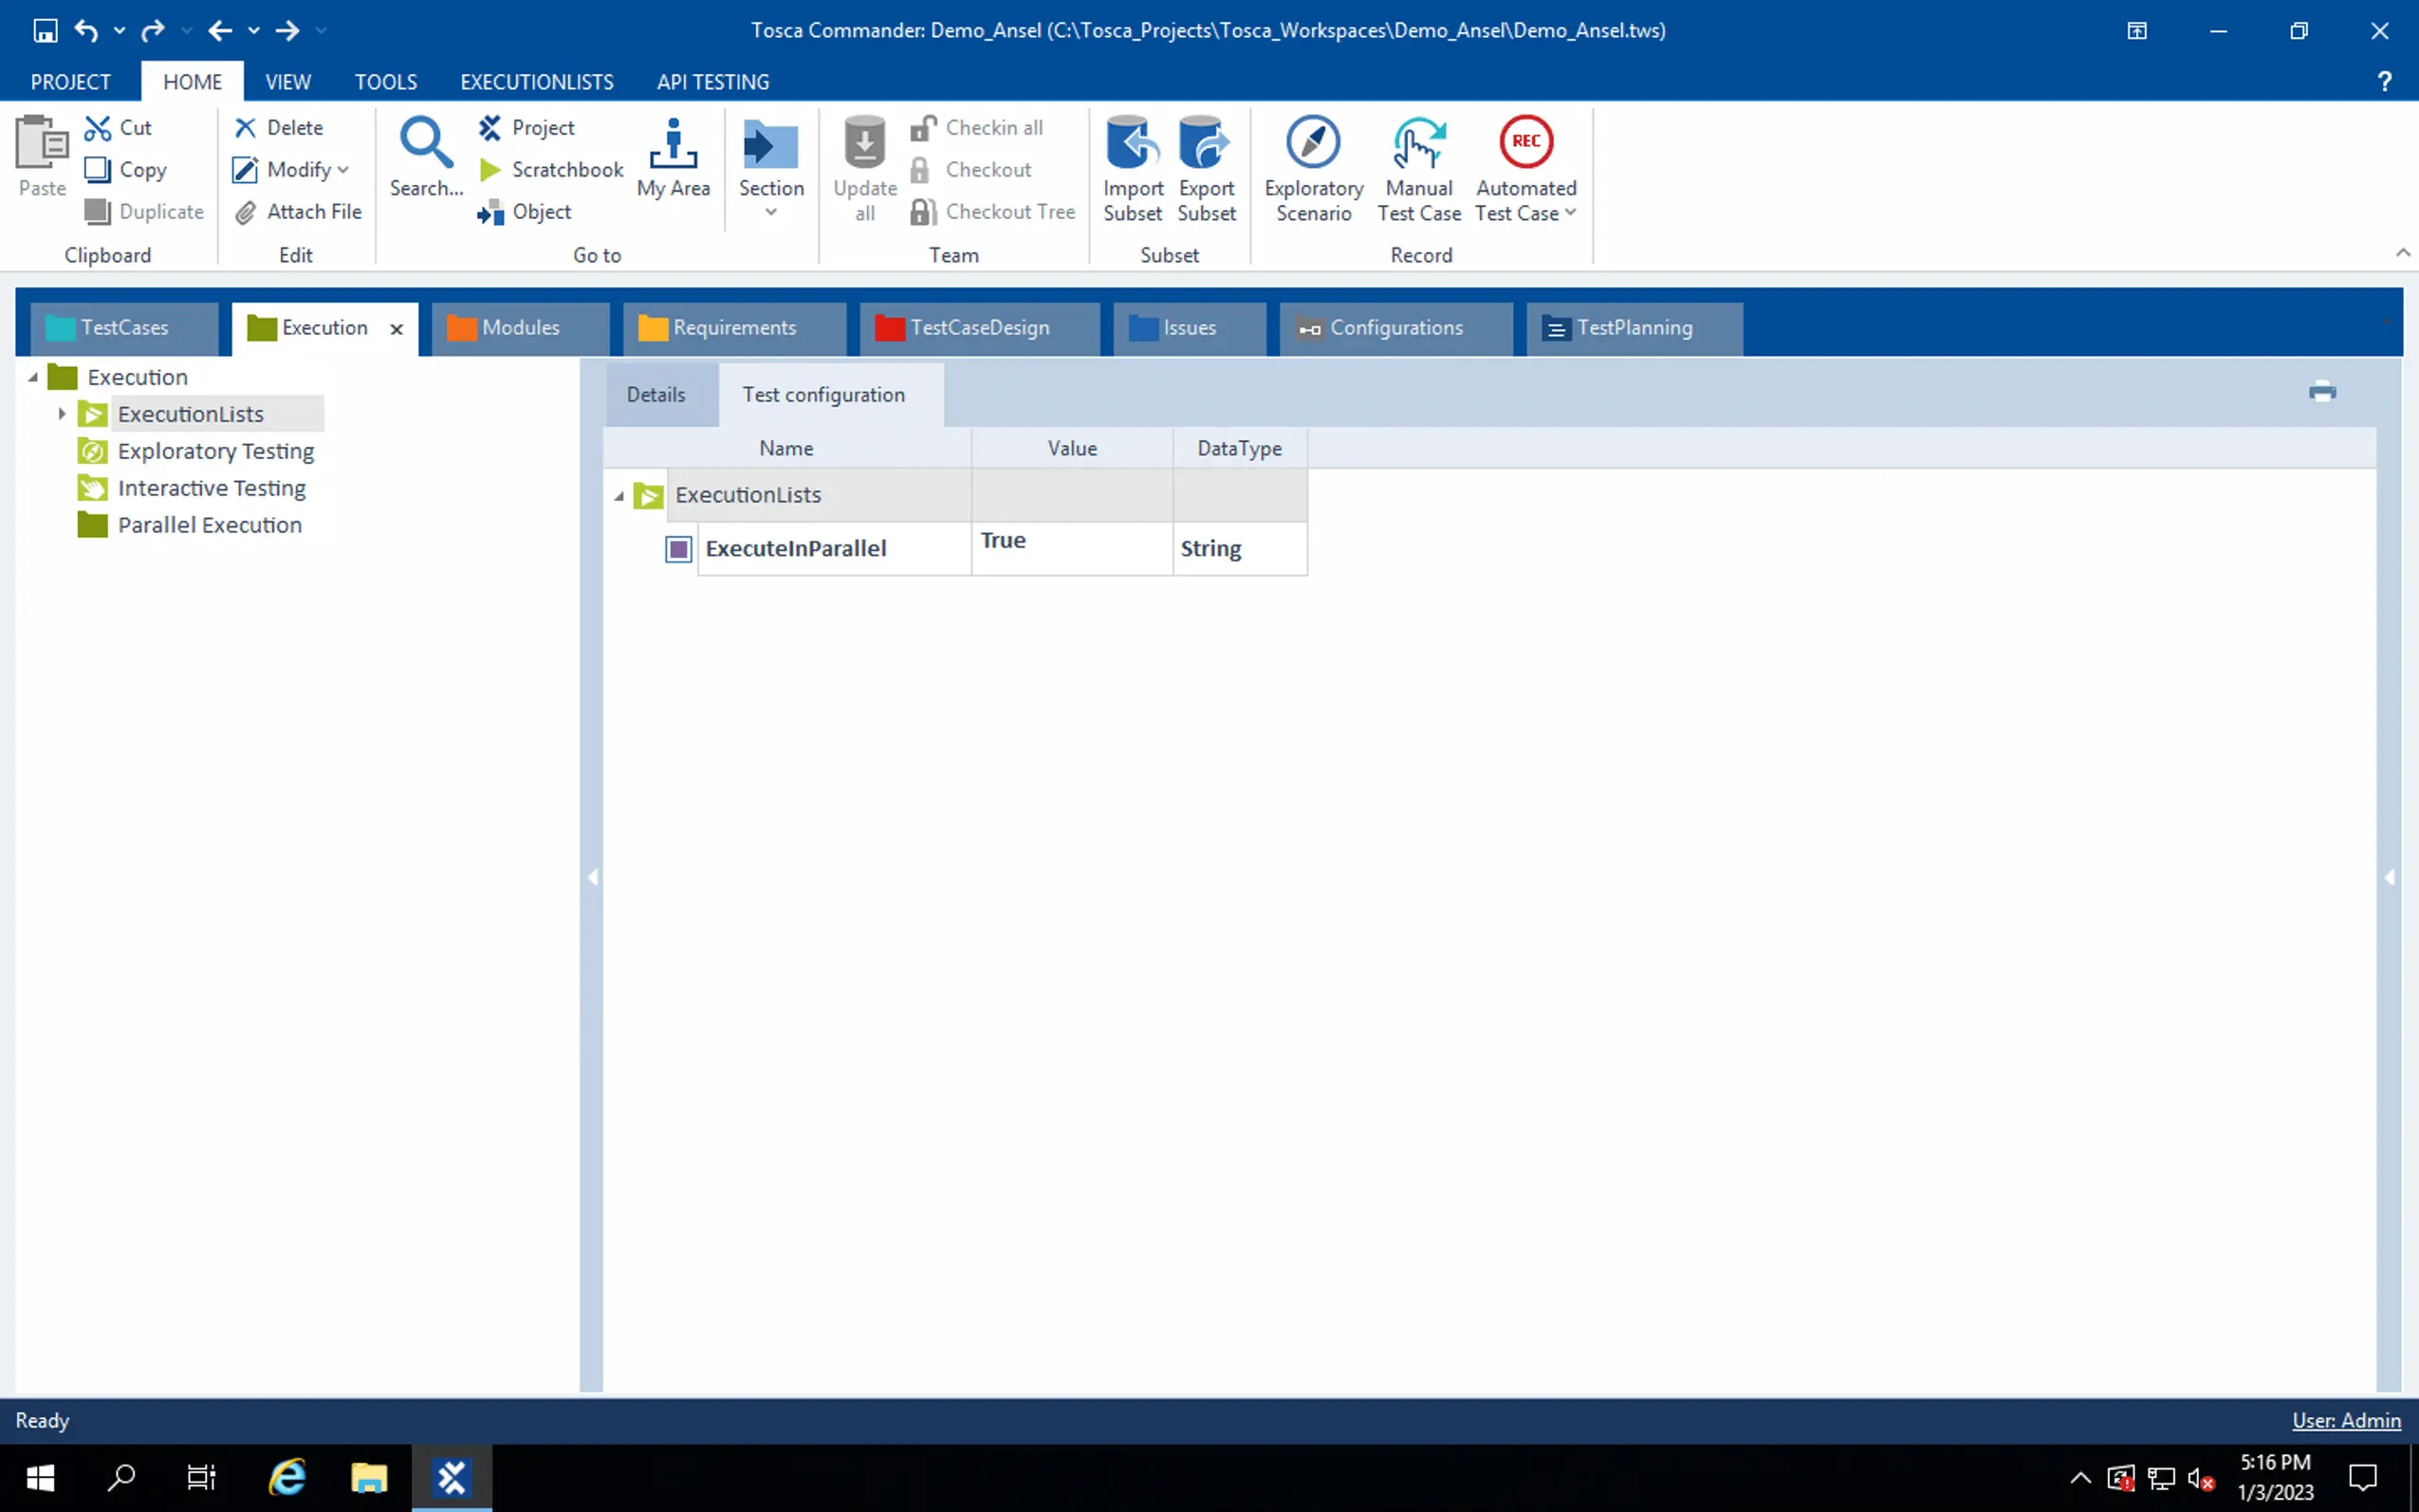
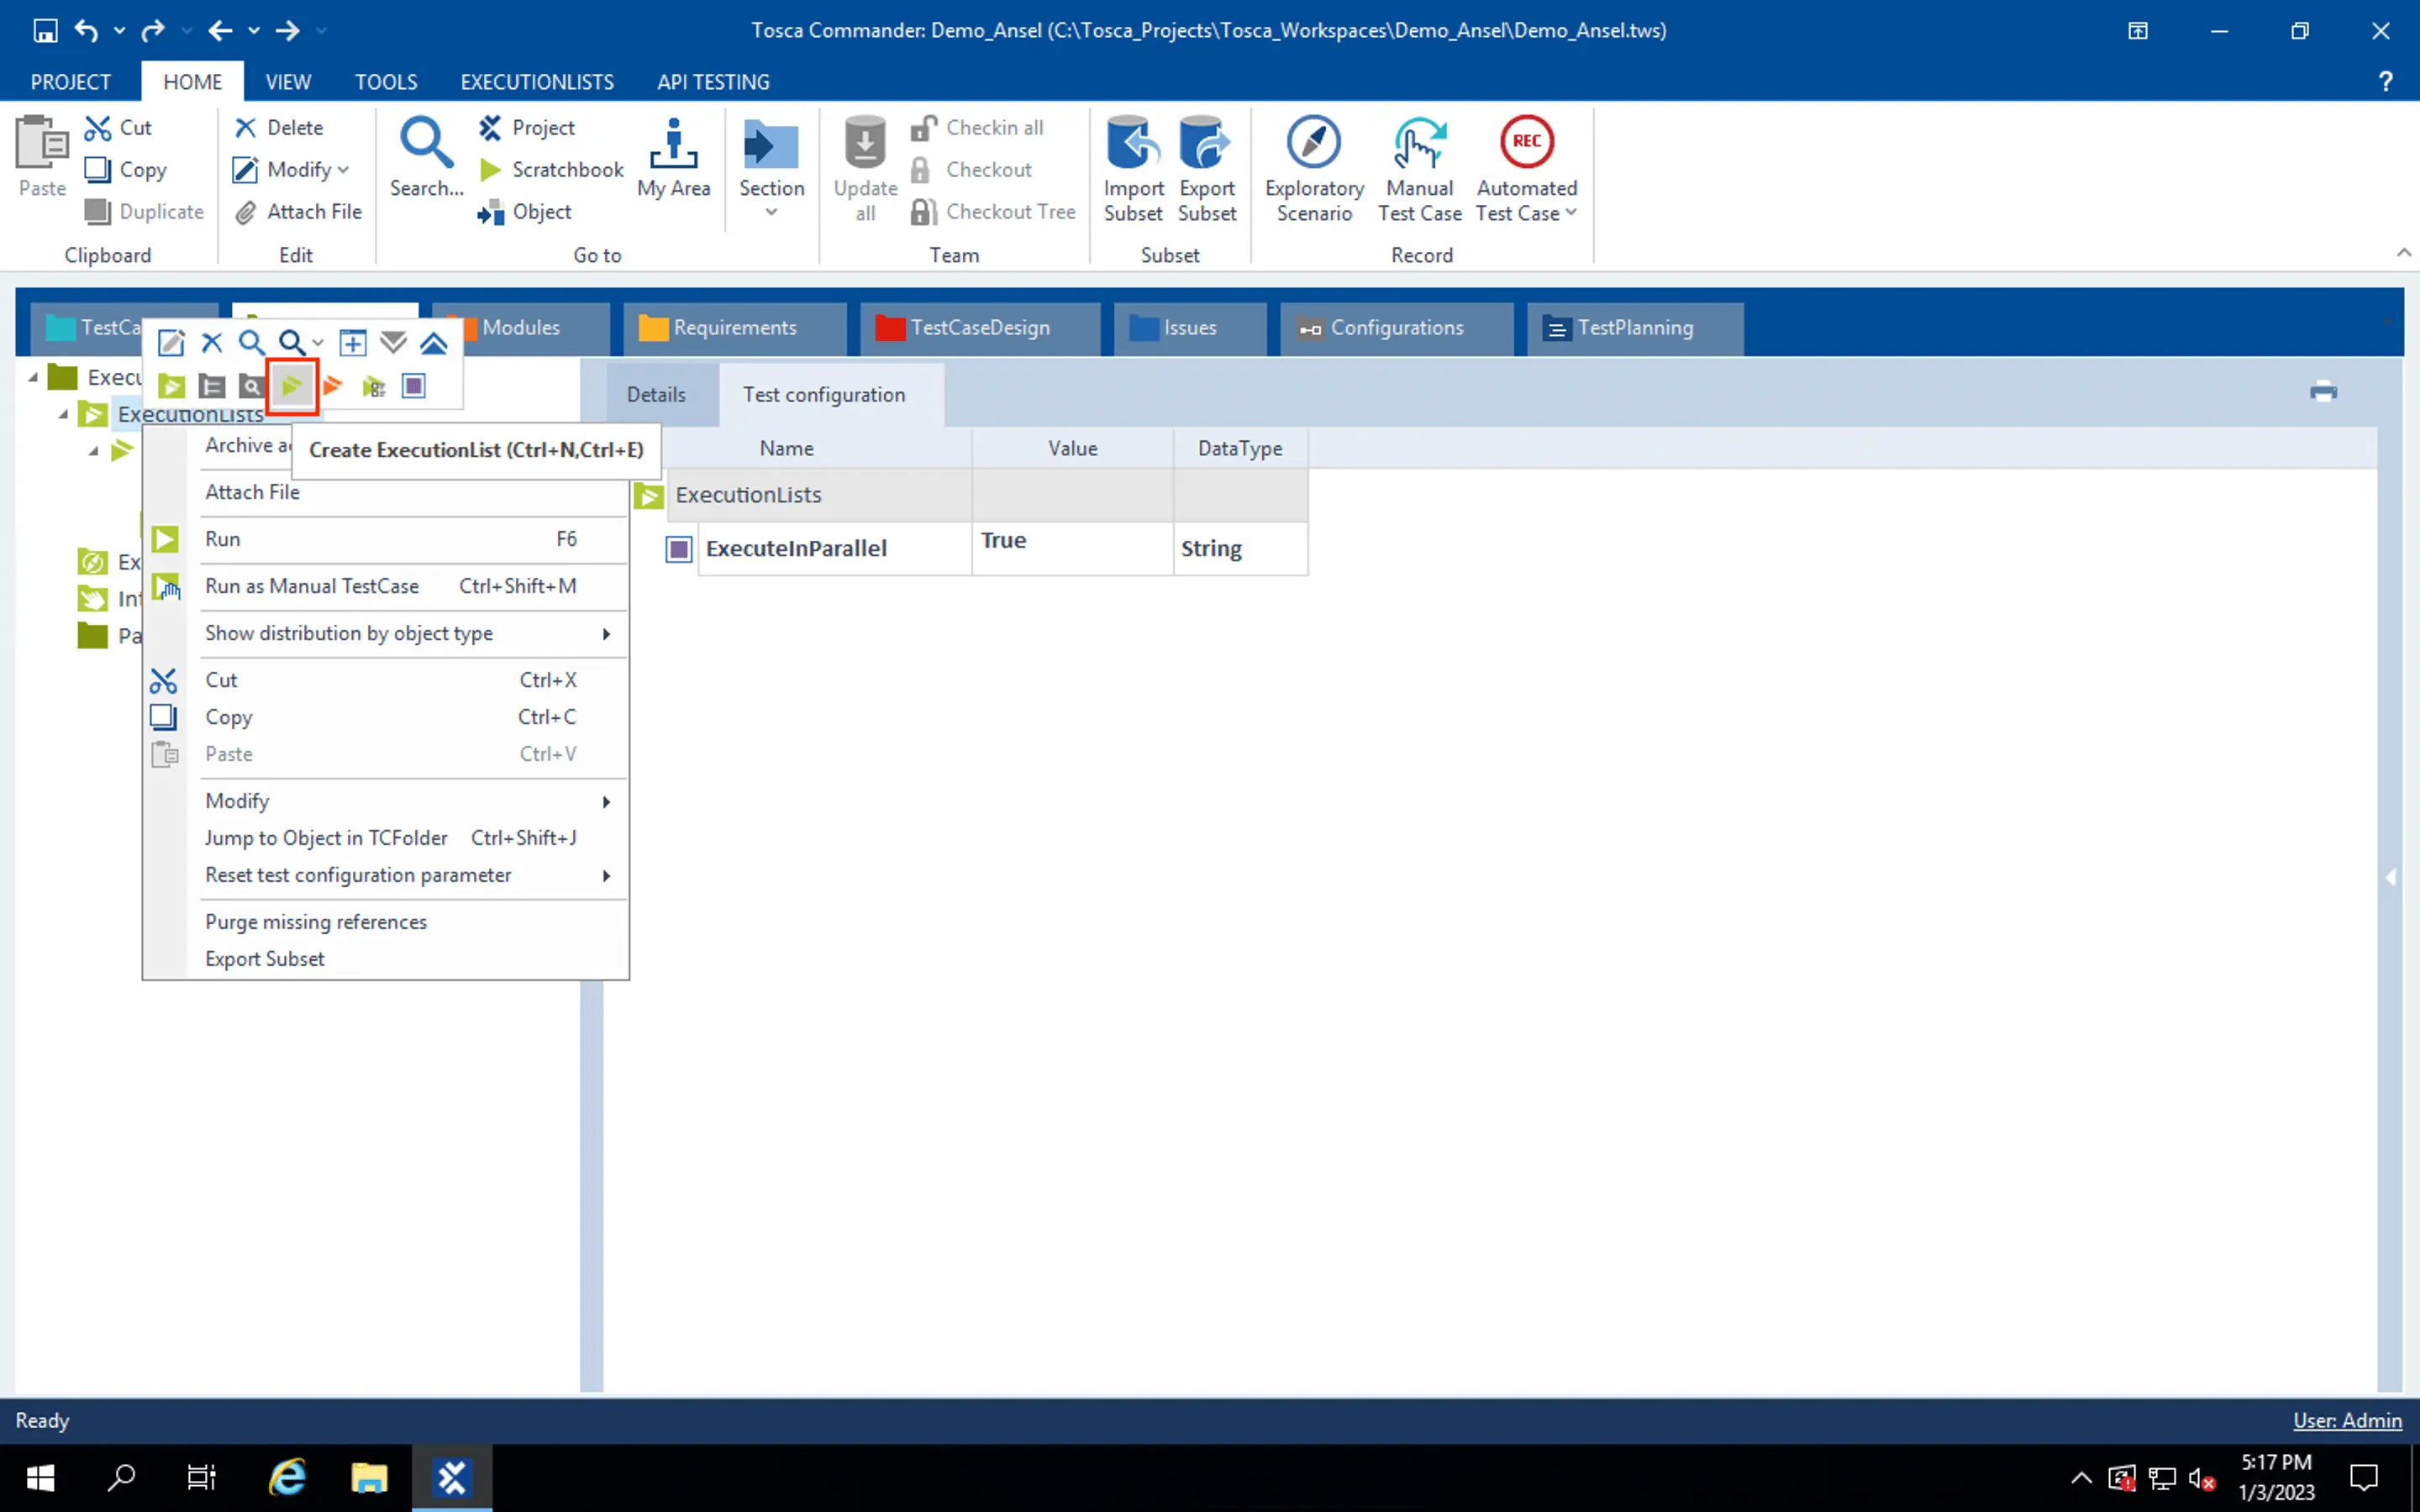
-
Right-click the ExecutionLists folder and click the highlighted icon to create an Execution List. You can drag and drop the Test cases in the Execution List.
-
Click Run from the ExecutionList folder.
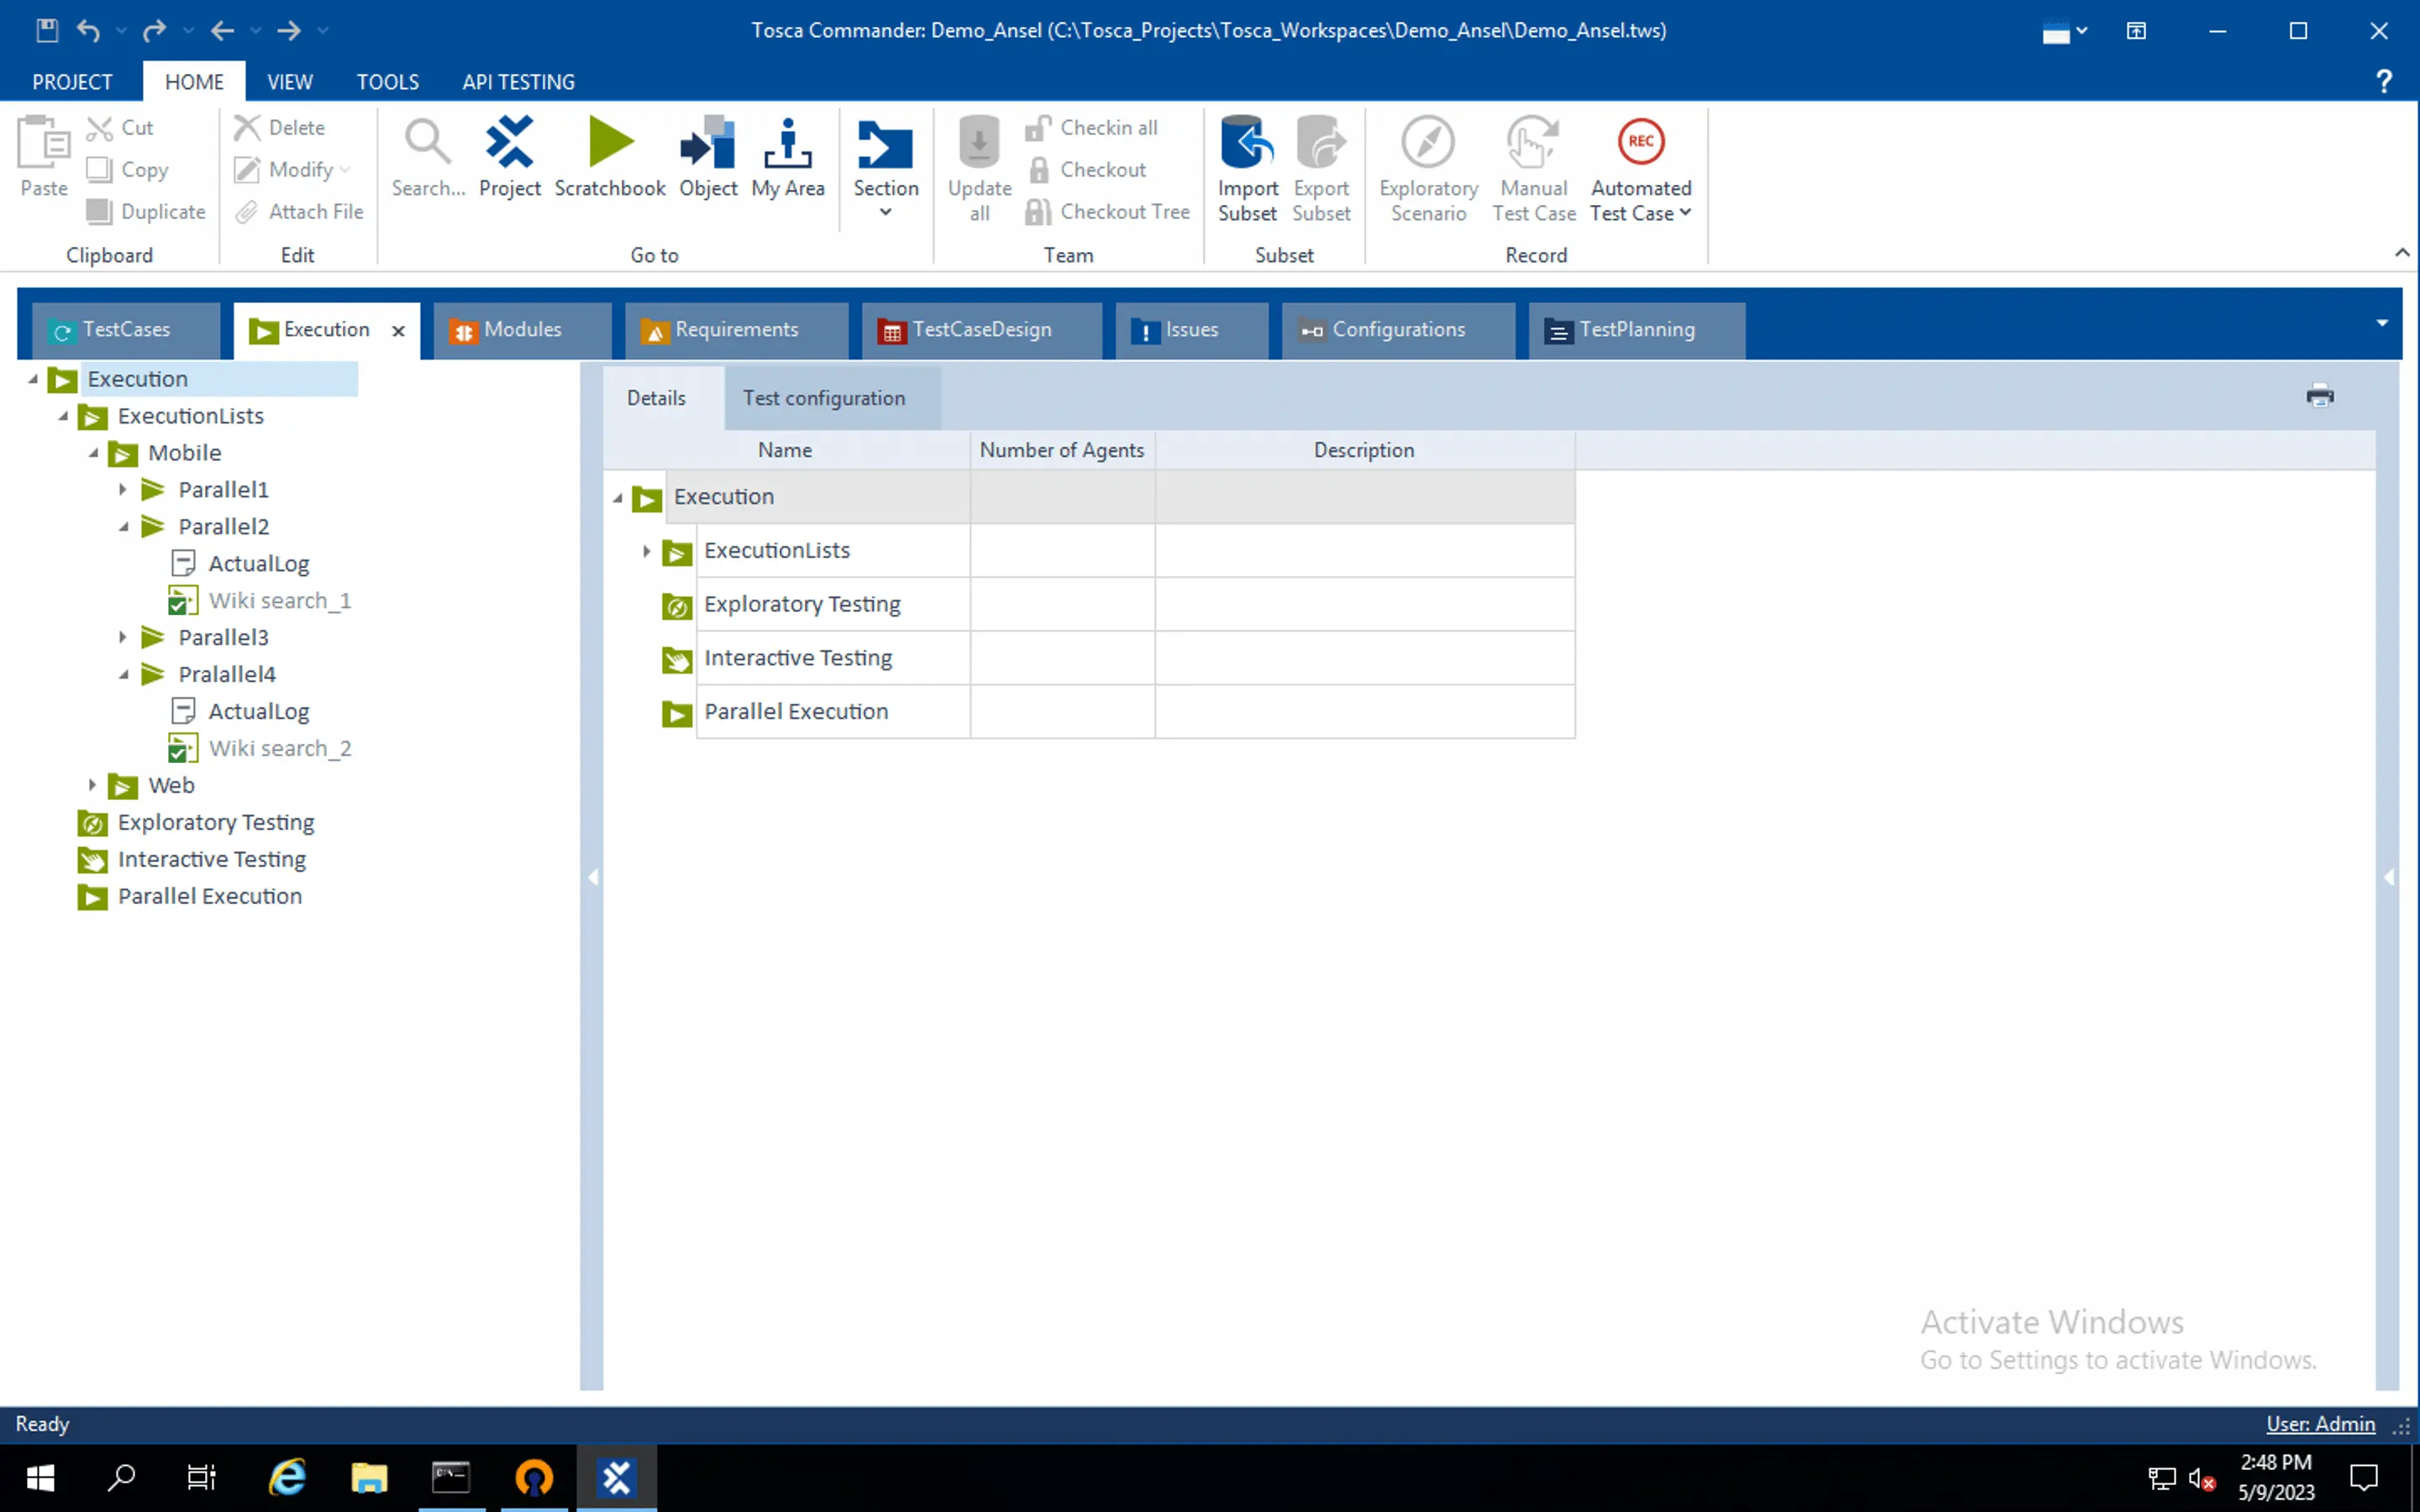
-
View the test run in parallel on the BrowserStack Dashboard.
We're sorry to hear that. Please share your feedback so we can do better
Contact our Support team for immediate help while we work on improving our docs.
We're continuously improving our docs. We'd love to know what you liked
We're sorry to hear that. Please share your feedback so we can do better
Contact our Support team for immediate help while we work on improving our docs.
We're continuously improving our docs. We'd love to know what you liked
Thank you for your valuable feedback!