A step-by-step guide to help you integrate GoCD with the BrowserStack device cloud for running all your Selenium tests on BrowserStack Automate.
GoCD is an open-source continuous integration and continuous delivery (CI/CD) server used to integrate your test suites. It enables continuous test, build, and deploy of iterative code changes. The use of CI/CD tools helps catch failures ahead of the production stage and mitigate them as they occur.
Before you can start integration, ensure that the following tasks are complete.
GoCD is installed on your machine.
GoCD server is running locally on the default port http://localhost:8153/, and have access to at least one GoCD Agent instance.
You are a maintainer or owner of the project.
You have access to the BrowserStack account credentials, namely Access Key and Username.
Set up GoCD Pipeline
To create a pipeline in GoCD, complete the following steps:
In your browser, enter http://localhost:8153/ to launch GoCD server.
Click Admin > Pipelines.
On the Pipelines page, click + Add new pipeline.
On the Add a New Pipeline page, under the Part 1: Material section, complete the following steps:
Select your project source, for example, Git, from the Material Type drop-down.
In Repository URL, enter the repository URL.
Click Test Connection. If GoCD establishes a connection successfully, the Connection OK message appears.
Under the Part 2: Pipeline Name section, enter a name for your pipeline, for example, sample-pipeline.
Under the Part 3: Stage Details section, enter a name for the stage, for example, testing-stage.
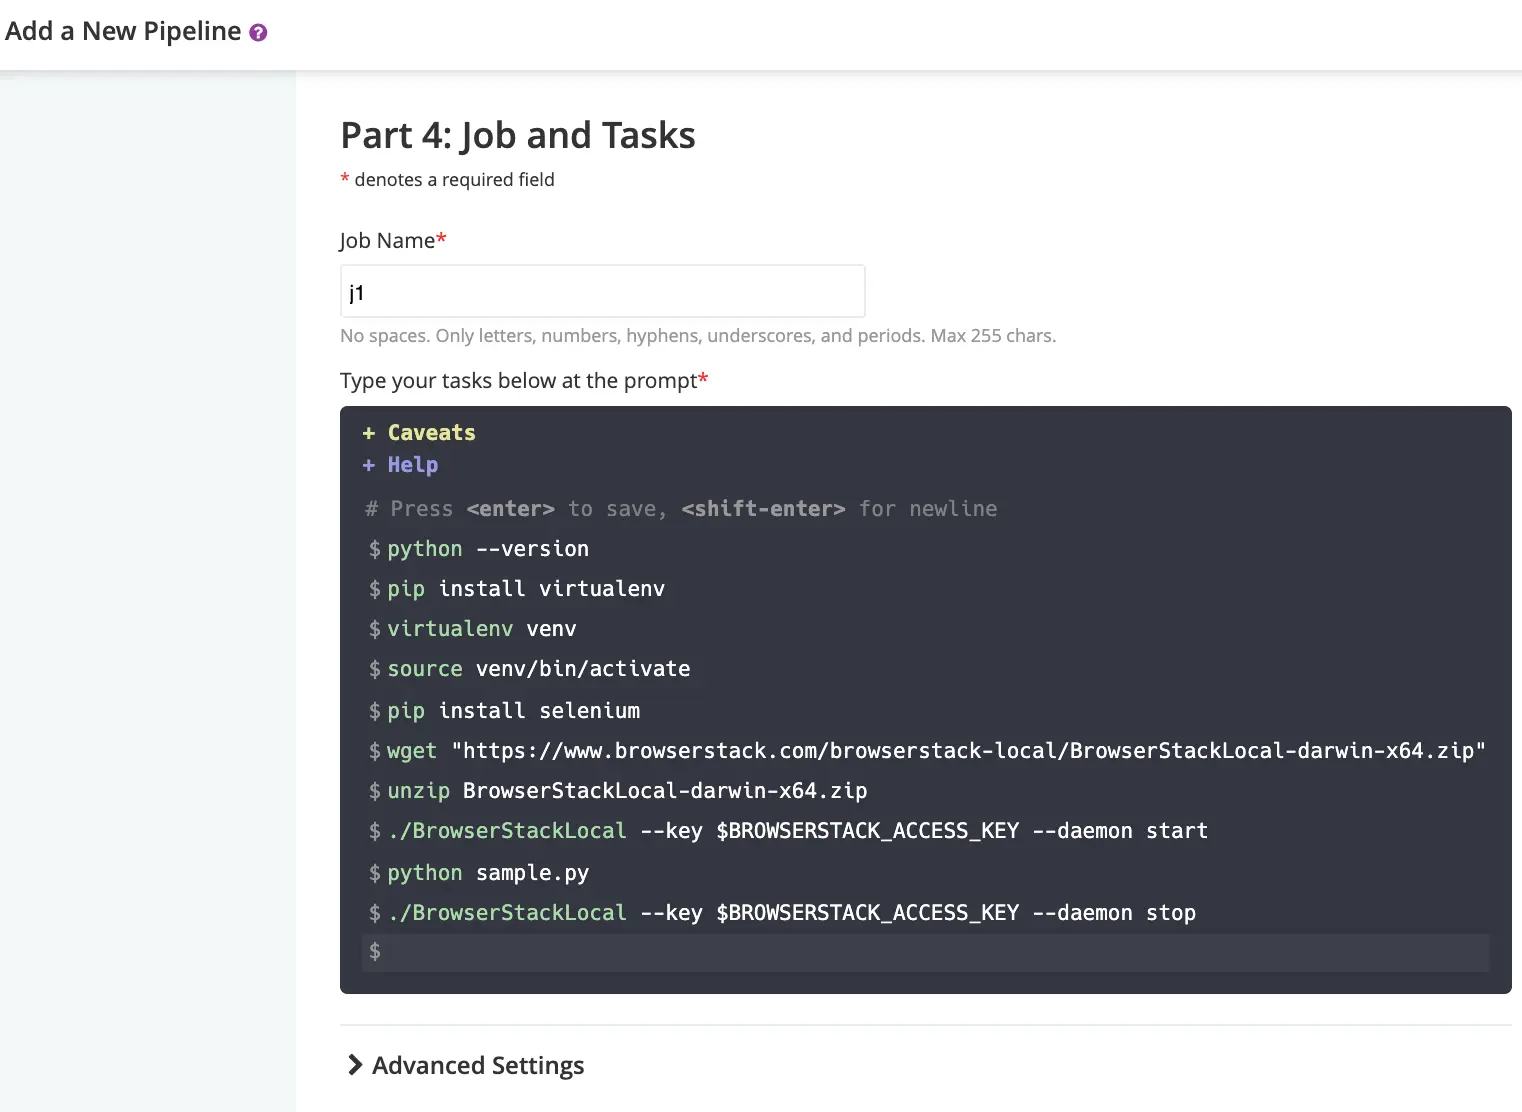
Under the Part 4: Job and Tasks section, complete the following steps:
Enter a name for the job, for example, single-job.
In the console, add the commands required to run your project code.
For example, if tests are based on Python, you need to add commands required to set up and run a Python project, may be using a virtual environment, as shown in this step.
Note: If you’re testing websites hosted locally as part of your testing or development environment, check out the Configure pipeline for locally hosted website section to add commands for configuring BrowserStack Local binary.
Under Advanced Settings, in the Secure Variables section, add your BrowserStack Username and Access key as the environment variables. These environment variables are used in the test scripts.
Along with BrowserStack environment variables in the test script, we will also use the GO_PIPELINE_LABEL default environment variable provided by GoCD that generates a unique build number.
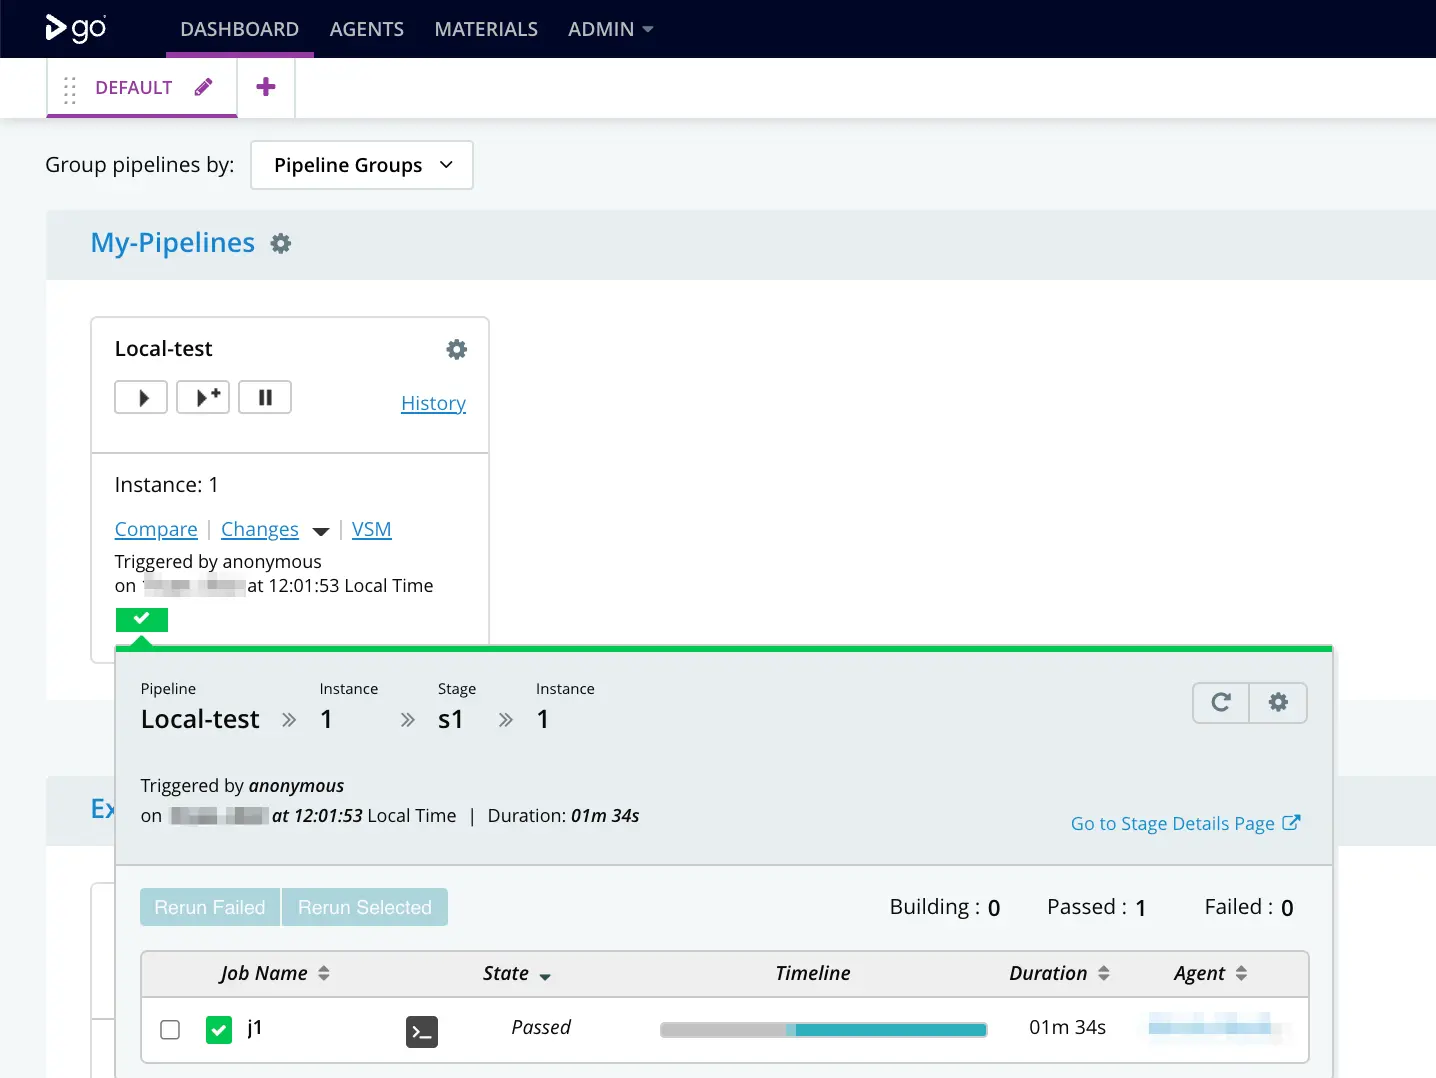
Click Save + Run This Pipeline to save and run your pipeline.
The pipeline runs and the test result is displayed on your GoCD Dashboard page.
Integrate existing test cases
With existing test cases, integrating BrowserStack involves editing your test cases to add BrowserStack capabilities, credentials, and, remote URL.
Though your existing test scripts include capabilities, BrowserStack also provides specific capabilities that help determine how tests are run. The following example code snippet sets the OS to windows and the browser to Chrome, declares Access Key and Username as environment variables, and creates a remote driver connection.
Appending the default GO_PIPELINE_LABEL environment variable to the BrowserStack build name helps generate a unique build name for every test run. To learn more about this environment variable, check out the GoCD pipeline labeling guide.
Set capabilities using the following code snippet:
username =ENV['BROWSERSTACK_USERNAME']
accessKey =ENV['BROWSERSTACK_ACCESS_KEY']
buildName =ENV['GO_PIPELINE_LABEL']
caps =Selenium::WebDriver::Remote::Capabilities.new
caps["os"]="Windows"
caps["os_version"]="10"
caps["browser"]="Chrome"
caps["browser_version"]="latest"
caps['javascriptEnabled']='true'
caps['name']='BStack-[Ruby] Sample Test'# test name
caps['build']='BStack Build Number: '+ buildName# CI/CD job or build name
driver =Selenium::WebDriver.for(:remote,:url=>"https://"+username+":"+accessKey+"@hub-cloud.browserstack.com/wd/hub",:desired_capabilities=> caps)
Integrate test cases for privately hosted websites
If you are testing websites hosted locally as part of your testing or development environment, you need to configure your GoCD pipeline to use the Local testing.
Using the Local testing feature of BrowserStack, remote browsers at the BrowserStack cloud can access websites hosted on your private or internal networks. To learn more about how Local testing works, check out the Local testing guide.
Apart from setting up a Local connection, you must also add the browserstack.local capability in your test scripts.
Using Local binary, the remote browsers in the BrowserStack cloud are able to access your private or locally-hosted website through the connection established between BrowserStack and the Local binary running on your machine.
To create GoCD pipeline for that uses BrowserStack Local, complete the following steps:
Under the Part 4: Job and Tasks section, along with the commands that your tests need to run, add the following commands based on your OS.
These commands use the --daemon start and --daemon stop flags to start and stop Local binary respectively. To learn about additional flags used in running Local binary, check out the Binary parameter guide.
# For Linux-based systems, add the following commands in the given console to download the binary, run it, and stop its execution after the test has been executed.
$ wget"https://www.browserstack.com/browserstack-local/BrowserStackLocal-linux-x64.zip"
$ unzip BrowserStackLocal-linux-x64.zip
$ ./BrowserStackLocal --key $BROWSERSTACK_ACCESS_KEY --daemon start
$ <your-test-command>
$ ./BrowserStackLocal --key $BROWSERSTACK_ACCESS_KEY --daemon stop
# For macOS-based systems, add the following commands in the given console to download the binary, run it, and stop its execution after the test has been executed.
$ wget"https://www.browserstack.com/browserstack-local/BrowserStackLocal-darwin-x64.zip"
$ unzip BrowserStackLocal-darwin-x64.zip
$ ./BrowserStackLocal --key $BROWSERSTACK_ACCESS_KEY --daemon start
$ <your-test-command>
$ ./BrowserStackLocal --key $BROWSERSTACK_ACCESS_KEY --daemon stop
# For Windows-based systems, add the following commands in the given console to download the binary, run it, and stop its execution after the test has been executed.
$ wget"https://www.browserstack.com/browserstack-local/BrowserStackLocal-win32.zip"
$ powershell.exe Expand-Archive BrowserStackLocal-win32.zip
$ \BrowserStackLocal-win32\BrowserStackLocal.exe --key %BROWSERSTACK_ACCESS_KEY% --daemon start
$ <your-test-command>
$ .\BrowserStackLocal-win32\BrowserStackLocal.exe --key %BROWSERSTACK_ACCESS_KEY% --daemon stop
Click Save + Run This Pipeline to save and run your pipeline.
A sample sequence of steps for configuring and running BrowserStack Local in your GoCD pipeline is shown in the following image:
If you prefer to manage the Local connection through your test scripts, you can use the language bindings.
Note: Ensure to complete the steps mentioned in the set up GoCD pipeline section to create your GoCD pipeline.
Apart from these configurations, you can set other Local options, such as, testing behind a proxy, folder testing, or using multiple local instances. Check out Introduction to Local Testing for more information.
Add browserstack.local capability to test scripts
Add the browserstack.local capability to test scripts using the following code snippets. When you set this capability to true, BrowserStack resolves the request via the Local agent running in your network.