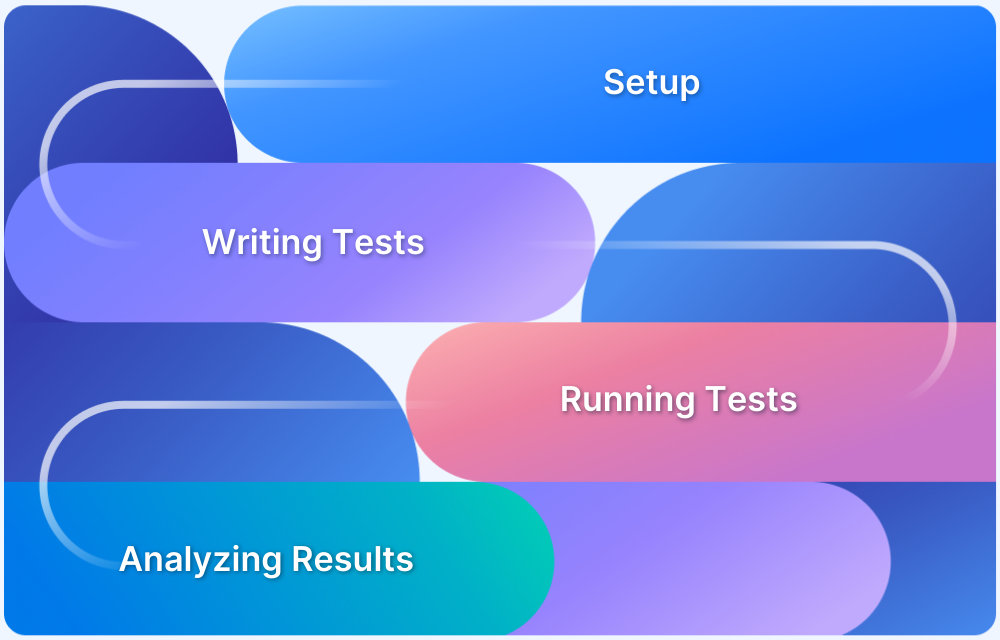
Storybook is an open-source JavaScript-based development tool that helps build user interface components in isolation.
Overview
What is Storybook Testing?
Storybook testing is the process of testing individual user interface (UI) components in isolation using Storybook.
Storybook Testing Features
- Component Isolation
- Interactive Component Libraries
- Support for Visual Regression Testing
- Storybook Addons
- Component reusability
- Seamless Integrations
- Documentation
Benefits of Storybook Testing
- Component Isolation
- Centralized Visual Documentation
- Quicker UI development
- Customizable UI
- Addon Ecosystem
- Seamless Integration
This guide explores what Storybook testing is and how it can be leveraged in software development.
What is Storybook?
Storybook is a JavaScript-based development tool, that allows developers to create the user interface component in isolation and helps them develop the UI component faster, and easier.
Storybook also helps in the process of documentation when developing UI components for better record keeping.
History of Storybook
Storybook was launched in April 2016 by an organization named Kadira. Initially, it was not an open source tool, but rather a paid tool. Storybook 2.0 was well documented and made extensible to cater to wider testing needs.
9 months after launch, Kadira shut down the Storybook Project, and no development was observed after the shutdown. However, in April 2017, the Storybook project was open-sourced to the community, and it started gaining a lot of traction. Storybook has come up with the major release of Storybook 3.0 in May 2017.
Today the Storybook is the most popular tool for UI components development, and it supports many development frameworks such as React, Vue, and Angular. Today, it also supports a lot of Add ons which can be easily integrated with the framework.
What is Storybook Testing?
Storybook helps to develop the UI components in an isolation; similarly, it can also be used to test the UI component. It provides a clean environment for testing UI components in isolation.
Storybook helps to test Visual Validation, Interaction, Accessibility, etc. Visual testing using Storybook is widely used and very popular.
Key Features of Storybook Testing
Here are the main features of Storybook that enhance testing:
Storybook Testing Features
- Component Isolation
- Interactive Component Libraries
- Support for Visual Regression Testing
- Storybook Addons
- Component reusability
- Seamless Integrations
- Document Components
- Testing Support
- Component Isolation: Test components in isolation without depending on the application’s context to ensure the components work as expected.
- Interactive Component Libraries: Provides an interactive UI to visualize, and interact with different variants and states of the components.
- Support for Visual Regression Testing: Integrate tools like Percy to capture and compare component snapshots to spot UI changes.
- Storybook Addons: Storybook offers different Addons to enhance its functionality, including A11y for accessibility testing, Knobs for dynamic component state changes etc.
- Component reusability: It lets you reuse components by letting you display, test and modify components without needing a full app rebuild.
- Seamless Integrations: Storybook can integrate with CI/CD tools like GitHub, Bitbucket, and CircleCI, along with frontend frameworks like Vue and Angular.
- Document Components: Storybook can automatically generate visual documentation of your components as you develop them, helping teams collaborate more effectively.
- Testing Support: Storybook integrates with testing libraries like Jest and React Testing Library to help write and run unit and integration tests for components easily.
Read More: How to perform Storybook Visual Testing?
How to Use Storybook for UI Testing
With Storybook, you can create isolated UI components and test their visual consistency. Here’s how you can use Storybook for UI Testing:
1. Install Storybook
Set Up Storybook in your project:
npx storybook init
Then, customize the configuration in . storybook folder as required.
2. Create Stories
Create stories to show different UI component states
3. Test Independent Components
Interact with components in isolation by using Storybook’s interface
4. Integrate Visual Testing
Integrate Storybook with tools like Percy to run automated visual regression tests. You can refer this detailed documentation to integrate Percy and Storybook seamlessly.
5. Accessibility Tests
Leverage the Storybook accessibility addon to validate compliance with WCAG standards.
6. Integrate with CI/CD
Integrate Storybook with your CI/CD pipeline to facilitate automatic testing of your stories during deployment.
Read More: How to implement a CI/CD Pipeline?
What is Visual Testing?
The visual tests are also called visual regression testing or visual validation testing. Visual testing helps to validate the UI changes such as font, layout, color, size, etc. Visual testing can be done after the integration of code by running the test against your application URL. The Storybook helps to test the components visually.
Read More: How to perform Storybook Visual Testing?
How does Visual Testing Work?
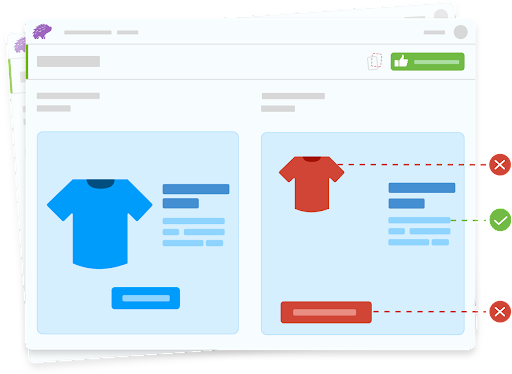
Visual testing works by comparing two screenshots. The baseline or the base image is compared against the actual image. The baseline image is captured once and stored, and whenever you run the visual validation test, the base screenshot is compared against the actual screenshot. The actual screenshot is generated in every run.
If there is any difference found while comparing, then the test is marked as a fail; if there is no difference then it is marked as a pass, as depicted in the image below.
How to Perform Storybook Testing with Percy?
BrowserStack’s Percy provides visual testing as a service. It makes visual testing easier and faster by providing online access to your test results and showing the visual differences side by side.
Percy can be integrated with many popular automation tools such as Selenium, Cypress, Playwright, TestCafe, WebDriverIO, etc.
Percy also supports integration with Storybook. When it comes to UI development, the Percy and Storybook combination help with component-level visual testing.
Let’s understand the Visual Testing in Storybook using Percy with an example
The Storybook and React are the most used combination; as a pre-requisite, you need to integrate Storybook with React App.
Once your framework is integrated with Storybook, the next step is to set up Percy for Visual Testing in Storybook.
Let’s use the sample application created on the Github code base.
Note: If you have integrated Storybook with your application, you can just choose to use the same. Here the Github code base is used for Demo purposes.
Step 1: Install Percy node packages
Navigate to your Project root folder where the package.json file is located, and enter the below command on your terminal
npm install --save-dev @percy/cli @percy/storybook
The above command installs two packages, @percy/cli, and @percy/storybook. these packages are required to integrate your application with Percy.
Step 2: Get the PERCY_TOKEN
The PERCY_TOKEN uniquely identifies your project on Percy’s infrastructure. Before executing your tests you need to get the PERCY_TOKEN.
Steps to get the PERCY_TOKEN
- Login to Percy
(Note If you don’t have a Percy account, you can create one. Alternatively, if you have a BrowserStack account you can use the same credential to Percy Login.)
- Create a new Project (If you have Percy Project already created, you can choose to use the same.)
- Navigate to Project Settings in Percy
- Copy the PERCY_TOKEN
Step 3: Set up the PERCY_TOKEN environment variable
As mentioned above, the PERCY_TOKEN uniquely identifies your project on Percy’s infrastructure, when you execute your tests, the Percy CLI looks for the PERCY_TOKEN environment variable so you need to set the PERCY_TOKEN environment variable.
Setting up token command differs from the command line tool, based on the command line tool you are using you can choose the below one and execute the same.
Use the commands below to Set up a PERCY_TOKEN environment variable in:
- Powershell
$Env:PERCY_TOKEN="<your-project-token>"
- Windows Command line
set PERCY_TOKEN="<your-project-token>"
- Linux/Mac-based Terminal
export PERCY_TOKEN=<your-project-token>
Step 4: Execute Percy Storybook Tests
Percy captures the screenshot of all your components once you execute the test. There are multiple ways to execute your Storybook and Percy Visual Tests, one of which is by entering the below command
npx percy storybook:start
This command starts the Storybook and loads the Storybook components and captures them. The captured screenshot will be uploaded to Percy’s infrastructure.
Alternatively, you can configure the test command shortcut in package.json and use the below command
npm run test
Once the execution is complete the command line output will show Percy’s build URL. You can navigate to the build and validate the test results.
Alternatively, Manually log in to Percy and go to Projects, then click on the latest build to validate the results.
Note: As mentioned previously in this article, the visual test works by comparing two screenshots, so the first time when you execute the test the baseline screenshot will be captured which will be then compared against the actual screenshot taken in subsequent runs. So you need to run the test at least two times to get valid test results.
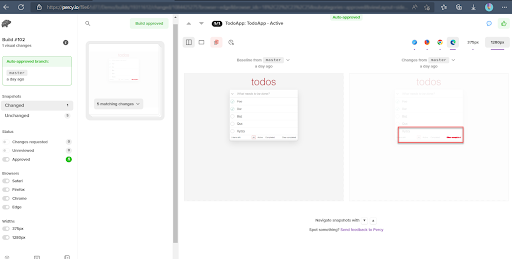
Percy’s build dashboard shows both the current image and baseline image side-by-side along with the differences highlighted if there are any as seen below:
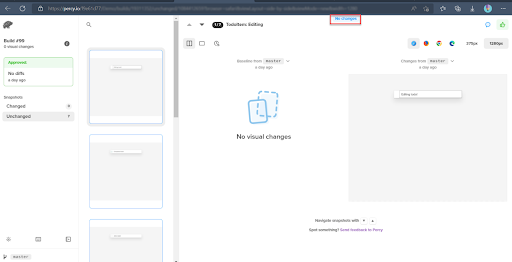
If there are no differences, Percy indicates that with the message “No Changes” as seen in the image below:
How to test various states of the component using Percy and Storybook
Let’s take an example of a To-Do app, the task can have various states like active, completed, etc. The completed tasks are marked with strike-through font. Percy provides the feature to test the component states.
Below is the story file, for to-do task component
import React, { useState, useRef } from 'react';

import TodoApp from './TodoApp';

export default {

  title: 'TodoApp',

  component: TodoApp,

};

export const App = args => <TodoApp {...args}/>;


// match component name for single story hoisting

App.storyName = 'TodoApp';

App.args = {

  showTodos: 'all',

  todos: [

    { title: 'Foo', completed: true },

    { title: 'Bar', completed: true },

    { title: 'Baz' },

    { title: 'Qux' },

    { title: 'Xyzzy' }

  ]

};
This story file can be modified to integrate with Percy to take a screenshot of states. Percy provides an option additionalSnapshots,which helps to take a screenshot of various states of the component such as active, completed, etc.
The above story file can be modified to take to screenshot of states, like below.
import React, { useState, useRef } from 'react';

import TodoApp from './TodoApp';

export default {

  title: 'TodoApp',

  component: TodoApp,

};

export const App = args => <TodoApp {...args}/>;

// match component name for single story hoisting

App.storyName = 'TodoApp';

App.args = {

  showTodos: 'all',

  todos: [

    { title: 'Foo', completed: true },

    { title: 'Bar', completed: true },

    { title: 'Baz' },

    { title: 'Qux' },

    { title: 'Xyzzy' }

  ]

};

App.parameters = {

  // take additional snapshots of various states

  percy: {

    additionalSnapshots: [{

      suffix: ' - Active',

      args: { showTodos: 'active' }

    },{

      suffix: ' - Completed',

      args: { showTodos: 'completed' }

    }, {

      suffix: ' - None',

      args: { todos: [] }

    }]

  }

};
In the above code, added the section App.parameters, which has some of Percy’s parameters like additionalSnapshots.
The suffix is used to name the image files in Percy’s infrastructure, which helps to differentiate the image files.
Best Practices for Storybook Testing
Here are some of the best practices one must follow during Storybook Testing:
- Consider visual testing: Many times visual testing is considered an afterthought, which increases the UI bugs at a later stage. Considering visual testing at the earlier stage while setting up a framework helps to deliver quality code.
- Schedule tests more often: The Storybook tests need to be scheduled and verified at intervals like every day, once in two days, etc., which helps eliminate any accidental changes or issues arising from code merging.
- Consider peer test result review: Like you do peer code review, consider reviewing test results by your peers, having a SaaS tool like Percy anyone can review from anywhere, this helps to catch the bugs or suggest improvements.
- Test all possible states of component: One component may have multiple states, it is important to test the states of the component, depending on the state of the component the styles may change, adding the state testing to your mandatory list helps to improve the code quality.
Benefits of Storybook Testing
Here are the key benefits for using Storybook for testing:
- Component Isolation: Develop and test components in isolation without depending on the full application
- Visual Documentation: Generate interactive and visual documentation for components automatically
- Quicker UI development: Accelerate UI development with the help of real-time previews and component state management
- Customizable UI: Customize UI to fulfill specific project requirements
- Addon Ecosystem: Leverage addons for accessibility testing, performance optimization, and more.
- Seamless Integration: Integrate seamlessly with testing tools to facilitate accessibility and consistency.
Read More: What is Component Testing?
Conclusion
Storybook testing allows to build and test UI components for a seamless user experience. However, you can integrate Storybook with Percy to perform visual testing of the UI components.
Percy is a dedicated tool for Visual Testing; unlike other tools, Percy mainly focuses on improving its visual testing features. One of the major features of Percy is once you run the Visual tests the captured screenshot will render based on multiple browsers such as Firefox, Chrome, and Safari this eliminates running your UI tests against multiple browsers.
Knowing that any bug found during the later stage of development gets costlier, integrating Percy with Storybook helps you to eliminate the bugs at the very early stage of development thus the quality code can be delivered.


