Modern web applications increasingly rely on lazy-loading techniques to improve performance and loading speed. However, lazy-loaded images can easily break visual regression testing if they aren’t fully rendered before a screenshot is taken. That’s where Puppeteer comes to play.
Overview
How Lazy Loading Works in Puppeteer?
Puppeteer behaves like a real user, so images won’t load until they’re scrolled into view, whether using native loading=”lazy” or JavaScript-based lazy loading. In order to capture complete, reliable visuals, it is important to use the right techniques to trigger and load every lazy-loaded element before testing.
1. Native Lazy Loading (loading=”lazy”)
If the site uses native loading=”lazy” which is supported by Chromium, Puppeteer loads images as they enter the viewport, and simple scrolling is enough to trigger them.
2. JavaScript-Based Lazy Loading (Intersection Observer, Custom Scripts)
For JS-driven lazy loading, Puppeteer must simulate user interaction, especially scrolling, to implement the lazy-load logic.
await page.evaluate(() => {

  window.scrollBy(0, window.innerHeight);

});
3. Wait for Images to Finish Loading after scrolling:
- Network to go idle (page.waitForNetworkIdle())
- Images or selectors to finish loading (page.waitForSelector(), page.waitForFunction())
4. Increase Viewport Size (Optional): A larger viewport can expose more images at once, reducing how much scrolling Puppeteer needs to perform.
5. Disable JavaScript (Rare Use Case): Only when JS controls lazy loading and you need the initial HTML without loading the images. This is not recommended for visual testing.
This article explores how to capture lazy-loaded images for visual regression testing using Puppeteer effectively.
What is Visual Testing
Testing the Visual aspect of the web page is called Visual Testing. Visual Testing is also called Visual Validation or Visual Regression Testing. Visual testing can be done by comparing two snapshots (base and actual). Visual Testing can be automated and done manually.
Visual Testing compares baseline and actual screenshots to detect visual discrepancies. It can be done manually or through automated tools to highlight differences. It ensures UI consistency, enhances user experience, and prevents visual bugs across browsers and devices.
What are Lazy Loaded Images
Lazy-loaded images refer to images on a web page that aren’t instantly loaded when the page is first rendered. These images are loaded only when the user reaches the part of the page where they are actually located (the user’s viewport).
Lazy loading is beneficial for media-heavy websites, ensuring a smoother user experience while optimizing bandwidth usage. However, proper implementation is essential to prevent issues like delayed rendering or missing images in automated tests and search engine indexing.
Advantages of Lazy Loading Images
Lazy loading is widely adopted because it offers several performance benefits:
- Faster initial load: Only in-view images load immediately, improving perceived speed.
- Improved responsiveness: Loading images progressively helps maintain smooth scrolling and interactions.
- Optimized resource usage: Reduces memory and CPU load by avoiding early rendering of heavy assets.
Disadvantages of Lazy Loading Images
Despite its benefits, lazy loading introduces some challenges in testing such as:
- Delayed rendering: Images may load late, causing visible shifts or layout jumps.
- Accessibility gaps: Screen readers may miss images if proper fallbacks aren’t provided.
- SEO limitations: Without correct fallbacks (e.g., <noscript>), crawlers may not index images.
- Inconsistent results: Dynamic loading can cause variability across test runs, leading to false positives or incomplete captures in visual regression tests.
Why is it Important to Capture lazy-loaded Images for Visual Regression Testing
It is essential to capture Lazy-loaded images during visual regression testing to facilitate the visual and functional integrity of an application
- Visual Validation: Lazy-loaded images are triggered and loaded dynamically. When that’s the case, the chances of the images being skipped or incomplete screenshots are high. Capturing them makes sure that the results of the visual testing efforts correspond to the final rendered state of the page.
- Detecting Visual Defects: If placeholders don’t load correctly or fail to get replaced by actual images, the design can be affected. It is necessary to capture lazy-loaded images to correctly identify these issues.
- User Experience Validation: Visual regression testing helps ensure that all the images of a page load seamlessly and provides a consistent user experience, which is why it is essential to capture lazy-loaded images.
- SEO Validation: Capturing lazy-loaded images helps you validate that they are being rendered as expected and in a way that search engines can index.
Visual Regression Testing in Puppeteer
Puppeteer framework was initially designed for functional testing. But you can perform Visual Validation Testing using third-party packages.
Must Read: How to Perform Visual Regression Puppeteer
One of the challenges in visual validation is testing lazy loading websites. As the web page assets will be loaded dynamically as the user scrolls down, if you capture the snapshot after navigation, only part of the web page gets captured. To overcome the lazy loading problem in Visual Testing, the simplest solution is to scroll to the bottom of the webpage before taking the screenshot.
How to capture Lazy Loading Images for Visual Regression Testing in Puppeteer
Prerequisites:
Step 1: Install jest-image-snapshot
npm i --save-dev jest-image-snapshot
Consider the webpage https://sdk-test.percy.dev/lazy-loading when you navigate to this webpage, only a few images loads, as you scroll down, the images keep loading until it reaches image number 40.
To address the above issue, you need to follow the below steps
- Navigate to https://sdk-test.percy.dev/lazy-loading
- Scroll to the bottom of the webpage
- Take a snapshot of the full webpage
- Compare base and actual images in a subsequent run
Note: Full webpage screenshot takes the complete webpage screenshot, not just the viewable area of the website.
Step 2: Install the scroll-to-bottomjs
Puppeteer doesn’t provide any direct command to scroll to the bottom. The scroll-to-bottom action can be achieved by the third-party plugin scroll-to-bottomjs.
Command:
npm i scroll-to-bottomjs
Step 3: Write Visual Regression Test using Puppeteer for Lazy loading webpage
//visual-lazyloading.test.js

const { toMatchImageSnapshot } = require('jest-image-snapshot');

let scrollToBottom = require("scroll-to-bottomjs");

expect.extend({ toMatchImageSnapshot });

describe('Visual Testing - Lazy Loading', () => {

jest.setTimeout(50000);

beforeAll(async () => {

await page.goto('https://sdk-test.percy.dev/lazy-loading')

})

it('Visual Regression Test - Lazy Loading', async () => {


await page.evaluate(scrollToBottom);

await page.waitForTimeout(5000);

const image = await page.screenshot({ fullPage: true });

expect(image).toMatchImageSnapshot({

failureThreshold: '0.10',

failureThresholdType: 'percent'

});

})

})
Let’s see what the above code snippet does,
- const { toMatchImageSnapshot } = require(‘jest-image-snapshot’); : This is required for comparison of image
- let scrollToBottom = require(“scroll-to-bottomjs”);: This helps to call the scroll to bottom function.
- expect.extend({ toMatchImageSnapshot }); : By default the expect doesn’t support snapshot comparison, you need to extend the support using this code.
- await page.evaluate(scrollToBottom); : scrollToBottom helps lazy loading website to scroll to the bottom of the webpage.
- const image = await page.screenshot({ fullPage: true }); : This code takes the screenshot, as you are using the option fullPage: true, which takes the screenshot of the entire webpage.
- expect(image).toMatchImageSnapshot() : At the end, you need to ensure the captured image is the same as the base image.
Step 4: Execute your Visual Comparison Tests using Puppeteer
Execute your Jest Puppeteer Visual Regression Test using the command
npx jest -c ./jest.config.js
Alternatively, if you have configured the tests command in package.json you can simply execute npm run test
The first time you execute the test, Puppeteer captures the base screenshot, the subsequent run compares the actual screenshot with the base screenshot.
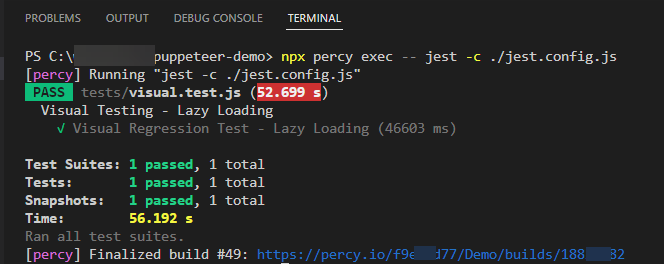
The pass/fail result will be shown on the command line
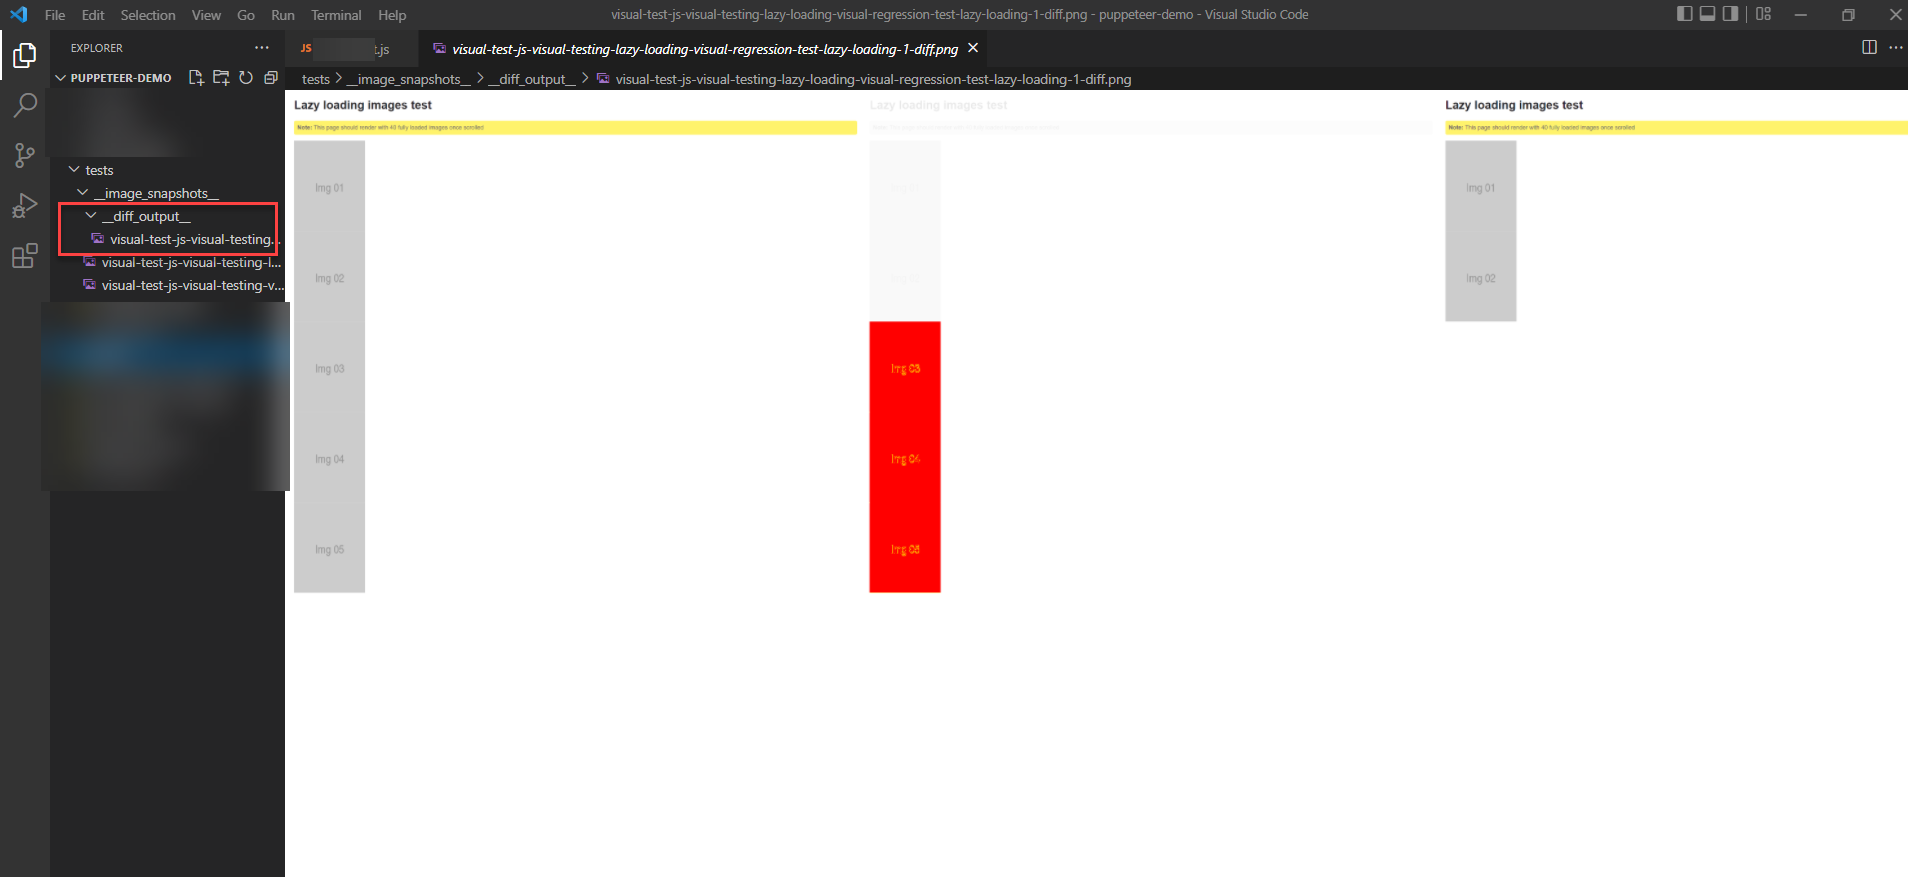
Example Output shows the failed scenario:
__diff_output__ folder shows the snapshot difference
Scaling Visual Regression Testing with Percy
Once Puppeteer has loaded all lazy-loaded images and the page is fully rendered, the next step is ensuring that these visuals remain consistent across code changes. This is where Percy by BrowserStack adds significant value.
Percy is an AI-powered visual testing platform that automates screenshot capture, comparison, and review. It handles the entire visual regression workflow, making it easy to catch layout shifts, styling issues, or changes caused by lazy-loaded content.
Why Use Percy with Lazy-Loaded Pages?
- Automated visual regression: Percy captures snapshots on every commit and compares them against your baselines, highlighting layout shifts or missing images that often occur when lazy-loaded content doesn’t render correctly.
- Visual AI that reduces false positives: Percy’s Visual AI Engine automatically ignores visual noise, such as animation flicker or anti-aliasing, so only meaningful changes are flagged. This is especially helpful for pages with dynamically loaded images or scrolling-driven behavior.
- Clear, actionable diffs: Percy draws bounding boxes around visual changes and provides human-readable summaries through its Visual Review Agent, making it easier to spot issues introduced by lazy-loading scripts or viewport-dependent content.
- Effortless integration with Puppeteer workflows: After your Puppeteer script scrolls and loads all images, adding Percy is as simple as calling a snapshot. Percy works seamlessly in CI/CD, so every build automatically checks for visual regressions.
- Scalable review and collaboration: Teams can review diffs, comment, approve, or reject changes directly in Percy’s dashboard—ensuring that UI changes are intentional and fully validated before release.
Pricing Options for Percy
- Free Plan: Includes up to 5,000 screenshots per month, ideal for getting started or testing smaller projects.
- Paid Plan: Starts at $199/month for advanced features, with custom enterprise pricing available for larger teams and workflows.
Visual Testing using Percy Puppeteer for Lazy Loading Website
Step 1: Install @percy/puppeteer and @percy/cli using npm:
npm install --save-dev @percy/cli @percy/puppeteer
Step 2: Write Puppeteer Tests using Percy
In the Puppeteer test, the percySnapshot needs to be imported, in order to take a screenshots
const percySnapshot = require('@percy/puppeteer')Once you import the percySnapshot, you can perform a set of actions and then take a screenshot at the required step.
let scrollToBottom = require("scroll-to-bottomjs");- scrollToBottom: The scrollToBottom function helps to scroll the lazy loading webpage to the bottom.
Note: Ensure you have installed scroll-to-bottomjs npm package, as explained in the first part of this tutorial.
//visual-percy-lazyloading.test.js

const percySnapshot = require('@percy/puppeteer')

let scrollToBottom = require("scroll-to-bottomjs");

describe('Visual Testing Percy-Lazy Loading', () => {

jest.setTimeout(50000);

beforeAll(async () => {

await page.goto('https://sdk-test.percy.dev/lazy-loading')

})

it('Visual Regression Test Percy - Lazy Loading', async () => {

await page.evaluate(scrollToBottom);

await page.waitForTimeout(5000);

await percySnapshot(page, "percy-lazyload-visual-test-puppeteer-jest")

})

})- await page.evaluate(scrollToBottom): scrollToBottom function, scrolls the lazy loading web page to the bottom.
- await percySnapshot(page, “percy-lazyload-visual-test-puppeteer-jest”): percySnapshot takes the snapshot of the full page and names it as percy-lazyload-visual-test-puppeteer-jest .
Step 3: Set PERCY_TOKEN
Navigate to Percy Project Settings (If Project is not created already create one) and copy the PERCY_TOKEN. Set the environment variable as per your tool.
- Windows command line
set PERCY_TOKEN=<your token here>
- Mac/Linux terminal
export PERCY_TOKEN=<your token here>
- Powershell
$env: PERCY_TOKEN="<your token here>"
Step 4: Execute Percy Test
Execute Percy Visual Test for Puppeteer and Jest using the below command.
npx percy exec -- jest -c ./jest.config.js
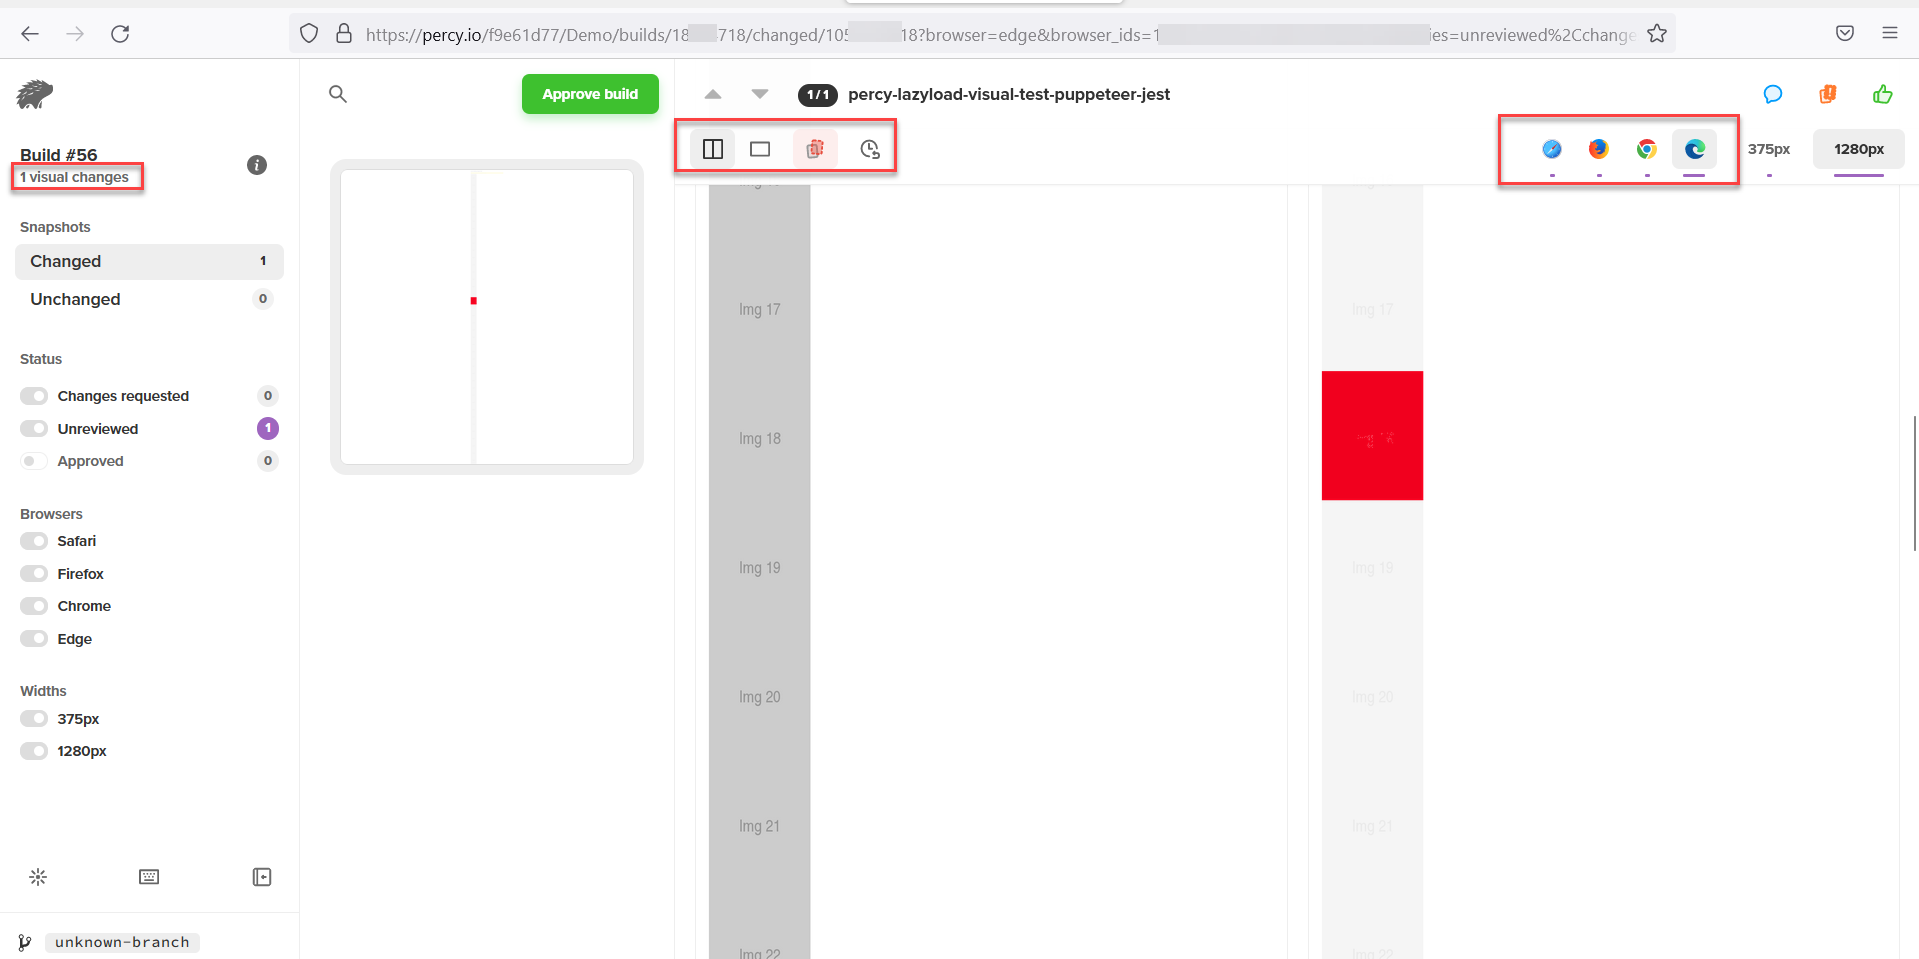
Once the Percy Test is completed, you will see the results in the command line with the Percy build number. Navigate to the URL to get the details.
Once you Navigate to the Build URL, the image diff overlay will be loaded side by side if there is any difference. If there is no difference Percy just shows “No Changes.”
Useful Resources for Lazy Loading
- What is Lazy loading?
- Implementing Lazy Loading in React
- How to Lazy Load Images in Javascript
- How to capture Lazy Loading Images for Visual Regression Testing in Cypress
- How to reduce False Positives in Visual Testing?
Conclusion
Visual Regression is essential for the visual correctness of the application which might get unnoticed while functional testing. Considering the UI aspect of the application, automated Visual Validation Testing saves time and effort, also it doesn’t need any expertise in coding. The modern frameworks that implement lazy loading can have infinite scrolling, in such scenarios, it is very difficult to perform manual visual testing.
You can use tools like BrowserStack Percy to enhance this process and automate visual comparisons by integrating with Puppeteer.


