Maintaining UI consistency across frequent releases is critical to delivering a seamless user experience. Even minor code changes can introduce unexpected layout breaks, styling inconsistencies, or visual regressions that impact how users interact with your application.
Visual regression testing with Puppeteer offers an automated solution to catch these UI issues before they reach production.
By capturing and comparing screenshots across builds, teams can ensure that new deployments preserve the intended look and feel of their web applications while accelerating the testing process.
Overview
Steps for Visual Regression with Puppeteer and jest-image-snapshot
1. Install dependencies:
npm install puppeteer jest jest-image-snapshot --save-dev
2. Set up Jest configuration if needed:
Update package.json:

{

  "scripts": {

    "test": "jest"

  }

}
3. Create a test file, e.g., visual.test.js:
const puppeteer = require('puppeteer');

const { toMatchImageSnapshot } = require('jest-image-snapshot');


expect.extend({ toMatchImageSnapshot });


describe('Visual regression example', () => {

  let browser;

  let page;


  beforeAll(async () => {

    browser = await puppeteer.launch();

    page = await browser.newPage();

  });


  afterAll(async () => {

    await browser.close();

  });


  it('should match full page snapshot', async () => {

    await page.goto('https://example.com');

    const screenshot = await page.screenshot();

    expect(screenshot).toMatchImageSnapshot({

      failureThresholdType: 'pixel',

      failureThreshold: 100, // allows minor differences

    });

  });


  it('should match element snapshot', async () => {

    await page.goto('https://example.com');

    const element = await page.$('h1');

    const screenshot = await element.screenshot();

    expect(screenshot).toMatchImageSnapshot();

  });

});
4. Run tests with Jest:
npm test

On failure, Jest auto-generates a __image_snapshots__ directory with comparison results.
Whether you’re new to visual regression testing or looking to optimize your existing workflow, this guide provides practical insights for implementing reliable UI testing with Puppeteer.
What is Puppeteer and Why Use It for Visual Regression Testing?
Puppeteer is an open-source Node.js library developed by Google that provides a high-level API to control Chrome or Chromium browsers through the DevTools Protocol. It’s primarily used for automating web application testing, generating screenshots, and performing performance or rendering checks.
For visual regression testing, Puppeteer captures baseline screenshots of web pages and compares them against new builds to detect unintended UI changes. It helps developers identify layout shifts, color mismatches, or missing elements early in the release cycle.
Key reasons to use Puppeteer for visual regression testing:
- Headless Browser Automation: Runs Chrome without a UI, enabling fast and efficient screenshot generation.
- Pixel-Perfect Comparisons: Supports visual diffing through integration with libraries like Pixelmatch or Resemble.js.
- CI/CD Integration: Easily integrates with build pipelines for continuous visual validation.
- Customizable Control: Allows advanced configuration for viewport size, device emulation, and network throttling.
Also Read: Best Practices for Visual Testing
Pre-Requisite for Puppeteer Visual Regression Testing
You need to Set up Basic Puppeteer Framework to perform Visual Regression Tests with Puppeteer.
There are several ways of performing Visual Regression in Puppeteer. This article highlights the following two methods:
- Puppeteer Visual Validation Test using jest-image-snapshot
- Puppeteer Visual Testing using Percy
Puppeteer Visual Validation Test using jest-image-snapshot
The jest-image-snapshot is a node package it provides integration with Jest and Puppeteer with minimal settings.
Follow the below steps to Perform Visual Testing using Puppeteer and Jest:
Step 1: Install jest-image-snapshot package using the command
npm i --save-dev jest-image-snapshot
Step 2: Add the visual regression test
Let’s take the snapshot after navigating to https://www.browserstack.com home page and compare them using the code below.
//visual.test.js

const { toMatchImageSnapshot } = require('jest-image-snapshot');

expect.extend({ toMatchImageSnapshot });

describe('Visual Testing', () => {

    jest.setTimeout(50000);

    beforeAll(async () => {

           await page.goto('https://www.browserstack.com')

    })


    it('Visual Regression Test', async () => {

        const image = await page.screenshot();


        expect(image).toMatchImageSnapshot({

            failureThreshold: '0.10',

            failureThresholdType: 'percent'

        });

    })

})
In the above code
const { toMatchImageSnapshot } = require('jest-image-snapshot');Importing the toMatchImageSnapshot constant, which helps to match the images.
expect.extend({ toMatchImageSnapshot });By default Jest’s expect doesn’t have an image comparison technique, so you need to extend the functionality with expect.extend();
const image = await page.screenshot();
The screenshot will be taken and saved in the variable image
expect(image).toMatchImageSnapshot({
            failureThreshold: '0.10',
            failureThresholdType: 'percent'
        });
The above code compares the screenshot. failureThreshold makes image comparison more flexible by adding image difference tolerance.
Step 3: Execute your Puppeteer Visual Tests using Jest by entering the below command
npx jest -c ./jest.config.js
Alternatively, if you have configured the tests command in package.json you can simply execute it using the below command.
npm run test
The first time when you execute the test, the Puppeteer captures the base screenshot. In subsequent runs, it compares the screenshot with the base screenshot.
After the first execution, the __image_snapshots__folder will be created, and it saves the base snapshot file inside the folder.
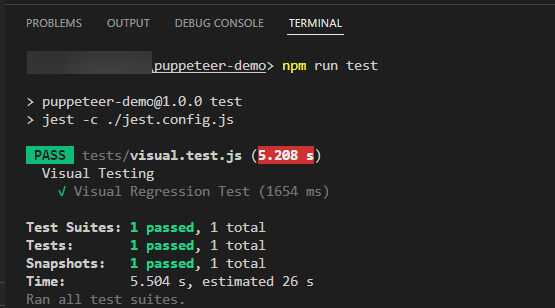
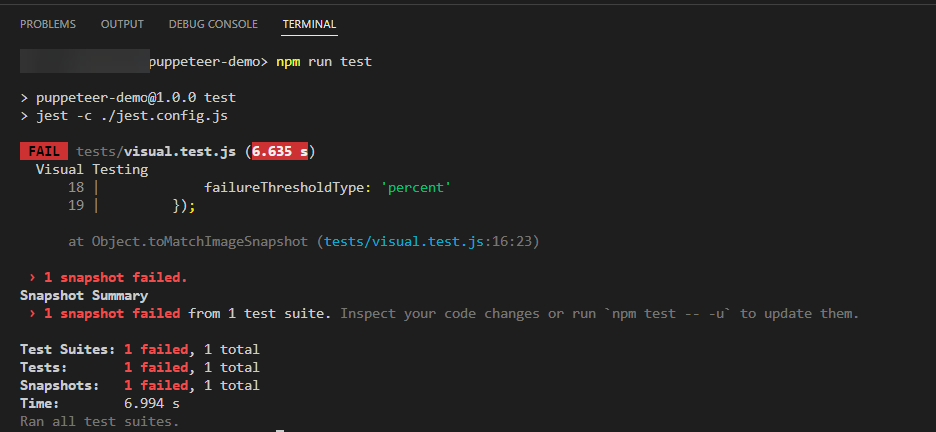
The pass/fail test results will be shown on the command line, as seen below.
If there is a difference in base and actual screenshots, then the test will be marked as a fail.
If you navigate to diff-output folder, the image will be shown in side by side comparison.
Must Read: Snapshot Testing with Jest
Puppeteer Visual Testing for DOM Element
Following the above method, you will be able to perform visual testing for the complete page. However, there might be certain scenarios in which you need to perform visual validation for Single DOM elements such as Button, Checkbox, Menu, etc. Puppeteer supports Visual Test for Single DOM Element. You just need to change the code to run Visual Tests for DOM Element.
Instead of taking the screenshot at the page level, you can take the screenshot at the element level, like below.
 const element = await page.$('#signupModalButton');

 const image = await element.screenshot();
In the above code, the element is captured first, and then the screenshot is taken.
The complete code of Puppeteer Visual Testing for DOM Element, looks like the snippet below.
//visual.test.js

const { toMatchImageSnapshot } = require('jest-image-snapshot');

expect.extend({ toMatchImageSnapshot });

describe('Visual Testing', () => {

    jest.setTimeout(50000);

    beforeAll(async () => {

        expect.extend(toMatchImageSnapshot);

        await page.goto('https://www.browserstack.com')

    })


    it('Visual Regression Test', async () => {

        const element = await page.$('#signupModalButton');

        const image = await element.screenshot();


        expect(image).toMatchImageSnapshot({

            failureThreshold: '0.10',

            failureThresholdType: 'percent'

        });

    })

})
The execution step remains the same as that used in the previous section.
Learn More: How to perform Visual Testing for React Apps
Puppeteer Visual Testing Using Percy
Percy by BrowserStack is an AI-powered visual testing platform that elevates Puppeteer testing with intelligent automation and collaborative review workflows. It seamlessly integrates with Puppeteer to provide a cloud-based dashboard for visual comparison, making it easier to review, approve, and share test results across teams.
Why Use Percy with Puppeteer?
- AI-Powered Accuracy: Percy’s Visual AI Engine automatically ignores visual noise from dynamic banners, animations, and anti-aliasing, focusing only on meaningful changes that affect user experience. This significantly reduces false positives and accelerates review workflows by up to 3x.
- Comprehensive Build History: Every Percy test execution triggers a build with side-by-side visual diffs, maintaining historical results for easy tracking and comparison across deployments.
- Seamless Collaboration: Share visual test reports directly through Slack or CI pipelines, enabling team-wide visibility and faster root cause analysis. Percy’s Visual Review Agent highlights impactful changes with bounding boxes and human-readable summaries.
- CI/CD Integration: Integrates into CI/CD pipelines with a single line of code, automatically capturing screenshots on every commit and instantly flagging visual regressions like broken layouts or style shifts.
- Cross-Browser Testing: Monitor visual consistency across 3500+ browsers and devices, with flexible scheduling options and the ability to compare staging, production, or any environment.
Percy supports all major frameworks and CI tools, offering quick onboarding with dedicated SDKs. Get started with a free plan (5,000 screenshots/month) or explore paid plans starting at $199/month.
Integrating Percy for Puppeteer Jest
Step 1: Install @percy/puppeteer and @percy/cli using npm:
npm install --save-dev @percy/cli @percy/puppeteer
Step 2: Write Puppeteer Tests using Percy
In the Puppeteer test, the percySnapshot needs to be imported in order to take screenshots using the below command
const percySnapshot = require('@percy/puppeteer')

Once you import the percySnapshot, you can perform a set of actions and then take a screenshot at the required step.

For example, navigating to browserstack.com homepage first, then taking a screenshot and comparing for visual testing, the scenario can be written as:

//visual-percy.test.js

const percySnapshot = require('@percy/puppeteer')

describe('Visual Testing', () => {

    jest.setTimeout(50000);

    beforeAll(async () => {

        await page.goto('https://www.browserstack.com')

    })

    it('Visual Regression Test', async () => {

        await percySnapshot(page, "percy-visual-test-puppeteer-jest")

    })

})
Step 3: Create Percy Project using the below steps
- Login to Percy
- Create a new Project
Step 4: Set the PERCY_TOKEN environment variable
Once a new Project is created, Navigate to Settings and Copy the Percy Token.
To run the Percy test, you need to set the environment variable. The setting up environment variable depends on the operating system and command-line tool you are using. Here’s how you can set PERCY_TOKEN for different CLIs, such as:
- Windows Command Line
set PERCY_TOKEN=<your token here>
- Mac/Linux Terminal
export PERCY_TOKEN=<your token here>
- Powershell Terminal
$env: PERCY_TOKEN="<your token here>"
Once the environment variable is set up, you are ready to execute your test.
Step 5: Execute your test using the command.
Execute Percy Visual Test for Puppeteer and Jest using the below command
npx percy exec -- jest -c ./jest.config.js
Wait until the execution finishes. Once execution is complete, you will see the build URL in the command line.
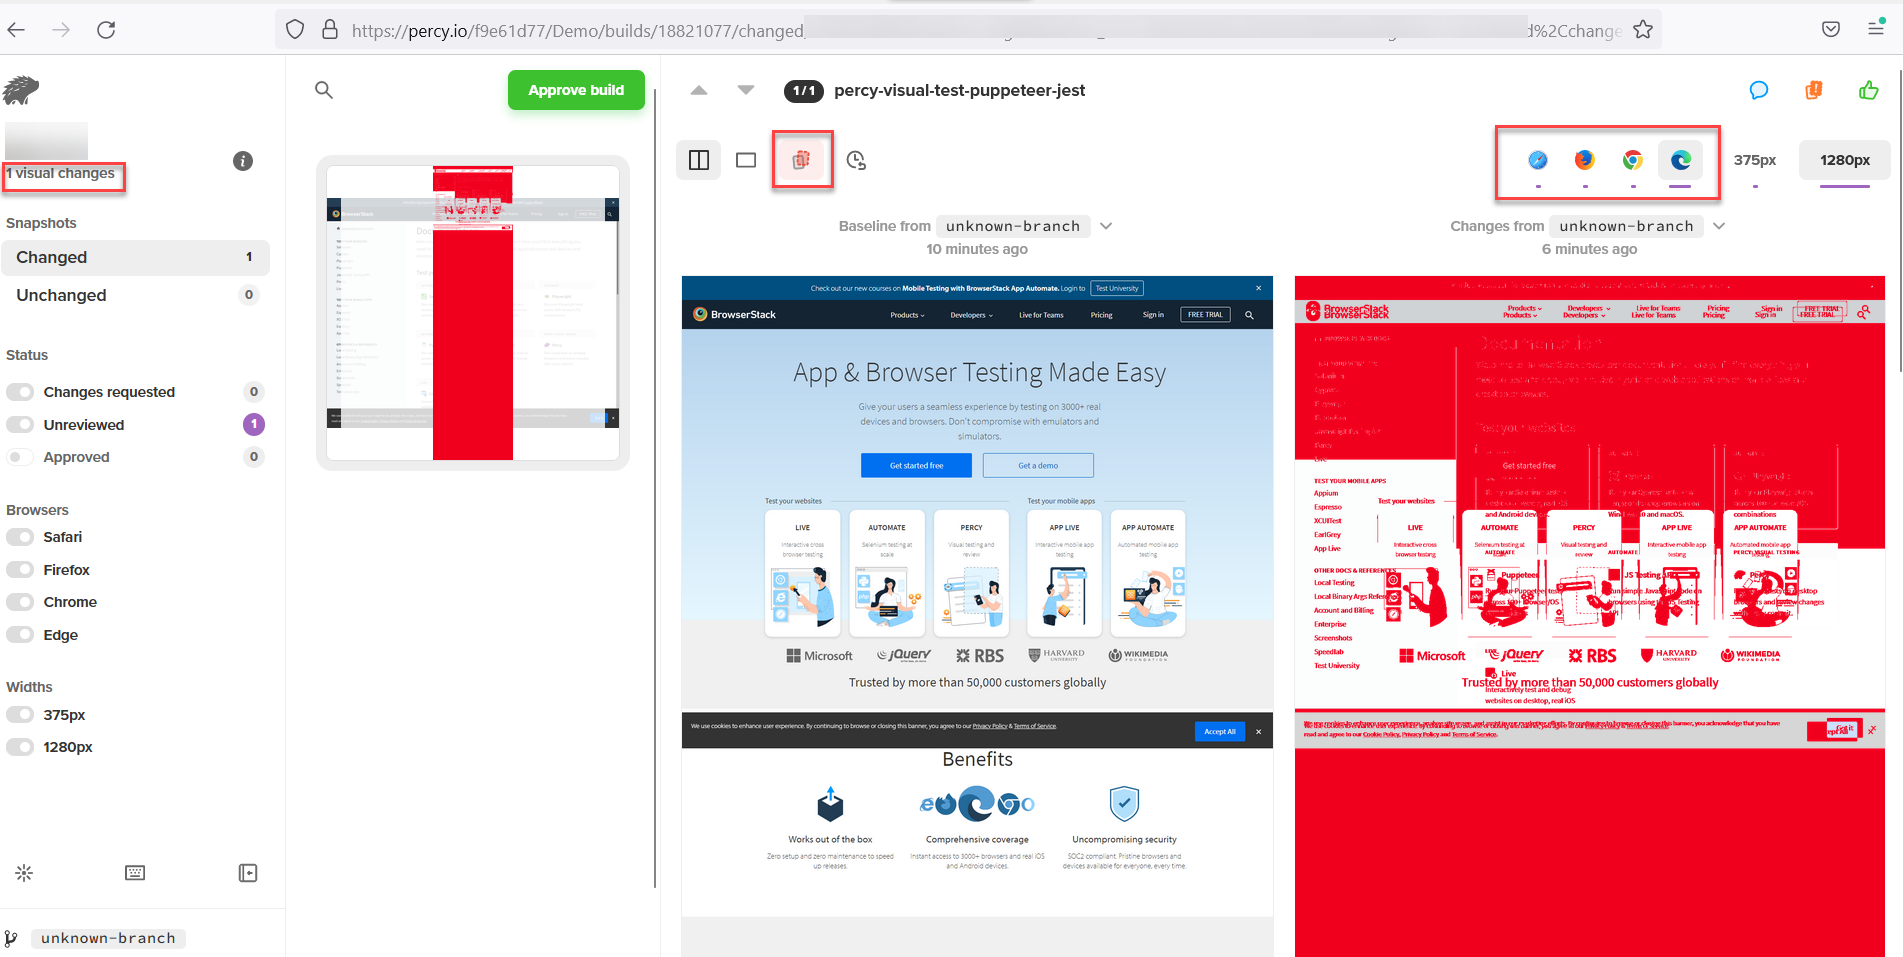
Navigate to the build URL, and you will be landed in Percy Build Dashboard. If there is any difference in the images, the Percy dashboard shows the diff in side by side, as seen below.
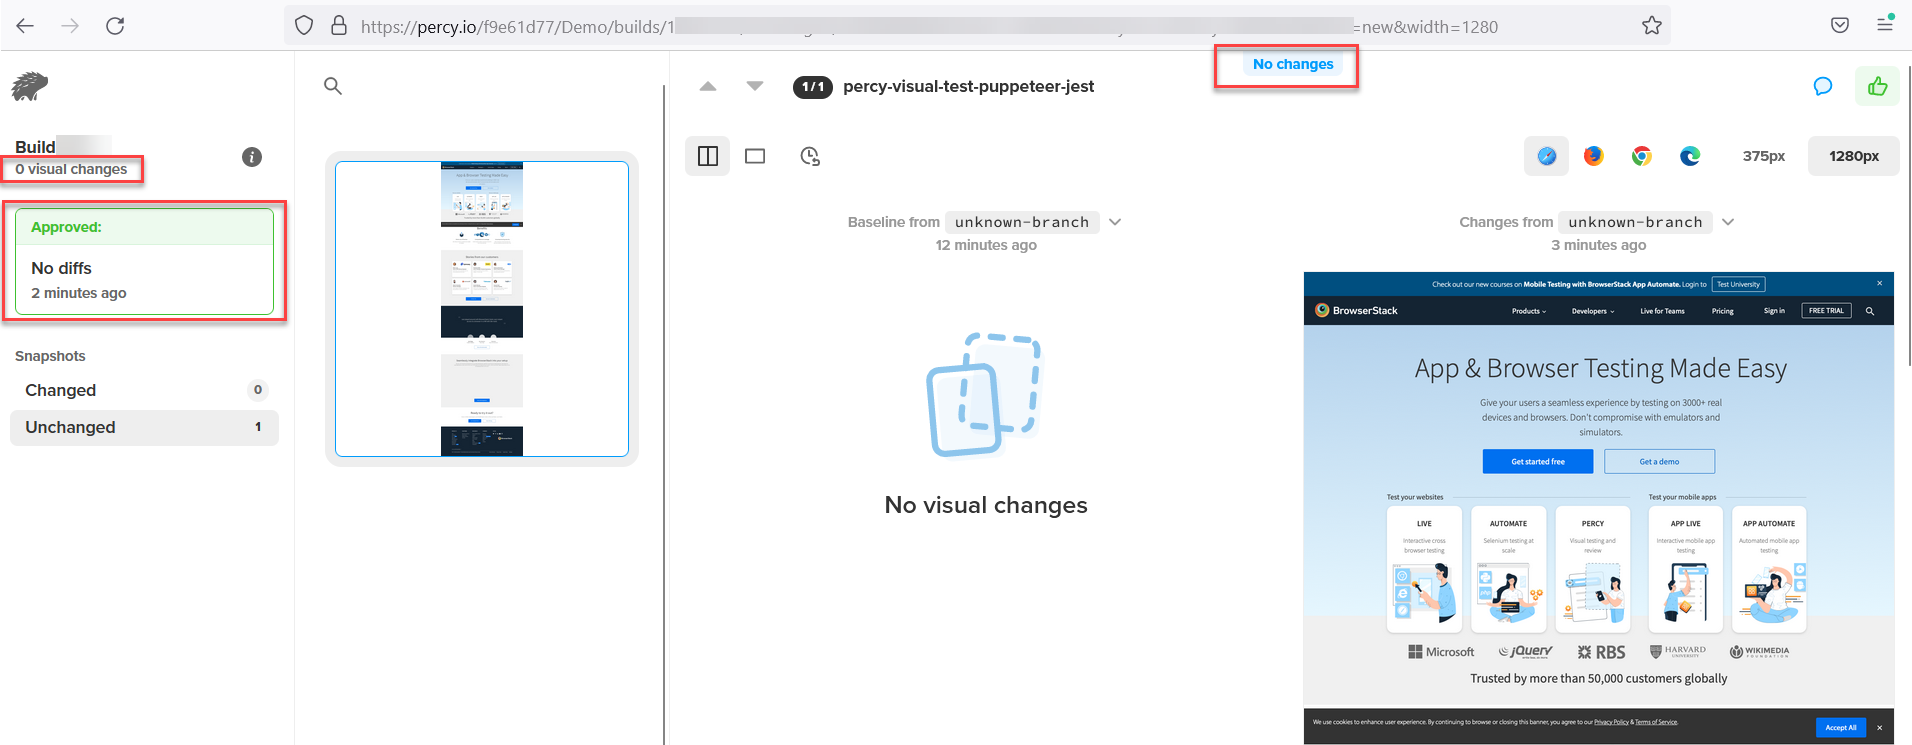
If there is no difference, then Percy’s dashboard shows the image with No Changes, as seen in the following screenshot.
Conclusion
Puppeteer was originally designed to perform functional tests. However, it can also be used for Visual Validation. Remember, visual testing is recommended only for validation of web application’s user interface changes. The functionality and dynamic data cannot be verified using Visual Regression Tests.
Visual regression test makes UI testing easy and quick. It helps deliver consistent visuals and hence a seamless user experience. It is usually recommended for projects with frequent releases, and visual testing can be a barrier in Continuous Deployment.
Useful Resources for Puppeteer
Understanding Puppeteer:
- Puppeteer Framework Tutorial: Basics and Setup
- How to start with Puppeteer Debugging
- How to install and setup Puppeteer with npm (NodeJS)
- Puppeteer Type Command: How to type a text in input box in Puppeteer
- Cross Browser Testing in Puppeteer: Tutorial
- Understanding Puppeteer Headless
- How to run UI Automation Testing using Puppeteer
- How to capture Lazy Loading Images for Visual Regression Testing in Puppeteer
- How to use Proxy in Puppeteer?
- How to run Tests in Puppeteer with Firefox
- How to Perform Visual Regression Puppeteer
- Handling Alerts and Popups in Puppeteer
- Pyppeteer Tutorial: Guide to Puppeteer in Python (with Examples)
Tools Comparisons:


