Visual aesthetics are key to engaging customers. A well-designed, visually consistent website is more likely to captivate and delight users. This makes Visual Regression Testing essential with every release to ensure that new updates do not disrupt the visual integrity of your site, maintaining both functionality and appeal.
Overview
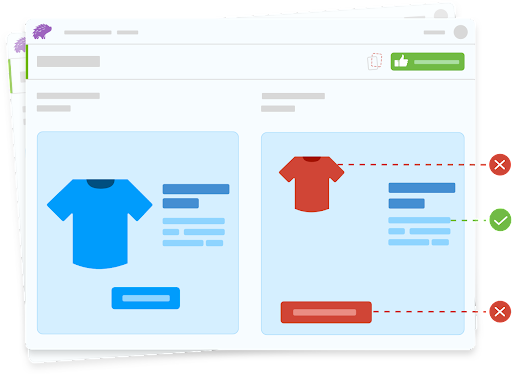
A visual diff algorithm detects differences between two images, ensuring UI consistency in visual testing. It compares a baseline (expected) and a new (actual) image at the pixel level, highlighting changes in color, position, and layout.
Advanced methods use tolerance thresholds and AI-driven analysis to minimize false positives from rendering inconsistencies.
Top Tools for Visual Testing with Visual Diff Algorithms
- BrowserStack Percy: Automated visual testing with CI/CD integration.
- Chromatic: Visual regression testing for Storybook components.
- VisualTest: Cloud-based UI testing with pixel-by-pixel comparisons.
- Reg-viz: Open-source tool for detecting visual changes in web apps.
- Wraith: A screenshot comparison tool for automated UI testing.
- Needle: A Python-based visual testing tool for validating web layouts.
This article explores Visual Diff Algorithms, how they work, the need for automated visual testing, and why automation outperforms manual testing. It also covers how to perform visual testing with Percy.
What is Visual Diff Algorithm?
A Visual Diff Algorithm compares two images, typically a baseline (expected) image and a new (current) image, during visual testing. It identifies unintended UI changes, layout shifts, or regressions in software applications.
Unlike traditional text-based testing, which verifies code functionality, Visual Diff Algorithms analyze pixel-level differences to ensure UI consistency across browsers, devices, and screen resolutions. These algorithms streamline automated visual testing and reduce the need for manual comparisons.
The Visual Diff Algorithm is the logic behind visual regression testing. It allows the system to compare a baseline and an actual image pixel-by-pixel. This algorithm can be implemented in various programming languages, including Java, C#, and JavaScript.
Read More: Strategies to Optimize Visual Testing
How does the Visual Diff Algorithm work?
Just as how Functional Testing compares the actual result of the test case with the expected result and marks the test as Pass or Fail based on the difference, Visual Diff compares the visuals in a similar way using Test Automation.
Steps to perform Visual Comparison
- First Run captures the baseline screenshot of the webpage and stores it as the reference image.
- The second run (subsequent) captures the screenshot (actual image) and compares it with the baseline image.
- The output will be produced based on the visual comparison algorithm in a diff image format.
- Before producing the output image, the tool considers whether there is any sensitivity factor or any other values that the user has specified.
Note: Sensitivity is also called threshold. The sensitivity factor or value defines how strictly comparison should take place. The higher the value, the lower the sensitivity and the comparison will ease out.
Why do you need Automated Visual Testing for Software?
Since Functional testing doesn’t guarantee that the UI elements rendered on the browser are correct and as expected. For example, the developer might have written the code where one button might partially overlap with the other, the functional test would still pass, but they are visually incorrect.
To catch all user interface-related bugs, you need Visual Testing.
Some of the common Visual Defects as below
- Issues with Font
- Issues with layout (such as padding, spacing margin, etc.)
- Issues while rendering (Based on the browser, the rendering may be different)
- Issues with Elements overlap
- Issues with Responsive screen
Why is Automation more efficient than Manual Visual Testing?
Manual visual testing typically involves a set of test cases and a design document or pre-captured screen, where the QA compares the webpage with a pre-captured screenshot by running a specific page on the website. The major problem with manual testing is since it is done by a human, giving attention to each and every pixel is impossible. The tester compares the screen based on their expertise and knowledge.
The output of the manual visual testing depends on the tester’s attention to detail capability. This makes manual Visual Testing complicated and provides less accuracy. Moreover, it will take a lot of time to test manually, causing a delay in the release.
Automated visual testing is always better in comparison with manual, as the screenshot capture and comparison are done by an automated tool. The automated visual testing tool compares the captured screenshot pixel-by-pixel so the output will be highly accurate and reliable. The produced output contains the difference in highlighted color, so it is easy to analyze and understand.
| Aspect | Automated Visual Testing | Manual Visual Testing |
|---|---|---|
| Speed | Fast, executes tests in seconds or minutes. | Slow, requires human effort to inspect each UI element. |
| Accuracy | High precision with pixel-by-pixel comparison. | Prone to human error and inconsistencies. |
| Scalability | Easily scales across multiple devices, browsers, and resolutions. | Limited scalability, requires more testers for larger coverage. |
| Efficiency | Runs test continuously in CI/CD pipelines. | Time-consuming and labor-intensive. |
| Regression Testing | Quickly detects unintended UI changes. | Difficult to catch minor UI regressions manually. |
| Cost | Higher initial setup cost but reduces long-term expenses. | Lower initial cost but expensive in the long run due to manual effort. |
| Consistency | Provides consistent results with no variations. | Results may vary depending on the tester’s perception. |
| Reporting & Tracking | Generates detailed reports with visual comparisons. | Relies on manual documentation, which may be inconsistent. |
| Best for | Large-scale projects with frequent UI updates. | Small-scale projects with minimal UI changes. |
How to perform Visual Testing with the Visual Diff Algorithm using Percy?
Percy is an Automated Visual Testing platform that uses the Visual Diff Algorithm to perform Visual Regression Testing. It can easily be integrated with most of the popular frameworks, such as Cypress, Selenium, TestCafe, Storybook, Playwright, Puppeteer, WebDriverIO, and NightwatchJS.
Based on the automation framework of your choice, you can download the package or module and make the pre-requisite configurations to run the visual test on Percy.
Using Cypress framework to demonstrate how Percy performs Visual Testing using Visual Diff Algorithm.
Step 1: Install Percy using the following command
npm install --save-dev @percy/cli @percy/cypress
Step 2: To import Percy to Cypress, navigate to cypress/support/index.js File and enter the following command:
import '@percy/cypress'
Step 3: Write your first Percy Visual Test Script as shown below. The following code uses Visual Diff Algorithm to compare the baseline image with the actual screenshot and deliver test results upon execution.
//visual-test.js
describe('Cypress Visual Testing', () => {
it('Visual Test', () => {
cy.visit("https://browserstack.com/");
cy.percySnapshot('Home-Page');
})
})
Step 4: Run Percy Test using the below command:
npx percy exec -- cypress run
Step 5: Review the Test Result
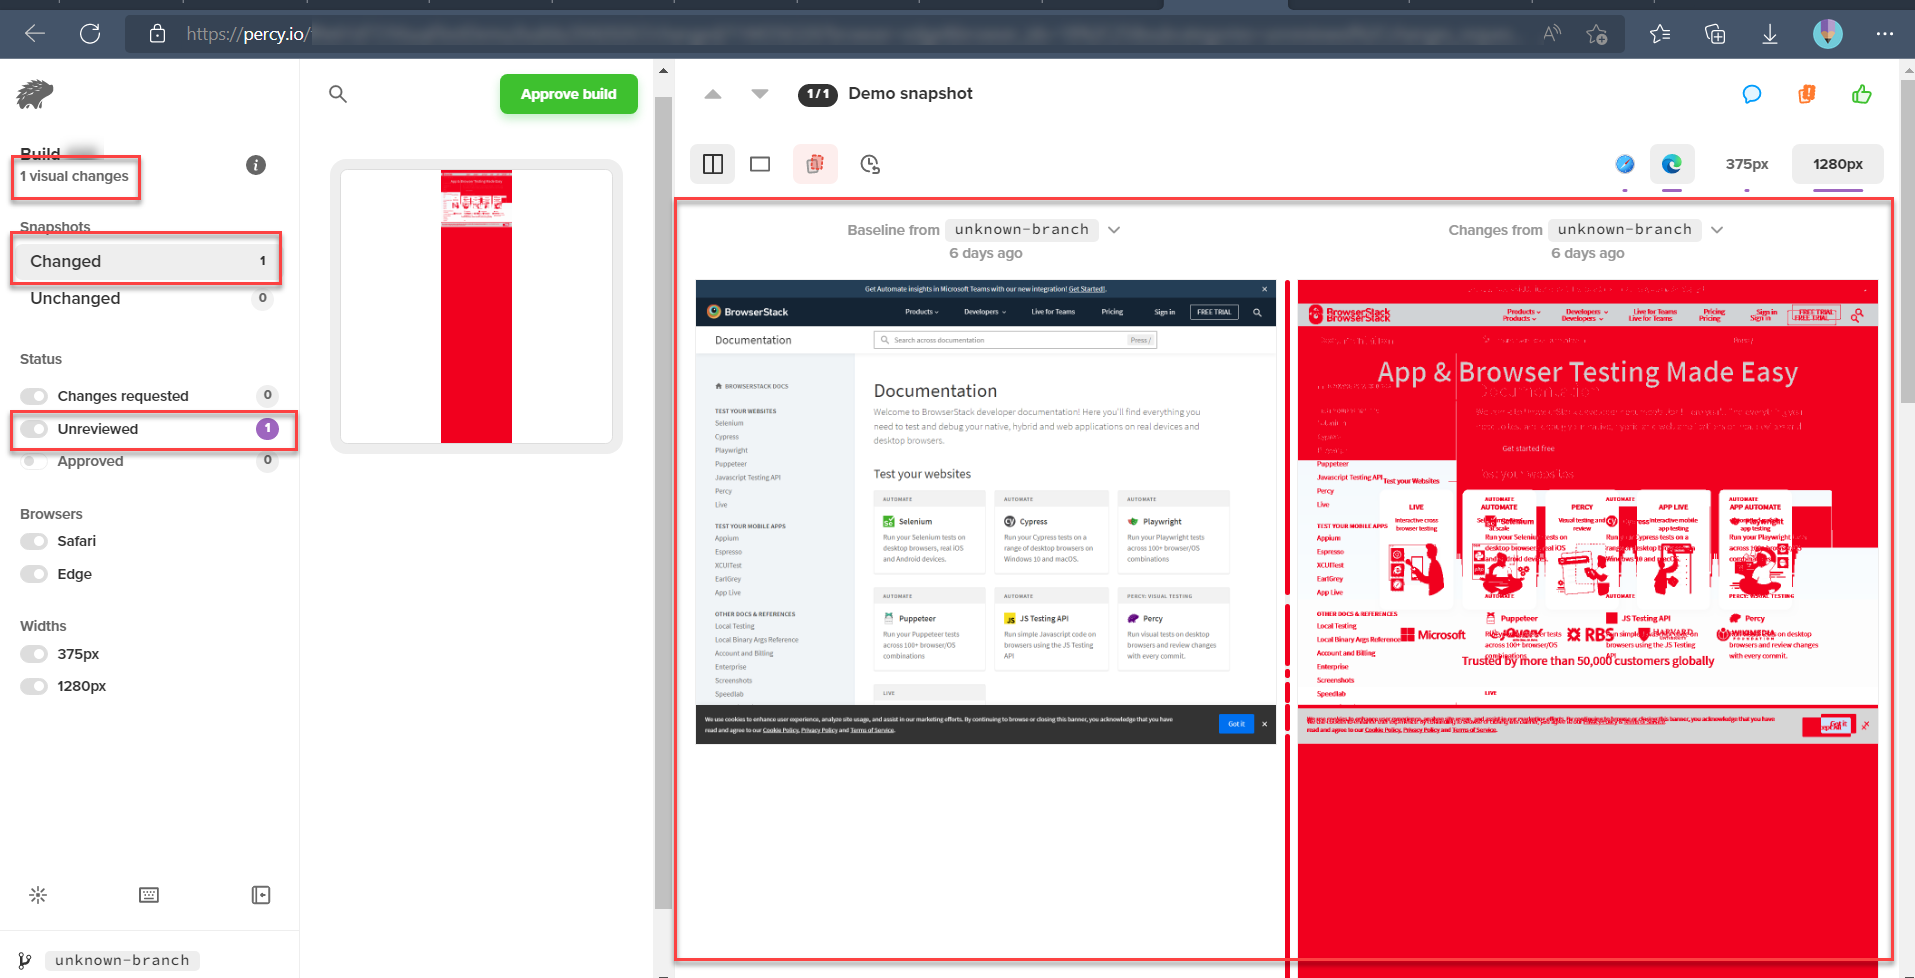
The results will be displayed with a detailed dashboard, where Percy provides a detailed Visual Comparison using the Visual Diff Algorithm and clearly highlights the difference if there are any.
Conclusion
Visual Diff Algorithm makes life easier by automating the visual regression tests to ensure that the website UI appears flawless and consistent to the user after every release. Percy is a Visual Testing Platform that uses a Visual Diff Algorithm to make pixel-by-pixel comparisons and highlight any visual changes in the website within a few minutes. Moreover, Percy is now able to carry out visual regression tests on mobile browsers as well, Safari for iOS and Google Chrome for Android.


