What are TestNG Parameters?
By Mohammed Waseem, Community Contributor - September 3, 2024
TestNG parameter is a powerful feature that allows you to pass values directly into your test methods, making your tests more flexible and data-driven. This guide explores TestNG parameters and how to effectively use them to enhance your test automation and run tests with varying inputs.
- What are TestNG Parameters
- When to use TestNG Parameters
- Prerequisites to Set up TestNG
- How to set TestNG Parameters?
- What is Parameter Annotation?
- How to run TestNG Parameters?
- How to run TestNG Parameters at a Suite Level?
- What is Data Provider Annotation?
- Data-Driven Testing vs Parameterization in TestNG
- How to Automate TestNG with Selenium?
What are TestNG Parameters
TestNG parameters are a feature that allows you to pass dynamic data inputs to your test methods, making it possible to run the same test with different values. This is particularly useful when testing functionality with various data sets without duplicating your test code.
Read More: How to Automate TestNg with Selenium
When to use TestNG Parameters
Understanding when to use TestNG parameters is crucial for optimizing your test automation strategy and enhancing the flexibility and maintainability of your test cases. Here are some cases where you can use these parameters:
- Data-Driven Testing: This method is used when you need to evaluate the same functionality with varying inputs, such as testing a login function with multiple usernames and passwords.
- Configuration Management: When you want to separate the test configuration from the test logic, you can change input values without modifying the test code.
- Reusable Test Cases: When you want to write a single test method that can handle multiple scenarios by receiving different parameters, to improve code reusability and maintenance.
Read More: JUnit vs TestNG: Which to choose?
Prerequisites to Set up TestNG
To set up TestNG, there are several prerequisites that must be fulfilled before you can utilize testNG for your test cases.
- Make sure you have Eclipse or any similar IDE set up on your machine
- Java development kit must be installed on your machine
After you have fulfilled the essential prerequisites, you can follow the steps to configure TestNG on your machine.
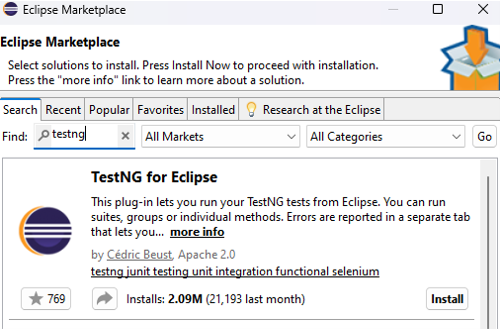
1. Navigate to the marketplace in Eclipse, search for TestNG, and install it.
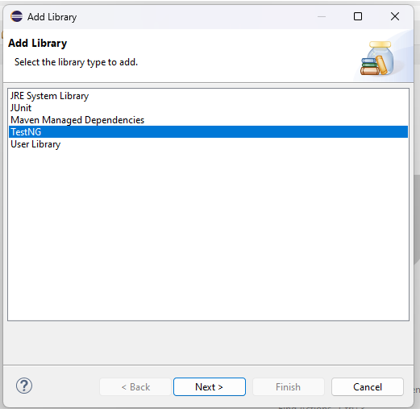
2. Once the dependencies are installed, you must check by adding the testNG library to the project.
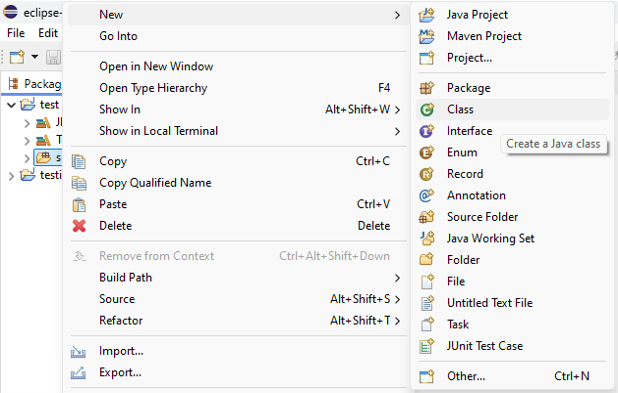
3. Create a new class to write a new TestNG class.
4. Write a testNG class to test methods.
{java}

import org.testng.Assert;

import org.testng.annotations.Test;


public class Sample {


    @Test

    public void testAddition() {

        int a = 5;

        int b = 3;

        int sum = a * b;

        Assert.assertEquals(sum, 15, "5 + 3 should be 8");

    }


    @Test

    public void testSubtraction() {

        int a = 5;

        int b = 3;

        int difference = a - b;

        Assert.assertEquals(difference, 2, "5 - 3 should be 2");

    }

}

{/java}
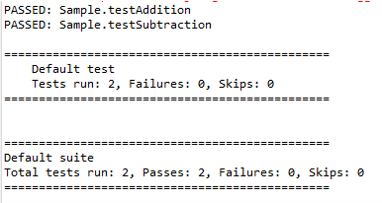
5. Run your testNG class.
Now that you know how to set up and run TestNG for the test cases, examine how to work with the testing parameters.
Read More: TestNg annotations in Selenium WebDriver
How to set TestNG Parameters?
TestNG parameters are essential tools in the TestNG framework that allow you to pass values to test methods at runtime, enhancing flexibility and reusability in automated testing. By defining parameters in the testng.xml file or using the @Parameters annotation, you can easily manage test data and configurations without hardcoding values. This approach not only simplifies code maintenance but also enables testing with various input sets, promoting comprehensive test coverage.
In TestNG, there are several ways to set parameters, each offering flexibility and convenience depending on your testing requirements:
- testng.xml File: Parameters can be defined directly in the testng.xml file. This method involves specifying parameter names and values within the XML file and accessing them in test methods using the @Parameters annotation.
- @Parameters Annotation: Using the @Parameters annotation, you can pass parameters directly to test methods. This approach is often used with the testng.xml file to inject values into your tests.
- @DataProvider Annotation: The @DataProvider annotation allows you to create methods that supply data to test methods. This method returns an array of objects, enabling you to run the same test with multiple data sets.
Take a look at these techniques in detail and understand how you can use them to set testing parameters.
Read More: How to run parallel test cases in TestNG?
What is Parameter Annotation?
Parameter annotations in TestNG pass values to test methods at runtime, providing flexibility and enhancing the reusability of your test scripts. The primary annotations for parameterization in TestNG are @Parameters and @DataProvider. These annotations allow you to inject data into your test methods from various sources, such as the testng.xml file, external data providers, or Java system properties.
Read More: Prioritizing tests in TestNG with Selenium?
How to run TestNG Parameters?
To run TestNG parameters, you typically use the @Parameters annotation with the testng.xml file. Here’s a step-by-step guide:
1. Define Parameters in testng.xml:
2. Use the @Parameters Annotation in Your Test Class:
{java}

import org.testng.annotations.Optional;

import org.testng.annotations.Parameters;

import org.testng.annotations.Test;


public class TestClass {


    @Test

    @Parameters({"username", "password"})

    public void testLogin(@Optional("defaultUser") String username, @Optional("defaultPass") String password) {

        System.out.println("Username: " + username);

        System.out.println("Password: " + password);

    }

}

{/java}
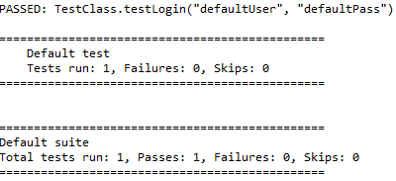
3. Run the Test:
TestNG will inject the parameter values defined in the testng.xml file into the testLogin method.
How to run TestNG Parameters at a Suite Level?
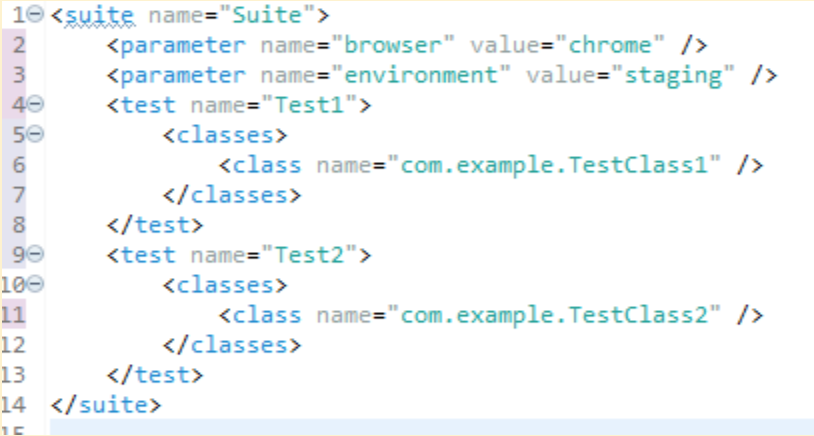
Running TestNG parameters at the suite level involves defining them in the testng.xml file, allowing all tests within the suite to access these parameters. This approach is useful when passing common parameters to multiple test classes.
1. Define Suite-Level Parameters in testng.xml:
2. Use the @Parameters Annotation in Your Test Classes:
{Java}

import org.testng.annotations.Optional;

import org.testng.annotations.Parameters;

import org.testng.annotations.Test;


public class TestClass1 {


    @Test

    @Parameters({"browser", "environment"})

    public void testMethod1(@Optional("defaultBrowser") String browser, @Optional("defaultEnvironment") String environment) {

        System.out.println("Browser: " + browser);

        System.out.println("Environment: " + environment);

    }

}

{java}
{java}

import org.testng.annotations.Optional;

import org.testng.annotations.Parameters;

import org.testng.annotations.Test;


public class TestClass2 {


    @Test

    @Parameters({"browser", "environment"})

    public void testMethod2(@Optional("defaultBrowser") String browser, @Optional("defaultEnvironment") String environment) {

        System.out.println("Browser: " + browser);

        System.out.println("Environment: " + environment);

    }

}

{/java}
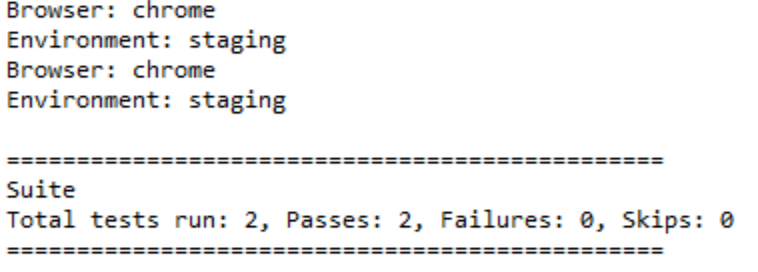
3. Run the Suite:
To run the suite, select the testng.xml file and execute it as a testNG suite.
TestNG will inject the suite-level parameter values into the respective test methods in both TestClass1 and TestClass2.
What is Data Provider Annotation?
In TestNG, the @DataProvider annotation is a powerful feature that enables you to run a test method multiple times with different data sets. This annotation enables you to supply complex parameter values to test methods from various sources, such as arrays or collections, promoting thorough and diverse test coverage.
By leveraging @DataProvider, you can efficiently handle data-driven testing scenarios, ensuring your test cases are versatile and robust.
Features of DataProvider Annotation
Discover how the DataProvider annotation in TestNG enables efficient data-driven testing with its key features.
- Multiple Data Sets: Allows running the same test method with multiple sets of data, enhancing test coverage.
- Custom Data Providers: You can define custom data provider methods to generate dynamic data sets.
- Parameterization: Facilitates passing complex data structures, such as objects and collections, to test methods.
- Integration with Other Annotations: Can be used in conjunction with other TestNG annotations like @Test and @Parameters.
- Decoupling Data from Tests: Separates test data from test logic, making tests cleaner and easier to maintain.
Read More: TestNG listeners in Selenium
How to run DataProvider Annotation?
To run a test method with the @DataProvider annotation, follow these steps:
1. Define a DataProvider Method:
{java}

package com.example;

import org.testng.annotations.DataProvider;


public class DataProviderClass {


    @DataProvider(name = "loginData")

    public Object[][] createLoginData() {

        return new Object[][] {

            { "user1", "pass1" },

            { "user2", "pass2" },

            { "user3", "pass3" }

        };

    }

}

{java}
2. Use the DataProvider in a Test Method:
{java}

package com.example;

import org.testng.annotations.Test;


public class TestClass {


    @Test(dataProvider = "loginData", dataProviderClass = DataProviderClass.class)

    public void testLogin(String username, String password) {

        System.out.println("Username: " + username);

        System.out.println("Password: " + password);

        // Add your test logic here

    }

}

{/java}
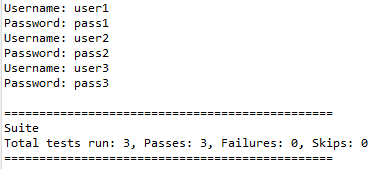
3. Run the Test:
TestNG will invoke the testLogin method multiple times, each with a different set of data from the DataProvider.
Data-Driven Testing vs Parameterization in TestNG
Data-driven testing in TestNG involves running tests with multiple sets of data provided by @DataProvider, while Parameterization uses @Parameters to pass specific values to test methods for more controlled test execution. Explore various segments of both data-driven testing and parameterization in TestNG.
| Aspect | Data-Driven Testing | Parameterization |
|---|---|---|
| Definition | A method of testing where test data is driven from external sources such as databases, CSV files, or Excel sheets, using the @DataProvider annotation. | Passing parameters directly to test methods at runtime, typically through the testng.xml file or the @Parameters annotation. |
| Annotation Used | @DataProvider | @Parameters |
| Purpose | To run a test method several times with different sets of data, enhancing test coverage and validation. | To pass specific values to test methods to avoid hardcoding, enabling flexible and dynamic test execution. |
| Data Source | Can use complex data sources, including arrays, collections, external files, or databases. | Values are typically defined in the testng.xml file or provided at runtime. |
| Test Execution | Executes the test method multiple times with different data sets supplied by the @DataProvider method. | Executes the test method once per set of parameters defined in the testng.xml file or passed via system properties. |
| Flexibility | Highly flexible, supports complex data structures and multiple data sets for thorough testing. | Moderate flexibility, suitable for simpler scenarios with predefined parameters. |
| Complexity | Can be more complex to set up, especially when dealing with external data sources. | Simpler to set up and use, mainly involves defining parameters in XML or annotations. |
| Use Case | Best suited for scenarios requiring validation against multiple data inputs, like login functionality with various user credentials. | Ideal for scenarios where specific configuration values or environmental settings need to be passed to tests, such as browser types or environment URLs. |
| Data Separation | Keeps test data separate from test logic, promoting clean code and easy maintenance. | Integrates parameter values directly within the test configuration, which can sometimes be less flexible. |
| Example | Using @DataProvider to supply multiple username and password combinations for a login test. | Using @Parameters to pass a browser type or environment URL to a test method from the testng.xml file. |
How to Automate TestNG with Selenium?
Follow the below steps to automate TestNG with Selenium:
1. Set Up Your Project
Create your maven project and add your dependencies.
https://maven.apache.org/xsd/maven-4.0.0.xsd (xsi:schemaLocation)

10 <project xmlns="http://maven.apache.org/POM/4.0.0" xmlns:xsi="http://www.

<modelVersion>4.0.0</modelVersion>

<groupId>xyz</groupId>

<artifactId>xyz</artifactId>

<version>0.0.1-SNAPSHOT</version>


<dependencies>

<dependency>

<name>testxyz</name>


<groupId>org.seleniumhq.selenium</groupId>

<artifactId>selenium-java</artifactId>

<version>4.0.0</version>


</dependency>


<dependency>


<groupId>org.testng</groupId>

<artifactId>testng</artifactId>

<version>7.4.0</version>


<scope>test</scope>


</dependency>


<dependency>


<artifactId>slf4j-api</artifactId>


<groupId>org.slf4j</groupId>

<version>2.0.0</version>

</dependency>

<dependency>


<groupId>ch.qos.logback</groupId>

<artifactId>logback-classic</artifactId>

<version>1.4.0</version>

</dependency>

</dependencies>


 </project>
2. Write a Selenium Test Script
Create a new Java class in the src/test/java directory.
{java}

package com.example.tests;


import org.openqa.selenium.WebDriver;

import org.openqa.selenium.chrome.ChromeDriver;

import org.openqa.selenium.chrome.ChromeOptions;

import org.testng.Assert;

import org.testng.annotations.AfterClass;

import org.testng.annotations.BeforeClass;

import org.testng.annotations.Test;


public class GoogleTest {

    WebDriver driver;


    @BeforeClass

    public void setUp() {

        System.setProperty("webdriver.chrome.driver", "C:/Users/DELL/Videos/chromedriver.exe");

        ChromeOptions options = new ChromeOptions();

        options.addArguments("user-agent=Mozilla/5.0 (Windows NT 10.0; Win64; x64) AppleWebKit/537.36 (KHTML, like Gecko) Chrome/91.0.4472.124 Safari/537.36");

        options.addArguments("--remote-allow-origins=*");

        driver = new ChromeDriver(options);

    }


    @Test

    public void testGoogleTitle() {

        driver.get("https://www.google.com/");

        String title = driver.getTitle();

        Assert.assertEquals(title, "Google");

    }


    @AfterClass

    public void tearDown() {

        if (driver != null) {

            driver.quit();

        }

    }

}

{/java}
3. Create a TestNG XML Configuration File
<!DOCTYPE suite SYSTEM "https://testng.org/testng-1.0.dtd">

<suite name="Suite">


<test name="Test">

<classes>

<class name="com.example.tests. GoogleTest"/>

</classes>

</test>

</suite>
4. Run Your Tests
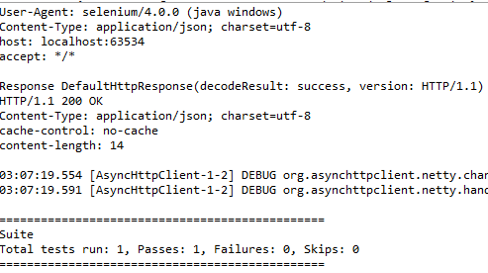
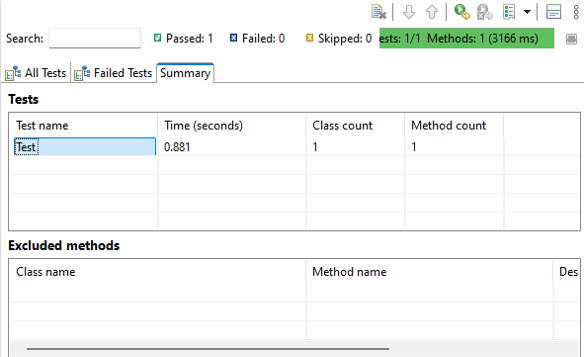
5. Review Results by checking the testNG reports.
This guide has helped you explore the powerful combination of TestNG and Selenium for parameterized testing. By leveraging TestNG’s data-driven testing capabilities, you have learnt how to run the same test with different inputs, increasing the efficiency and coverage of your automated tests.
Parameterization not only enhances the flexibility of your test scripts but also ensures that your tests are comprehensive and robust, catching edge cases and potential issues early in the development cycle. With the examples provided, you should now be equipped to implement parameterized tests in your own Selenium projects, leading to more reliable and maintainable automation.
BrowserStack Automate is an essential tool for streamlining and enhancing automated testing. It empowers developers and QA teams to efficiently scale their tests and speed up feature delivery.
BrowserStack Automate supports all major automation testing frameworks like TestNG, which streamlines your testing process, reduces setup complexity, and enhances test coverage. Additionally, Cloud Selenium Grid provides a robust framework for running parallel tests across multiple browsers and devices with different operating systems.
