Running iOS apps on a Mac is essential for developers, testers, and users who want to experience iOS applications without a physical device. Whether you’re testing an app, debugging, or simply trying an iOS-exclusive app, there are multiple ways to do it.
Overview
Running iOS apps on Mac can be done using different methods depending on your needs. Here’s how you can do it for testing:
- Running iOS Apps on Mac Using BrowserStack
- Running iOS Apps on Mac Using Xcode
- Running iOS Apps on Mac Using an Emulator
This article explores various ways to run and test iOS apps on Mac, including using emulators, Xcode, and BrowserStack. It also highlights why real device testing is preferable to emulators.
Running iOS Apps on Mac
Running iOS on a Mac is essential for developers who need to test and debug their applications before deploying them to the App Store. While macOS does not natively support running iOS apps, several methods exist to achieve this. The popular methods include:
- Leveraging cloud-based services like BrowserStack
- Utilizing Apple’s official development environment, Xcode
- Using iOS emulators for Mac
Read More: How to test Android Apps on macOS
Running iOS Apps on Mac using BrowserStack
BrowserStack provides a seamless way to test iOS apps on real devices without needing physical hardware. With an easy setup, developers can upload their apps, choose from various iPhone and iPad models, and test across different iOS versions. This cloud-based approach simplifies debugging, enhances performance testing, and ensures better compatibility across devices.
- Login to BrowserStack’s App Live platform from your Mac.
- You can either upload an app from a URL or a local system. If you would like to test an existing app that is available on the App Store, you can install the app once you select the device in the next step.
- Next, Select the iOS device. After selecting the device and uploading the app, a real device will be opened with the app installed on it.
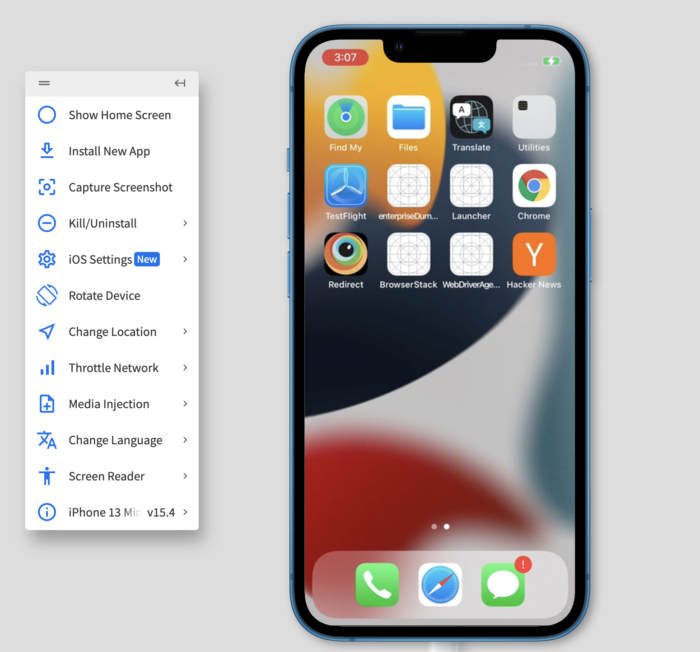
For testing an iOS App, BrowserStack Live gives following out of the box features:
- Show Home Screen: Using this option, the user can come to the Home Screen of the device; it’s similar to the physical Home button on the iPhone.
- Install New App: The user can install a new app on the go using this option.
- Capture Screenshot: It will capture the screenshot of the current screen as shown below.
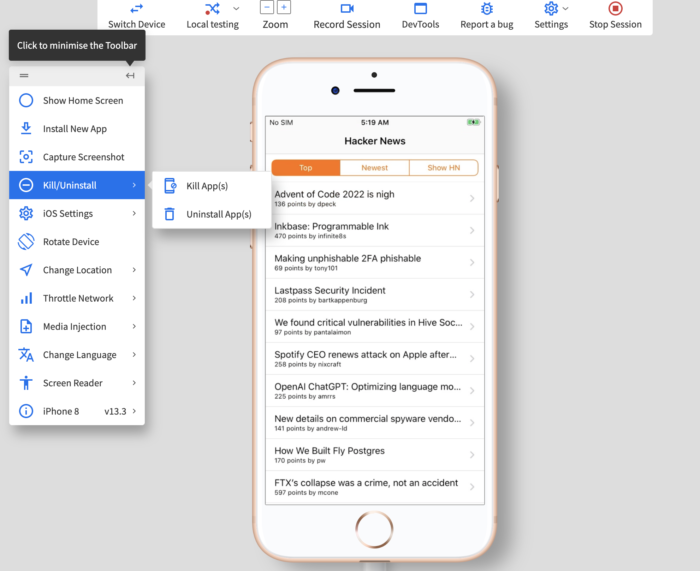
- Kill/Uninstall: Using this option one can kill the running App or Uninstall the same.
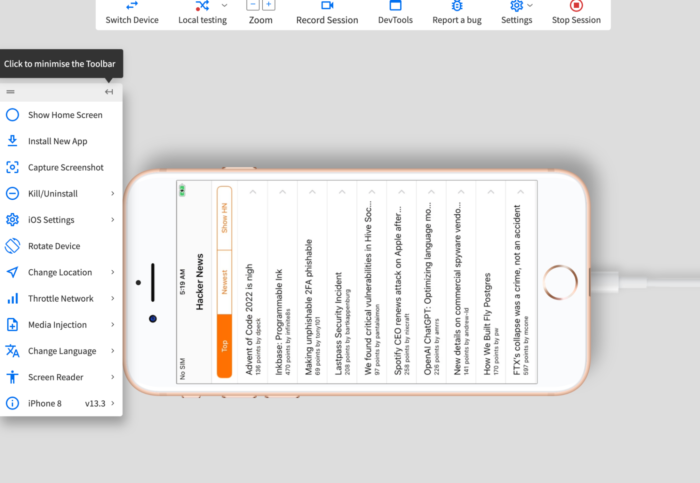
- Rotate Device: Rotating Device change the screen orientation from portrait to Landscape and vice-versa.
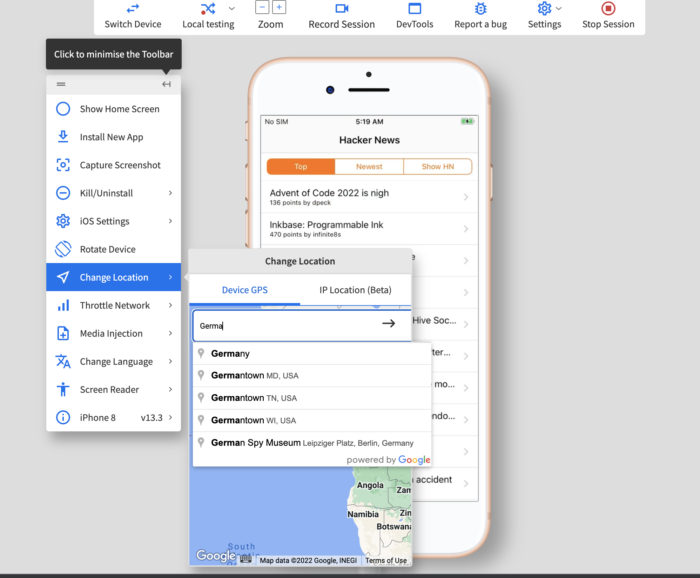
- Change Location: By using the change location option, the user can change the geolocation of the device so that the App can be tested for different geolocations.
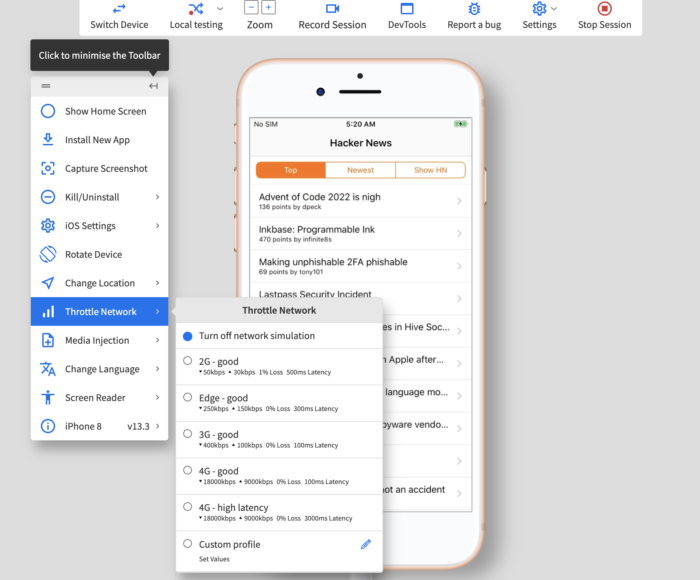
- Throttle Network: Apps behavior can be tested for different network speeds using this option as shown in the image below:
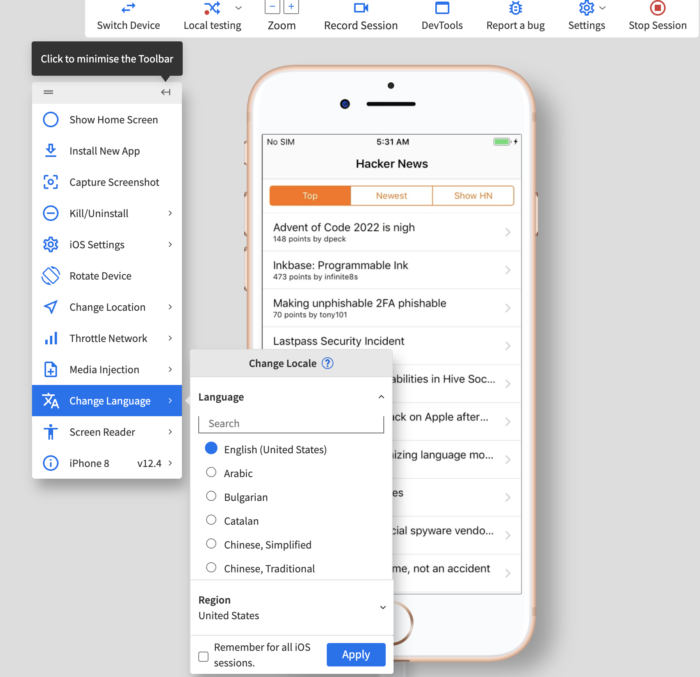
- Change Language: Using this option the language can be changed from the listed menu of languages for the Apps.
Read More: Testing on Virtual Machines (VM)?
Running iOS Apps on Mac using Xcode
Xcode is Apple’s official integrated development environment (IDE) for iOS app development. It includes a built-in iOS Simulator that allows you to run and test iOS apps directly on Mac. Here is a step-by-step guide on how to run iOS apps on a Mac using Xcode:
Download and Install Xcode
The first step in running iOS apps on a Mac is to download and install Xcode. It can be downloaded from the Mac App Store and is available for free. Once you have downloaded and installed Xcode, you can use it to create a new project, and build and test your iOS app.
Launch Xcode and Create a New Project
To launch Xcode, simply search for Xcode in Spotlight or find it in the Applications folder on your Mac. Once Xcode is launched, you can create a new project by clicking on File > New > Project. You’ll be asked to select a template for your project, and you can choose from a variety of templates depending on the type of app you’re building.
Install the iOS Simulator
The iOS Simulator is a virtual environment that runs iOS and lets you run iOS apps on your Mac. The Simulator is not installed by default with Xcode, so you’ll need to install it before you can use it to run iOS apps. To install the Simulator, go to Xcode’s Preferences, select the Downloads tab, and look for the Components section. In the Components section, you’ll see a list of components that can be installed, including the Simulator. Simply click the Install button next to the Simulator, and Xcode will download and install it for you.
Build and Run Your iOS App
With the iOS Simulator installed; you can now build and run your iOS app. To build your app, simply click the Run button in Xcode. Xcode will compile your code and launch the iOS Simulator, and your app will be installed and run on the Simulator just as it would on a physical iOS device. You can use the Simulator to test your app, and you can use Xcode’s Debug area to debug any issues you encounter.
Test Your iOS App on Different Devices
One of the benefits of using the iOS Simulator is that you can test your app on different devices, including different models of the iPhone and iPad. To test your app on different devices, simply go to the Hardware menu in the Simulator and select the device you want to use. Xcode will automatically switch the Simulator to the selected device, and you can test your app on that device.
Still confused on whether to use a simulator or real device cloud?
Read this article on Will the iOS emulator on PC (Windows & Mac) solve your testing requirements?
Running iOS Apps on Mac using Emulators
iOS emulators are software tools that simulate the iOS environment on Mac. They create a virtual iOS device on your system, allowing you to run and test iOS apps without needing a physical iPhone or iPad.
While they can’t fully replicate hardware features, they offer a cost-effective way to test basic functionality, debug code, and assess UI layouts.
- Download and Install an Emulator: Choose an emulator like iPhone Simulator, Appetize.io, or Smartface. Visit the official website, download the installation file, and follow the setup instructions.
- Launch the Emulator and Configure the iOS Version: Open the emulator and select the desired iOS version and device model. Some emulators allow adjusting settings such as screen resolution, memory allocation, and performance preferences for better simulation.
- Upload or Install Your iOS App: Depending on the emulator, manually upload the .ipa or .app file or use a drag-and-drop feature. Some emulators require using the command line to install apps. Ensure the app appears on the home screen and is ready for testing.
- Run and Test Your App: Open the app in the emulator, interact with its features, navigate through different screens, and test UI/UX functionality. Use the emulator’s debugging tools to identify and resolve any issues during testing.
Why is testing iOS apps on Real Devices better than testing with iOS Emulators?
Emulators and simulators are helpful in iOS app development but have significant limitations. They can’t perfectly replicate real iOS device hardware, leading to potential mismatches in performance, sensor functionality, and user experience.
Simulators, in particular, only mimic the iOS operating system but do not accurately replicate real-world conditions such as battery consumption, network fluctuations, or hardware-specific behaviors.
Emulators and simulators may miss device-specific issues and fail to capture subtle iOS variations. These drawbacks make testing on real iOS devices essential for ensuring true compatibility, performance, and user experience before app release. Real device testing provides an authentic environment that emulators can’t match.
Elevate your testing process with cloud-based solutions like BrowserStack App Live. With BrowserStack, you can instantly access a wide range of real iOS devices, capturing device-specific scenarios without the hassle of managing physical inventory. It helps ensure your app performs flawlessly across all iOS versions and device models.
Conclusion
You can run iOS apps on a Mac using BrowserStack, Xcode, or emulators. Xcode’s simulator helps with local testing, while emulators lack real-world accuracy.
Real-device testing is essential for the most reliable results. BrowserStack provides the best solution, with instant access to a real device cloud, ensuring accurate testing without a complex setup.


