Puppeteer is a powerful Node.js library that lets you control Chrome or Chromium browsers using a simple, high-level API. Whether you’re automating form submissions, taking screenshots, generating PDFs, or testing web apps, Puppeteer makes browser tasks fast, efficient, and developer-friendly.
Overview
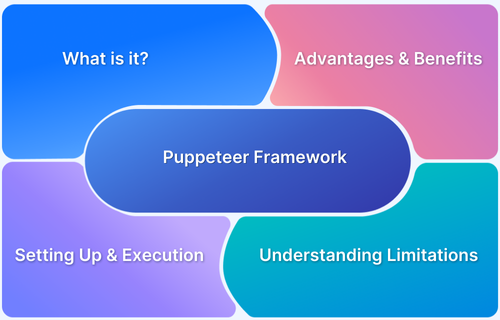
Puppeteer Architecture Components
- Puppeteer (Node.js API): Developer-facing high-level methods.
- Chrome DevTools Protocol (CDP): Protocol bridge for browser commands.
- WebSocket Communication: JSON-based message exchange channel.
- Headless Chrome/Chromium: Actual browser executing tasks like DOM rendering, JS execution, etc.
Types of Locators in Puppeteer
- CSS Selectors: Standard and widely used (.class, #id, div > p)
- XPath: Hierarchical DOM-based selection (//div[@id=’main’])
- Attributes-based Selectors: Targets using [name=value], data-* attributes
- Nth-child Selectors: For specific element positions (li:nth-child(2))
- Text Content: Indirectly via XPath or evaluate() (//*[text()=’Click Here’])
- Custom JavaScript Selectors: Using page.evaluate() with querySelectorAll
This tutorial explains the core Puppeteer concepts, its architecture, advantages, limitations, and how to handle elements using various locators
What is the Puppeteer Framework?
Puppeteer is a NodeJS-based Automation Framework that allows programming through Javascript. It’s an Open Source and is maintained by Google. Puppeteer framework allows direct communication with Chrome-based browsers such as Chrome and Chromium while its advanced feature allows working with Firefox (Nightly Build) as well.
Read More: Puppeteer vs Selenium: Core Differences
Advantages of the Puppeteer Framework
Here are the advantages of the Puppeteer Framework
- Easy Configuration: Puppeteer is easy to configure and set up
- No Webdriver Dependancy: Unlike Selenium, Puppeteer doesn’t rely on a web driver so that we can expect stable test runs. No more browser/driver incompatibility.
- Faster Executions: Since it directly interacts with the browser, Puppeteer is faster and more stable.
- Test Library/Framework Integration: Puppeteer can easily be integrated into the Mocha and Jest framework.
- Documentation: Puppeteer has good documentation on their API, so it is easy to learn and implement
- Browser Support: The Puppeteer framework supports Chrome and Firefox
- Community Support: Since Puppeteer has a huge user base, it has good community support.
Limitations of Puppeteer
Here are the disadvantages of the Puppeteer Framework:
- Puppeteer is a thin wrapper, it’s not a complete framework-ready automation tool like Cypress or Testcafe.
- Browser support is limited to only Chrome and Firefox.
- Programming Language support is limited to Javascript.
Puppeteer Architecture
Puppeteer is a Node.js library that provides a high-level API to control headless (or full) Chrome or Chromium browsers over the DevTools Protocol. It’s commonly used for automation, scraping, rendering, testing, and more.
Core Components of Puppeteer Architecture:
1. Puppeteer Node.js API
- It provides user-friendly methods like page.goto() and page.click(), etc.
- Acts as a wrapper over the Chrome DevTools Protocol (CDP).
2. Chrome Dev Tools Protocol (CDP)
- A low-level communication protocol used to control and inspect Chrome or Chromium.
- Puppeteer sends JSON-formatted messages over WebSocket to the browser.
3. Headless Chrome / Chromium
- A browser engine that runs without a UI.
- Executes tasks sent via the protocol like page rendering, network interception, screenshots, etc.
4. WebSocket Communication
- Puppeteer connects to Chrome’s debugging port over WebSocket.
- JSON commands and responses are exchanged through this channel.

Read More: Understanding Puppeteer Headless
Flow of Execution in Puppeteer:
- The developer writes the Puppeteer script using Node.js API.
- Puppeteer translates commands into Chrome DevTools Protocol (CDP) messages.
- WebSocket connection sends the messages to Chrome or Chromium.
- Browser executes the tasks (for example, load a URL or click a button).
- Results and events are sent back from the browser to Puppeteer via CDP.
- Puppeteer handles responses, enabling assertions, screenshots, scraping, etc.
Puppeteer Element Handling and Locators
Handling elements efficiently is a core feature of Puppeteer, enabling developers to interact with web pages programmatically. Puppeteer provides various methods to locate and manipulate elements using selectors and locators, making it powerful for tasks like form filling, clicking buttons, and extracting data.
Types of Locators in Puppeteer
Puppeteer supports a variety of locators to identify and target elements on the page:
- CSS Selectors: Uses standard CSS rules to locate elements.
Example:
.class, #id, div > p
- XPath: Locates elements based on their hierarchical structure in the DOM.
Example:
//div[@id='main']/button
- Text Content (via XPath/JavaScript): Though not directly supported, elements can be selected by text using XPath.
Example:
//*[text()="Click Here"]
Attributes: Targets elements based on attributes like name, type, data-*
Example:
[data-test-id="submit"]
Nth-child Selectors: Targets elements based on their position within a parent.
Example:
ul > li:nth-child(2)
Custom JavaScript Selectors: Advanced logic can be written within the browser context using page.evaluate
Example:
document.querySelectorAll('...')Common Puppeteer Methods to Locate and Interact with Elements
| Method | Description | Example |
|---|---|---|
| page.$(selector) | Selects the first matching element by CSS selector | const btn = await page.$(‘.submit’) |
| page.$x(xpath) | Selects elements using XPath | const elements = await page.$x(‘//button[text()=”Submit”]’) |
| page.$$(selector) | Selects all matching elements by CSS selector | const links = await page.$$(‘a.nav-link’) |
| page.waitForSelector(selector) | Waits until the selector appears in the DOM | await page.waitForSelector(‘#username’) |
| page.evaluate(fn) | Executes JavaScript within the browser context | await page.evaluate(() => document.querySelector(‘#header’).innerText) |
| page.$eval(selector, fn) | Runs a function on the first matching element | const title = await page.$eval(‘.title’, el => el.innerText) |
| page.$$eval(selector, fn) | Runs a function on all matching elements | const items = await page.$$eval(‘ul li’, els => els.map(el => el.textContent)) |
Read More: Cross Browser Testing in Puppeteer: Tutorial
How to Automate Web Scraping using Puppeteer’s Headless Browsing?
Automating web scraping with Puppeteer’s headless browsing involves several key steps:
Step 1. Install Puppeteer: Begin by installing Node.js and Puppeteer. Puppeteer comes with a bundled version of Chromium, ensuring compatibility. Install it using npm:
bash
npm install puppeteer
Step 2. Launching a Headless Browser: Puppeteer allows you to launch a browser instance in headless mode, which operates without a graphical user interface, making it ideal for automated tasks.
Here’s how to launch a headless browser:
javascript
const puppeteer = require('puppeteer');


(async () => {

  const browser = await puppeteer.launch({ headless: true });

  const page = await browser.newPage();

  await page.goto('https://example.com');

  // Your scraping logic here

  await browser.close();

})();
Step 3. Navigating and Interacting with Pages: Use Puppeteer’s API to navigate to web pages and interact with elements. For example, to click a button or extract text:
javascript
await page.click('selector'); // Clicks an element matching the selector

const text = await page.$eval('selector', el => el.textContent); // Extracts text content
Step 4. Handling Dynamic Content: Many websites load content dynamically using JavaScript. Puppeteer can wait for specific elements to ensure content is fully loaded before proceeding:
javascript
await page.waitForSelector('selector'); // Waits for the element to appear in the DOMStep 5. Extracting Data: Once the desired content is loaded, extract data using selectors:
javascript
const data = await page.$$eval('selector', elements => {

  return elements.map(el => el.textContent);

});
Step 6. Closing the Browser: After completing the scraping tasks, close the browser instance to free up resources:
javascript
await browser.close();
Read More: Puppeteer: How to Click Buttons
Setting up Puppeteer and Jest Automation Tool
This section explains setting up Puppeteer with NodeJS, Javascript, and Jest Framework.
Prerequisites:
- Install NodeJS
- Install Visual Studio Code (Recommended)
Follow these step-by-step instructions:
Step 1: Create an empty directory; let’s name it puppeteer-demo
Step 2: Open the newly created empty directory (puppeteer-demo) in Visual Studio Code.
Step 3: Open a new terminal. You should be pointing to the root of the project: puppeteer-demo
Step 4: Enter Command to create package.json
npm init
package.json gives the flexibility to create shortcut commands and tracks all dependencies.
While creating the package.json file, the CLI asks for questions. If you wish to answer, you can reply. Else just hit the ENTER key to set the default values.
Step 5: Install the puppeteer npm module
From Visual Studio Code Terminal, enter the command.
npm i puppeteer
Step 6: Install the jest package
Jest provides assertion libraries and configuration for the puppeteer
npm i jest
Step 7: Install jest-puppeteer
Jest-puppeteer provides integration between Puppeteer and jest framework.
npm i jest-puppeteer
Step 8: Create a Jest configuration file
In your project root directory, create a file with the name jest.config.js. Copy and paste the below code
module.exports = {
preset: 'jest-puppeteer',
testRegex: './*\\.test\\.js$',
}
In the above code, is mentioned as preset as jest-puppeteer, and testRegex helps find the set of puppeteer tests inside the project.
Step 9: Create a jest-puppeteer configuration file
In your project root directory, create a file with the name jest-puppeteer.config.js. Copy and paste the below code
// jest-puppeteer.config.js
module.exports = {
launch: {
headless: false,
product: 'chrome',
args: ['--start-maximized'],
defaultViewport :{width: 1700, height: 800 }

},
browserContext: 'default',
}
In the above code, Chrome is used for testing, and the headless mode is turned off. The browser context is set to default.
Step 10: Create a new folder to place our functional tests.
Create new folder ex: tests, at your project root directory level.
Step 11: Create a new Puppeteer test file
Inside your ‘tests’ folder, create a new file (ex: demo.test.js). Copy and paste the below code.
//demo.test.js
describe('Browserstack Demo', () => {
jest.setTimeout(50000);
beforeAll(async () => {
await page.goto('https://www.browserstack.com/')
})

it('Should Verify Forgot Password', async () => {
await page.click('a[href="/users/sign_in"]');
await page.waitForSelector('#user_email_login');
await page.click('a[href="/users/password/new"]');
await page.waitForSelector('input[id="user_email_login"]');
await page.type('input[id="user_email_login"]','ok@example.com')
await page.click('input[type="submit"]');
await page.waitForSelector('p[class="bs-alert-text"]');
const el = await page.$('p[class="bs-alert-text"]');
const text = await page.evaluate(el => el.innerText, el);
await expect(text).toContain("Password reset initiated");
})
})
The test scenario covered is as below:
- Navigating to browserstack.com
- From Home, we are clicking the Sign In menu item
- Click on Forgot Password, on the Sign In Page
- Enter email-id and Submit
- Verify the Information Message
Step 12: Configure package.json to run the test
In the package.json file, search for “scripts”, and add the below value
"scripts": {
"test": "jest -c ./jest.config.js"
},
Step 13: Execute First Test with Puppeteer
From the Visual Studio Code Terminal, Enter the below command
npm run test
Once you enter the above test, the execution starts, wait until it finishes.
The execution result will be shown in VS Code Terminal


Best Practices for Optimizing your Tests with Puppeteer
To make the most of Puppeteer and ensure your tests are efficient, reliable, and maintainable, consider these best practices:
1. Use Headless Mode for Speed
Run tests in headless mode to minimize resource usage and maximize execution speed.
Use headless: false only for debugging or visual validation.
Example:
const browser = await puppeteer.launch({ headless: true });2. Implement Explicit Waits
Avoid hard-coded delays like await page.waitForTimeout(). Instead, use Puppeteer’s wait methods like:
javascript
await page.waitForSelector('selector', { visible: true, timeout: 5000 });This ensures tests wait only as long as needed for elements to load.
3. Leverage Browser Contexts
Use browser contexts to isolate sessions, enabling parallel tests within the same browser instance without interference.
javascript
const context = await browser.createIncognitoBrowserContext();

const page = await context.newPage();
4. Optimize Selectors
Use efficient and specific selectors (for example, #id, .class) to reduce execution time and avoid flaky tests.
Avoid overly generic or dependent selectors that can break with minor DOM changes.
Example:
await page.click('#submit-button'); // Good

await page.click('div > span > a:nth-child(2)'); // Fragile5. Reuse Browser Instances
Instead of launching a new browser for each test, reuse a single browser instance across multiple tests to save resources.
javascript
const browser = await puppeteer.launch();

const page = await browser.newPage();
6. Capture and Log Errors
Wrap test actions in try-catch blocks to log detailed errors and improve debugging.
javascript
try {

  await page.click('.button');

} catch (error) {

  console.error('Error clicking button:', error);

}
7. Use Environment Variables
Store sensitive data like credentials or URLs in environment variables instead of hardcoding them.
javascript
const user = process.env.USERNAME;

const pass = process.env.PASSWORD;
8. Use Debugging Tools
Use Puppeteer’s built-in debugging options. Slow down execution with slowMo for debugging:
Example:
javascript
puppeteer.launch({ headless: false, slowMo: 50 });

Enable verbose logging using the DEBUG environment variable:

bash
DEBUG=puppeteer:* node script.js
9. Capture Screenshots and Logs
Take screenshots or save logs on failure to identify issues quickly.
Example:
javascript
await page.screenshot({ path: 'error.png' });10. Keep Tests Atomic
Write small, focused tests that verify individual functionalities. This reduces dependencies and makes debugging easier.
11. Optimize Resource Usage
Block unnecessary resources like images or ads for faster execution:
javascript
await page.setRequestInterception(true);

page.on('request', req => {

  if (['image', 'stylesheet', 'font'].includes(req.resourceType())) {

    req.abort();

  } else {

    req.continue();

  }

});
12. Integrate with CI/CD Pipelines
Automate your tests by integrating Puppeteer with CI/CD tools like Jenkins, GitHub Actions, or CircleCI for consistent execution in your pipeline.
Example:
jobs:

test:

runs-on: ubuntu-latest

steps:

- name: Install dependencies

run: npm install

- name: Run Puppeteer Tests

run: npm test
13. Update Puppeteer Regularly
Stay updated with the latest version of Puppeteer to ensure compatibility with new browser features and bug fixes.
npm update puppeteer
14. Use Page Object Model (POM)
Organize code into reusable components using the Page Object Model for maintainability:
javascript
class LoginPage {

  constructor(page) {

    this.page = page;

  }

  async login(username, password) {

    await this.page.type('#username', username);

    await this.page.type('#password', password);

    await this.page.click('#login');

  }


}
Execute a Puppeteer Test on BrowserStack
Browserstack provides thousands of real devices for test execution and supports the Puppeteer framework for flawless test execution. Refer to the official Puppeteer docs for detailed steps.
Step 1: Configure jest-puppeteer.config.js
Once tests execution on your machine are successful, you can execute the same tests on BrowserStack with minor changes listed below
jest-puppeteer.config.js.
In the jest-puppeteer.config.js file add capabilities, and connect.
The complete jest-puppeteer.config.js file looks like the one below.
// jest-puppeteer.config.js
const caps_chrome = {
'browser': 'chrome',
'browser_version': 'latest',
'os': 'windows',
'os_version': '10',
'name': 'Puppeteer-jest test on Chrome',
'build': 'puppeteer-jest-build-2',
'browserstack.username': process.env.BROWSERSTACK_USERNAME || 'your_user_name',
'browserstack.accessKey': process.env.BROWSERSTACK_ACCESS_KEY || 'your_access_key'
};


module.exports = {
launch: {
headless: false,
product: 'chrome',
args: ['--start-maximized'],
defaultViewport :{width: 1700, height: 800}

},

 browserContext: 'default',
connect: {
browserWSEndpoint: `wss://cdp.browserstack.com/puppeteer?caps=${encodeURIComponent(JSON.stringify(caps_chrome))}`,
}
}
Note: Copy ‘browserstack.username’ and ‘browserstack.accessKey’ from BrowserStack Account page.
Github Page Documents all different sets of capability options.
Step 2: Execute your scripts
In Visual Studio Code, Terminal enter the below command
npm run test
Once you enter the above command, the script starts executing; wait until it completes.
After completion of execution, you can see the result in the Browserstack Dashboard.
Step 3: View the Results in the Browserstack dashboard
Login to Browserstack and navigate to Dashboard,
Choose the build, and you will see the complete snapshot of your test.

Puppeteer vs Selenium: Key Differences
Puppeteer and Selenium are both powerful tools used for browser automation, enabling developers and testers to simulate user interactions, automate workflows, and perform end-to-end testing.
While both tools share the goal of automating web browser behavior, they differ significantly in their architecture, browser support, language compatibility, and use cases. Here are the primary differences between Puppeteer and Selenium.
| Feature | Puppeteer | Selenium |
|---|---|---|
| Language Support | Only supports JavaScript and TypeScript | Supports multiple languages: Java, Python, C#, Ruby, etc. |
| Browser Compatibility | Works mainly with Chrome/Chromium (Firefox experimental) | Supports all major browsers: Chrome, Firefox, Safari, Edge |
| Control Protocol | Uses Chrome DevTools Protocol for direct control | Uses WebDriver protocol to interact with browsers |
| Execution Speed | Generally faster due to native integration with Chromium | Slower because of WebDriver communication overhead |
| Setup Complexity | Simple setup via npm, no drivers needed | Requires configuring browser drivers per environment |
| Headless Mode Efficiency | Headless by default and highly optimized | Supported but not as optimized |
| Community and Ecosystem | Smaller community, maintained by Google | Large, mature ecosystem with wide support and tooling |
Puppeteer vs Protractor: Key Differences
Puppeteer and Protractor are both used for automating browser interactions, but they cater to different testing needs and have distinct architectural approaches.
While Puppeteer offers low-level control over Chromium-based browsers, Protractor is built specifically for Angular applications. Here are the key differences:
| Feature | Puppeteer | Protractor |
|---|---|---|
| Primary Use Case | Browser automation, scraping, and performance testing | End-to-end testing for Angular and AngularJS applications |
| Framework Integration | Requires manual integration with test frameworks like Jest | Built to work seamlessly with Jasmine, Mocha, and Cucumber |
| Angular Awareness | Not Angular-specific | Angular-aware: waits for Angular to stabilize automatically |
| Browser Support | Chrome/Chromium (limited Firefox support) | Supports multiple browsers via Selenium WebDriver |
| Language Support | JavaScript, TypeScript | JavaScript, TypeScript |
| Setup Complexity | Simple (npm install) | Requires Selenium WebDriver and related configurations |
Note: Since Protractor is officially deprecated, Puppeteer is often preferred for modern front-end testing setups when Angular-specific features aren’t required.
Puppeteer vs Cypress: Key Differences
Puppeteer and Cypress are both popular tools in the JavaScript testing ecosystem, but they serve slightly different purposes.
Puppeteer is a browser automation library, while Cypress is a full-fledged testing framework focused on developer-friendly end-to-end testing. Here’s how they compare:
| Feature | Puppeteer | Cypress |
|---|---|---|
| Nature of Tool | Browser automation library | Complete E2E testing framework |
| Testing Style | Script-based automation and control | Assertion-based, test-runner style with built-in UI |
| Browser Support | Chrome/Chromium (experimental Firefox support) | Chrome, Edge, Firefox (limited Safari support) |
| Debugging Support | Manual setup with DevTools and logs | Excellent debugging with time travel, snapshots, and UI logs |
| Network Control | Allows request/response interception via DevTools | Offers built-in network stubbing and mocking |
| CI/CD Integration | Requires manual setup | Built-in CI support with rich dashboard via Cypress Cloud |
Conclusion
Accelerate your test automation with BrowserStack Automate for Puppeteer. Run cross-browser Puppeteer tests in parallel to expand coverage and deliver high-quality applications faster. With BrowserStack Local, securely test on local servers without compromising on performance or data security.


