Puppeteer: How to Click Buttons
By Yogendra Porwal, Community Contributor - January 2, 2025
Puppeteer is a powerful Node.js library developed by the Google Chrome team. It allows developers to programmatically interact with Chrome or Chromium browsers, enabling tasks like form submissions, page navigation, and UI testing.
Whether you’re automating a login flow, testing modal dialogs, or submitting forms, Puppeteer provides a high-level API to streamline these actions.
One of the most frequent tasks in automation is clicking a button, and Puppeteer simplifies this through its robust click() methods. However, buttons can behave differently depending on their visibility, interactivity, and dynamic states, which makes understanding Puppeteer’s button interaction capabilities crucial.
- Understanding Click Action in Puppeteer
- Basics of Button Interaction in Puppeteer
- Setting Up Puppeteer
Understanding Click Action in Puppeteer
Puppeteer’s click method simulates a user’s click by generating low-level mouse events like mousedown, mouseup, and click. This ensures the browser processes it just like a real user interaction.
Here’s how Puppeteer handles button clicks:
- It identifies the button using selectors like CSS or XPath.
- Ensures the button is visible and interactable before clicking.
- Executes the click and waits for follow-up actions (e.g., page navigation or dialog).
Also Read: Xpath Vs CSS Selector: Key Differences
Basics of Button Interaction in Puppeteer
Before diving deep into the click interaction of Puppeteer, here is how to set it up quickly.
Setting Up Puppeteer
Below are the steps to set up Puppeteer:
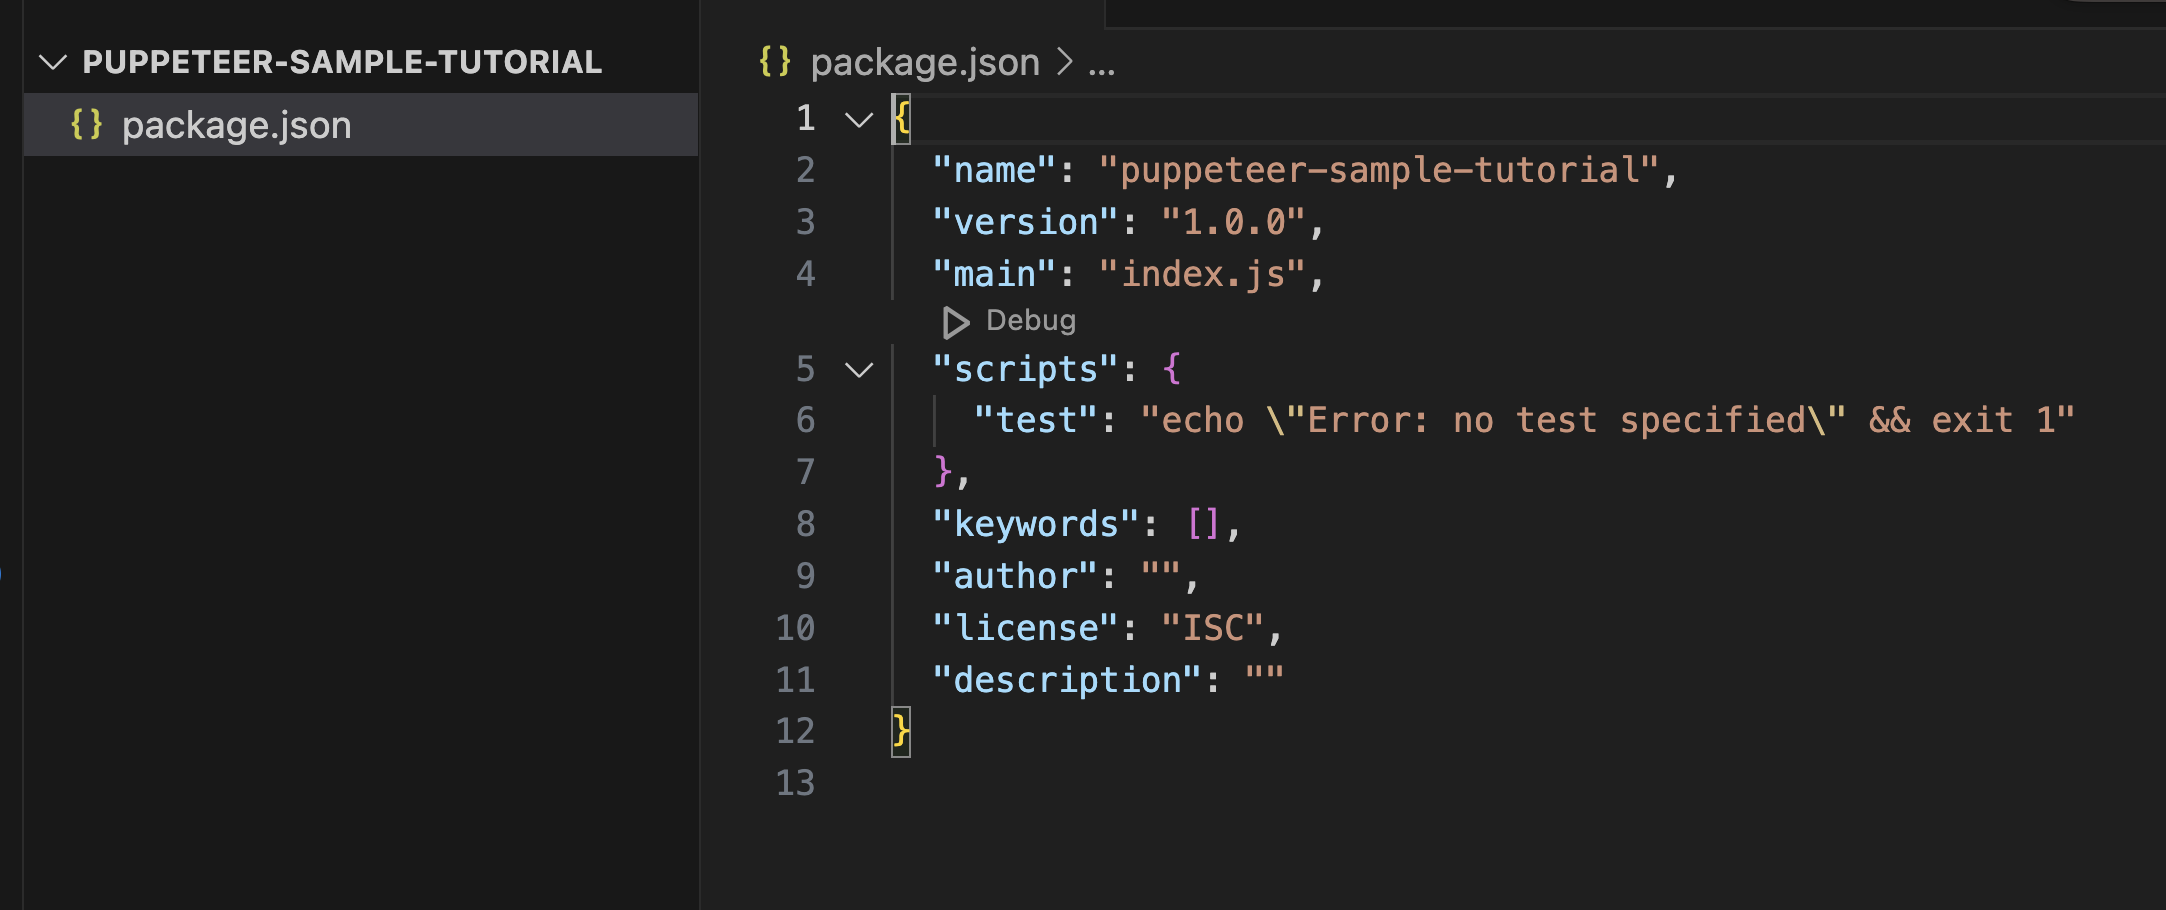
Step 1: Start by creating a sample project and installing Puppeteer
mkdir puppeteer-sample-tutorial

cd puppeteer-sample-tutorial

npm init -y
It will set the npm directory for you and create a package.json
Next is installing Puppeteer.
npm install puppeteer –saveStep 2: Add a sample script
Now that Puppeteer is installed, add a sample script (sample-test.js) to launch Puppeteer and open a webpage.
const puppeteer = require('puppeteer');


(async () => {

  const browser = await puppeteer.launch({headless:false});

  const page = await browser.newPage();

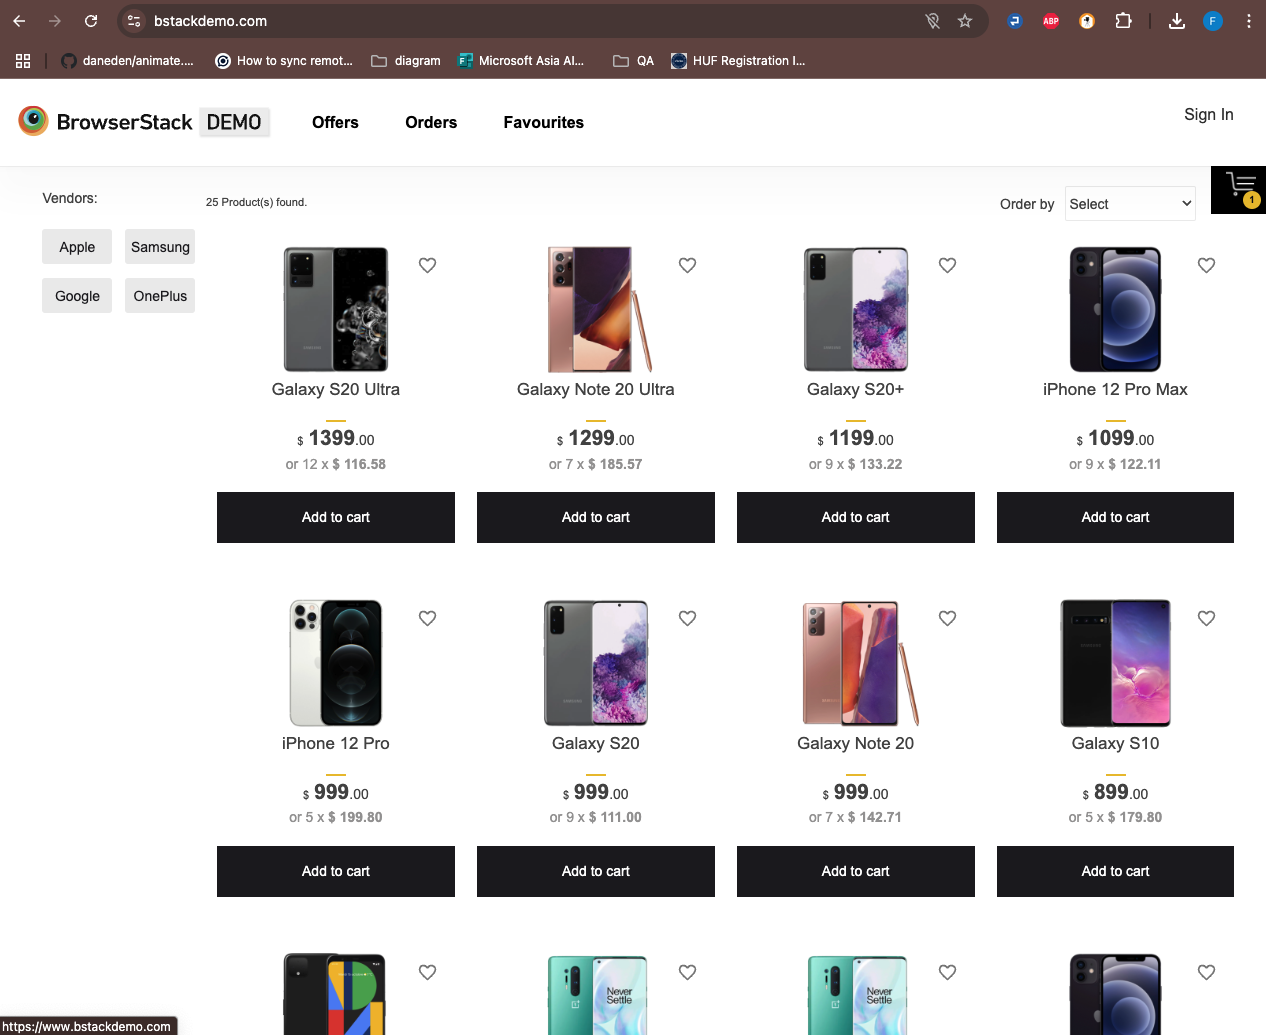
  await page.goto('https://www.bstackdemo.com/');

  console.log('Page loaded successfully!');

  await browser.close();

})();
Step 3: Test the script
Run the puppeteer script with Node.js
node ./tests/sample-test.jsThis basic setup is the foundation for automating button interactions.
How to Click a button in Puppeteer
Below are the methods to click a button in Puppeteer:
Page.click()
The simplest method to click a button using css-selector:
javascript
await page.click('#submit-button');Output: Simulates a user click on the button with ID submit-button.
Also Read: CSS Selectors Cheat Sheet (Basic & Advanced)
Locator.click()
Using Puppeteer’s Locator API for more dynamic targeting:
javascript
const button = await page.$('#submit-button');

await button.click();
Output: Locates the button element for the given css-selector and triggers a click.
Non-CSS Selector Locator Click
When CSS selectors are insufficient, XPath can be used:
javascript
const button= await page.$x("//button[text()='Submit']");

await button.click();
Output: Finds the button based on its text and clicks it.
Also Read: Quick XPath Locators Cheat Sheet
Advanced Button Clicking Techniques in Puppeteer
Puppeteer click is not just limited to simple click event simulation. Puppeteers can click buttons in many advanced ways like multiple clicks, right click, or click on specific coordinates.
Here are puppeteer click-button techniques in detail.
Double Click
A double click can be performed on an element on the webpage by providing clickCount option in the click method.
javascript
await page.click('#double-click', { count: 2 });Output: Simulates a double-click event on an element with id double-click.
Also Read: How to perform Double Click in Selenium?
Specific Mouse Button Click
Puppeteer also provides capabilities to perform click by specific mouse button by providing button option with default value of left and except one of left,right,middle,back, Forward values.
javascript
await page.click('#button', { button: 'right' });Output: Simulates a right-click on the button.
Click on Coordinate
Clicks at a specific coordinate on the page uare seful when elements lack selectors.
javascript
await page.mouse.click(200, 300);Output: Clicks at the specified screen coordinates.
Click with Offset
Clicks on a specific point relative to the button’s top-left corner.
javascript
await page.click('#submit-button', { offset: { x: 10, y: 5 } });Output: Clicks 10px right and 5px down from the button’s top-left corner.
Multiple Clicks with Delay
Performs multiple clicks on the button with a delay between each.
javascript
await page.click('#multi-click', { count: 3, delay: 500 });Output: Clicks the button three times with a 500ms delay between clicks.
Custom Mouse Actions
Simulates detailed mouse movements and actions like drag-and-drop.
javascript
await page.mouse.move(100, 200);

await page.mouse.down();

await page.mouse.up();
Output: Simulates custom mouse movements and actions.
Common Issues While Clicking Buttons in Puppeteer
Below are some common challenges while clicking buttons in Puppeter:
1. Handling Navigation After Click
When clicking a button triggers navigation (e.g., form submission or link click), Puppeteer may move to a new page before completing subsequent actions.
Solution: Use waitForNavigation to ensure Puppeteer waits for the new page to load.
javascript
await page.click('#submit');

await page.waitForNavigation();
2. Clicking Inside an iFrame
Buttons inside iframes require special handling since Puppeteer can’t directly access elements inside the frame.
Solution: Use page.frames() to locate the iframe and interact with its content.
javascript
const frame = await page.frames().find(f => f.name() === 'frameName');

await frame.click('#frame-button');
3. Handling Browser Dialogs
Browser dialogs like alerts or confirm boxes can block Puppeteer from proceeding.
Solution: Listen for the dialog event and handle it (e.g., accept or dismiss the dialog).
javascript
page.on('dialog', async dialog => await dialog.accept());4. Clicking Invisible Elements
Buttons hidden or off-screen aren’t interactable, leading to click errors.
Solution: Use scrollIntoView to bring hidden elements into focus or modify their styles to make them visible.
javascript
await page.evaluate(() => {

  document.querySelector('#hidden-button').style.display = 'block';

});

await page.click('#hidden-button');
5. Clicking with page.evaluate
Some buttons may require custom JavaScript for interaction due to complex DOM structures. I.e. element is obstructed by other elements.
Solution: Use page.evaluate to execute a click directly within the browser context.
Javascript
await page.evaluate(() => {

  document.querySelector('#button').click();

});
6. Clicking in Shadow DOM
Shadow DOM encapsulation makes elements inaccessible via normal selectors.
Solution: Access the shadow DOM root using Puppeteer’s evaluation methods and then locate the button.
javascript
const shadowHost = await page.$('#shadow-host');

const shadowRoot = await shadowHost.evaluateHandle(node => node.shadowRoot);

const button = await shadowRoot.$('#shadow-button');

await button.click();
Sample Use Cases of Clicking a Button in Puppeteer
Below are some sample usecases of clicking a button in Puppeteer:
Use Case 1: Submitting a Login Form
Submitting a login form is one of the most common automation scenarios. Puppeteer can fill in the username and password fields, click the login button, and handle the subsequent page navigation.
The example below uses: https://www.bstackdemo.com/
Code Example:
const puppeteer = require('puppeteer');


(async () => {

  const browser = await puppeteer.launch({headless:false});

  const page = await browser.newPage();

  await page.goto('https://www.bstackdemo.com/signin');

  await page.type('#react-select-2-input','demouser', {delay: 100})

  await page.keyboard.press('Enter');

  await page.type('#react-select-3-input','testingisfun99', {delay: 100})

  await page.keyboard.press('Enter');

  await page.click('#login-btn')

  await page.waitForNavigation();

  await browser.close();

})();
Explanation:
- The page.type() method inputs text into the username and password fields.
- The page.click() method simulates a button click on the login button.
- page.waitForNavigation() ensures Puppeteer waits for the page to load after completing the login action, preventing race conditions.
- This approach is commonly used for automated testing of authentication flows.
Output:
After running the script, Puppeteer logs in and navigates to the next page.
Use Case 2: Handling a Modal Dialog
Interacting with modal dialogs often involves clicking a button to open the modal, interacting with its content, and then closing it. Puppeteer can handle these interactions with ease.
Code Example:
javascript
const puppeteer = require('puppeteer');


(async () => {

  const browser = await puppeteer.launch({headless:false});

  const page = await browser.newPage();

  await page.goto('https://demo.automationtesting.in/Alerts.html');


  await page.click('a[href="#CancelTab"]')

  await page.waitForSelector('button[onclick="confirmbox()"]')


  page.on('dialog', async dialog => await dialog.accept());

  await page.click('button[onclick="confirmbox()"]')


  await browser.close();

})();
Output:
The script opens up a confirmation modal dialog box then accept it.
Run Puppeteer Tests on Real Devices and Browsers with BrowserStack
Puppeteer tests often rely on local environments, but real-world scenarios demand broader coverage. BrowserStack Automate allows you to run Puppeteer scripts on real devices and browsers, ensuring your automation is robust and cross-platform.
Benefits of BrowserStack:
- Test on a wide range of real devices and browsers.
- Debug faster with logs and screenshots.
- Seamless integration with CI/CD pipelines.
Conclusion
From basic interactions to advanced workflows, Puppeteer simplifies button handling with its versatile API. By incorporating techniques like shadow DOM handling and real-device testing with BrowserStack, you can ensure your automation scripts are reliable and future-proof. Leveraging Puppeteer’s rich functionality enables precise control over web page elements, ensuring thorough testing of application behavior.
Combining Puppeteer with cross-browser testing platforms like BrowserStack helps verify compatibility across diverse environments, enhancing the quality and consistency of your application.
Useful Resources for Puppeteer
Understanding Puppeteer:
- Puppeteer Framework Tutorial: Basics and Setup
- How to start with Puppeteer Debugging
- How to install and setup Puppeteer with npm (NodeJS)
- Puppeteer Type Command: How to type a text in input box in Puppeteer
- Cross Browser Testing in Puppeteer: Tutorial
- Understanding Puppeteer Headless
- How to run UI Automation Testing using Puppeteer
- How to capture Lazy Loading Images for Visual Regression Testing in Puppeteer
- How to use Proxy in Puppeteer?
- How to run Tests in Puppeteer with Firefox
- How to Perform Visual Regression Puppeteer
- Handling Alerts and Popups in Puppeteer
- Pyppeteer Tutorial: Guide to Puppeteer in Python (with Examples)
Tools Comparisons:
- Puppeteer vs Selenium: Core Differences
- Cypress vs Selenium vs Playwright vs Puppeteer: Core Differences
- Cypress vs Puppeteer: Core Differences
- Playwright vs Puppeteer: Which to choose in 2024?
- Top 10 Puppeteer Alternatives
FAQ
How to Handle Disabled Buttons in Puppeteer?
Click on the disabled button will not work as it is. It needs some extra work to be done before it can be clicked with the page.click() method.
Modify the disabled attribute to false on element with help of page.evaluate() method:
javascript
await page.evaluate(() => {

  document.querySelector('#button').disabled = false;

});

await page.click('#button');
This allows Puppeteer to interact with the button during automation.
