How to run Selenium Tests with NightwatchJS
By G H, Community Contributor - November 21, 2022
NightwatchJS is an open-source automation tool maintained by BrowserStack. NightwatchJS gained popularity because of its unique features such as clear syntax, multiple browser support, cloud testing readiness, etc. NightwatchJS uses the Webdriver under the hood. Webdriver is part of the Selenium project and follows the W3C specification.
The Webdriver API makes NightwatchJS faster and more consistent. NightwatchJS supports Selenium Grid. As NightwatchJS uses the Selenium-based Webdriver API, you can perform every operation that selenium does, using the NightwatchJS. In layman’s terms, you can automate selenium tests using NightwatchJS.
NightwatchJS uses NodeJS libraries, so tests can be written in Javascript or Typescript. NightwatchJS supports all major browsers Chrome, Safari, Edge, and Firefox. One of the unique features of NightwatchJS is you can use any test runner such as Mocha, Cucumber, or Nightwatch test runner to run the tests.
- Advantages of NightwatchJS
- Disadvantages of NightwatchJS
- How to Setup and Run Selenium Tests in NightwatchJS: Step by Step Tutorial
- Run NightwatchJS tests on Firefox
- Run NightwatchJS tests on Chrome
- Run NightwatchJs Test parallely on multiple browsers on your local
- How to run NightwatchJS on Remote Machine (Cloud)
- NightwatchJS Tips and Tricks
Advantages of NightwatchJS
Here are the advantages of using NightwatchJS:
- Easy to set up
- Inbuilt Test runner
- Cloud testing support is ready
- Clear syntax
- Page object model support
- Selenium Server support
- CI/CD or DevOps support
- Headless automation support
Disadvantages of NightwatchJS
While NightwatchJS certainly has several advantages to it, here’s disadvantage of using NightwatchJS:
- Less community support, as it is still growing.
How to Setup and Run Selenium Tests in NightwatchJS: Step by Step Tutorial
Prerequisite
- Install NodeJS
- Navigate to the download page
- Choose your operating system and download NodeJS (LTS recommended)
- Install the NodeJS binaries
- Install Visual Studio Code (optional but recommended)
- Navigate to VS Code download page
- Download and install
Note: Visual Studio Code is open source, it provides a rich interface and better support for NodeJS-based frameworks. In this tutorial we will be using VSCode as an IDE, however, you are free to use any IDE.
Step 1: Create a fresh folder (ex:nightwatchJSdemo)
As a first step, you need to create a fresh and empty directory to install NightwatchJS and its dependencies
Step 2: Launch Visual Studio Code, and Open the newly created directory using the steps mentioned below
- Launch Visual Studio Code app
- Click on File and then Click on Open Folder
- Choose a newly created directory (Ex: nightwatchJSdemo)
Step 3: Open the Terminal and enter the command
- From the Terminal menu in Visual Studio code > Click on New Terminal
- Enter the below command to initiate the NightwatchJS installation
npm init nightwatchStep 4: Answer the command line questionnaire
NightwatchJS doesn’t install unnecessary packages rather it installs based on the custom option you choose. So when you enter the installation command, the command line tool asks you a set of questions, and you need to answer it
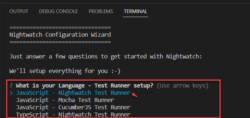
- The first question is “What is your Language – Test runner setup?”
You can choose any desired option, for demo purposes let’s choose Javascript-Nightwatch Test runner
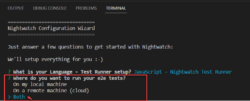
- The next question is “Where do you want to run your e2e tests?”
As mentioned earlier NightwatchJS tests can be run locally or on a remote machine (cloud) such as BrowserStack, Saucelabs, etc.
For this question, you choose the option Both
- The next option is “(Remote) Please select your cloud provider”
Since you have chosen Both in the previous step, you need to select the cloud or remote provider, For simplicity, you can choose BrowserStack
- The next option is “Choose the browsers where you want to run the tests on Local”
Let’s set up both Firefox and Chrome so choose these two.
- The next option is “Choose the browsers where you want to run the tests on Browserstack(remote)”
Let’s Chose chrome and firefox
- The next question is “Where do you plan to keep your end-to-end tests?”
This is your folder name where the actual test files are present, the default folder name is “tests”. Let’s choose the default folder, so you can just hit enter.
- The next question is “What is the base_url of your project? What is the base_url of your project?”
The baseURL can be set during the installation or after, If you don’t provide baseURL during the installation later you can set it inside the nightwatch.conf.js file. For now, choose the default one that is localhost
Once you answer all of the above questions then NightwatchJS starts the installation. The necessary package and its dependencies will be installed.
Wait for the installation to complete.
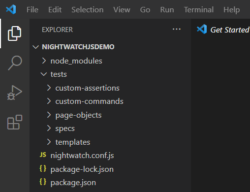
Once the installation is complete, your project folder (example, nightwatchJSdemo) can be seen as below
All installed packages are tracked in the package.json file. The package.json file looks as below.
{
"name": "nightwatchjsdemo",
"version": "1.0.0",
"description": "",
"main": "index.js",
"scripts": {
"test": "echo \"Error: no test specified\" && exit 1"
},
"keywords": [],
"author": "",
"license": "ISC",
"devDependencies": {
"chromedriver": "^104.0.0",
"geckodriver": "^3.0.2",
"nightwatch": "^2.3.3"
}
}
Step 5: Write a simple Selenium NightwatchJS script
By default there are a lot of example tests given in the specs directory, however, since we are starting with NightwatchJS let’s understand by writing the simple test.
Navigate to the tests folder located under the Project root folder (example, NightwatchJSdemo), and create a file with name demo-test.js
Let’s take two simple scenarios
- Navigate to the BrowserStack home page and verify
- Click on the Product menu to verify all the products are present
For the above scenario, you can write the NightwatchJS script as shown below:
describe('Browserstack Demo', function() {
before(browser => browser.navigateTo('https://browserstack.com'));

it('Verify home page', async function(browser) {
await browser
.waitForElementVisible('a.logo')
.assert.titleContains('Most Reliable App & Cross Browser Testing Platform | BrowserStack')
});

it('Verify product page', async function(browser) {
await browser
.click('a[title="Pricing"]')
.waitForElementVisible('#pricing')
.waitForElementVisible('a[data-toggle-id="automate"]')
.assert.textContains('a[data-toggle-id="automate"]', 'Automate')
.assert.textContains('a[data-toggle-id="live"]', 'Live')
.assert.textContains('a[data-toggle-id="percy"]', 'Percy')
.assert.textContains('a[data-toggle-id="app-live"]', 'App Live')
.assert.textContains('a[data-toggle-id="app-automate"]', 'App Automate')

});

after(browser => browser.end());
});
Let’s understand the above code snippets:
- browser.navigateTo – Navigates to the given URL, i.e www.browserstack.com
- waitForElementVisible – This command waits until the given element visibility, in our case we are waiting for the logo to appear.
- assert.titleContains – To ensure that the page loaded, is the home page, we are asserting the title of the BrowserStack home page i.e ‘Most Reliable App & Cross Browser Testing Platform | BrowserStack’
In the next it() block,
- .click(‘a[title=”Pricing”]’) – We are clicking on the Pricing menu
And subsequent commands are added to verify the list of product names that we are clicking
Step 6: Execute the Nightwatch tests
NightwatchJS provides flexibility to execute all the tests or selected tests
Execute the Single tests using the below command
Syntax:
npx nightwatch <path_to_test.js>Example: npx nightwatch tests/demo-test.js
Execute all the tests using the below command
Syntax:
npx nightwatch For simplicity, let’s execute a single test using the command
npx nightwatch tests/demo-test.js
Note: The default browser is firefox unless you specify the environment(browser) explicitly
Step 7: View the result
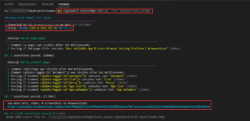
Wait until the execution completes, the command line output shows the result of execution with test case name and assertions.
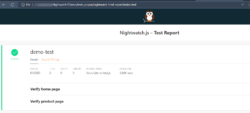
Nightwatch HTML Reporter
The default configuration also provides HTML reporter, which will be saved under \tests_output\nightwatch-html-report\index.html path
The HTML report looks as below
Run NightwatchJS tests on Firefox
While installation you have chosen browsers as firefox and chrome, so the configurations will be created in nightwatch.conf.js automatically during the installation.
In order to run the NightwatchJS in firefox use the below command:
npx nightwatch <path_to_test.js> --env firefox For example,
npx nightwatch tests/demo-test.js --env firefox Note: Ensure the geckodriver is installed, by running the command
npx geckodriver –version
The command should output the installed version
Run NightwatchJS tests on Chrome
NightwatchJS also supports, chrome browser you can easily execute NightwatchJS tests on chrome by providing the –env option in command line
npx nightwatch <path_to_test.js> --env chrome For Example,
npx nightwatch tests/demo-test.js --env chrome Note: Ensure the chromedriver is installed, by running the command
npx chromedriver --version
The command should output the installed version
Run NightwatchJs Test parallely on multiple browsers on your local
NightwatchJS supports multiple browsers and also parallel execution. The NightwatchJS tests can be run on multiple browsers parallely
Use the below command to execute NightwatchJS tests parallely on multiple browsers
npx nightwatch <path_to_test.js> --env chrome,firefoxFor Example,
npx nightwatch tests/demo-test.js --env chrome,firefoxHow to run NightwatchJS on Remote Machine (Cloud)
NightwatchJS supports test execution with Remote Selenium Grid. These tests can be executed on any cloud environment which supports NightwatchJS. Many frameworks support such cloud execution, but the beauty of NightwatchJS is you don’t have to worry about the configuration part.
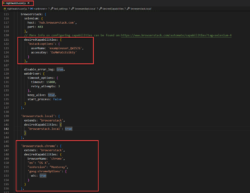
During the installation questionnaire (Step 4) you have chosen the BrowserStack as the remote machine, so the NightwatchJS puts the BrowserStack configuration as part of the installation step. The configuration can be viewed in the nightwatch.conf.js file.
Run NightwatchJS Test on Real Devices
To run the NightwatchJS on BrowserStack, you need to add the Username and Access key. This is unique for each user and provided by BrowserStack.
Copy the BrowserStack Username and Access Key
- Login to BrowserStack
- Navigate to Profile > Summary
- Copy the Username and Access Key
Modify the NightwatchJS configuration file
- Navigate to nightwatch.conf.js file, located in your root directory
- Search for desiredCapabilities under the browsertack option
- Look for userName and accessKey options
- Add the values
Configure run time environments
The environment is the browsers and Operating systems that you want to run on BrowserStack. Based on the installation questionnaire, the default values are added however you can customize it further.
For example: If you need to run the tests on BrowserStack cloud with Chrome browser and OSX with Monterey version you can just add the options browserName, os, and osVersion as shown in the below image.
Note: Borwserstack has a dedicated page for generating custom capabilities. By navigating to Capabilities Generator page, you can generate one as per your choice.
Execute NightwatchJS tests on BrowserStack
Once you configure the BrowserStack test environment with NightwatchJS, you can execute the tests on BrowserStack.
Command to execute the tests on BrowserStack
Syntax:
npx nightwatch <path_to_test.js> --env='<browserstack_env>'Example
npx nightwatch tests/demo-test.js –env='browserstack.chrome'
View Results
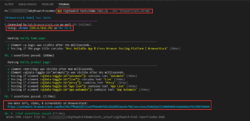
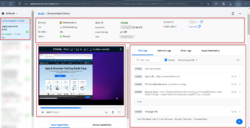
Wait until the command line output shows the test execution summary. Once the test execution is complete the command line output shows the summary of execution along with the BrowserStack URL, by navigating the URL you can simply view the detailed reports of test execution.
Command Line Output
BrowserStack Results page
NightwatchJS Tips and Tricks
1. Run NightwatchJS tests on headless mode
NightwatchJS supports headless mode, you can achieve headless mode execution by specifying the option –headless
Example:
npx nightwatch --env chrome --headless2. Execute a single test and all at once in NightwatchJS
NightwatchJS test can be executed as single tests or all tests at once.
Execute the Single tests using the below command
Syntax:
npx nightwatch <path_to_test.js>Example: npx nightwatch tests/demo-test.js
Execute all the tests using the below command
Syntax:
npx nightwatch 3. Execute a group of tests or folders in NightwatchJS
Using the –group option you can execute all the tests in the folder at once
Example:
npx nightwatch --group tests/with-page-objects4. Open HTML report after completion of NightwatchJS test execution
The –open option opens the HTML report in your default browser once the test execution is complete.
Example:
npx nightwatch tests/demo-test.js --env firefox --headless --open5. Run NightwatchJS tests on multiple environment parallelly on cloud platforms such as BrowserStack
If you have configured multiple environments for cloud platforms, you can specify the multiple environments using the command line option –env. All the tests will be run on the cloud platform.
Below is the example of running multiple environments on BrowserStack
Example:
npx nightwatch tests/demo-test.js --env 'browserstack.chrome,browserstack.firefox'NightwatchJS is an easy and simple-to-use automation framework, which supports multiple browsers and platforms. The outcome of the tests not only depends on your test case but also depends on the environment you run. If your execution environment is unstable you will be more likely to see false failures. The frequent false failures make the automation tests unreliable.
Hence it is recommended to test on real device cloud like BrowserStack Automate. Since the cloud-based testing platforms are stable, provides consistent and accurate results by taking real user conditions into account.
BrowserStack provides 3000+ real device and browser combinations for execution. As these are real devices you will see the same result as physical machines. BrowserStack reduces your effort in maintaining the test execution infrastructure and helps you to concentrate on what matters most such as test execution, test planning, and test automation. NightwatchJS and BrowserStack together make a good choice to achieve the highest quality in a short development cycle.

