Selenium allows for user interactions like clicking and typing in text boxes. What makes Selenium even more powerful is its ability to simulate mouse actions such as click, double-click, right click, drag and drop, as well as keyboard actions.
By using Actions class in Selenium, testers can automate a variety of user behaviour actions, ensuring that the application responds appropriately to different input conditions and providing comprehensive validation of the user interface.
What is Actions Class in Selenium?
Actions class is a part of the org.openqa.selenium.interactions package which is used to perform complex and advanced user interactions in Selenium. This comprises mouse actions such as click, double click, context click and keyboard actions such as key press and release.
The Actions class lets you compose a series of actions into a single interaction which can be executed in sequence using the perform() method.
Read More: How to handle Action class in Selenium
What is moveToElement in Selenium?
moveToElement is a method in Selenium’s Actions class which is used to move the mouse pointer to the middle of a specific web element on the page. Certain elements on a web page are hidden and only visible when a mouse hover is performed.
moveToElement method is mostly used to simulate mouse hover actions over such elements to make it visible, which can later be interacted with.
Syntax of moveToElement in Selenium
Actions moveToElement(WebElement target)
target is the web element you want to move the mouse cursor to.
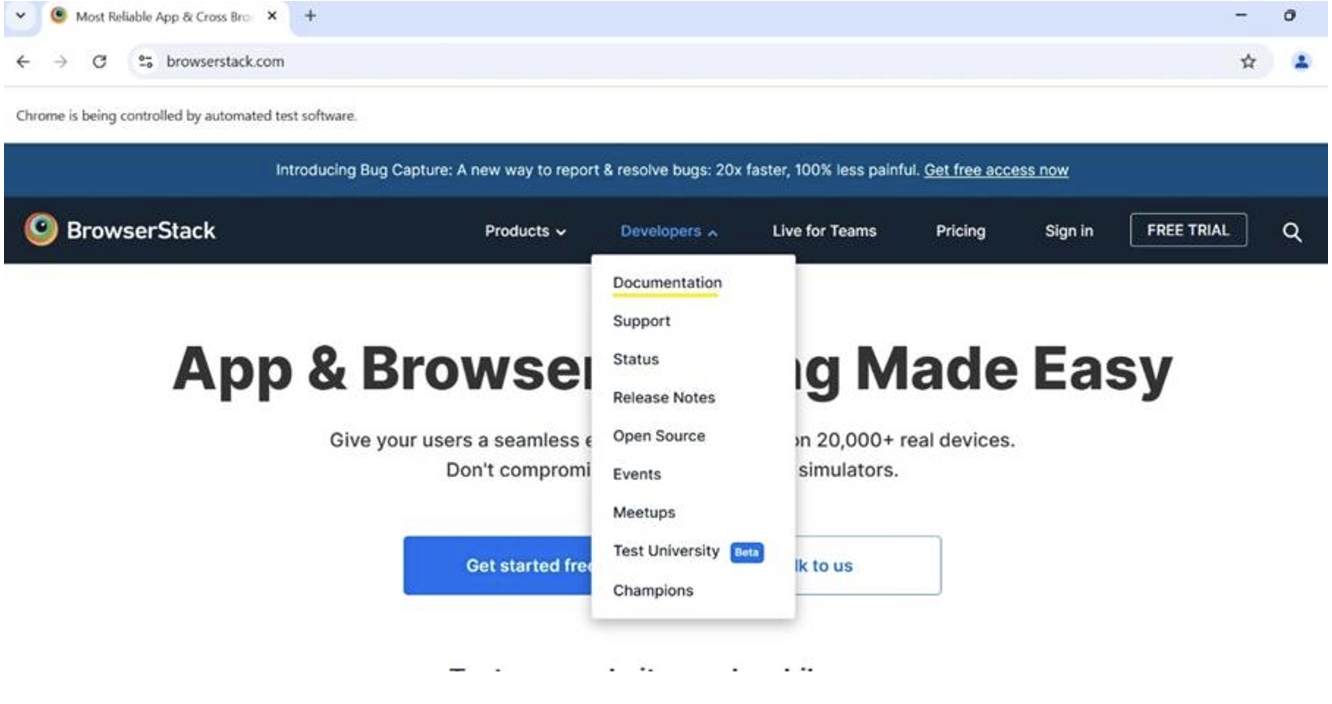
To understand how mouse hover makes certain elements on the page visible to perform further interaction, consider the below scenario.
Suppose you need to click on the Documentation link, which is visible only after hovering on the Developers link. If you do not hover and directly click on the Documentation link, you will face an ElementNotInteractableException, as the element you are trying to interact with is not visible in the DOM.
package com.qa.testcases;

import org.openqa.selenium.By;

import org.openqa.selenium.WebDriver;

import org.openqa.selenium.WebElement;

import org.openqa.selenium.chrome.ChromeDriver;


public class MouseActions {


           public static void main(String args[]) {

                          WebDriver driver= new ChromeDriver();

                          driver.get("https://www.browserstack.com/");

                          WebElement documentation = driver.findElement(By.cssSelector("a.bstack-mm-dev-link-documentation"));

                          documentation.click();

                          driver.quit();

           }

}
After hovering on the Developers link, the revised code is as below:
public class MouseActions {


           public static void main(String args[]) {

                          WebDriver driver= new ChromeDriver();

                          driver.get("https://www.browserstack.com/");

                          WebElement dev=driver.findElement(By.id("developers-dd-toggle"));

                          WebElement documentation = driver.findElement(By.cssSelector("a.bstack-mm-dev-link-documentation"));

                          Actions ac=new Actions(driver);

                          ac.moveToElement(dev).perform();

                          documentation.click();

                          driver.quit();

           }

}
Why Use moveToElement for Scrolling?
The moveToElement method can be used to scroll to a specific web element in the web page, making it visible in the DOM, or to trigger lazy loading of elements that follow it.
Below are some of the scenarios where you may use moveToElement to scroll:
1. To lazy load: Some websites have infinite scrolling also called as lazy loading implementation where the additional content loads only after scrolling to the end of the page or to a specific element. With the moveToElement method you can simulate mouse action of scrolling to the end of the current page or any specific element which will load the further content.
2. To make an element visible: There may be instances where you need to bring an element into the viewable area of the screen which might be outside the current visible viewport. By using the moveToElement method you will automatically scroll the page to bring that element in view.
Syntax of moveToElement
Here are different syntaxes of moveToElement:
1. To move to a given Element
Actions moveToElement(WebElement target);
target- The web element that you want to move mouse to
2. To move to a given Element with Pixel coordinates
Actions moveToElement(WebElement target, int xOffset, int yOffset);
target- The web element that you want to move mouse to
xOffset: The number of pixels to offset along the X axis
yOffset: The number of pixels to offset along the Y axis
Example:
Actions actions = new Actions(driver);

WebElement element = driver.findElement(By.id("locator value"));

actions.moveToElement(element, 50, 100).perform();
With the above code, the mouse will be moved to the given element and then offset by 50px on X axis, 100px on Y axis respectively.
How to use moveToElement in Selenium to scroll to a specific element: Example
Suppose you need to load full content on the BrowserStack website. In that case, consider scrolling till the “Benefits“ section to load the lazy content.
public class MouseActions {

           public static void main(String args[]) {

                          WebDriver driver= new ChromeDriver();

                          driver.get("https://www.browserstack.com/");

                          WebElement benefits=driver.findElement(By.xpath("//h2[contains(text(), 'Benefits')]"));

                          Actions ac=new Actions(driver);

                          ac.moveToElement(benefits).perform();

                          driver.quit();

           }

}
Combining moveToElement with Different Mouse Actions (Click, Double-Click)
The moveToElement method moves the mouse to the center of the specified element. However, to perform further actions on the element, you need to use additional mouse actions.
In Selenium, you can combine the moveToElement method with other mouse actions like click, double click, context click (right click), etc to simulate a series of user interactions in a particular order. The Actions class allows you to chain multiple actions together and perform them all at once.
1. Move to element and click:
The following code will move the mouse to the “Free Trial” button on BrowserStack homepage and click on it.
public class MouseActions {


           public static void main(String args[]) {

                          WebDriver driver= new ChromeDriver();

                      driver.get("https://www.browserstack.com/");

                          WebElement trial=driver.findElement(By.cssSelector("a[title='Free Trial']"));

                          Actions ac=new Actions(driver);

                          ac.moveToElement(trial).click().perform();

                          driver.quit();

           }


}
2. Move to element and double click:
The following code will move the mouse to the “Free Trial” button on BrowserStack homepage and double click on it.
public class MouseActions {

           public static void main(String args[]) {

                          WebDriver driver= new ChromeDriver();

                      driver.get("https://www.browserstack.com/");

                          WebElement trial=driver.findElement(By.cssSelector("a[title='Free Trial']"));

                          Actions ac=new Actions(driver);

                      ac.moveToElement(trial).doubleClick().perform();

                          driver.quit();

           }

}
3. Move to element and right click (context click):
The following code will move the mouse to the “Free Trial” button on BrowserStack homepage and right click on it.
public class MouseActions {


           public static void main(String args[]) {

                          WebDriver driver= new ChromeDriver();

                          driver.get("https://www.browserstack.com/");

                          WebElement trial=driver.findElement(By.cssSelector("a[title='Free Trial']"));

                          Actions ac=new Actions(driver);

                          ac.moveToElement(trial).contextClick().perform();

                          driver.quit();

           }

}
4. Move to element, click and hold, then release:
The following code will click and hold the mouse down button on the “Free Trial” button on BrowserStack homepage and then release it later over the “Get Started” button.
public class MouseActions {

           public static void main(String args[]) {

                          WebDriver driver= new ChromeDriver();

                      driver.get("https://www.browserstack.com/");

                          WebElement trial=driver.findElement(By.cssSelector("a[title='Free Trial']"));

                          WebElement getStarted=driver.findElement(By.cssSelector("a#signupModalProductButton"));

                          Actions ac=new Actions(driver);

                      ac.moveToElement(trial).clickAndHold().perform();

                      ac.moveToElement(getStarted).release().perform();

                          driver.quit();

           }

}
Running moveToElement in Selenium on Real Devices using BrowserStack Automate
BrowserStack Automate allows you to run Selenium tests on 3500+ real devices and browsers. You can test under real user conditions for more accurate test results.
To run the test scripts on automate product using BrowserStack SDK, follow the steps mentioned below:
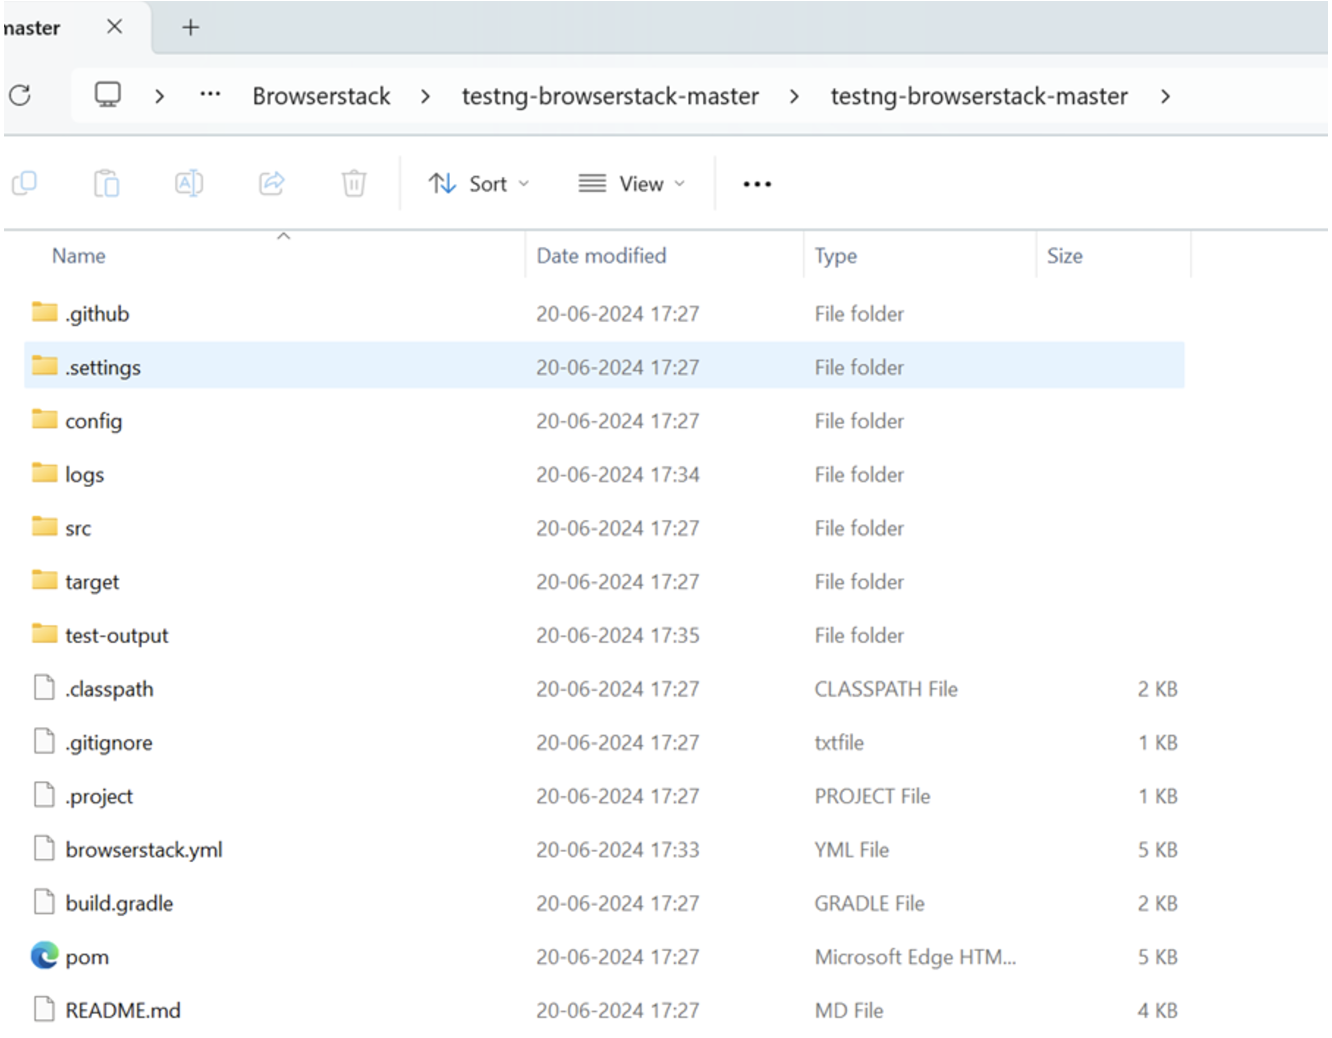
Step 1. Download BrowserStack Project Zip from the GitHub page.
Step 2. Once it is downloaded, unzip it in a desired location in your local system.
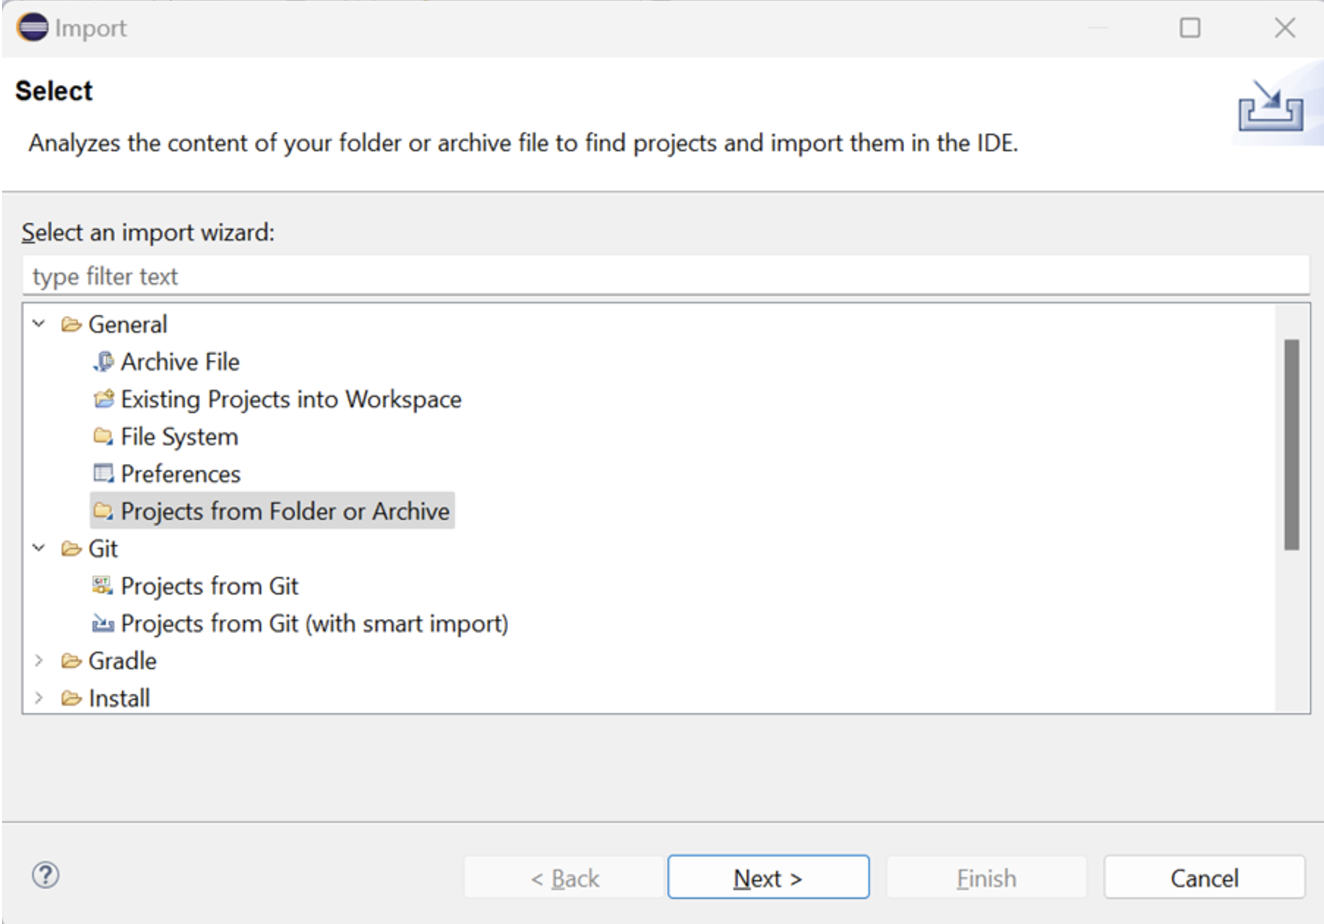
Step 3. Import the project in Eclipse via File-> Import -> General -> Projects from Folder or Archive in Eclipse.
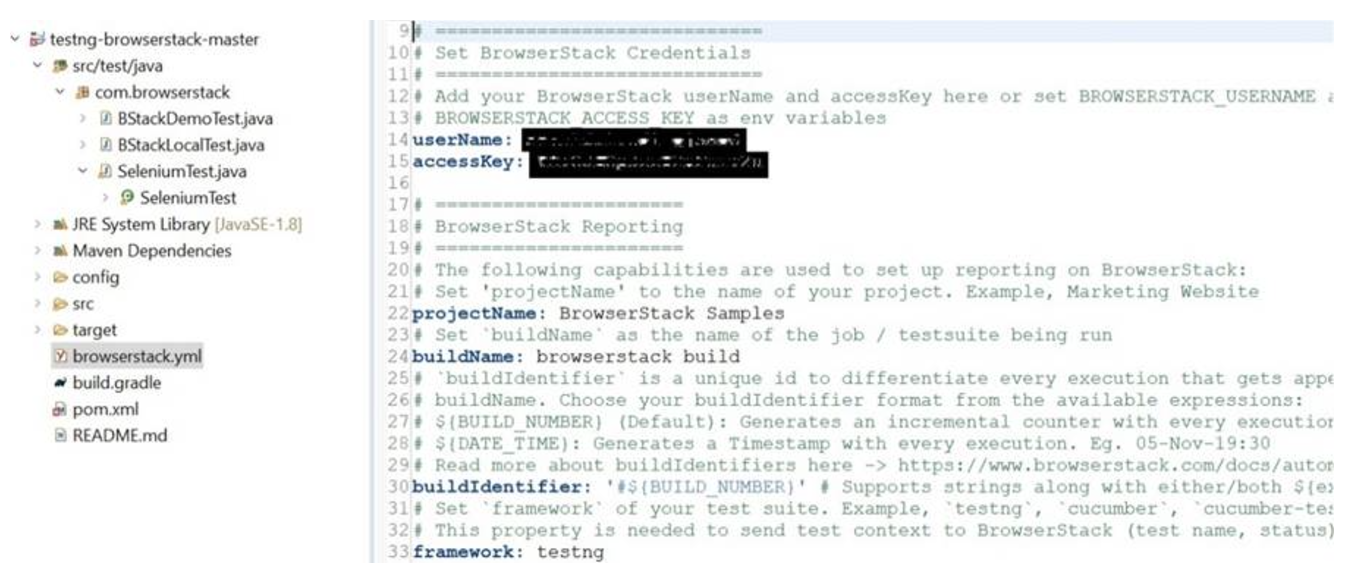
Step 4. Once the project is imported it should have a structure like below. Open browser.yml file which contains all the required capabilities to run the tests on BrowserStack platform.
Step 5. Set username and password in the browserstack.yml file available at the root directory.
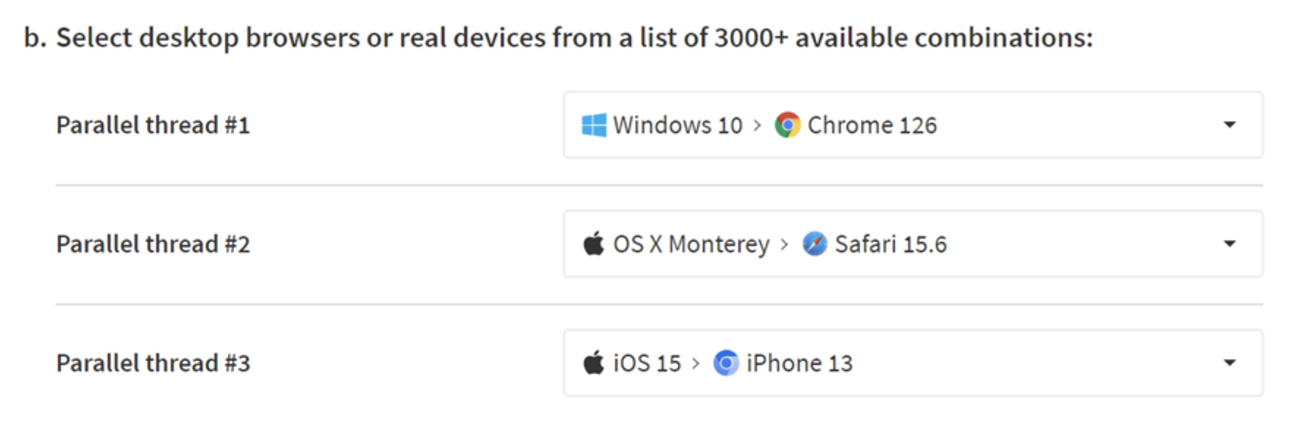
Step 6. You can run the testcases on multiple devices and browser combinations available at the BrowserStack Cloud Selenium Grid. To do so select the required combinations from the selection list using BrowserStack Capabilities Generator.
Step 7. Copy and replace the platforms object in the browserstack.yml file like below.
platforms:
  - os: Windows

osVersion: 10

browserName: Chrome

browserVersion: latest
This is for running the testcases on only 1 platform. If you wish to run on multiple OS and browser combinations you may edit the platforms accordingly.
Run Parallel Tests on Real Devices
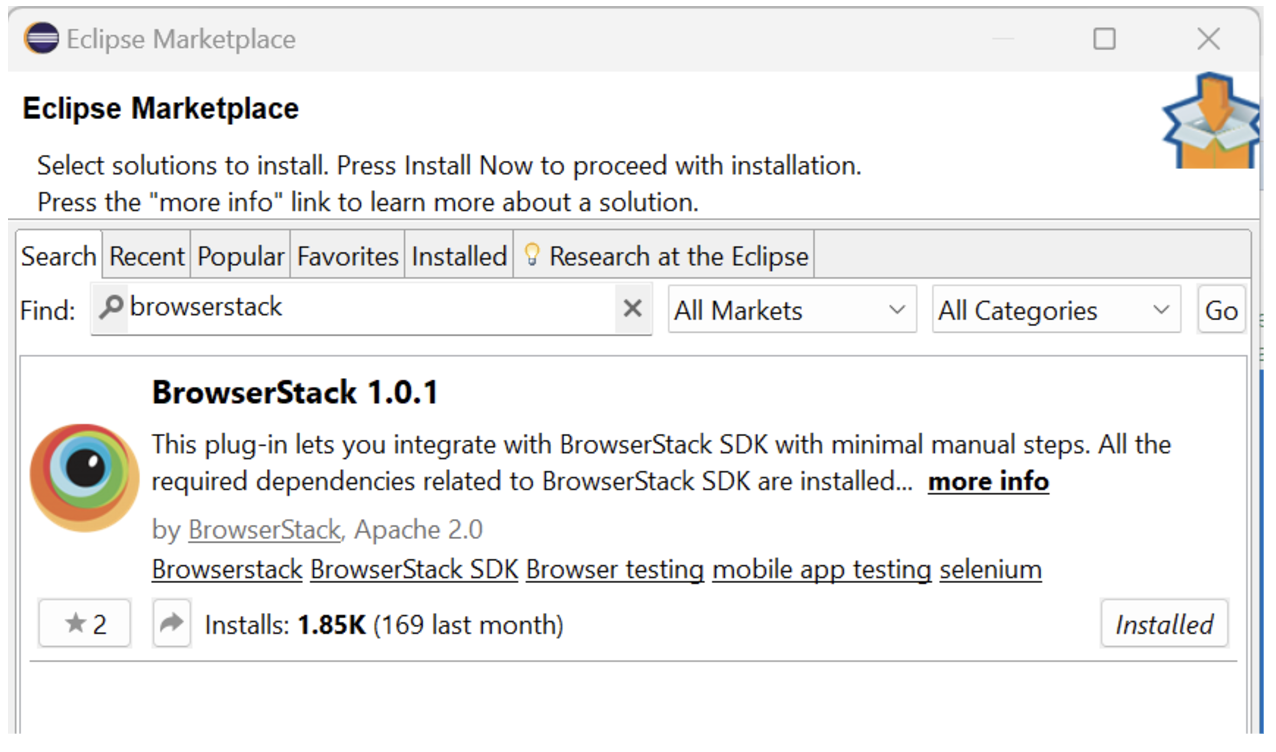
Step 8. Install BrowserStack plugin in Eclipse via MarketPlace.
Step 9. Add the MouseActions program under src/test/java folder and com.browserstack package. This class should extend SeleniumTest as it has the setup and teardown methods.
package com.browserstack;

import org.openqa.selenium.By;

import org.openqa.selenium.WebDriver;

import org.openqa.selenium.WebElement;

import org.openqa.selenium.chrome.ChromeDriver;

import org.openqa.selenium.interactions.Actions;

import org.testng.annotations.Test;


public class MouseActions extends SeleniumTest{

  WebDriver driver = new ChromeDriver();


  @Test(priority = 1)

  public void click() {

            driver.get("https://www.browserstack.com/");

            WebElement trial=driver.findElement(By.cssSelector("a[title='Free Trial']"));

            Actions ac=new Actions(driver);

            ac.moveToElement(trial).click().perform();

  }


  @Test(priority = 2)

  public void doubleClick() {

            driver.get("https://www.browserstack.com/");

            WebElement trial=driver.findElement(By.cssSelector("a[title='Free Trial']"));

            Actions ac=new Actions(driver);

            ac.moveToElement(trial).doubleClick().perform();

  }


  @Test(priority = 3)

  public void contextClick() {

            driver.get("https://www.browserstack.com/");

            WebElement trial=driver.findElement(By.cssSelector("a[title='Free Trial']"));

            Actions ac=new Actions(driver);

            ac.moveToElement(trial).contextClick().perform();

  }


  @Test(priority = 4)

  public void dragDrop() {

            driver.get("https://www.browserstack.com/");

            WebElement trial=driver.findElement(By.cssSelector("a[title='Free Trial']"));

            WebElement getStarted=driver.findElement(By.cssSelector("a#signupModalProductButton"));

            Actions ac=new Actions(driver);

  ac.moveToElement(trial).clickAndHold().perform();

  ac.moveToElement(getStarted).release().perform();

            driver.quit();

  }


}
Handling Failures when using moveToElement in Selenium
When using moveToElement in Selenium, handling failures effectively is essential to ensure robustness in your automation scripts. Here are some key pointers to consider for managing failures:
- Solution: Ensure the element is visible and interactable. Use explicit waits to make sure the element is present and ready for interaction before attempting to move to it.
- Tip: Use WebDriverWait with expected conditions like element_to_be_clickable or visibility_of_element_located.
- Solution: Re-locate the element if it becomes stale due to page refreshes, DOM changes, or navigation.
- Tip: Always re-fetch the element in such scenarios instead of relying on the initially located element.
3. Element Not Found
- Solution: If an element is not found, handle this with proper error messages and graceful recovery.
- Tip: Implement a retry mechanism or fallback logic (e.g., using a different locator strategy) in case the element is not immediately available.
4. Timing Issues
- Solution: Timing issues may cause moveToElement to fail due to delayed rendering of elements.
- Tip: Always wait for the page to load completely and check for dynamic content that could change the element’s position.
5. Element Covered by Another Element
- Solution: If an element is covered (e.g., by a popup or overlay), moveToElement will fail.
- Tip: Check for and handle potential overlays or modals that may block the element, either by waiting for them to disappear or interacting with them directly.
6. Scrolling Issues
- Solution: Sometimes, the element may not be in view, causing moveToElement to fail.
- Tip: Use JavaScript to scroll to the element before trying to move to it. You can use scrollIntoView() to ensure the element is in the viewport.
7. Browser-Specific Behavior
- Solution: Different browsers may behave differently when executing actions like moveToElement.
- Tip: Ensure compatibility by testing across different browsers and handling any browser-specific quirks.
8. Invalid XPath or CSS Selectors
- Solution: If the element’s locator (XPath, CSS selector) is incorrect, moveToElement will not work.
- Tip: Validate your locators and ensure they are correct and uniquely identifying the element.
9. Interrupted Action (like Page Refresh)
- Solution: An action might get interrupted if the page refreshes or reloads during the execution.
- Tip: Consider adding retry logic or making sure the page is stable before performing actions like moving to elements.
10. Handling Unexpected Popups or Alerts
- Solution: If an alert or popup appears, it can block the interaction.
- Tip: Ensure you have a strategy for dealing with popups, such as dismissing them or switching to the alert before proceeding with actions.
Read More: How to handle Alerts and Popups in Selenium?
Best Practices for Using moveToElement in Selenium
Here are the key best practices for using moveToElement in Selenium:
1. Make sure the element is not obscured by another element: When you are trying to hover on an element, make sure that the element is visible and not covered by any other element. If the element is obscured by another element, the moveToElement method may not work as expected. Use explicit wait to ensure that the element is visible before performing any hover action.
2. Always perform the hover action before any other action: Hovering over an element can sometimes reveal additional menu items or options that can be clicked later. It is always a good practice to first use the moveToElement method on such elements before interacting with those that appear after the hover.
3. Handle dynamic content: Some web applications have dynamic elements that change their attributes on page refresh. If you are trying to hover on an element that is dynamic in nature, you may not be able to locate the element which will ultimately fail the move to element function. Ensure that the element you are hovering to is stable before performing any operation.
4. Test across various screen sizes: Every browser renders page differently and therefore the hover and the visibility of elements may vary depending on different screen resolutions. To ensure that the moveToElement method functions consistently, always test in different screen sizes and resolutions.
Why run Selenium Tests on BrowserStack Automate?
BrowserStack Automate simplifies Selenium testing by offering cross-browser and cross-platform support, real-device testing, and the ability to run tests at scale in a cloud-based environment.
Following are some features provided by BrowserStack Automate.
- Parallel Testing: Parallel testing is paramount in reducing overall execution time as it let the testers execute the scripts simultaneously on multiple devices/ browsers. BrowserStack Automate platform provision this feature by giving access to latest devices and browsers for the testers to test their applications.
- Real devices and browsers: A genuine user experience can only be achieved after testing the applications on real devices and browsers. Testing on emulators and simulators can be easy, however it may not give accurate test results at all times with respect to functional and even non-functional testing such as application’s performance.
- Dedicated Dashboard: After running Selenium test cases on BrowserStack Automate, it creates a report in a dashboard which can be referred to manage and monitor the automation testing activities. It includes an overview of the testing status as Pass/Fail/Pending with all the environment details such as device name, OS version, Platform, browser name, browser version, test execution time and duration, screenshots, etc.
- Custom Reports with Artifacts: In Automate, custom reports can be generated to provide detailed and customized reports for the automated test execution. With this feature it allows to customize the structure and content of the report as per user’s need. It can include a vast range of test data such as test execution status, device and browser configurations, test duration, video recording, screenshots, etc.
- Easy Integration with CI/CD Pipeline: BrowserStack Automate integrates seamlessly with popular CI/CD tools such as Jenkins, TeamCity, TravisCI. The team can achieve faster delivery cycles with great confidence in the reliability, performance and compatibility of the application across different devices and platforms.
Conclusion
The moveToElement() method simulates moving the mouse cursor to a specific element on a web page. If the element is out of view, it triggers the browser to scroll and make the element visible. Testing this functionality across different devices with varying screen sizes and resolutions is essential. For such scenarios, BrowserStack is an excellent choice.
BrowserStack Automate provides access to 3500+ browsers and devices to test web applications. Start automating your web application tests on BrowserStack by signing in today.


