Junit – Assertthat method
By Mohit Joshi, Community Contributor - January 2, 2025
JUnit is a popular testing framework for Java-based applications. It has several classes or components, one of which is JUnit Assert, which is static code that provides methods to validate certain conditions.
It helps assert whether a situation passes or fails in certain scenarios. It is also instrumental in software testing to ensure the expected value matches the actual value of the outcomes under specified conditions.
What is Junit assertThat?
JUnit offers several assertion methods, and one of the extremely useful Junit assertions is the Junit Asserthat() method. In the latest version of Junit, JUnit 5, Asserthat is not directly included; therefore, to use it, you need to import it from the Hamcrest library.
Also Read: JUnit Assert
The key reason for implementing Junit Asserthat is its features, including human-readable syntax and a wide variety of conditions that can be used with its syntax, such as ranges, equality, collection properties, and string patterns.
Assertions are very useful in early code detection, and with the ease of the JUnit Assertthat, writing scripts that provide quality assertions becomes effortless.
Syntax for Junit assertThat
The Junit Assertthat() method has a very straightforward syntax which is as follows:
assertThat(actualValue, matcher);
1. actualValue: It contains the value or object for which you are going to test. It can contain a variable, a method, a result, or any value you want to satisfy with the matcher.
2. Matcher: A condition that defines what the actualValue is intended for and what it should satisfy.
Advantages of using assertThat in JUnit
There are several assertion methods in JUnit like assertEquals, assertTrue, and more. However, using assertThat in testing offers several more advantages.
Here are some of the advantages of using assertThat in Junit:
1. Improved Readability: This method enables writing script in a natural language which not only enhances readability, and understanding it also promotes people with no technical know-how to collaborate and understand tests.
2. Straightforward Assertions: The syntax of the method allows the developer to write complex scenarios cleanly and structured.
assertThat(number, allOf(greaterThan(10), lessThan(20)));
The above code can be used in the place of the below one which makes the codebase cleaner.
assertTrue(number > 10);

assertTrue(number < 20);
3. Clear error messages: Traditional Assertion methods show generic failure messages. However, the assertThat method displays human-readable failure messages when a test fa,ils highlighting what was expected from the code and what the outcome was.
4. Combining conditions: Certain keywords can be used in JUnit Asserthat to combine multiple conditions into a single assertion. Some of the keywords are allOf and anyOf.
The above code can be transformed into the one below, making the codebase less complex by combining conditions with the allOf keyword.
assertThat(number, allOf(greaterThan(10), lessThan(20)));
Read More: Best Practices for Unit Testing
Understanding JUnit assertThat Methods
Depending upon several variations formed by the combinations of messages and Matchers, several JUnit assertThat methods are useful for different purposes.
Here are the following JUnit assertThat Methods:
- assertThat (Boolean, string, object): This method asserts a boolean condition with an error message.
- assertThat(Object, IResolveConstraint): It compares an object to a constraint.
- assertThat(Object, IResolveConstraint, String): This method is similar to the above one; however, it also includes an error message in case the assertion fails.
- assertThat(Boolean): It checks the direct condition without additional context. It evaluates if the condition is true or false by comparing it to any existing absolute value.
- assertThat(Boolean, String): It is also similar to the above. However, it includes a custom error message.
How to Use JUnit assertThat?
To practically demonstrate the usefulness of the JUnit assertThat method, let’s take an example with a simple JUnit test code performing the following:
- Assigning a value to a string to later assert it.
- With the help of the assert keyword, check if the value assigned matches our intended value.
Prerequisite
1. Install Java JDK on your system. Run the following command to ensure Java is properly installed.
java --version
2. Any IDE of your choice. In this example, we are using Eclipse IDE.
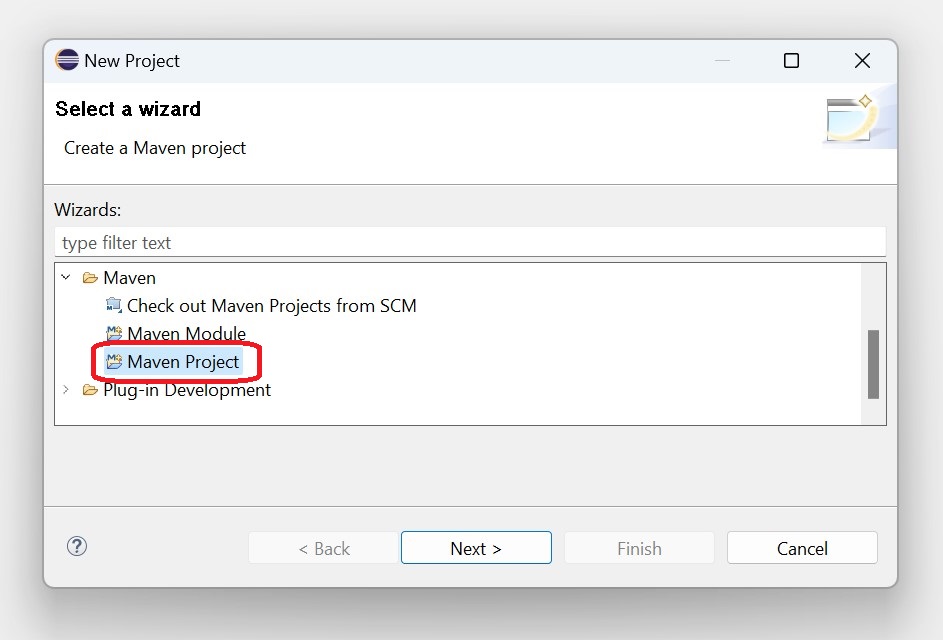
Step 1: Create a Maven project
To create a Maven project, open Eclipse and then complete the following steps:
- Click on File option
- Hover on the New drop-down menu
- Click on the Project option
- Select the Maven project option
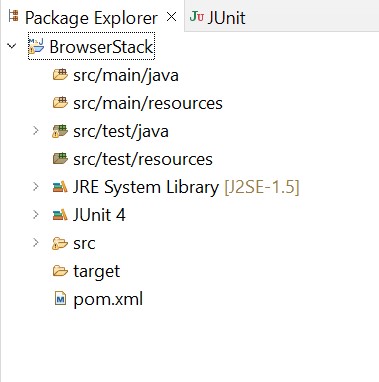
- Enter the Group ID and Artifact ID of your choice and proceed.
- Your Maven project is created.
Step 2: Add Maven dependencies
- Add the JUnit dependency from the Maven marketplace.
- Add the following script inside the dependencies tag in the pom.xml file.
<!-- https://mvnrepository.com/artifact/junit/junit -->

<dependency>

    <groupId>junit</groupId>

    <artifactId>junit</artifactId>

    <version>4.13.2</version>

    <scope>test</scope>

</dependency>
Read More: How to Configure Selenium in Eclipse
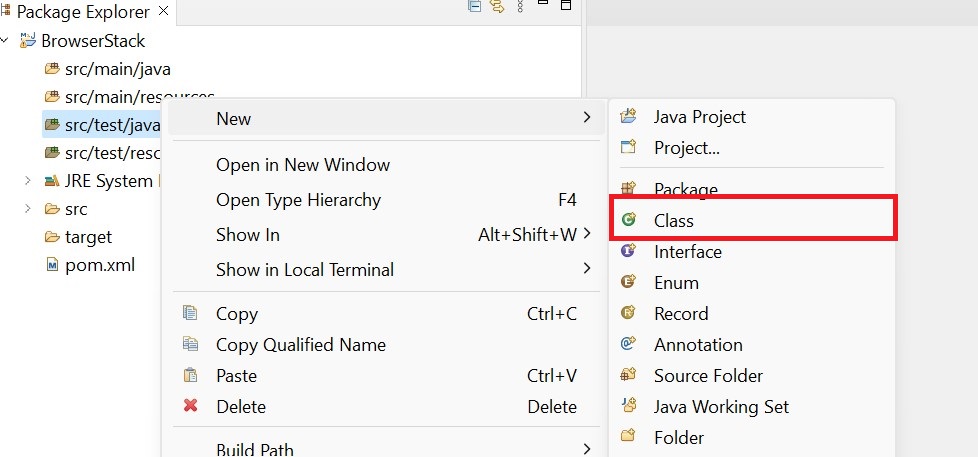
Step 3: Create a new class file
Now, follow these steps to create a new class file where you will write the Junit test.
- Right-click on the folder src/test/java
- Hover over to the new
- Click on the class and create a file by entering a name of your choice
Step 4: Writing the Test Script
The final part is to write the JUnit test after setting up the project. Open the previously created test class file inside the src/test/java folder.
import org.junit.Test;

import static org.hamcrest.MatcherAssert.assertThat;

import static org.hamcrest.Matchers.*;

public class SimpleTest {

    @Test

    public void testNumberIsGreaterThanFive() {

        int actualNumber = 10;

        // Assert that the number is greater than 5

        assertThat(actualNumber, greaterThan(5));

    }

}
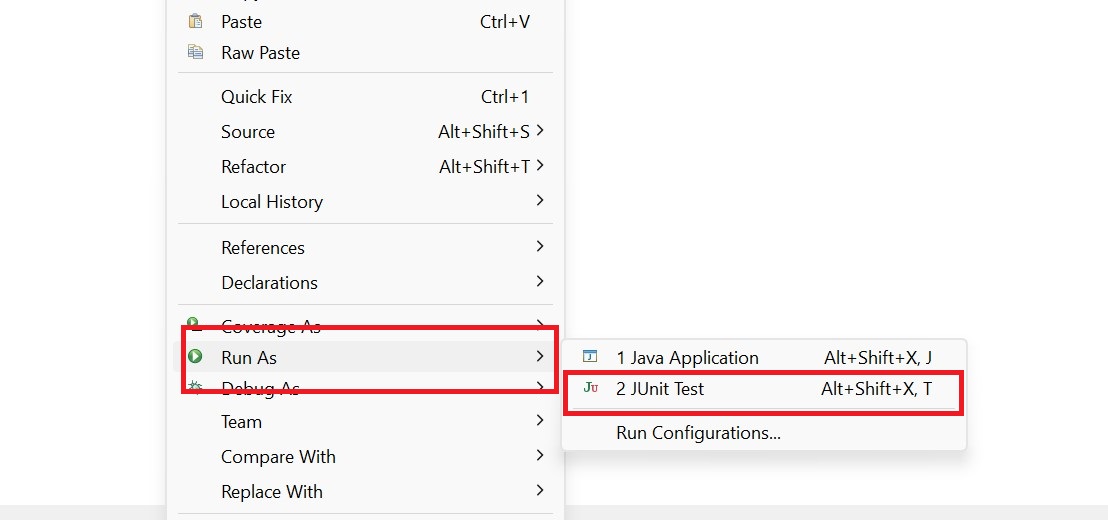
Step 5: Executing the JUnit test
Once the test is written, right-click and select run as JUnit test.
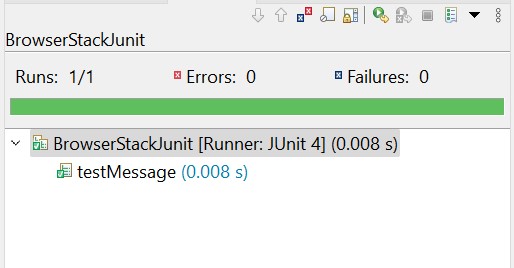
Once the test is executed, on successful completion of the test, it will be indicated on the left panel, highlighted in green.
Upon making any slight change in the test script that fails our test, it will be indicated with red color and the log of error will be displayed on the console.
Why Use assertThat Over Other Assert Methods in JUnit
Using assertThat over other traditional methods in the JUnit such as assertEquals, assertTrue, etc., offers several advantages such as:
1. The syntax of assertThat is very human-readable, which makes the test easier to comprehend even by someone without any technical know-how.
For example:
assertThat(actual, is(equalTo(expected)));
The above syntax is more readable than the one below.
assertEquals(expected, actual);
2. The other methods often provide failure messages that would confuse the developers regarding the cause of the error.
3. On the other hand, the assertThat method produces failure messages that are easier to read, reducing the debugging time and helping to curate simple yet useful test reports.
4. The assertThat method enhances clarity in the syntax and eliminates the chances of incorporating logical errors.
Unit Tests in Java with BrowserStack Automate
Selenium is a powerful tool for automated web testing, and combining it with JUnit enhances its functionality. JUnit provides robust support for multiple assertions and annotations, streamlining test case creation and management.
By leveraging BrowserStack Automate, developers can seamlessly execute unit tests in Java with Selenium, ensuring comprehensive test coverage across various browsers and devices.
Conclusion
JUnit is a popular testing framework for Java-based projects. It offers several useful features, such as Assertions. One of the most useful Assertions on JUnit is the assertThat method.
This method is very useful and comes in handy as it makes your test scripts easy to read and maintain and simplifies the syntax in complex scenarios.
One advantage of using the assertThat method is that it provides clarity in syntax that anyone can read and understand. This allows valuable collaboration in writing efficient test scripts and encourages people with different technical backgrounds to collaborate.
Useful Resources for JUnit
- JUnit Testing Tutorial: JUnit in Java
- How to write JUnit test cases
- How to Ignore a Base Test Class in JUnit
- How to run JUnit Parameterized Test in Selenium
- Understanding JUnit assertions for Selenium Testing with Examples
- Test Automation using JUnit Annotations and Selenium
- How to create JUnit Test Suite? (with Examples)
- How to run JUnit 4 Test Cases in JUnit 5
- Unit Testing in Java with JUnit
- JUnit vs NUnit: Framework Comparison
- JUnit Vs TestNG

