Continuous Integration (CI) and Continuous Delivery/Deployment (CD) are essential for rapid delivery and efficiency. Jenkins, a leading open-source CI/CD tool, automates the building, testing, and deployment of code, making it easier for developers to integrate changes seamlessly. Its support for Docker and Kubernetes further enhances its capabilities, streamlining processes and reducing infrastructure costs.
Overview
What is Jenkins Docker Agent?
A Jenkins Docker Agent is a Docker container that acts as a Jenkins build agent (or node), allowing Jenkins to run jobs inside isolated, reproducible environments.
Benefits of using Jenkins with Docker Agents
- Provides isolated, consistent build environments
- Simplifies dependency and environment management
- Enables dynamic provisioning of agents on demand
- Improves scalability and resource utilization
- Supports clean, repeatable builds across pipelines
- Reduces overhead of managing physical or virtual machines
This guide explores how leveraging Jenkins Docker agents can optimize your development workflow and boost overall productivity.
What is Jenkins?
Jenkins is an open-source tool for continuous integration (CI) and continuous delivery/deployment (CD) in software development. It works on Windows, Linux, and macOS, and can run within Docker containers. Jenkins supports various plugins for various tasks, including security, testing, and cloud integrations. It also integrates with tools like BrowserStack for real-device testing, making it a versatile choice for DevOps teams.
Read More: Jenkins vs Bamboo – Core Differences
What is Docker?
Docker is an open-source technology that provides an isolated environment to automate the deployment, manage applications, testing, and other repetitive tasks. Docker uses the concept of containers to encapsulate applications, libraries, packages, resources, and configuration files.
These containers are more efficient than traditional virtual machines and physical machines. It requires less resources. Because of its many benefits and features, Docker is a modern standard for development, testing, Continuous Integration/Continuous Deployment (CI/CD), and scalable deployments. Many modern DevOps tools including Jenkins provide support for Docker.
Read More: How to run Selenium tests in Docker
What is Jenkins Docker Agent?
Jenkins consists of two components: a Server (Master) and Slaves (Agents). Jenkins’s server, also known as Master, is a central system that controls all the tasks, including the build and deployment processes.
Jenkins Slave, also known as Jenkins Agent or Node, is a separate machine that can be a physical, virtual, or containerized system that receives the command from the Jenkins Server and performs the actual tasks. Depending on the type of task, an agent might need to have different configurations.
Jenkins docker agent is a containerized system that acts as a node in Jenkins environments. Instead of using physical machines or virtual machines (VM), the containers are used for performing tasks that are more efficient and less resource-consuming compared to physical machines. A single physical machine can have N number of containers depending on the physical machine’s computing power.
Understanding Jenkins Agent Types
In Jenkins, agents (also known as nodes or slaves) are machines that execute build jobs. Jenkins supports different types of agents depending on infrastructure, scalability needs, and use cases. Understanding these agent types helps in choosing the right setup for efficient CI/CD execution.
1. Static Agents
- Permanently configured and always available to Jenkins.
- Ideal for small teams or fixed infrastructure.
- Require manual setup and resource allocation.
2. Dynamic Agents
- Provisioned on-demand using plugins like Docker, Kubernetes, or cloud services.
- Automatically created when a job starts and terminated afterward.
- Suitable for elastic scaling in modern DevOps environments.
3. SSH Agents
- External machines connected to the Jenkins master using SSH.
- Common in traditional setups where Jenkins controls physical or virtual machines.
4. Docker Agents
- Lightweight containers spun up for executing specific builds.
- Offer isolation, reproducibility, and easy dependency management.
- Can be defined in the pipeline (agent { docker { … } }) or dynamically launched via the Docker plugin.
5. Kubernetes Agents
- Run inside Kubernetes clusters using the Jenkins Kubernetes plugin.
- Ideal for cloud-native CI/CD at scale with dynamic pod provisioning.
Choosing the right agent type depends on factors like infrastructure (bare metal, cloud, containers), build environment consistency, job concurrency, and automation needs. Docker agents are particularly useful when builds need to run in isolated, reproducible environments with custom dependencies.
Benefits of using Jenkins with Docker Agents
Docker agents have many benefits over legacy physical agents, and some of them are:
- Docker agents consume fewer resources compared to physical agents which decreases the infrastructure cost.
- These agents provide the isolation environment that ensures every build runs in a clean environment without any inference.
- Docker containers can be set up and torn down on demand. This helps to bring the system only when required
- Docker images are highly customizable. Based on the task, you may need to have different types of containers. These requirements can easily met with docker-compose files
- It has many additional features, such as increased security, simplified management, faster task completion, and an isolated environment.
- Docker agents don’t require specialized hardware. It can even be configured with regular computers.
Read More: Jenkins alternatives for developers
How to configure Jenkins’s Agent with Docker?
The Jenkins extensively supports Docker containers. You can configure any number of nodes with different configurations with docker containers. A single physical system can have many Jenkin nodes without any hassle. In the upcoming sections, understand how to configure Jenkins agents with Docker containers.
Prerequisite
- Install Java 17 or Above
- Install Jenkins
- Install Dockers
- Install SSH Tools (Example: Git SSH is part of GitSCM)
Step 1: Generating an SSH key pair
SSH Key contains a public key and a private key. This helps to make secure communication between master and agent nodes seamless. Jenkins’s server is configured with private key and docker agent will be launched with public key.
There are many SSH tools available to generate SSH keys. Git SCM is the easiest tool and is available for free. However, you can use any tool to generate them
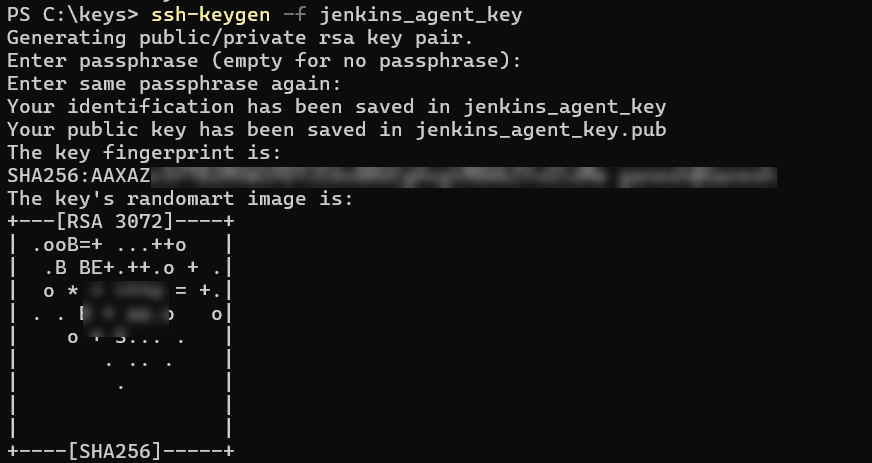
Navigate to your desired Directory, and enter the below command
ssh-keygen -f jenkins_agent_key
Note: If the system asks for a Passphrase, do not give anything and hit enter as it is an optional
The above command generates two files, jenkins_agent_key and jenkins_agent_key.pub
Step 2: Configure Keys on the Jenkins Server
- Navigate to Jenkins Dashboard
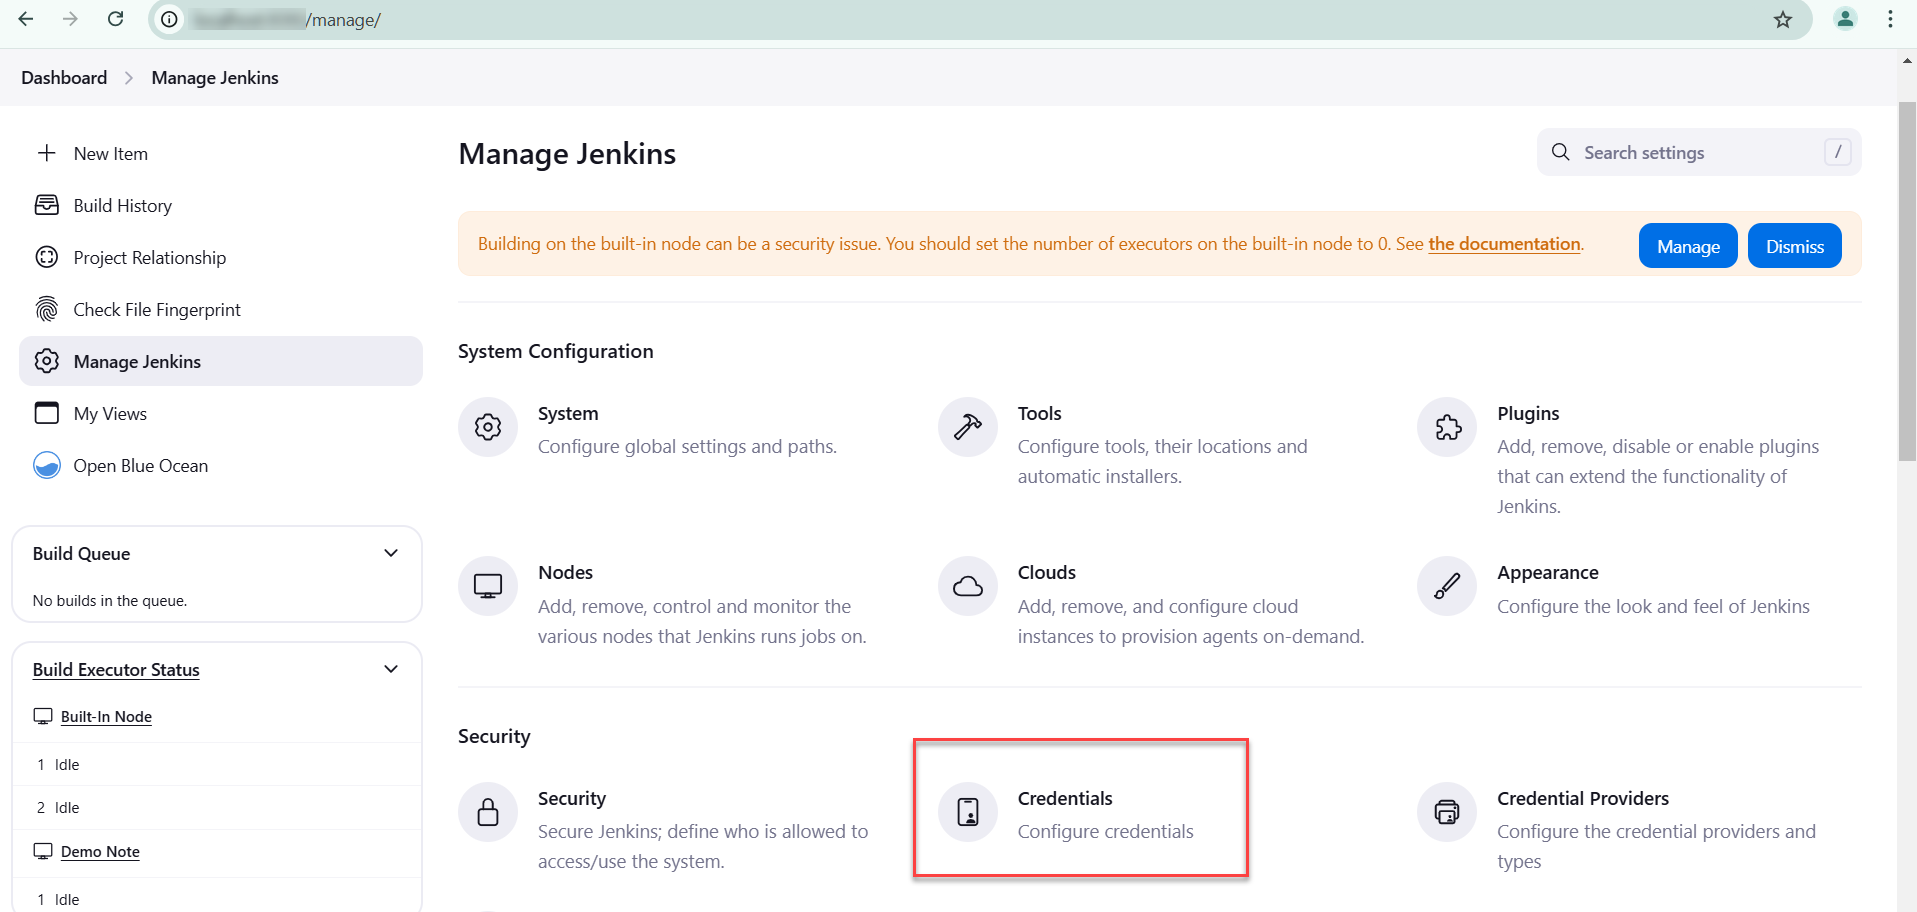
- Click on Manage Jenkins
- Choose Credentials under the Security Section
- Click on Global below the Domain column header
- Click on Add Credentials
Enter the values as mentioned below
- Kind: SSH Username with private key
- Scope: Global (Jenkins, nodes, items, all child items, etc)
- ID: Jenkins
- Username: Jenkins
- Private Key: Enter Directly Check the radio button
- Key: Click on Add
- Copy the key generated in Step 1 and paste it here (Use jenkins_agent_key file)
- Passphrase: Leave empty
- Click on Create
Step 3: Create a Docker Agent for Jenkins
In the above step, credential configurations for Jenkins Server have been added. Now proceed with Jenkins Agents with Docker
Enter the below command to create a docker agent
docker run -d --rm --name=agent --network jenkins -p 22:22 ` -e
"JENKINS_AGENT_SSH_PUBKEY=[your-public-key]" ` jenkins/ssh-agent:jdk17
In the above command, replace [your-public-key] with a public key. This key is created during Step 1 and available in the file named jenkins_agent_key.pub. Copy the entire content and replace it.
- docker run: This command is used to create a new container from a specific image
- -d: Executes the container in the background and returns the container ID
- -rm: Automatically removes the container once it stops, helping to manage disk space and avoid clutter.
- -name: Assigns a name to the container, making it easier to reference in other Docker command
- -p: Maps a port on the host to a port on the container
- -e: Sets environment variables inside the container.
Once you execute the above command, the new container with the name agent will start running. This can be viewed in the Docker Desktop UI
Step 4: Setup Docker Node or Agent in Jenkins
In the previous step, a new Docker Agent has been created. However, it is not yet linked to Jenkins. To communicate, link them together.
- Navigate to Jenkins Dashboard
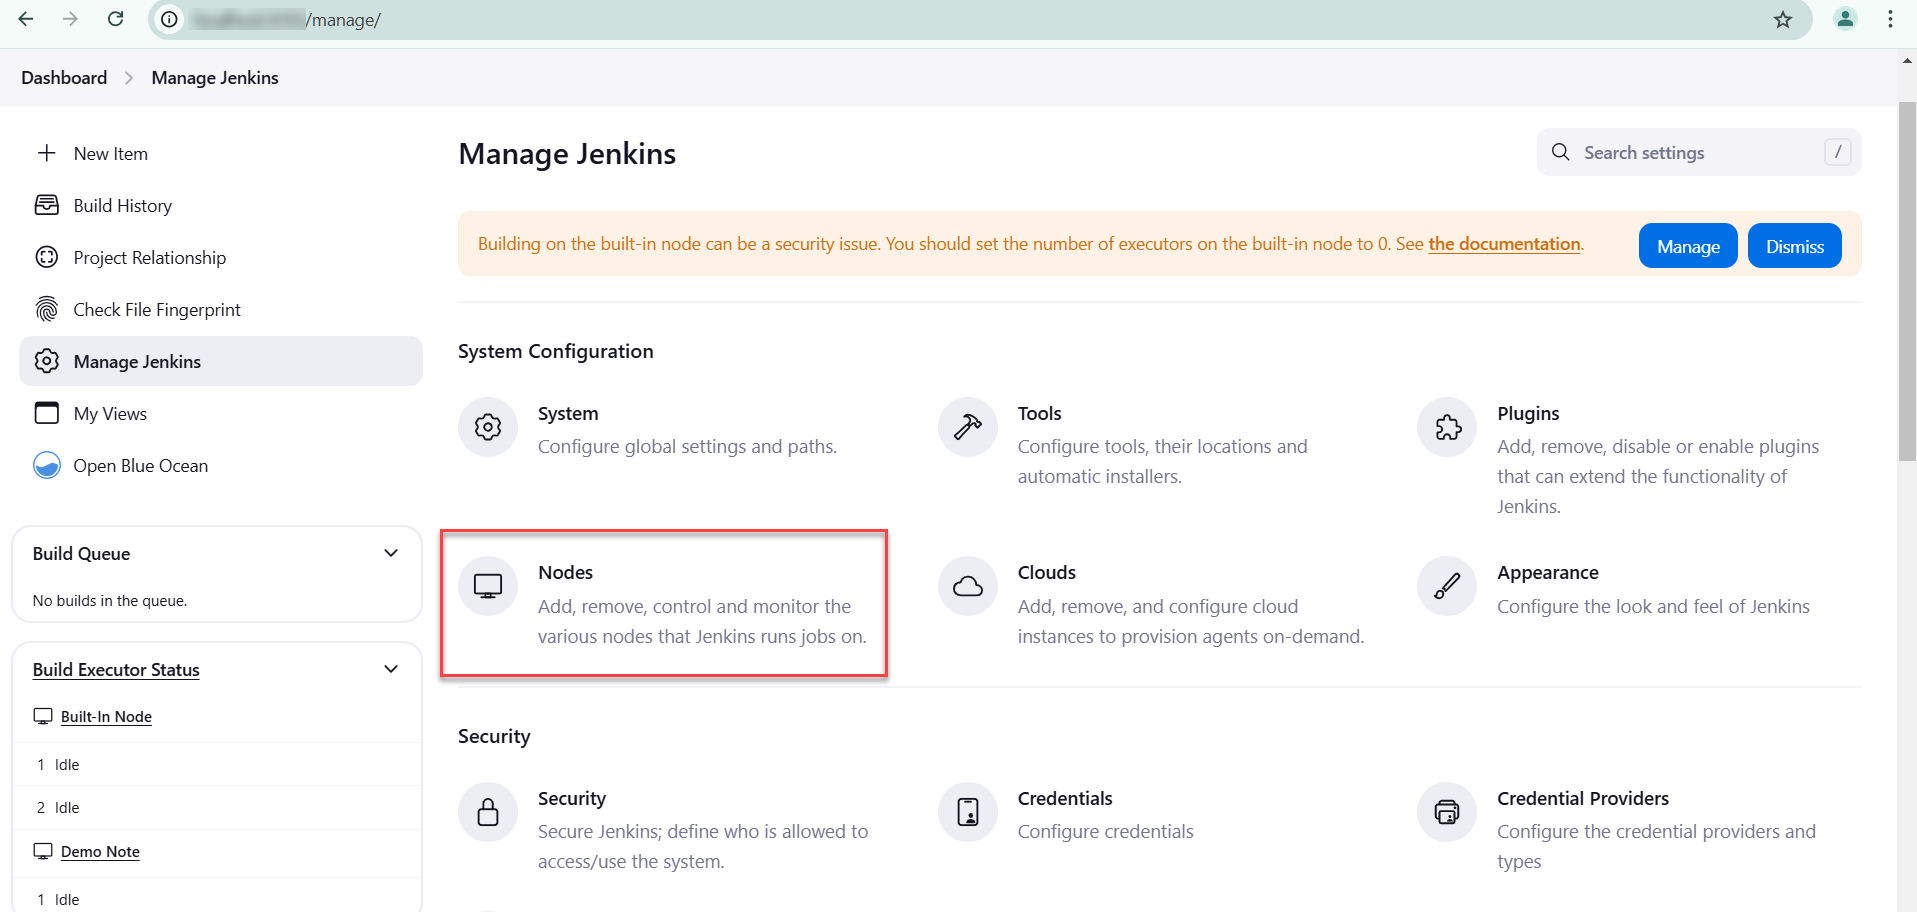
- Click on Manage Jenkins
- Click on Nodes
- Click on New Node
Enter the information given below:
- Node Name: DemoNode
- Number of executors: 1
- Remote root directory: /home/jenkins
- Labels: agent1
- Usage: Use this node as much as possible
- Launch method: Launch agents via SSH
- Host: Enter the host IP
Note: To get the host IP, type the command below into the terminal.
docker container inspect agent | Select-String -Pattern '"IPAddress": "\d+\.\d+\.\d+\.\d+"'
- Credentials: jenkins (Should auto popup)
- Host Key Verification Strategy: Manually trusted key Verification Strategy
- Availability: Keep this agent online as much as possible
Leave all the fields to values to default and Click on Save.
Once you complete the above step, you should see Agent online. It may take a few minutes; you can also try to relaunch it if it doesn’t come online.
You will see the information below on the Logs.
Note: Logs are available in Manage Jenkins> Nodes > DemoNode > Logs
Step 5: Build and Execute the first Jenkins Job on Docker Agent
You have now created a Docker agent that is linked to the Jenkins Server. Now create a first Job on Jenkins
- Navigate to Jenkins Dashboard
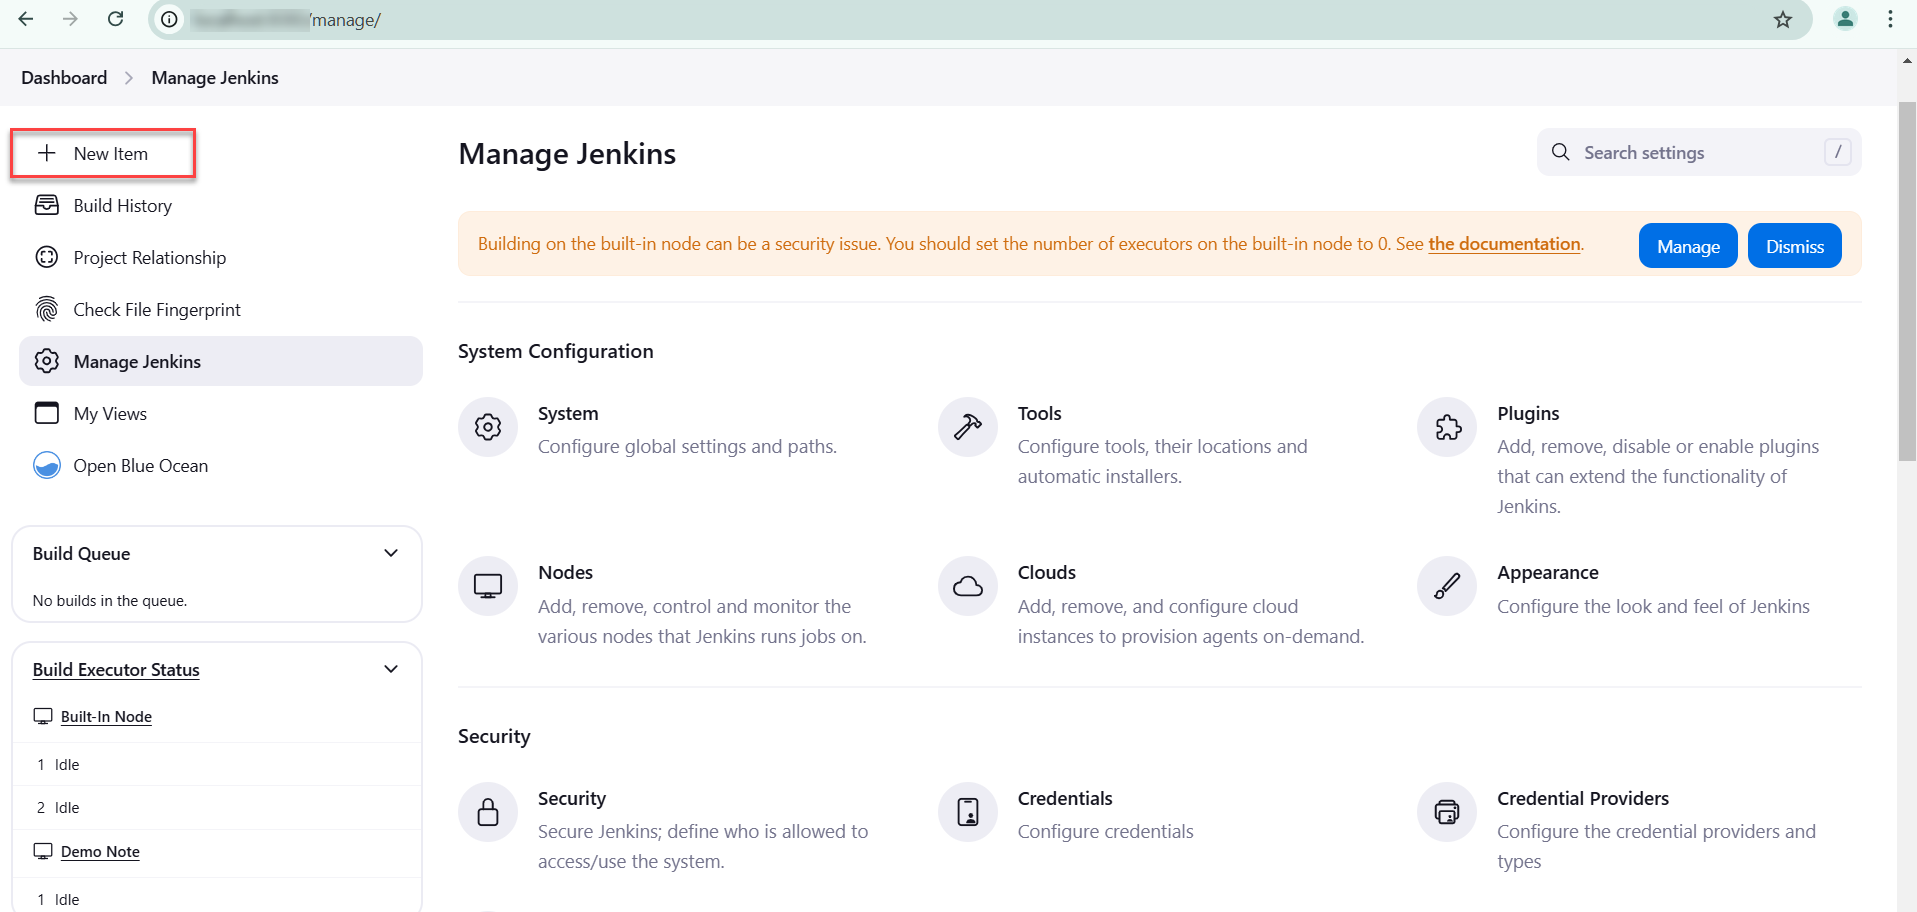
- Click on New Item
- Enter the Name (Example: Test Job)
- Choose Free Style Project and Click on Ok
In the Configuration Section, enter the below information
- Description: Test Job
- Restrict where this project can be run: Check the Checkbox
- Label Expression: agent
- Source Code Management: None
- Build Steps: Choose Execute Shell
Enter the below command:
echo $BUILD_NUMBER
echo $NODE_NAME
Leave all the options to default and Click on Save.
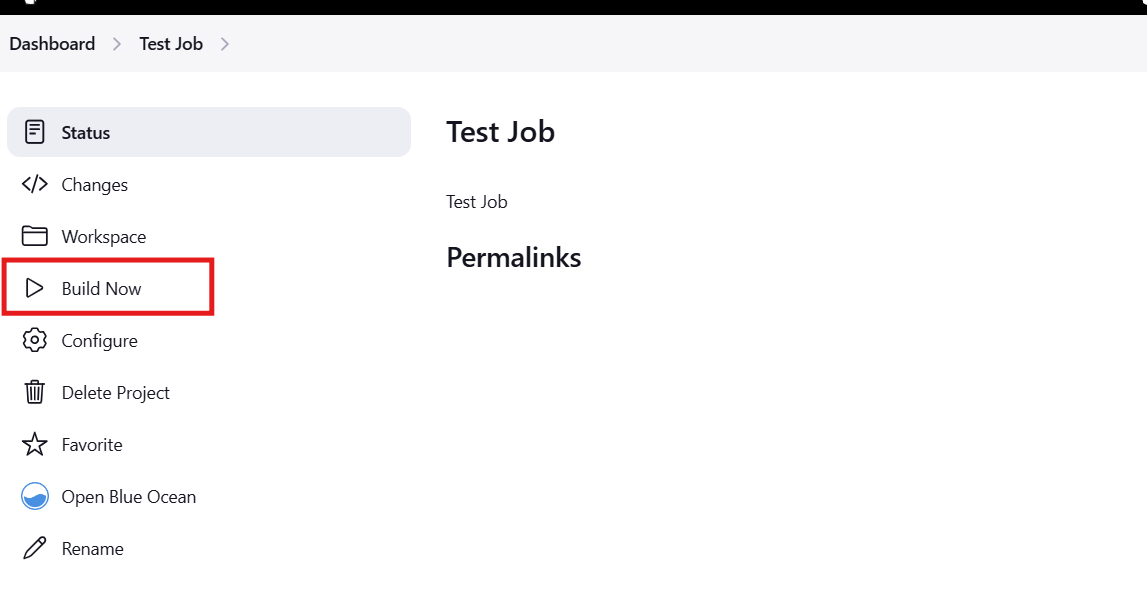
Once you complete the above step, you should see the Build Now menu in the left nav bar
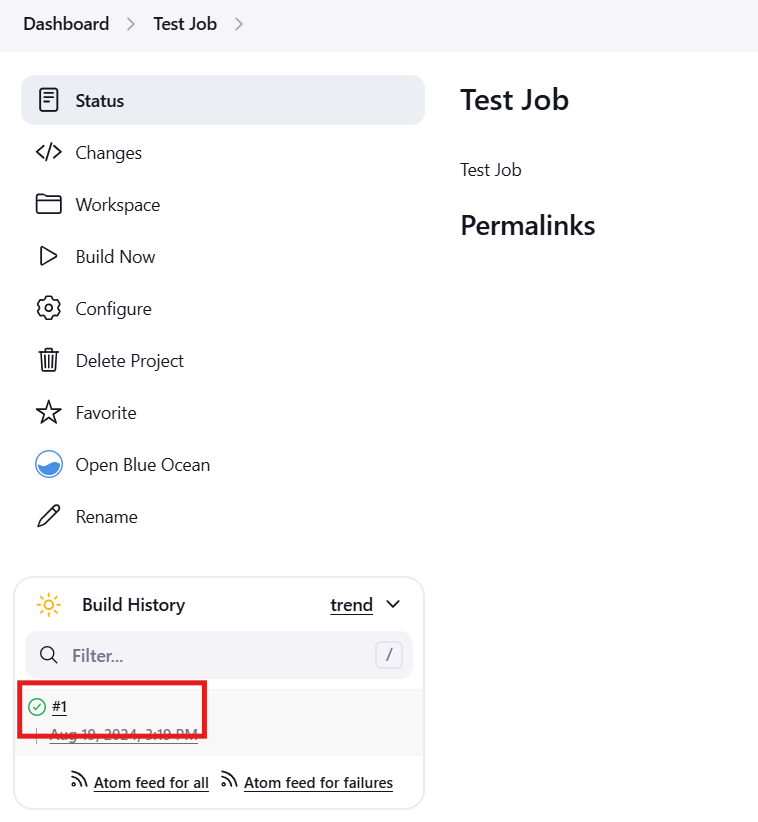
Click on Build Now and Wait for it to be complete. Once the build is completed, you will see the build number in Green.
To view the detailed results click on Build number and navigate to the Console Output.
How do you test your Jenkins pipeline with BrowserStack?
Testing your Jenkins pipeline with BrowserStack can greatly enhance your CI/CD process. BrowserStack is a cloud-based platform that automates testing across various devices and operating systems. Integrate BrowserStack with Jenkins to bring the advantage of cloud infrastructure to your testing workflow. It allows for automated responsive design testing, end-to-end testing, cross-browser testing, and cross-platform testing for both web and mobile applications.
Follow the steps given below to configure, install, and test your Jenkins Pipeline with BrowserStack Automate:
Step 1: Install and Configure the BrowserStack Jenkins Plugin:
- Install the Plugin: Navigate to Jenkins’ Manage Jenkins > Manage Plugins > Available tab. Search for “BrowserStack” and install the plugin.
- Configure Credentials: Go to Manage Jenkins > Configure System. Add your BrowserStack credentials (Username and Access Key) under the BrowserStack Credentials section and save.
Step 2: Set Up Your Jenkinsfile:
- Add BrowserStack Integration: Modify your Jenkinsfile to include the BrowserStack plugin by wrapping your test commands with the browserstack(credentialsId: ‘<credential_id>’) block.
- Configure for Local Testing (if needed): For testing privately hosted websites, add the localConfig option to the browserstack block and set up BrowserStack Local as described.
Step 3: Integrate Existing Test Cases:
- Update Test Scripts: Ensure your test scripts include BrowserStack-specific capabilities and environment variables like BROWSERSTACK_USERNAME, BROWSERSTACK_ACCESS_KEY, and BROWSERSTACK_BUILD_NAME.
- Run Tests: Add commands in the Jenkinsfile to execute your tests, including commands for BrowserStack Local if necessary.
Step 4: View Test Reports in Jenkins:
- Enable Reporting: Add the BrowserStackReportPublisher ‘automate’ statement in your Jenkinsfile to embed BrowserStack test results into Jenkins.
- Access Reports: After the tests are complete, view detailed test reports and session information directly in Jenkins by clicking on the BrowserStack Test Report link.
By following these steps, you’ll successfully integrate BrowserStack Automate with Jenkins, enabling automated, scalable testing and comprehensive reporting for your CI/CD pipeline.
For more detailed information, refer to the BrowserStack Automate Jenkins integration documentation.
Common Issues in Jenkins Docker Agent and Resolving Them
While Jenkins Docker agents streamline CI/CD workflows, they can come with their own set of challenges. Understanding and resolving these common issues is crucial for maintaining a smooth and efficient development pipeline.
1. Docker Agent Fails to Start: This issue may come from misconfiguration in docker agents in Jenkins or an incorrect image tag specified. It can also come from an invalid parameter used in the command line
Resolution: Verify that the Docker image specified in Jenkins exists and is accessible. Check the Docker agent configuration in Jenkins for any incorrect settings.
2. Jenkins Cannot Connect to the Docker agent: This issue may originate from SSH key pair configurations, or the Docker agent may not be up and running
Resolution: Ensure SSH keys are configured properly in both Jenkins server and docker agents. Ensure the docker container is running by using the command docker ps alternatively, you can also open the docker application in your system and verify the status
3. Docker Image Pull Failures: Docker cannot find the specified agent
Resolution: Verify image name and tag are correct, and ensure the image version you are using exists in the repository
Conclusion
Jenkins has a major market in CI/CD tools. It provides setup and configuration options using UI and scripting. It is highly extensible and customizable, and it integrates with many third-party components.
Docker is one such component that can configure the agent with containers to reduce the cost and increase efficiency. Jenkins provides the capability to integrate cloud-based testing tools like BrowserStack.
BrowserStack Automate seamlessly integrates with Jenkins to automatically trigger Selenium tests with every code commit. This lets you detect compatibility issues early through testing on a real device cloud of over 3500+ devices and browsers.
Utilize the tool’s parallel testing to run multiple tests simultaneously, gaining faster feedback and accelerating your development cycle. With BrowserStack Automate, you can confidently ship bug-free applications and streamline your release process.


