iPhones have always been popular and known for the ease of operation that they give. Regardless of the age group that is using the iPhone, it has maintained its popularity due to the simplistic UI experience.
In addition to the UI excellence, iPhone offers a unique experience to users through gestures. From effortlessly switching apps to copying text with a pinch, gestures redefine convenience and creativity.
What are iPhone Gestures?
Any touch-based interactions that include Swipes, taps, pinches, or drags, which lets users navigate with ease and also control devices through intuition can be defined as gestures. Today, gestures have easily replaced many purposes of physical buttons and provide a smoother experience with accessing digital content and interfaces.
With the introduction of gestures, the way users interact with digital devices in the era of touch screen technology was revolutionised. It was Apply back in 2007, who gave a whole new meaning to gestures by replacing buttons with intuitive Swipes and pinches. As time progressed, gestures evolved with support for multitasking, undo/redo actions, and even haptic feedback, blending natural motion with advanced functionality.
Different iPhone Gestures
iPhone provide different gestures to the users for a seamless user experience while performing different tasks and actions.
List of different iPhone Gestures
- Double-tap to zoom
- Tap and hold for menu
- Swipe between screens
- Pinch to zoom
- Drag and Drop
- Three-finger Swipe to undo
- Two-finger Scroll
- Swipe Down on Home Screen for Search
- Swipe Down for Notification Centre
- Swipe Up from app to return to Home screen
- Swipe to switch between apps
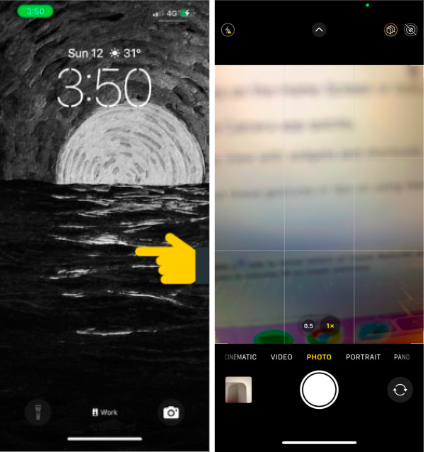
- Swipe left on Lock screen for Camera
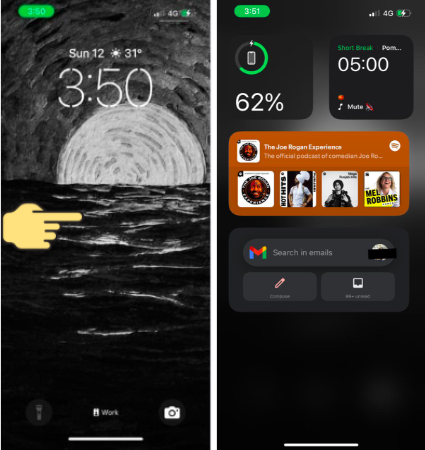
- Swipe right on Lock screen for Today view
Here’s a detailed elaboration of different iPhone Gestures and how it is used with screenshots.
1. Double-tap to Zoom
A very useful feature that lets you quickly go deeper in your pictures is the double-tap to zoom action. Go to the Photos library, open a picture, and double-tap.
2. Tap and Hold for Menu
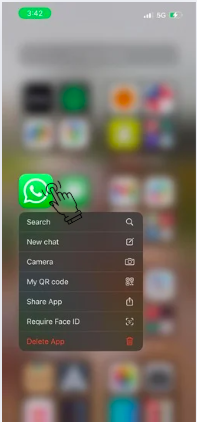
Apple provides support for applications to show a smaller version of commonly used actions from their menu when you Tap and hold the app icon. Go the Home screen, and then Tap and hold the App icon for which you want to see the consolidated menu.
3. Swipe between Screens
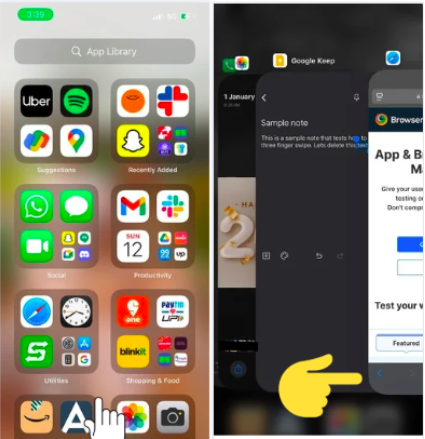
As with any use of a smartphone, we might have multiple apps open at the same time. Apple offers an intuitive way of accessing all the open apps on your phone. Go to the Home screen, and Swipe up to pause, and then Swipe right to Swipe through open apps. Tap the app that you want to access.
4. Pinch to Zoom
Though the double Tap to zoom is a convenient option to zoom into your pictures, the iPhone also offers a more intuitive option that lets you control the amount of zoom that you want to apply to the picture. Go to the Photos library, open the picture, and then pinch to zoom to the percentage that you require.
5. Drag and Drop
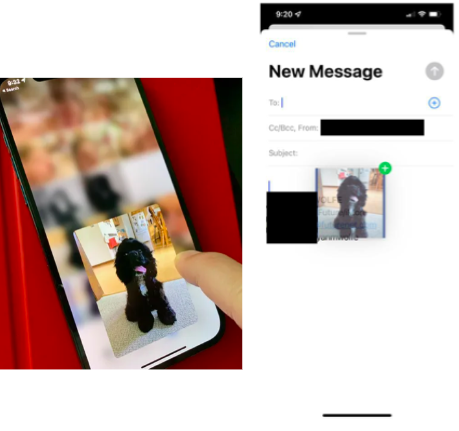
With drag and drop, you can move text, images, files, or other content between apps. For example, you can simply Tap and hold the image that you want to drag. Drag the image and drop it in the Note app. Go to the required app, Tap and hold to highlight the item. Then, drag the image, in this example, and drop it in the Message app.
6. Three-finger Swipe to Undo
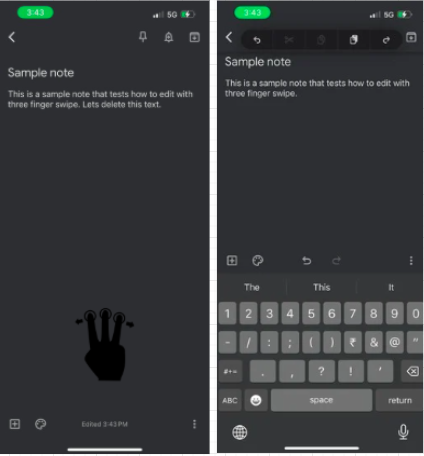
Use the three-finger-Swipe to enact the undo and redo actions. For example, Swipe to the right to undo text you have written, and Swipe left to redo the action, and bring the text back. This gesture helps in smoother text editing experience and supports apps like Notes, Mail, and Messages.
7. Two-finger Scroll
Use the two-finger scroll to scroll through long lists, documents, or webpages. This feature is especially important when you want to scroll faster when reading large amounts of text or viewing lengthy research papers, for example. Open the website that you want to scroll through or open the PDF you want to view, and then use the two-finger scroll to navigate the page.
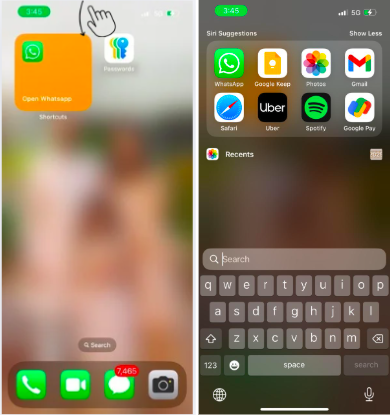
8. Swipe down on Home Screen for Search
Use the Swipe down on Home screen action to open the Spotlight Search, which is a great tool for finding everything on your iPhone. To access Spotlight Search, Swipe down, type keywords in the search bar, and access the intended app or web result.
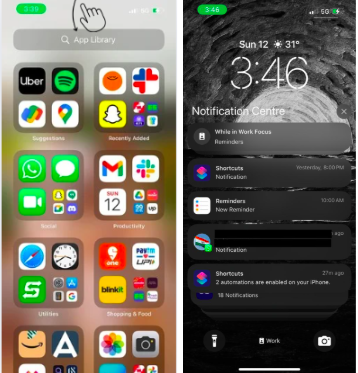
9. Swipe down for Notification Center
Use the Swipe down from any iPhone screen to access the Notification Center. The Notification center is a central location where you can view recent notifications, missed alerts, or app updates. From any screen on your iPhone, Swipe down to access the Notification center.
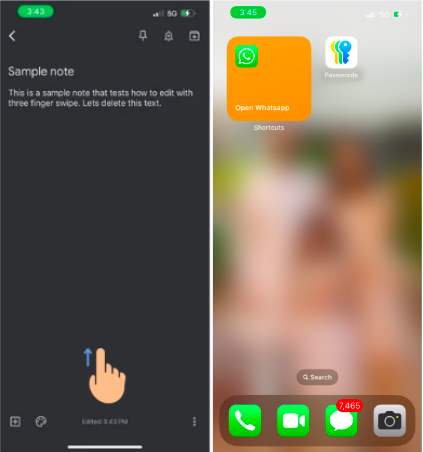
10. Swipe Up from app to return to Home Screen
Use the Swipe up action from any app to return to the Home screen. This removes the overhead of closing the app and then returning to the Home screen. This gesture makes it easier to navigate replacing a dedicated physical Home button.
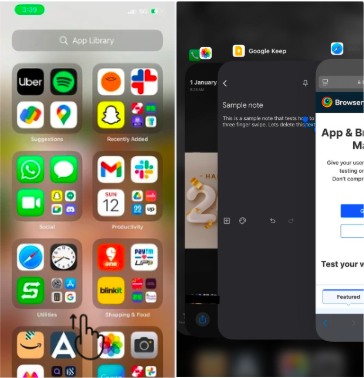
11. Swipe to Switch between Apps
Use the Swipe up from the bottom edge of any screen on your iPhone to pause the view and open the App Switcher on iPhone. This gesture lets you view all your open apps and quickly switch between apps without the explicit need to quit existing apps.
12. Swipe Left on Lock Screen for Camera
Use the Swipe left action on your Lock screen to open the Camera app, that allows quick access to take photos or record videos without the need to unlock the phone.
13. Swipe right on Lock screen for Today view
Use the Swipe right on the Lock screen or Home screen and open the Today view. This view is a customizable view that typically users modify based on the apps, such as weather, calendar, news, etc., that they want quick access to.
Testing on Real iPhones for compatibility with Gestures and Native Features
Apple has revolutionized the smartphone industry with the number of gesture features that it provides. We have only covered a few gestures that are popular among users, but the list isn’t limited to only these. Considering that you are developing applications for iOS platforms, it is important that your app takes the benefit of these gesture features.
As the gesture features are huge, using a physical device to test these features might seem like a quick solution, but with the limitation of device availability and expensive if you think about the number of iPhone versions.
In these situations, consider investing in a real device cloud testing platform, such as BrowserStack Live and App Live. BrowserStack provides scalability, flexibility, and cost-effectiveness, enabling testers to run tests remotely, automate processes, and quickly identify issues, ultimately speeding up development and enhancing app quality.
BrowserStack Live and App Live provide access to the real device cloud that include more than 3500+ devices for parallel testing with real world testing conditions. BrowserStack Live and App Live include support for AssistiveTouch functionality that lets you simulate gestures as you would on physical devices.
Conclusion
BrowserStack Live and App Live provide a near physical device experience with the variety of real devices that they give access to along with the robust support for AssistiveTouch, making it a great choice for testing your applications. BrowserStack Live and App Live also integrate easily with other BrowserStack products, such as Test Observability, Accessibility testing, Bug Capture, and more that provide a holistic experience in your testing journey.
BrowserStack offers an option to register for a free trial to try out its line of products without any financial commitment.


