Automating tests within a Continuous Integration pipeline is essential for delivering reliable software efficiently. CircleCI offers a robust platform to run automated tests on every code change, helping teams catch issues early and maintain code quality.
Overview
CircleCI is a popular continuous integration and continuous delivery (CI/CD) platform that automates software builds, tests, and deployments, enabling faster and more reliable development workflows.
Why integrate your Test Automation Suite with CircleCI?
- Automate Testing on Every Code Change
- Faster Feedback Loop
- Parallel Test Execution
- Seamless Integration with Popular Tools
- Scalable and Flexible Pipelines
- Enhanced Collaboration
- Secure Credential Management
This guide explains how to set up test automation with CircleCI and leverage BrowserStack’s real device cloud to run cross-browser tests seamlessly.
Understanding CircleCI
CircleCI is a cloud-based continuous integration and continuous delivery platform designed to automate the software development lifecycle. It helps development teams build, test, and deploy applications efficiently by automating repetitive tasks and enabling rapid feedback on code changes.
At its core, CircleCI runs your code through a series of customizable steps defined in a configuration file (.circleci/config.yml). These steps can include checking out your source code, installing dependencies, running tests, and deploying your application.
Key concepts in CircleCI include:
- Jobs: Independent units of work, such as running tests or building your app.
- Workflows: Define the order in which jobs run and can run jobs in parallel or sequentially.
- Executors: The environment (Docker, machine, or macOS) where jobs run.
- Orbs: Reusable packages of CircleCI configuration that simplify integrating common tools and services.
By automating your test automation suite within CircleCI, you ensure that every code update is validated consistently and quickly, reducing errors and improving software quality.
Read More: CircleCI vs GitLab: Core Differences
Why integrate your Test Automation Suite with CircleCI?
In many organizations, multiple Test Automation Engineers work on the same project, frequently updating automation code. Manually running tests after every change is tedious and prone to errors, such as forgetting to trigger builds, which can let bugs slip through and disrupt the workflow.
By integrating test automation with CircleCI, every commit and pull request automatically triggers tests, with results visible directly in GitHub. This ensures early detection of issues, boosts confidence in the test suite, and enables faster fixes, helping maintain code quality throughout development.
Additional benefits include:
- Faster Feedback Loops: Automated builds provide near-instant results, reducing delays in the development cycle.
- Parallel Test Execution: Run multiple tests simultaneously, dramatically cutting down overall test runtime.
- Consistent Test Environment: CircleCI uses containerized environments to ensure tests run in a clean, reproducible setup every time.
- Improved Collaboration: Test results integrated into pull requests and dashboards make it easier for the entire team to monitor code health.
- Reduced Human Error: Automation removes the risk of forgetting to run tests manually, increasing overall codebase stability.
- Secure and Scalable Pipelines: Manage sensitive credentials securely and scale pipelines effortlessly as your test suite grows.
- Artifact and Log Storage: CircleCI stores test artifacts and logs for easier debugging and auditing.
- Integration with Other Tools: Easily connect CircleCI workflows with deployment pipelines, code quality tools, and monitoring services.
- Customizable Workflows: Define conditional steps, test filters, and approval gates to match your team’s development process.
- Cost Efficiency: Catching bugs earlier reduces expensive late-stage fixes and downtime.
By integrating your test automation suite with CircleCI, teams improve reliability, speed, and overall software quality, creating a more efficient and scalable development process.
For reliable cross-browser and real device testing, integrating BrowserStack with CircleCI further enhances your test coverage and speeds up release cycles.
Prerequisites
Before you begin setting up test automation with CircleCI, make sure you have:
- A Source Code Repository: Your project’s code hosted on GitHub, Bitbucket, or any Git repository supported by CircleCI. This article uses a public GitHub repository for demonstration.
- Test Automation Scripts: Automated tests written using your preferred framework (e.g., Selenium, Cypress, JUnit). This article uses Selenium with Java.
- CircleCI Account: Access to CircleCI with permissions to link your repository and configure pipelines.
- Basic Knowledge of CircleCI: Understanding of CircleCI configuration files (.circleci/config.yml) and concepts like jobs, workflows, and executors.
- Build Environment Setup: Necessary environment configurations such as language runtimes (Java, Node.js, Python), dependencies, and test tools installed in your build environment. This article uses Maven for managing Java dependencies.
Read More: 25 Best DevOps Automation Tools
How to perform Test Automation with CircleCI
Once your prerequisites are in place, follow these steps to configure and run your test automation suite using CircleCI.
Step 1: Sample Test Automation Code
Create a sample test automation code to later integrate with CircleCI. For the purpose of this demo, a simple test case is created here that opens a website using TestNG.
Below are the contents of the test class, pom.xml, and testng.xml files.
NewTest.java
package tests;

import org.openqa.selenium.chrome.ChromeDriver;

import org.testng.annotations.Test;

import org.testng.annotations.AfterTest;

import org.testng.annotations.BeforeTest;


public class NewTest {

public ChromeDriver driver;

@BeforeTest

public void beforeClass() {

 System.setProperty("webdriver.chrome.driver", "chromedriver.exe");

     driver = new ChromeDriver();

}

    @Test

    public void openWebsite() {

     driver.get("https://www.google.com/");

    }

    @AfterTest

    public void afterClass() {

    driver.close();

  }

}
pom.xml
<project xmlns="http://maven.apache.org/POM/4.0.0" xmlns:xsi="http://www.w3.org/2001/XMLSchema-instance" xsi:schemaLocation="http://maven.apache.org/POM/4.0.0 http://maven.apache.org/xsd/maven-4.0.0.xsd">

  <modelVersion>4.0.0</modelVersion>

  <groupId>mavenPackage</groupId>

  <artifactId>MavenProject</artifactId>

  <version>0.0.1-SNAPSHOT</version>


  <dependencies>


<!-- Selenium -->

<dependency>

  <groupId>org.seleniumhq.selenium</groupId>

  <artifactId>selenium-java</artifactId>

  <version>4.2.0</version>

</dependency>

<!-- TestNG -->

<dependency>

  <groupId>org.testng</groupId>

  <artifactId>testng</artifactId>

  <version>7.4.0</version>

  <scope>test</scope>

</dependency>


  </dependencies>


  <build>

   <plugins>

   <plugin>

   <groupId>org.apache.maven.plugins</groupId>

            <artifactId>maven-compiler-plugin</artifactId>

            <version>3.10.1</version>

            <configuration>

            <source>1.8</source>

            <target>1.8</target>

            </configuration>

   </plugin>


   <plugin>

   <groupId>org.apache.maven.plugins</groupId>

            <artifactId>maven-surefire-plugin</artifactId>

            <version>2.20</version>

            <configuration>

            <suiteXmlFiles>

            <suiteXmlFile>testng.xml</suiteXmlFile>

            </suiteXmlFiles>

            </configuration>

   </plugin>

   </plugins>

  </build>


</project>
testng.xml
<!DOCTYPE suite SYSTEM "http://testng.org/testng-1.0.dtd" >

<suite name="Suite" parallel="false">

  <test name="Test">

    <classes>

      <class name="tests.NewTest"/>

    </classes>

  </test> <!-- Test -->

</suite> <!-- Suite -->
Step 2: Create a free account on CircleCI
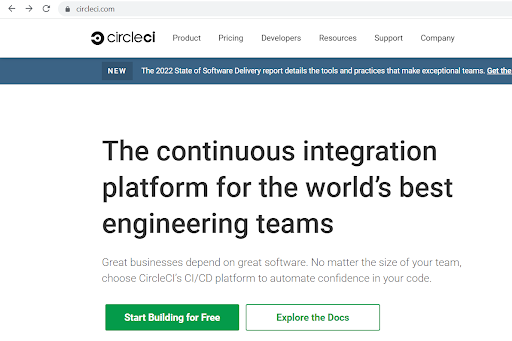
CircleCI offers a cloud build platform wherein you can easily get started by creating a free account. Please note the limitations of the free tier. Click on the Start Building for Free button.
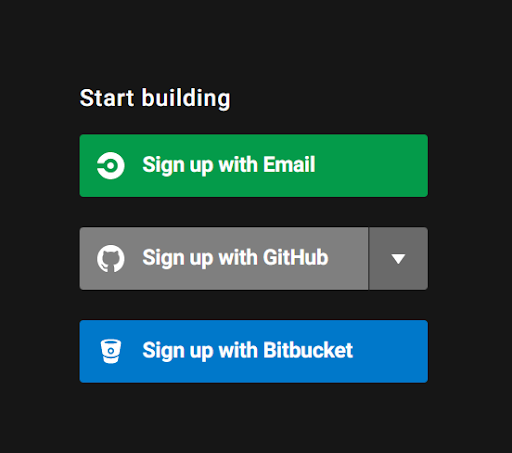
This will take you to a page where you will need to select the account using which you will create your CircleCI account. For ease of setup, you can choose to integrate your GitHub account.
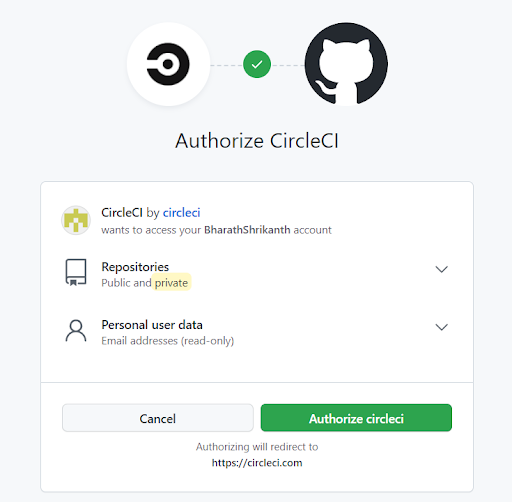
Click on Sign up with GitHub and it will link to your GitHub organization if it is already logged in. Else login to your Github organization when prompted. Once this is done, Github asks for authorization to allow access to CircleCI to integrate with your account. Click on Authorize CircleCI
Step 3: Select your organization
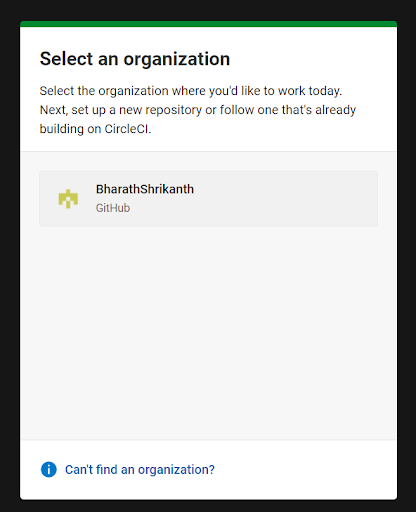
Once the login is completed, you will be asked to select your GitHub organization. Select the one you want to link with CircleCI.
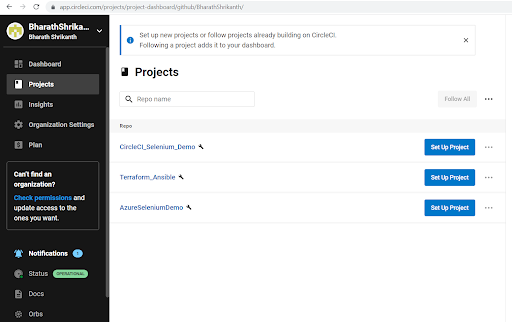
Once done, the homepage of CircleCI opens. This will have your repositories populated. The left pane offers buttons for Dashboards, Projects, Organization Settings, and Plan.
For this demo, let’s use the CircleCI_Selenium_Demo repository.
Step 4: Create a Project
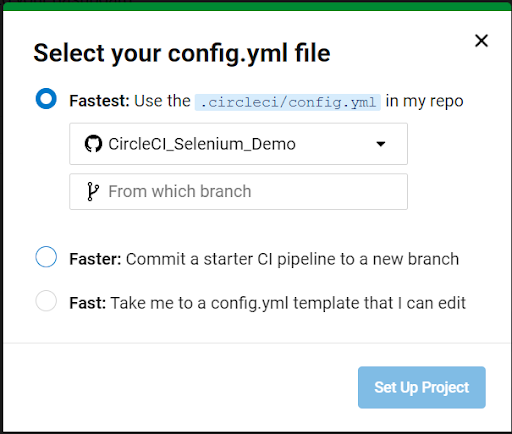
Click on Set Up Project for the repository that holds your test automation code. This will open a dialogue box with the following options.
Select the default branch from which you want to run the project. CircleCI relies on a config.yml file that holds all the configuration of the pipeline. Here adding a sample config.yml file to this project by choosing the Hello World template after selecting the Fast option.
If you already are familiar with creating a config.yml, you can create one in your test automation repo. Below is the config.yml that has been used for this project.
config.yml
version: 2

jobs:

  build:

    docker:

      # specify the version you desire here

      - image: circleci/openjdk:8-jdk

    working_directory: ~/circleCI_Selenium_Demo

    environment:

      # Customize the JVM maximum heap limit

      MAVEN_OPTS: -Xmx3200m

    steps:

      - checkout

      # Download and cache dependencies


      - restore_cache:

          keys:

          - v1-dependencies-{{ checksum "pom.xml" }}

          # fallback to using the latest cache if no exact match is found

          - v1-dependencies-


      - run: mvn dependency:go-offline


      - run:

          name: Install latest version of ChromeDriver Sample

          command: |

            sudo wget -q -O - https://dl-ssl.google.com/linux/linux_signing_key.pub | sudo apt-key add -

            sudo sudo sh -c 'echo "deb [arch=amd64] http://dl.google.com/linux/chrome/deb/ stable main" >> /etc/apt/sources.list.d/google.list'

            sudo apt-get update

            sudo apt-get install google-chrome-unstable


      - run:

          name: Install latest version of ChromeDriver Sample

          command: |

            sudo wget https://chromedriver.storage.googleapis.com/2.31/chromedriver_linux64.zip

            sudo unzip -o chromedriver_linux64.zip

            sudo rm chromedriver_linux64.zip

            sudo mv chromedriver /usr/bin/

            sudo chmod 777 /usr/bin/chromedriver

            sudo apt-get install libxi6 libgconf-2-4

            sudo apt-get -y install xvfb gtk2-engines-pixbuf

            sudo apt-get -y install xfonts-cyrillic xfonts-100dpi xfonts-75dpi xfonts-base xfonts-scalable

            sudo apt-get install xvfb

            sudo apt-get -y install imagemagick x11-apps


      - run:

          name: Running X virtual framebuffer

          command: Xvfb :0 -ac &


      - run:

          name: Run Tests

          command: |

            export DISPLAY=:99


      - save_cache:

          paths:

            - ~/.m2

          key: v1-dependencies-{{ checksum "pom.xml" }}


      # run tests!

      - run: mvn clean test


      - store_artifacts:

          path: target/surefire-reports

          destination: tr1

      - store_test_results:

          path: target/surefire-reports
Note that upon every commit, CircleCI will trigger a new run of the pipeline automatically. Also, when you use the Hello World template for creating a sample config.yml file, you would have noticed that it would automatically create a new branch in GitHub circleci-project-setup.
You can continue to edit your config.yml file in the branch and merge it back onto the main branch when needed. The CircleCI project can be configured to run the tests from any branch on the repo.
Run CircleCI Selenium Tests on Real Devices
It can be noted that for every PR raised on Github, a new run is triggered on CircleCI and the status of the run would get updated in GitHub. This serves as an additional check while merging PRs.
This is how you can configure and run our test automation using CircleCI.
Integrating Browserstack with CircleCI
CircleCI relies on the config.yml file to define all workflows, jobs, and integrations. You can integrate BrowserStack directly within this configuration to run tests on real devices.
This enables access to 3500+ real device-browser combinations for comprehensive test coverage and supports popular automation frameworks such as Selenium, Cypress, Playwright, and Puppeteer.
There are some variables like grid config, username, and access key, that we will need to set in order to get the integration to work.
Configuration of circle.yml file for Selenium Tests
machine:

  environment:

    BROWSERSTACK_USERNAME: “<user-name>”

    BROWSERSTACK_ACCESS_KEY: "<access-key>j"

    BROWSERSTACK_LOCAL: false

    BROWSERSTACK_LOCAL_IDENTIFIER: "identifier"
CircleCI environment variables in your code can be seen as below:
String username = System.getenv("BROWSERSTACK_USERNAME");

String accessKey = System.getenv("BROWSERSTACK_ACCESS_KEY");

String browserstackLocal = System.getenv("BROWSERSTACK_LOCAL");

String browserstackLocalIdentifier = System.getenv("BROWSERSTACK_LOCAL_IDENTIFIER");

DesiredCapabilities capabilities = new DesiredCapabilities();

capabilities.setCapability("os", "Windows");

capabilities.setCapability("browser", "chrome");

capabilities.setCapability("browserstack.local", browserstackLocal);

capabilities.setCapability("browserstack.localIdentifier", browserstackLocalIdentifier);

driver = new RemoteWebDriver(new URL("https://" + username + ":" + accessKey + "@hub.browserstack.com/wd/hub"), capabilities);Best Practices for Test Automation with CircleCI and BrowserStack
To ensure reliable, maintainable, and efficient test automation when using CircleCI with BrowserStack, consider the following best practices:
- Use Environment Variables for Sensitive Data: Store credentials like your BrowserStack username and access key as environment variables in CircleCI. This keeps your configuration secure and avoids exposing sensitive data in your config.yml.
- Trigger Tests on Meaningful Events: Run tests on every pull request and merge to the main branch to catch regressions early. You can also set up nightly test runs for extended test suites that don’t need to run on every commit.
- Run Tests in Parallel: Leverage CircleCI’s parallelism and BrowserStack’s concurrent session support to distribute test cases and reduce overall execution time.
- Group Tests by Priority or Type: Organize tests into critical, regression, smoke, or UI categories. Run critical and smoke tests early in the pipeline to detect blockers faster.
- Use CircleCI Caching Efficiently: Cache dependencies (like Maven or npm packages) to speed up your builds and reduce redundant downloads.
- Limit Browser/Device Combinations When Appropriate: During early development cycles, test on a smaller set of representative browsers and devices. Expand coverage in later stages or during nightly runs.
- Collect and Store Test Artifacts: Save screenshots, logs, and videos from BrowserStack for failed tests. Configure CircleCI to store these artifacts so teams can easily debug issues.
- Keep Your config.yml Clean and Modular: Use reusable commands or orbs to avoid duplication. This makes your CircleCI pipeline easier to read and maintain.
- Fail Fast and Provide Clear Feedback: Ensure failing tests stop the pipeline early and include meaningful logs and messages so developers can act quickly.
- Monitor Test Health Regularly: Track flaky tests and maintain test stability by periodically reviewing test results and removing or fixing inconsistent cases.
Conclusion
Integrating your test automation suite with CircleCI streamlines the testing process by automating test execution on every commit or pull request. It ensures faster feedback, improves collaboration across teams, and helps catch issues early in the software development cycle.
By extending this setup with BrowserStack Automate, you can run tests across a wide range of real device-browser combinations, further boosting test coverage and reliability. Together, CircleCI and BrowserStack enable a robust, scalable, and efficient continuous testing pipeline that supports faster and more confident releases.


