How to Install and Add TestNG in Eclipse
By Gurudatt S A, Community Contributor - May 16, 2023
Test automation enables user preferences and convenience to remain at the center of the development process while saving time and effort. Comprehensive automation testing is core to the. TestNG is a Java Test Automation Framework, that can be used to perform different types of testing, such as Unit Testing, Functional Testing, Regression Testing, and End to End Testing.
What is TestNG Framework?
TestNG is a Unit testing framework for Java inspired by JUnit and NUnit, which allows you to run your tests using TestNG Annotations. It is popular because of the Annotations range it supports as compared to JUnit.
Features that make TestNG Framework so popular are:
- Wide range of Annotations Support.
- Support Data-driven tests
- Flexible execution model via Testng.xml configuration
- Concurrent testing: TestNG runs tests in arbitrarily big thread pools with various policies available (all methods in their own thread, one thread per test class, etc.) and tests whether the code is multithread safe.
- Parallel Run support: With parallel testing, multiple tests can be run simultaneously, supporting testing at scale in lesser time.
Different ways to run TestNG Test
TestNG tests can be run using two different methods as follows:
- Inside IDE (Like Eclipse)
- Via Maven Profile through Command Line
Running tests within IDE is needed during the development and debugging of the TestNG test. While, Maven Profile is used when you need to execute all the tests outside the IDE, like executing the TestNG tests from Jenkins.
How to install TestNG in Eclipse
To configure Eclipse you need to perform the following:
- Add TestNG to Eclipse using TestNG Plugin configuration and Run
- Creating Sample Maven Project by adding TestNG dependency
How to Install and Add TestNG in Eclipse
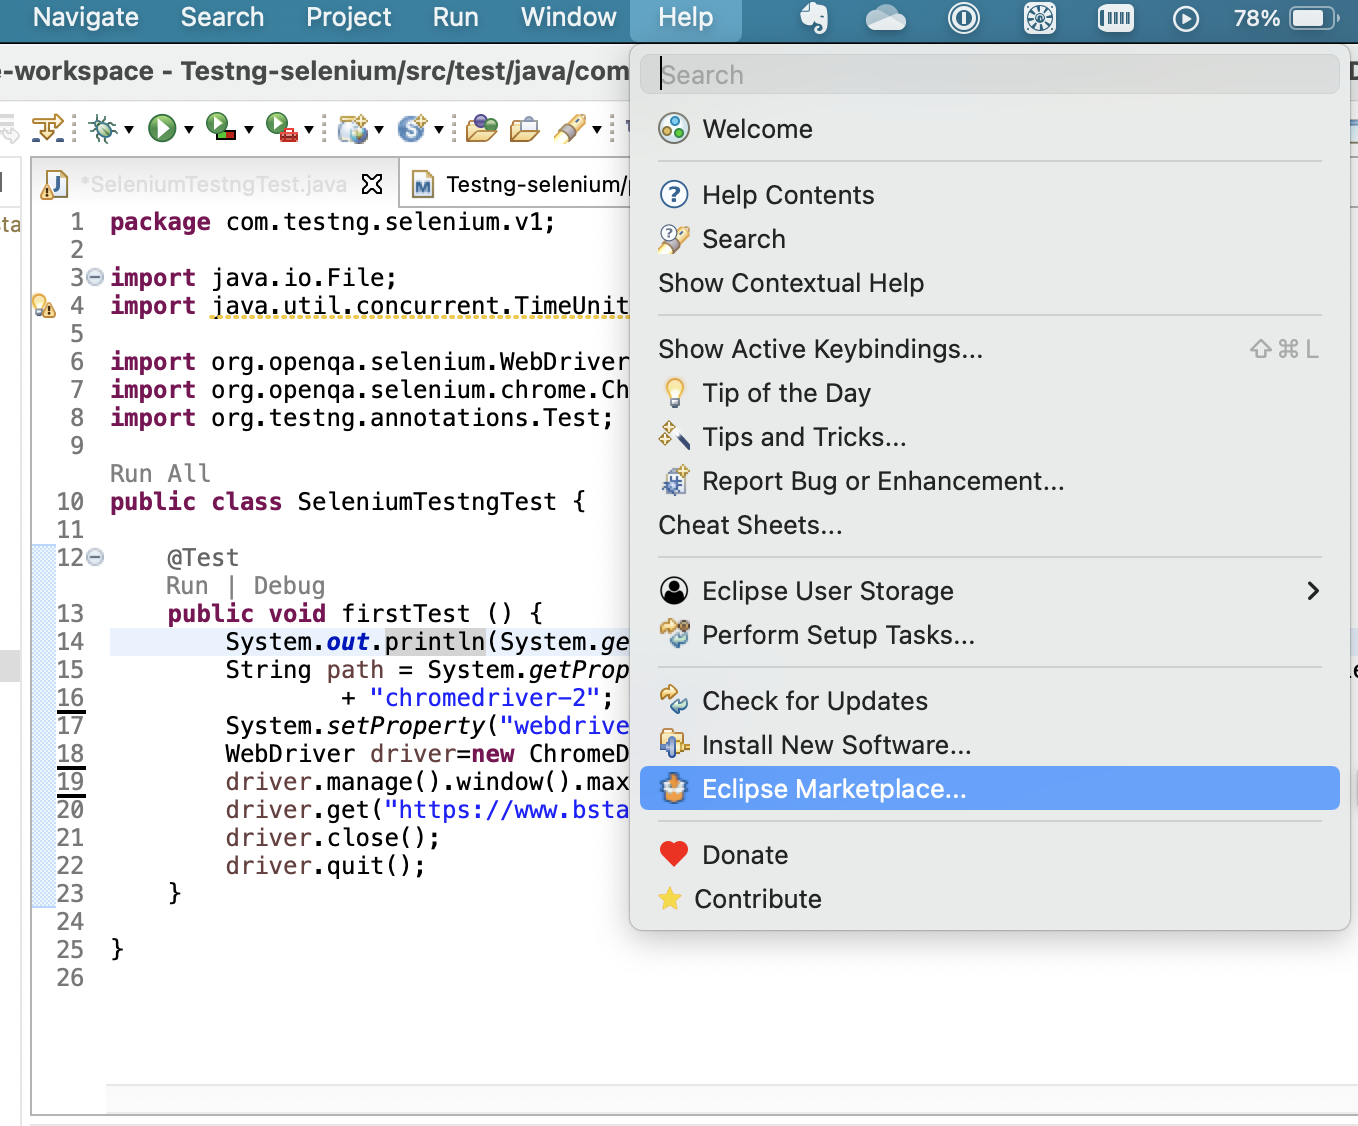
Step 1: Navigate to Eclipse Marketplace
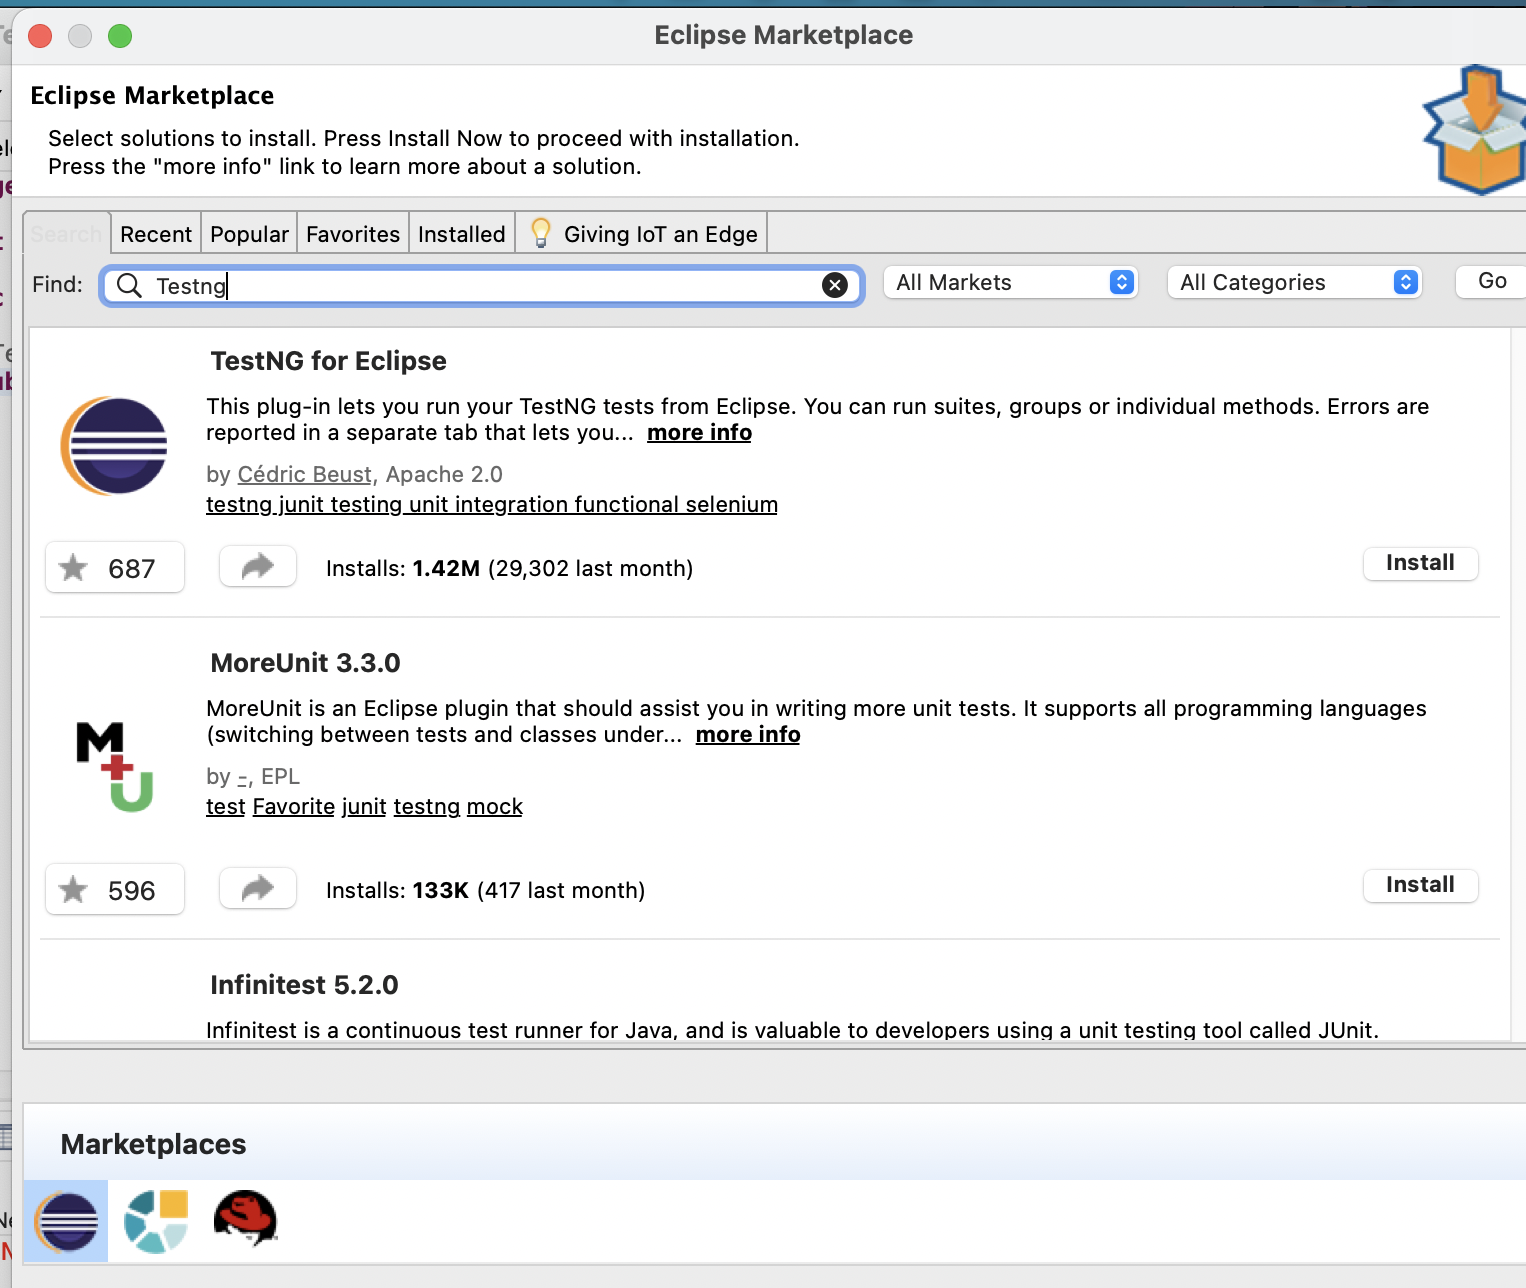
Step 2: Search for TestNG and click on install.
Note: After the plugin is installed, restart the Eclipse IDE
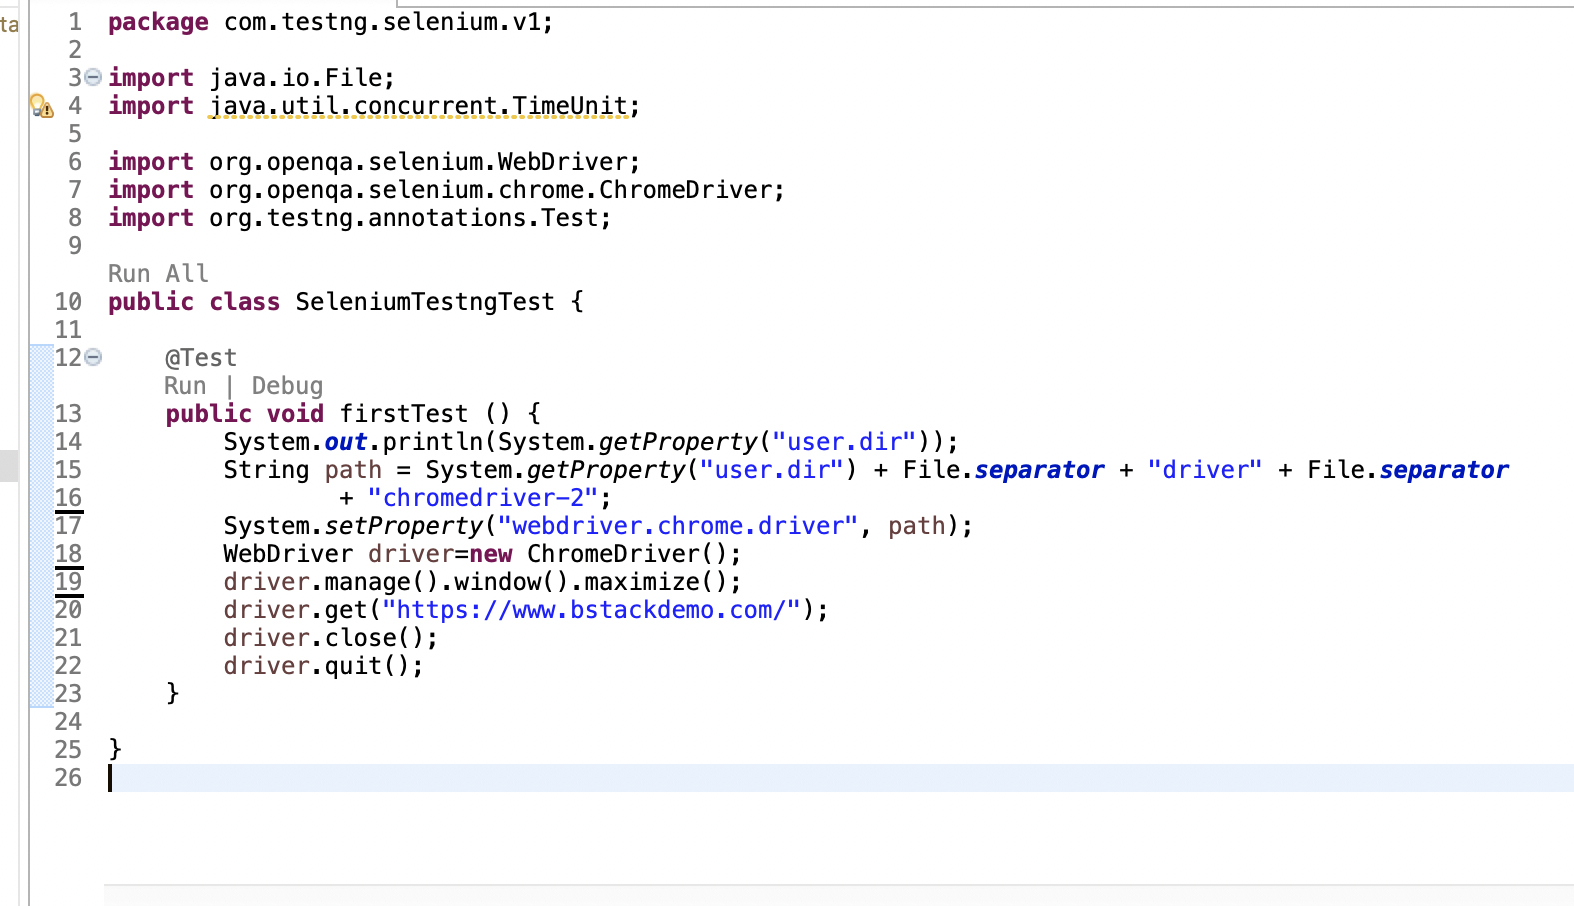
As the plugin is installed, you can see Options like Run All, Run | Debug in the editor itself, and clicking on Run above the TestNG Test will execute the test likewise Debug will allow debugging the test.
Adding a TestNG plugin within the Eclipse IDE helps in making the test execution easier by directly running the tests inside the Text Editor itself. Hence, it is recommended to configure the TestNG Plugin in Eclipse to run Unit Tests.
Creating Sample Maven Project by adding TestNG dependency
Here are the steps to create Sample Maven Project and how to add TestNG Dependencies:
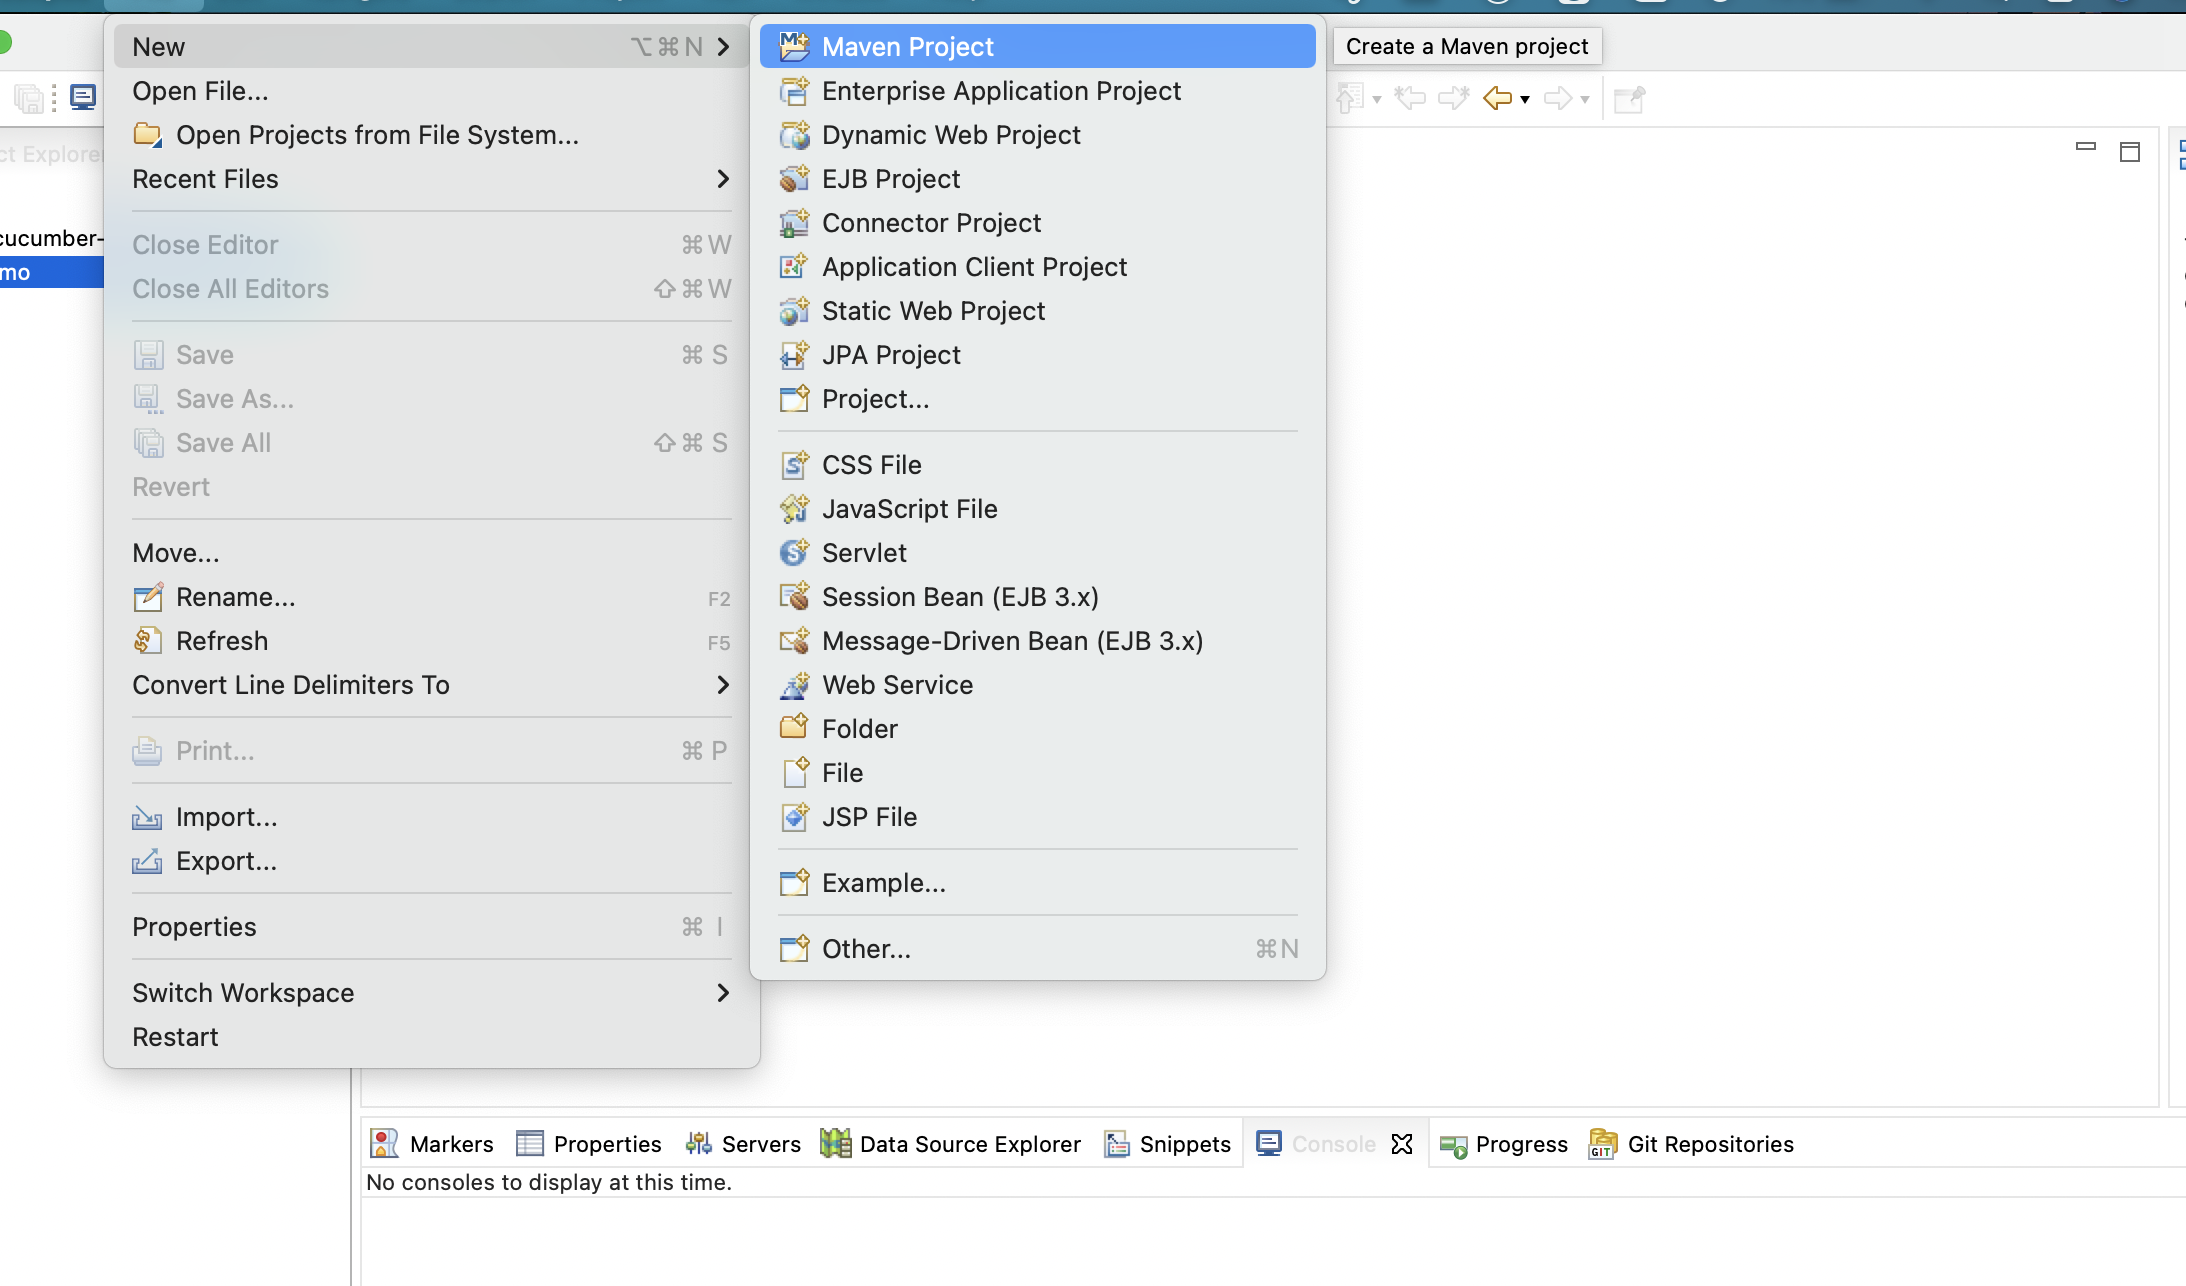
Step 1: Create a new Maven Project by opening eclipse. Click on New > Select Maven Project
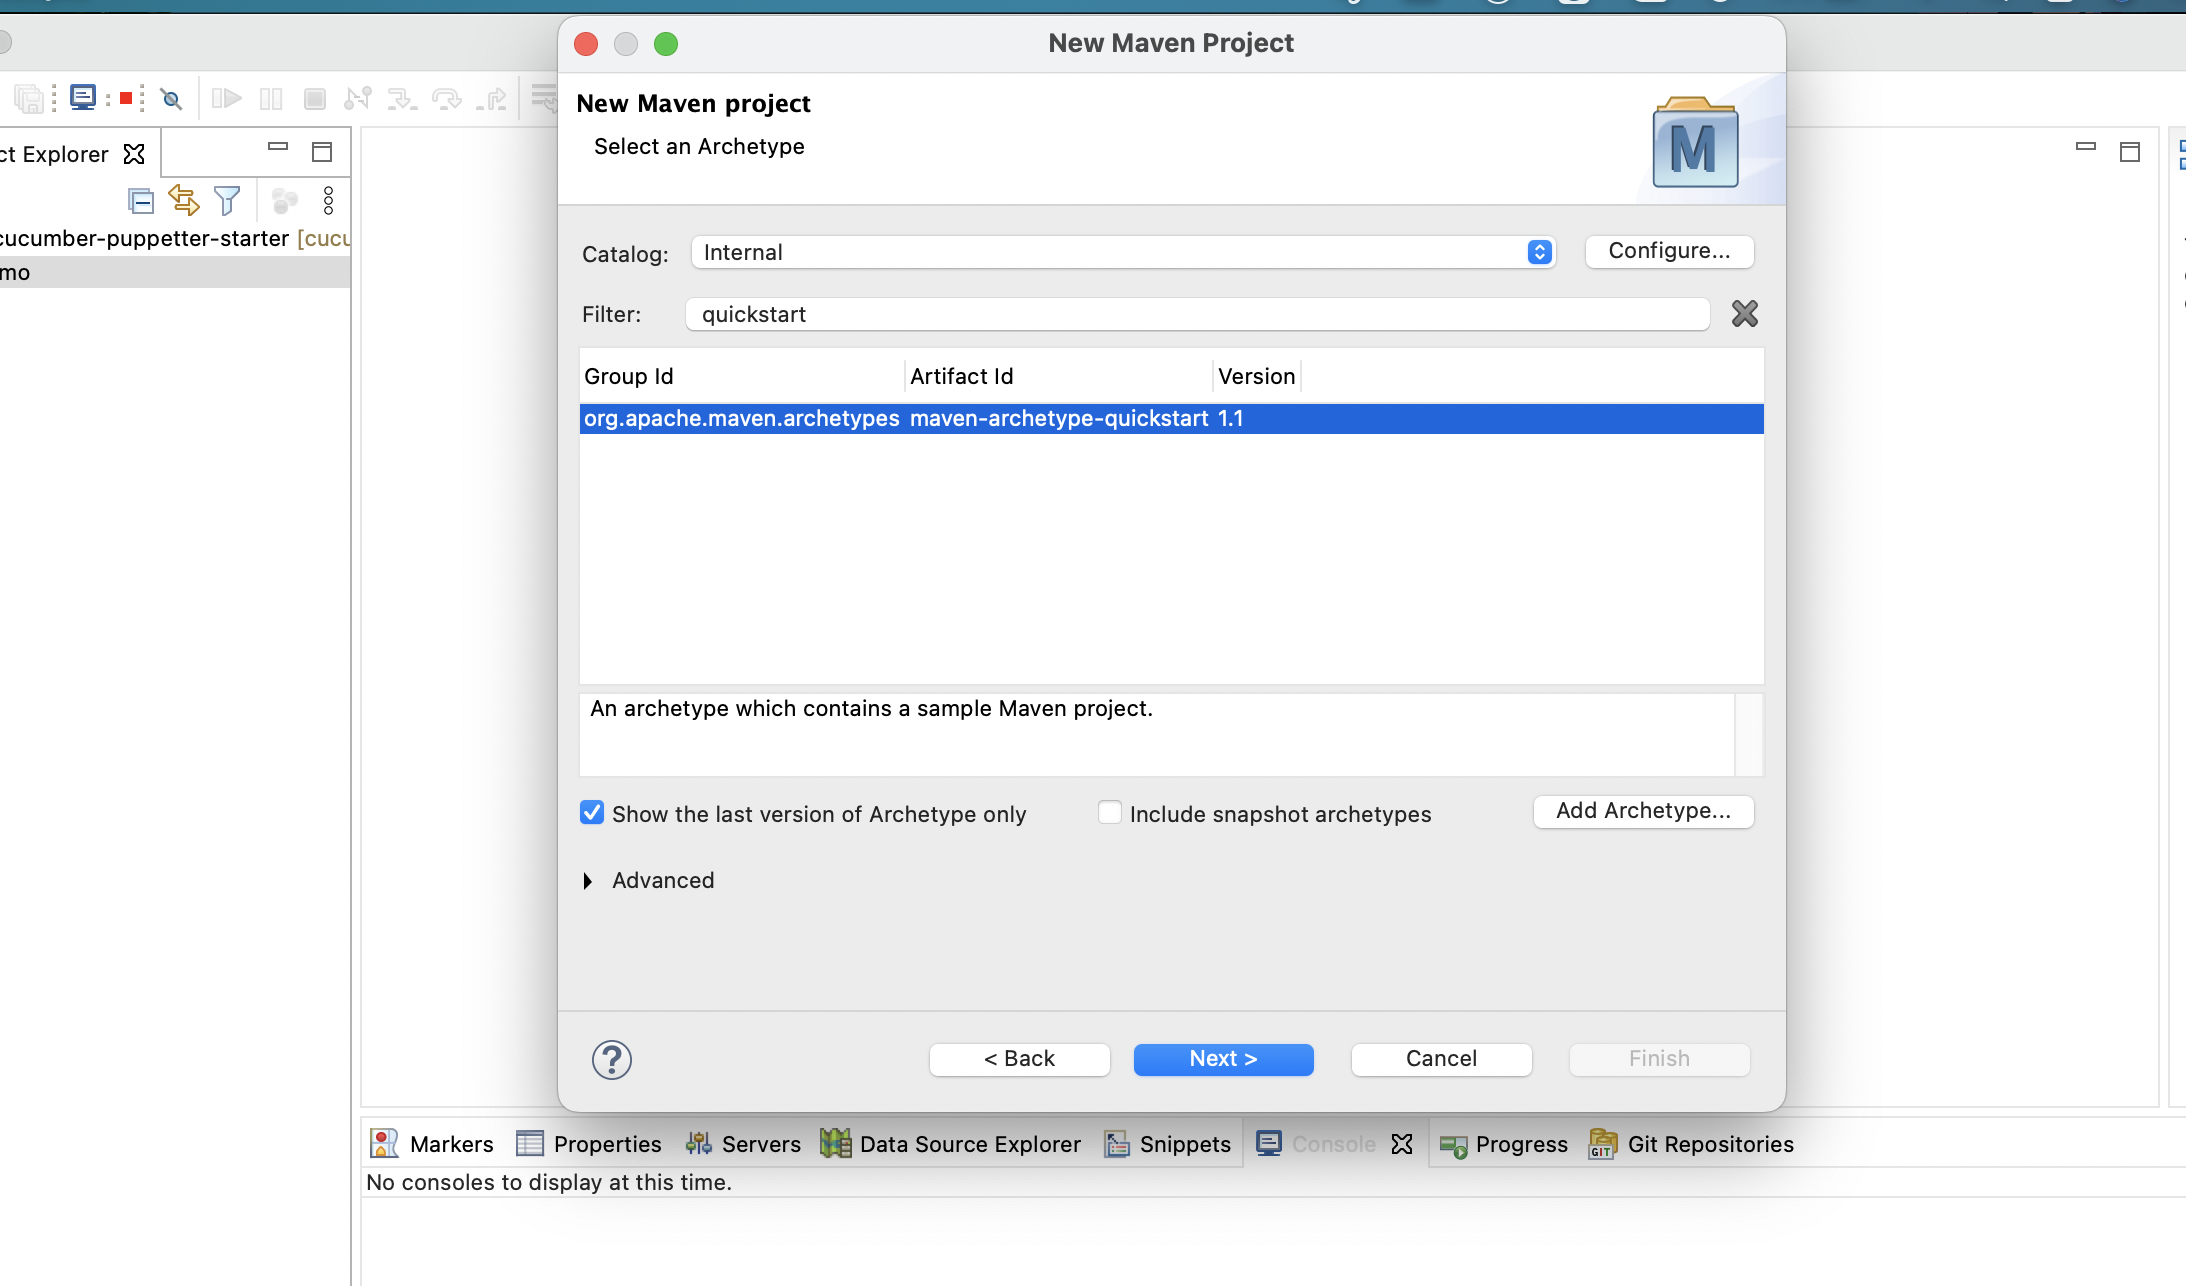
Step 2: Select the quickstart Archetype
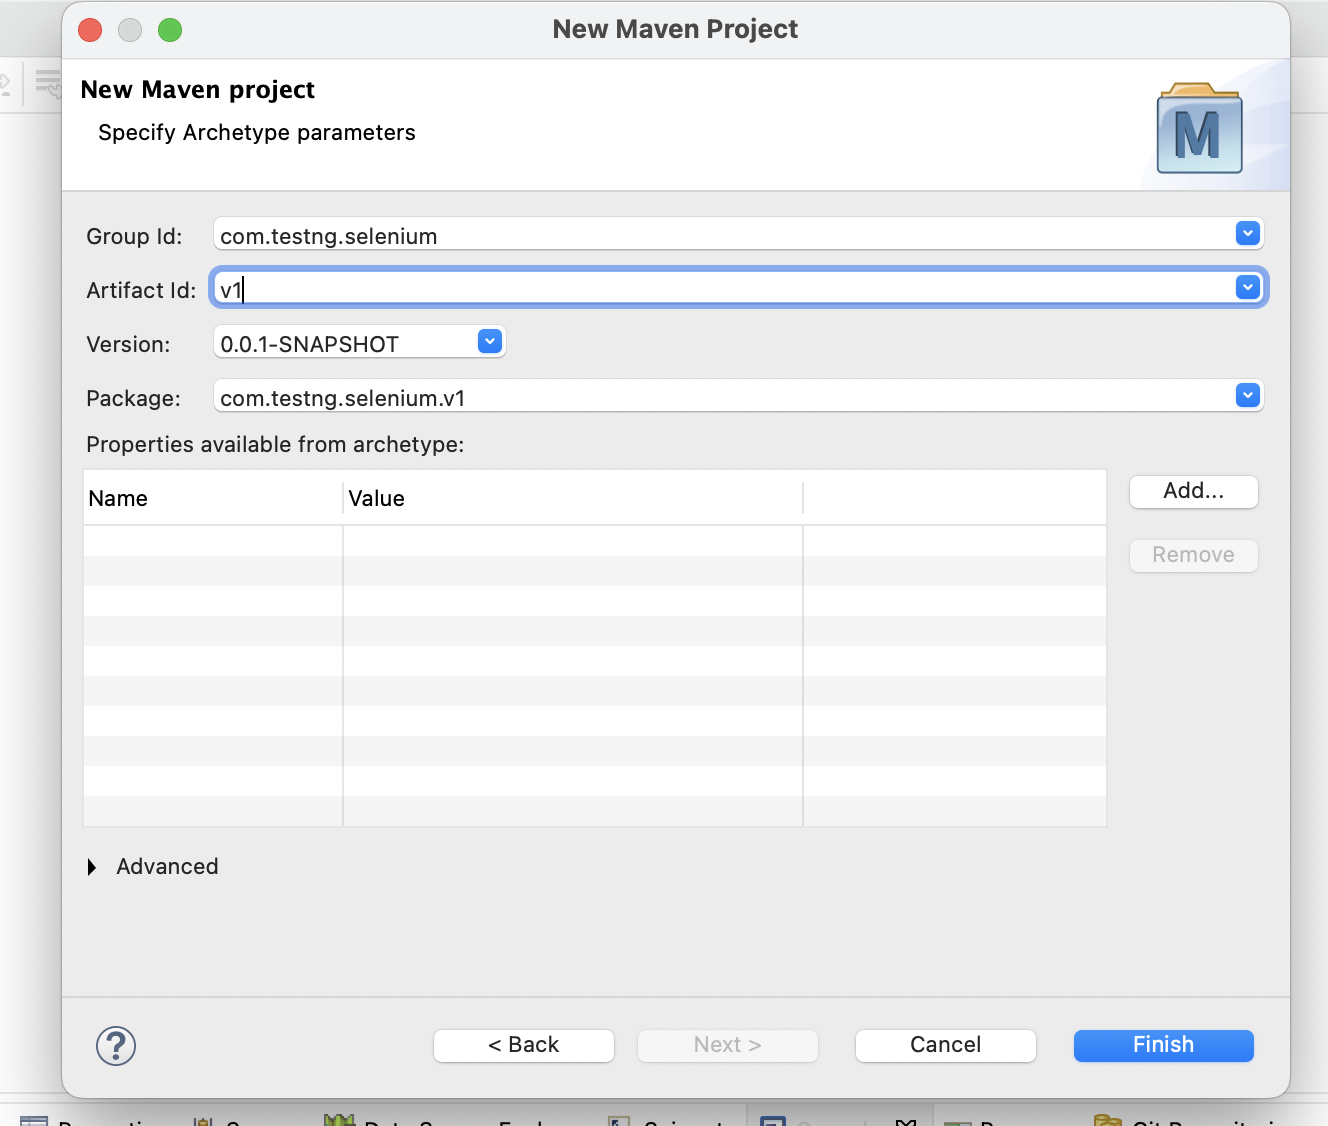
Step 3: Enter Group ID, Artifact ID, and Finish the setup process
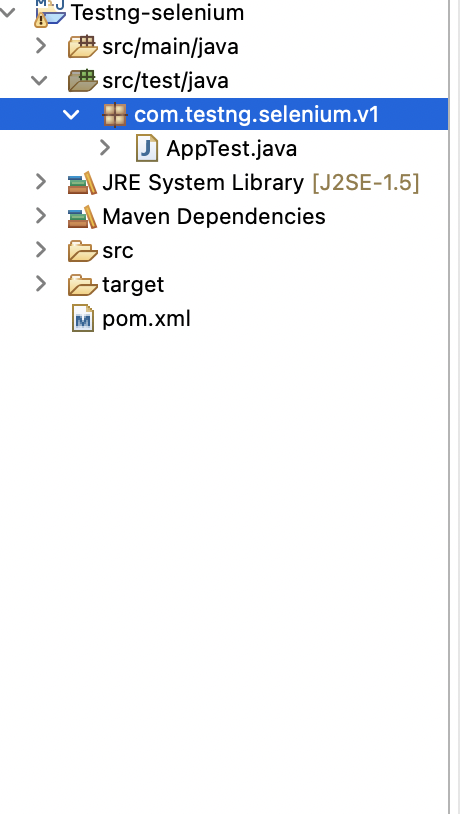
Step 4: New Maven project is created and all our tests will be written inside folder src/test/java and package com.test.selenium.v1
Step 5: Add dependencies to the POM.xml file
Add the below dependencies to the POM.xml file
<project xmlns="http://maven.apache.org/POM/4.0.0"
xmlns:xsi="http://www.w3.org/2001/XMLSchema-instance"
xsi:schemaLocation="http://maven.apache.org/POM/4.0.0 http://maven.apache.org/xsd/maven-4.0.0.xsd">
<modelVersion>4.0.0</modelVersion>

<groupId>com.testng.selenium</groupId>
<artifactId>Testng-selenium</artifactId>
<version>0.0.1-SNAPSHOT</version>
<packaging>jar</packaging>

<name>v1</name>
<url>http://maven.apache.org</url>

<properties>
<project.build.sourceEncoding>UTF-8</project.build.sourceEncoding>
</properties>

<dependencies>
<!-- https://mvnrepository.com/artifact/org.seleniumhq.selenium/selenium-java -->
<dependency>
<groupId>org.seleniumhq.selenium</groupId>
<artifactId>selenium-java</artifactId>
<version>4.2.1</version>
</dependency>
<!-- https://mvnrepository.com/artifact/org.testng/testng -->
<dependency>
<groupId>org.testng</groupId>
<artifactId>testng</artifactId>
<version>7.6.0</version>
<scope>test</scope>
</dependency>
</dependencies>
</project>
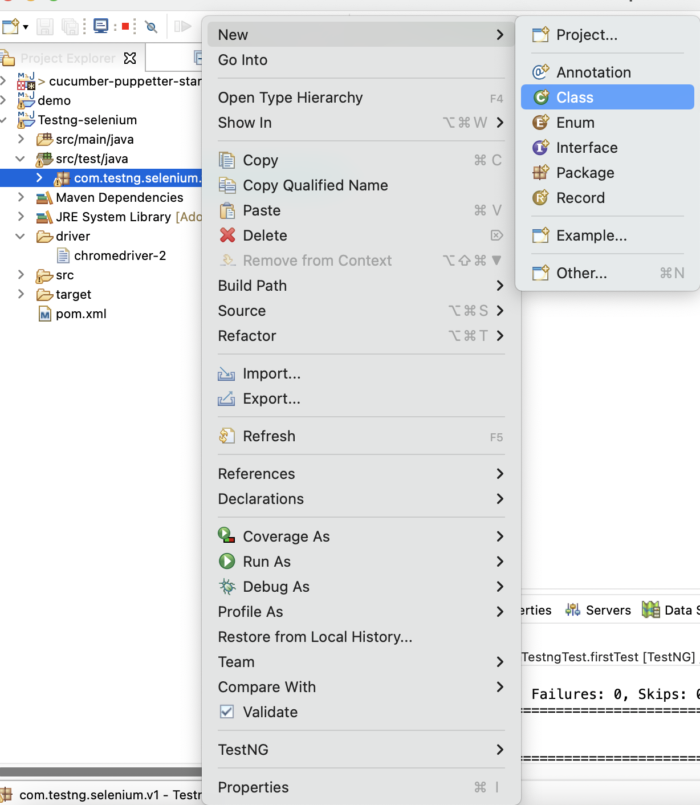
Step 6: Add a new Class to the package
Step 7: Add a TestNG test to the newly created class
import java.io.File;

import org.openqa.selenium.WebDriver;
import org.openqa.selenium.chrome.ChromeDriver;
import org.testng.annotations.AfterTest;
import org.testng.annotations.BeforeTest;
import org.testng.annotations.Test;

public class SeleniumTestngTest {
WebDriver driver;

@BeforeTest
public void initDriver() {
String path = System.getProperty("user.dir") + File.separator + "driver" + File.separator
+ "chromedriver-2";
System.setProperty("webdriver.chrome.driver", path);
WebDriver driver=new ChromeDriver();
driver.manage().window().maximize();
}

@Test
public void firstTest () {
driver.get("https://www.bstackdemo.com/");
}

@AfterTest
public void tearDown() {
driver.close();
driver.quit();
}

}
Follow Up Read: Maven Dependency Management with Selenium

