Flutter is a robust framework leveraged for building high-performance, cross-platform mobile applications with a single codebase. Ensuring the quality of your Flutter-based app is of utmost importance.
Overview
What is Flutter?
Flutter is an open-source UI toolkit built by Google. It allows developers to create natively compiled mobile, web, and desktop applications from a single codebase. It uses the Dart programming language and comes with a rich set of pre-designed widgets.
Flutter Benefits
- Cross-Platform Testing
- Faster Feedback with Hot Reload
- Built-In Testing Support
- Improved App Stability
- Customizable and Scalable
- Better Developer-Tester Collaboration
This guide explores the essentials of Flutter test automation, covering its importance, testing types, implementation, and more.
What is Flutter?
Flutter is an open-source UI toolkit built by Google. It allows developers to create natively compiled mobile, web, and desktop applications from a single codebase. Flutter applications are written once, and their codebase is compiled to create applications across various Android, iOS, and web platforms.
The Flutter test framework is based on widget development. It requires coding in the Dart language, which can be compiled into different native applications. Dart is a programming language created by Google, similar to JavaScript, but has static checking and strong node features.
Since Google has created Flutter, an open-source mobile UI framework, it automatically builds trust among people to use it to scale their businesses. Creating a native application on Android and iOS platforms requires extensive coding in different languages to create individual applications. A cross-platform application is a better yet needed alternative.
Flutter Real-World Example
Flutter is used by renowned companies like Google, Alibaba, BMW, eBay and so on to build high-quality cross-platform applications.
A well-known example of a real-world Flutter application is Google Pay (GPay).
- Initially, it was developed using native technologies. GPay then transitioned to Flutter to streamline development across Android and iOS platforms.
- This move helped their development team maintain a single codebase, accelerate feature rollout, and ensure a consistent user experience.
- Using Flutter, GPay achieved faster time to market, reduced maintenance overhead, and improved performance across devices.
This case shows how Flutter can efficiently support large-scale, high-traffic applications while meeting the demands of cross-platform consistency and reliability.
Importance/Benefits of Flutter Testing
Here are the benefits of flutter testing:
- Cross-Platform Testing: You can test once and run on multiple platforms (iOS, Android, Web).
- Faster Feedback with Hot Reload: Quickly detect and fix test failures without restarting the app.
- Built-In Testing Support: Flutter provides an out-of-the-box testing framework, including unit, widget, and integration testing.
- Improved App Stability: Automated tests catch regressions early, ensuring the app remains stable as new features are added.
- Customizable and Scalable: Tests can be customized to align with app complexity and scaled easily as it grows.
- Better Developer-Tester Collaboration: A Clear test structure and output make it easier for teams to collaborate and debug efficiently.
Types of Testing in Flutter
Flutter provides support for different types of testing to help developers ensure their applications work as expected and deliver a smooth user experience. Here are the main types of testing used in Flutter:
- Unit Testing: Unit testing focuses on testing individual functions, methods or classes in isolation. It enables the early identification of bugs by ensuring that small units of code behave as intended.
- Widget Testing: Widget testing checks the UI components and their interactions. It verifies that widgets render correctly, respond to user input, and maintain expected behavior without relying on a full device or emulator.
- Integration Testing: Integration testing tests the complete app or a large part of it, including how different modules and widgets work together. It helps ensure that the app performs correctly in a real-world scenario and identifies any issues in the app’s flow.
Setting Up Flutter
To start building and testing Flutter apps, you need to set up the Flutter development environment. Below are the steps to install and configure Flutter on your system:
1. Download the Flutter SDK
Visit the official Flutter website at flutter.dev and download the latest stable version of Flutter SDK.
2. Extract the SDK
Extract the contents of the downloaded ZIP file to a suitable location on your system. Avoid using folders that require administrator access, such as C:\Program Files.
3. Add Flutter to System Path
Add the Flutter SDK’s bin directory to your system’s PATH environment variable. This enables you to run Flutter commands from any terminal or command prompt.
4. Install Required Dependencies
- On Windows: Install Git for Windows if not already installed.
- On Mac: Ensure Xcode is installed for iOS development.
- On Linux: Install development tools like curl, git, unzip, and required libraries.
5. Install an IDE
Install an integrated development environment like Android Studio, VS Code or IntelliJ IDEA. Install the Flutter and Dart plugins in the IDE for better development support. (This step is optional but recommended.)
6. Set Up an Emulator or Device
Use Android Studio to create a virtual device (AVD) for testing or connect a physical Android or iOS device with USB debugging enabled.
7. Run flutter doctor Command
Open CMD or terminal and run
flutter doctor
This command checks your environment and displays any missing dependencies or required actions.
Read More: Flutter vs Android Studio: Core Differences
How to test Flutter applications?
Flutter testing tools are a great option for developing cross-platform applications; therefore, now understand how to test Flutter applications.
Flutter app testing is done in two ways: Manual and Automated testing.
- In manual testing, errors are handpicked in the Flutter applications
- In Automated testing, tests are run automatically, and their results are analyzed to resolve errors.
- Manual testing is done for UI UX mockup testing, testing widgets, and more.
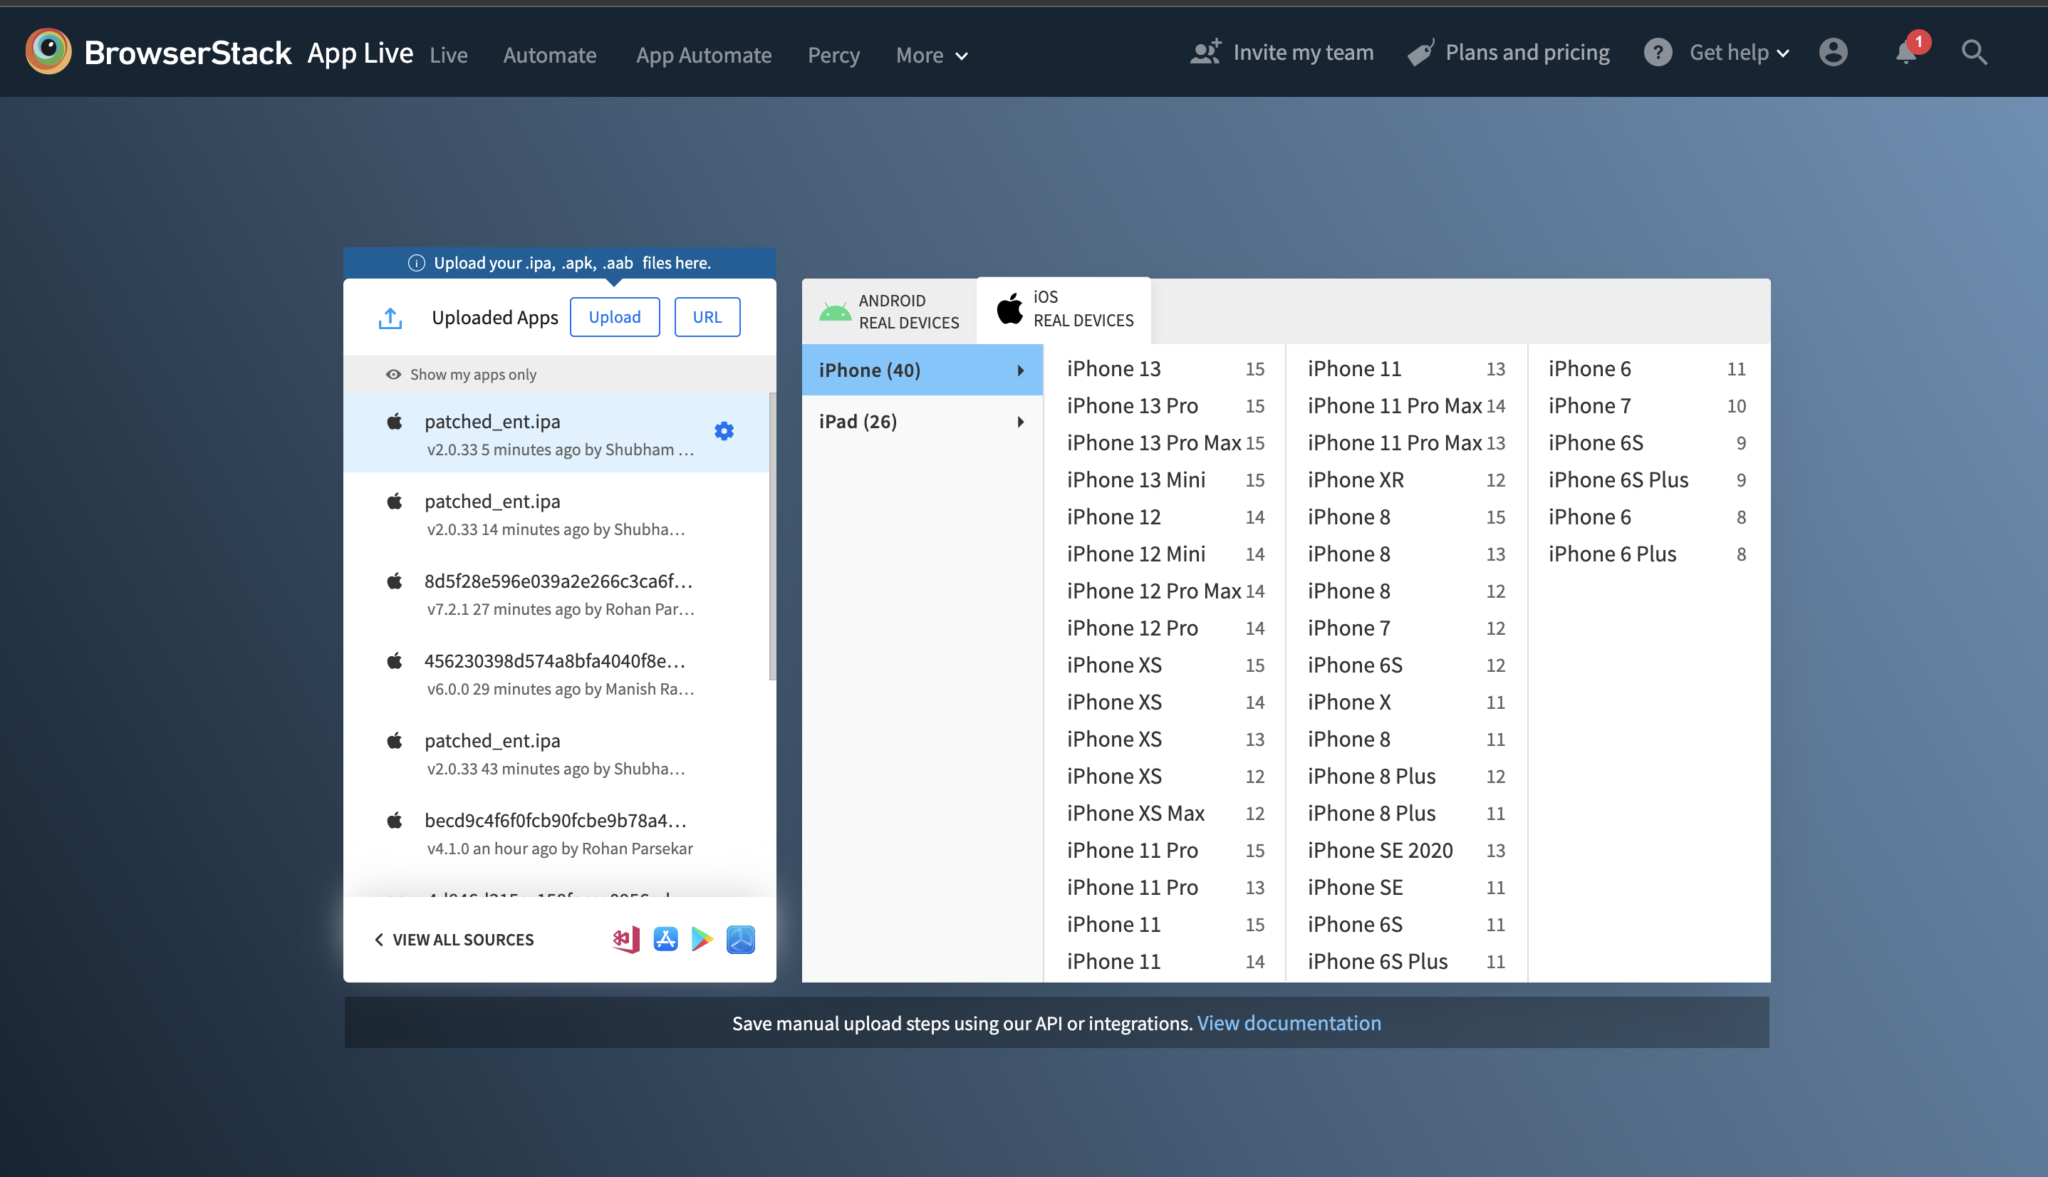
1. Manual Flutter Testing on a Real Device Cloud
It is important to test your applications in several combinations of devices-browsers-OS to ensure proper reliability of applications in terms of UI and UX. One of the most preferred ways is to consider a real device cloud for testing instead of setting up a device lab, as a better and cost-efficient process.
2. Flutter UI Automation Testing using FlutterDriver
FlutterDriver is a testing framework or package to run automated testing on Flutter applications. It is a greater alternative for Flutter UI tests in applications instead of going along with the conventional process. Moreover, it is convenient and straightforward to set up and use.
First, create an application on Flutter and try to run Flutter testing using FlutterDriver on our application.
Prerequisite
- Install any IDE of your choice. Select IDE based on the platform for which you will develop the application primarily. VS code for Android and XCode for iOS. This is important since you would want to test your application simultaneously. In this example, you are using VS Code. Also, install the Flutter plugin and Dart plugin in VS Code.
- Install Microsoft Visual Studio if you want to run the flutter app on windows. Also, install the workload “desktop development with C++” inside Visual studio.
- Install FlutterSDK on your system.
Step 1: Create Flutter Project
First open any folder in VS code where you want to start your Flutter project. Then, open the terminal in VS code and follow the command to create a new Flutter application.
flutter create sampleproject
Step 2: Write the application
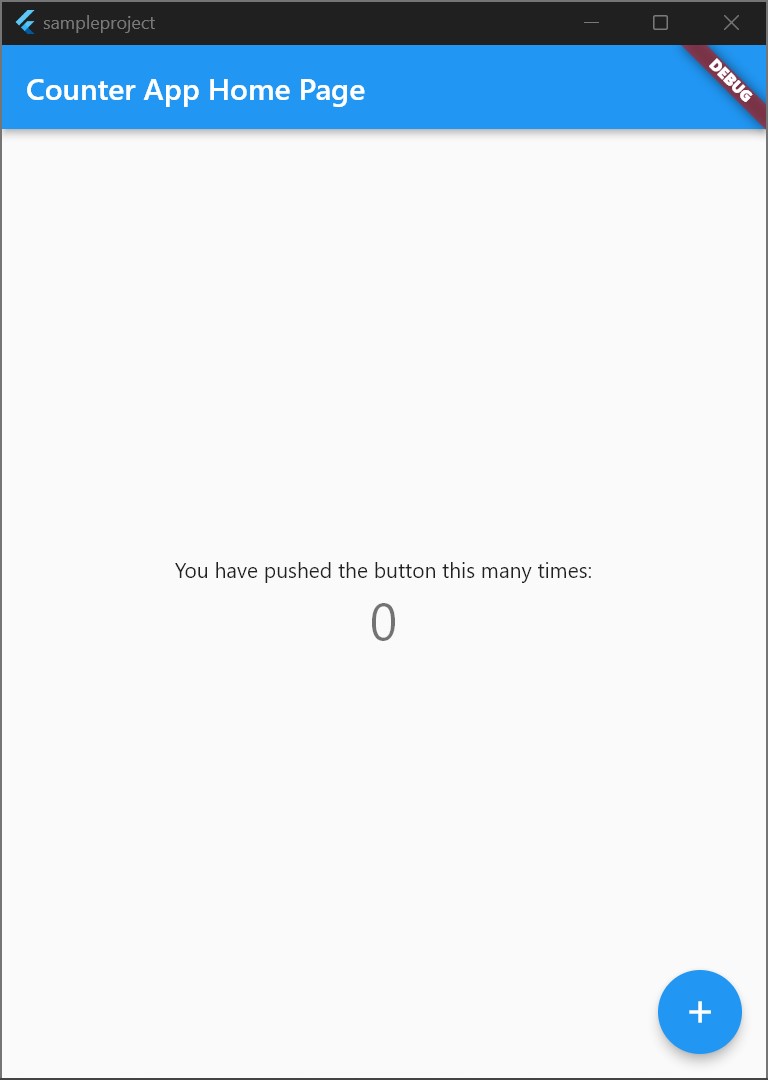
After successfully creating the project, you will get a Flutter counter application by default. Learn the Flutter app testing in this default application.
import 'package:flutter/material.dart';

void main() => runApp(const MyApp());

class MyApp extends StatelessWidget {
const MyApp({super.key});

@override
Widget build(BuildContext context) {
return const MaterialApp(
title: 'Counter App',
home: MyHomePage(title: 'Counter App Home Page'),
);
}
}

class MyHomePage extends StatefulWidget {
const MyHomePage({super.key, required this.title});

final String title;

@override
State<MyHomePage> createState() => _MyHomePageState();
}

class _MyHomePageState extends State<MyHomePage> {
int _counter = 0;

void _incrementCounter() {
setState(() {
_counter++;
});
}

@override
Widget build(BuildContext context) {
return Scaffold(
appBar: AppBar(
title: Text(widget.title),
),
body: Center(
child: Column(
mainAxisAlignment: MainAxisAlignment.center,
children: <Widget>[
const Text(
'You have pushed the button this many times:',
),
Text(
'$_counter',
key: const Key('counter'),
style: Theme.of(context).textTheme.headlineMedium,
),
],
),
),
floatingActionButton: FloatingActionButton(
key: const Key('increment'),
onPressed: _incrementCounter,
tooltip: 'Increment',
child: const Icon(Icons.add),
),
);
}
}
To view the application, follow the command in the root folder of your project.
flutter run
After the command is executed in the terminal, it will scan all the available devices, and will ask you to pick one on which you want to run your Flutter application.
See how to perform Flutter testing using FlutterDriver. Write a test for the sample Flutter application. In the test, validate the functioning of the elements present in the application.
Step 3: Add the Flutter driver dev dependency
Open the pubspec.yaml file and edit the default value inside the dev_dependencies tag to enable the integration testing with Flutter Driver.
dev_dependencies:
integration_test:
sdk: flutter
flutter_test:
sdk: flutter
Step 4: Create test script
There are several methods available in the FlutterDriver, to write automated tests. These methods are useful in navigating the application to perform several operations, such as tapping, entering data, scrolling, and more.
Some of the methods are:
- tap()
- enterText()
- waitFor()
- waitForAbsent()
- scrollIntoView()
Moreover, you can identify UI elements in Flutter driver using the following ways:
- bySemanitcsLabel(..)
- byTooltip(…)
- byType(…)
- byValueKey(..)
Paste the following test script inside the integration_test/app_test.dart file.
import 'package:flutter_test/flutter_test.dart';
import 'package:integration_test/integration_test.dart';

import 'package:counter_app/main.dart' as app;

void main() {
IntegrationTestWidgetsFlutterBinding.ensureInitialized();

group('end-to-end test', () {
testWidgets('tap on the floating action button, verify counter',
(tester) async {
app.main();
await tester.pumpAndSettle();

// Verify the counter starts at 0.
expect(find.text('0'), findsOneWidget);

// Finds the floating action button to tap on.
final Finder fab = find.byTooltip('increment');

// Emulate a tap on the floating action button.
await tester.tap(fab);

// Trigger a frame.
await tester.pumpAndSettle();

// Verify the counter increments by 1.
expect(find.text('1'), findsOneWidget);
});
});
}
Step 5: Running the test
Follow the command on the root folder of your project to execute the test.
flutter test integration_test/app_test.dart
Upon running the test script, the output in the terminal is displayed.
3. Running the Flutter App on an Android Emulator
Running your Flutter app on an Android emulator is a convenient way to test and debug during development. Follow the steps below to set up and launch your app on an emulator:
Step 1: Install Android Studio
Download and install Android Studio from the official website.
Step 2: Open Android Studio and Set Up SDK
Launch Android Studio and ensure the Android SDK is properly installed.
Go to Preferences > Appearance & Behavior > System Settings > Android SDK to verify or install required SDK components.
Step 3: Create a Virtual Device (AVD)
- Open the AVD Manager from the Android Studio toolbar or from the “More Actions” menu on the welcome screen.
- Click Create Virtual Device, choose a device model (e.g., Pixel 5), and select a system image (e.g., Android 12).
- Follow the prompts and finish the setup to create your emulator.
Step 4: Start the Emulator
Launch the emulator by clicking the Play button next to your virtual device in AVD Manager. Wait for it to boot completely.
Step 5: Create and Run the Flutter App
Create a Flutter project if you don’t have one. Make sure the emulator is running. Then, in the terminal, run this command:
flutter run
Flutter will detect the emulator and launch your app on it.
4. Using Appium Flutter Driver for Flutter App Automation
Appium Flutter Driver is a tool that enables you to automate Flutter apps using the Appium framework. It works by communicating with Flutter engine to interact with widgets during automated testing.
Below are the steps to set up and use Appium Flutter Driver:
Step 1 :Install Appium
Make sure Node.js is installed on your system. Then, install Appium using the following command:
npm install -g appium
Step 2: Install Appium Doctor
Appium Doctor helps verify that all required dependencies are installed. To install it, run:
npm install -g appium-doctor

appium-doctor
Follow any suggestions to fix missing tools or configurations. (This step is optional but recommended.)
Step 3 : Download Appium Flutter Driver
Clone the Appium Flutter Driver GitHub repository:
git clone https://github.com/truongsinh/appium-flutter-driver.git
Step 4: Install Dependencies for Flutter Driver
Navigate to the cloned directory and install the required packages:
cd appium-flutter-driver

npm install
Step 5: Add flutter_driver Package
To enable automation, you need to add the flutter_driver package to your app and include the necessary test configurations:
- Add flutter_driver and test dependencies to pubspec.yaml.
- Create a separate test target with a main entry file for the driver.
Step 6: Start Appium Server
Launch the Appium server in the terminal using the command:
appium
Step 7: Write Appium Test Script
Create a test script using a supported language like JavaScript or Python. Use Appium’s capabilities and Flutter Driver commands to locate and interact with UI elements using widget keys.
Step 8: Run the Automation Test
Execute the test script with your preferred test runner. Appium will control the connected device or emulator and interact with the Flutter app accordingly.
5. Automated Flutter UI Test on a Real device cloud
A real device cloud supporting Flutter Appium automation is an excellent choice for automation testers. The only thing the automation tool must have is the collection of real devices and their servers are maintained well.
Flutter automated UI testing is easier using BrowserStack’s real device cloud, integrating CI/CD technologies. The process speeds up testing, increases scalability, enables easy collaboration, and makes the tests more maintainable.
NOTE: BrowserStack App Automate supports testing Flutter apps on Android and iOS devices. Includes support for Appium’s Flutter driver to test Flutter apps using the Appium testing framework on BrowserStack.
The process to test Flutter apps involves preprocessing your app, uploading it to BrowserStack, adding the automationName capability to your test script along with the app ID, and then running your test script
6. Flutter Test Automation with Appium and BrowserStack Automate
You can run automated Flutter app tests using Appium on BrowserStack Automate. This enables you to test on real Android and iOS devices hosted on the cloud. Below are the steps to set it up:
Step 1: Create a BrowserStack Account
Sign up or log in at browserstack.com.
Step 2: Prepare Your Flutter App
Build your Flutter app for testing. APK or AAB for Android and IPA for iOS.
Step 3: Upload Your App to BrowserStack
Upload your app from the BrowserStack Automate dashboard.
Step 4: Set Up Appium Test Script
Write your Appium test script using supported language such as Java, Python, etc. Use the appium-flutter-driver for Flutter-specific commands. Make sure to include your uploaded app URL and device capabilities in the test configuration.
Step 5: Configure BrowserStack Capabilities
In your script, define capabilities such as device name, OS version and app URL. Example:
{

  "device": "Google Pixel 5",

  "os_version": "12.0",

  "app": "bs://<uploaded-app-id>",

  "project": "Flutter Project",

  "build": "Build 1",

  "name": "Appium Flutter Test"

}
Step 6: Run the Test on BrowserStack
Execute your Appium test. The script will connect to BrowserStack, install the app on a real device, and perform automated actions.
Step 7: View Test Results
Go to the BrowserStack Automate dashboard to see real-time test execution, logs, screenshots, and video recordings.
How to Write Effective Test Cases for Flutter Testing
Writing clear and effective test cases is important to ensure your Flutter application works as expected and is easy to maintain. Below are key guidelines to follow when writing test cases for Flutter apps:
1. Define Clear Objectives: Start by identifying what you want to test. Each test case should focus on specific functionality, user interaction or UI behavior.
2. Use Descriptive Names: Give each test case a clear and meaningful name that describes what it is testing. This helps in understanding test coverage and makes debugging easier.
3. Keep Test Cases Small and Focused: Avoid writing long or overly complex tests. Test one function, widget or feature at a time to keep your tests simple and reliable.
4. Use Mocks and Fakes Wisely: When testing in isolation, use mock data or fake services to simulate external dependencies like APIs or databases. This makes tests more predictable and faster.
5. Follow the Arrange, Act and Assert Pattern: Structure your tests in three steps:
- Arrange: Set up the environment and input data
- Act: Run the code or interaction you want to test
- Assert: Check that the expected result matches the actual result
6. Ensure Tests Are Repeatable and Stable: Write tests that give consistent results regardless of when or how often they are run. Avoid using random values or time-based logic unless handled carefully.
7. Test Edge Cases and Error Scenarios: Go beyond standard use cases. Include tests for invalid inputs, empty fields, failed API responses, and unexpected user behavior.
8. Keep Your Tests Up to Date: Update test cases whenever there are changes in the app’s logic or UI. Outdated tests can cause false failures or miss new issues.
Best Practices for Flutter Testing
Following best practices in Flutter testing ensures higher code quality, easier maintenance and faster development. These practices help in creating reliable tests. Here are some best practices to follow:
- Plan Testing Strategy Early: Define your testing approach at the beginning of the project. Decide what types of tests (unit, widget, integration) will be used and where they are most effective.
- Maintain a Clear Test Structure:Organize your test files in a logical folder structure (e.g., /test/unit/, /test/widget/, /test/integration/). This makes test management easier as the project grows.
- Use Meaningful Test Names: Write test names that clearly describe what is being tested and under what conditions. This improves readability and helps quickly identify failing tests.
- Test One Thing at a Time:Each test should focus on a single functionality or behavior. Avoid combining multiple test objectives in a single test case.
- Mock External Services:Use mocking libraries like mockito to replace external APIs or services during testing. This keeps tests fast, reliable and independent.
- Automate Tests in CI/CD: Integrate your test suite into a continuous integration pipeline. This ensures tests run automatically with every code change and helps catch issues early.
- Avoid Hard-Coding Values: Use constants or test data builders for test inputs instead of hard-coding values. This improves test flexibility and reduces duplication.
- Use Test Coverage Tools: Monitor test coverage to ensure important parts of the code are being tested. Focus on meaningful coverage rather than achieving 100% blindly.
Read More: Code Coverage vs Test Coverage
Conclusion
Flutter is a popular and growing cross-platform mobile framework, widely adopted by developers for its ability to render the same codebase across Android, iOS, Linux, and web. Backed by Google, it offers a reliable and efficient development experience, which makes it a trusted choice for building modern mobile apps.
Flutter applications can be tested through manual testing, automated testing, and using tools like FlutterDriver. Manual testing helps validate user experience, and automated testing ensures functional stability and performance.
If you are looking for a robust tool to scale your Flutter Test automation across multiple devices, you can opt for BrowserStack. It offers a real-device cloud with access to over 3500+ real-device-OS-browser combinations and testing support with real-time results and seamless integrations for teams looking.
Useful Resources for Flutter
- Essential Guide to Flutter Test Automation
- Flutter vs React Native: A Comparison
- How to make Flutter App Responsive
- How to Test Flutter Apps Using Appium Automation
- TDD in Flutter: How To Use Test Driven Development in Flutter
- How to run integration tests on Flutter apps
- Introduction to UI Testing in Flutter
- How to test Flutter Apps on Android Devices?
- Flutter vs Android Studio: Core Differences
- How to Test Flutter Apps on Real iOS Devices


