How to perform Root Cause Analysis and Debugging in Visual Regression Tests
By Gurudatt S A, Community Contributor - May 30, 2022
Debugging plays a vital role in the testing process. Any failed test needs to be diligently analyzed to identify the root cause of failure and work to rectify it.
Automation frameworks like Selenium, Cypress, Puppeteer, and Playwright are best suited and widely used for Functional testing. What if you need to validate the look and feel of the application User Interface? One way to achieve that is by checking the CSS values using the CSS selector but it’s a tedious process and not reliable.
To perform Visual Testing for a web application, Percy is an intelligent tool that provides an automated way of detecting UI changes with Visual Regression Testing. Percy is the one-stop solution for capturing screenshots to detect visual changes and notifying the team by highlighting exactly what has changed.
Let’s understand how to access Percy dashboard from a Failed Test Build for performing Root Cause Analysis behind the failure.
How to access Percy dashboard from Failed build
To start working with Percy, here are the prerequisites that are required.
Prerequisites:
- Percy set up in CI.
- Percy setup with various test automation tools.
Once the Percy is set up and visual regression tests are run, find the failed test that you would want to do the Root cause analysis of. Then follow the steps mentioned below to access the Failed tests from Percy.
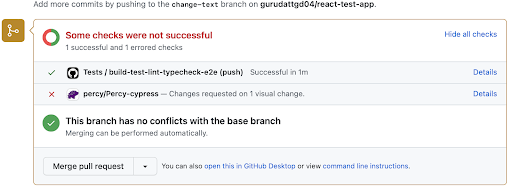
Step 1: Once you open the Pull Request for the build which has failed, you can check the Details link against Percy failed step as seen below
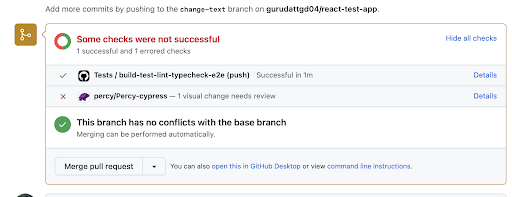
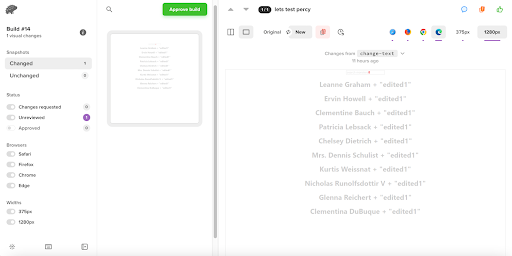
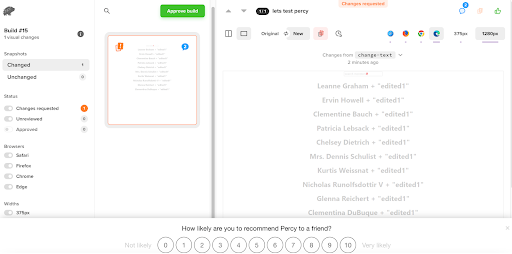
Step 2: Click on details to open the associated Percy build highlighting the change
Performing Root Cause Analysis in Visual Regression Tests
When you first run the Percy integrated test, Percy captures the snapshot and stores that as a baseline image, and for the next subsequent runs the baseline image is compared against the newly captured images.
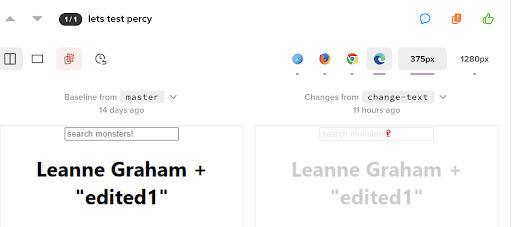
For example, here the Placeholder text within the Search input element is modified as
Before: search monsters!.
After: search monsters?.
So the difference in the comparison is! changed to? and Percy highlights this change in red color. Similarly, any change in the baseline and a new snapshot is highlighted by Percy using pixel-to-pixel comparison.
Now either QA or BA can validate if the change is intended or an error using the workflow in Percy as seen below.
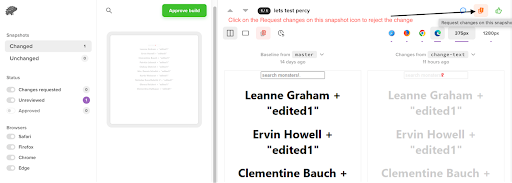
Workflow: Request changes on this snapshot
Step 1: If the change is not intended and the developer changed it accidentally, you can reject the change by clicking on Request changes on this Snapshot
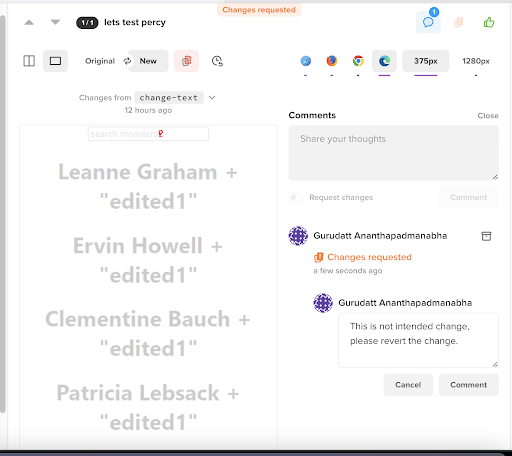
Step 2: You can also add a comment for rejecting the change as seen below
Step 3: Once a snapshot is rejected in Percy, Percy sends this information back to Github and the build status will change to Changes requested on 1 visual change. Here the developer can now revert that accidental change and Percy build will be successful.
Workflow: Approve build
Step 1: Now if the changes are made by the developer as intended and you need the change to be approved, then QA and BA need to click on Approve Build button
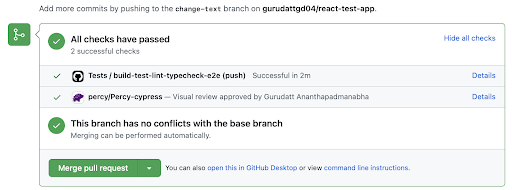
Step 2: As the build is approved, Percy sends this information to Github and the failed check will be updated to Successful status. This newly approved snapshot becomes the new baseline image in Percy
Visual inconsistencies deeply influence the user journey, which means that they need to be completely eliminated. Visual testing is the only method to do this quickly, accurately, and comprehensively, making them indispensable for any enterprise looking to have an online presence. Hence, doing the root cause analysis is essential in the debugging process for a failed Visual Regression test
