Test Automation is the key to faster delivery of the product. Testing can be done at different levels to prevent the bug in production. Levels of testing can be broadly classified as Component Testing, API/Integration Testing, and E2E Testing. These tests fall under functional testing. For a smoother user experience, many organizations adopt non-functional testing such as Performance testing, Security Testing, Accessibility Testing, Responsive Testing, etc.
Functional testing is the most critical part of the application, you need to ensure the user interface and functionality work smoother as part of functional testing. As manual testing is time-consuming and it requires a lot of effort and cost, Automation testing is a recommended approach in SDLC.
There are many automation tools available in the market such as Selenium, Cypress, and Playwright, Puppeteer etc. The Cypress latest version supports both component and e2e tests.
This tutorial explains the quick and easy way of Cypress UI Testing with component and end-to-end tests.
How to Perform Cypress End-to-End UI Testing
Pre-requisite:
- Install NodeJS
- Navigate to the download page
- Choose your operating system and download NodeJS (LTS recommended)
- Install the NodeJS binaries
- Install Visual Studio Code (optional but recommended)
- Navigate to VS Code download page
- Download and install
Step 1: Create an empty directory (ex:cypress-e2e)
Create an empty folder that helps to install and configure cypress
Step 2: Launch Open Empty directory and Launch Terminal
- Launch the VSCode app installed as a prerequisite
- Open the newly created folder from File Menu
- Navigate to the Terminal menu
- Click on the New Terminal
Step 3: Install Cypress
The Cypress installation command installs all required dependencies. To install Cypress use the below command
npm install cypressCypress automatically creates the package.json folder in your project root folder during the installation.
Step 4: Open the Cypress
Cypress needs to perform initial settings, you need to enter the open command to start the cypress window.
npx cypress openNote: Cypress may throw the verification failed error, entering the open command again should resolve the issue.
Step 5: Choose the options on the Cypress window
Once you enter the open command, the Cypress window will be launched and choose the configuration.
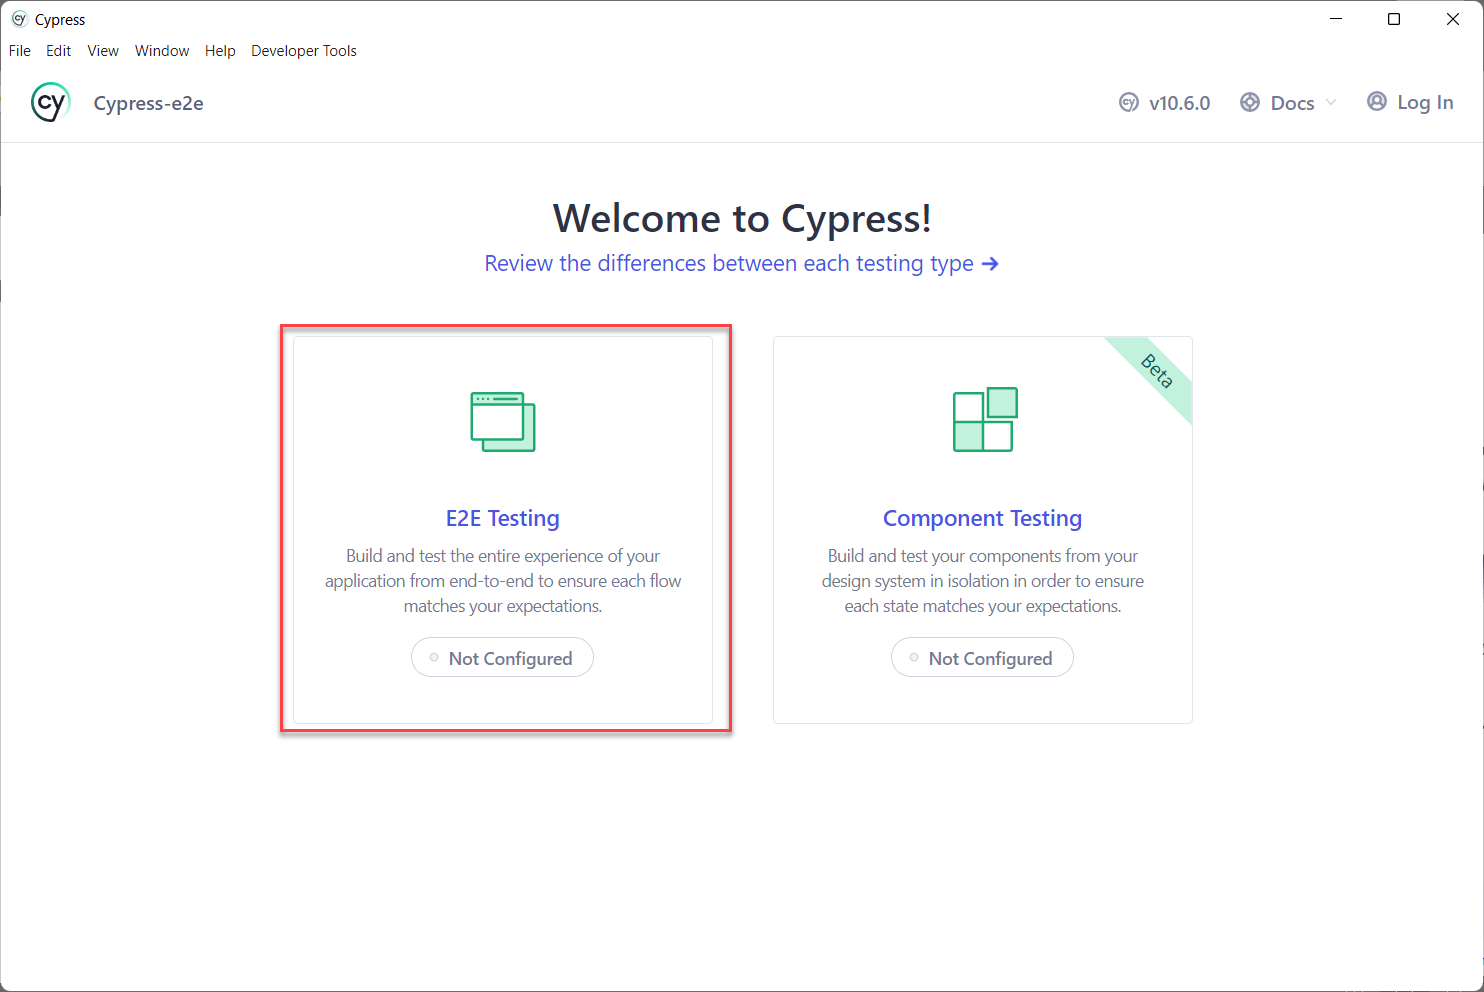
- Choose the Testing Type
When you run the open command, the Cypress window opens. Choose the testing type. In our case, it is end-to-end testing.
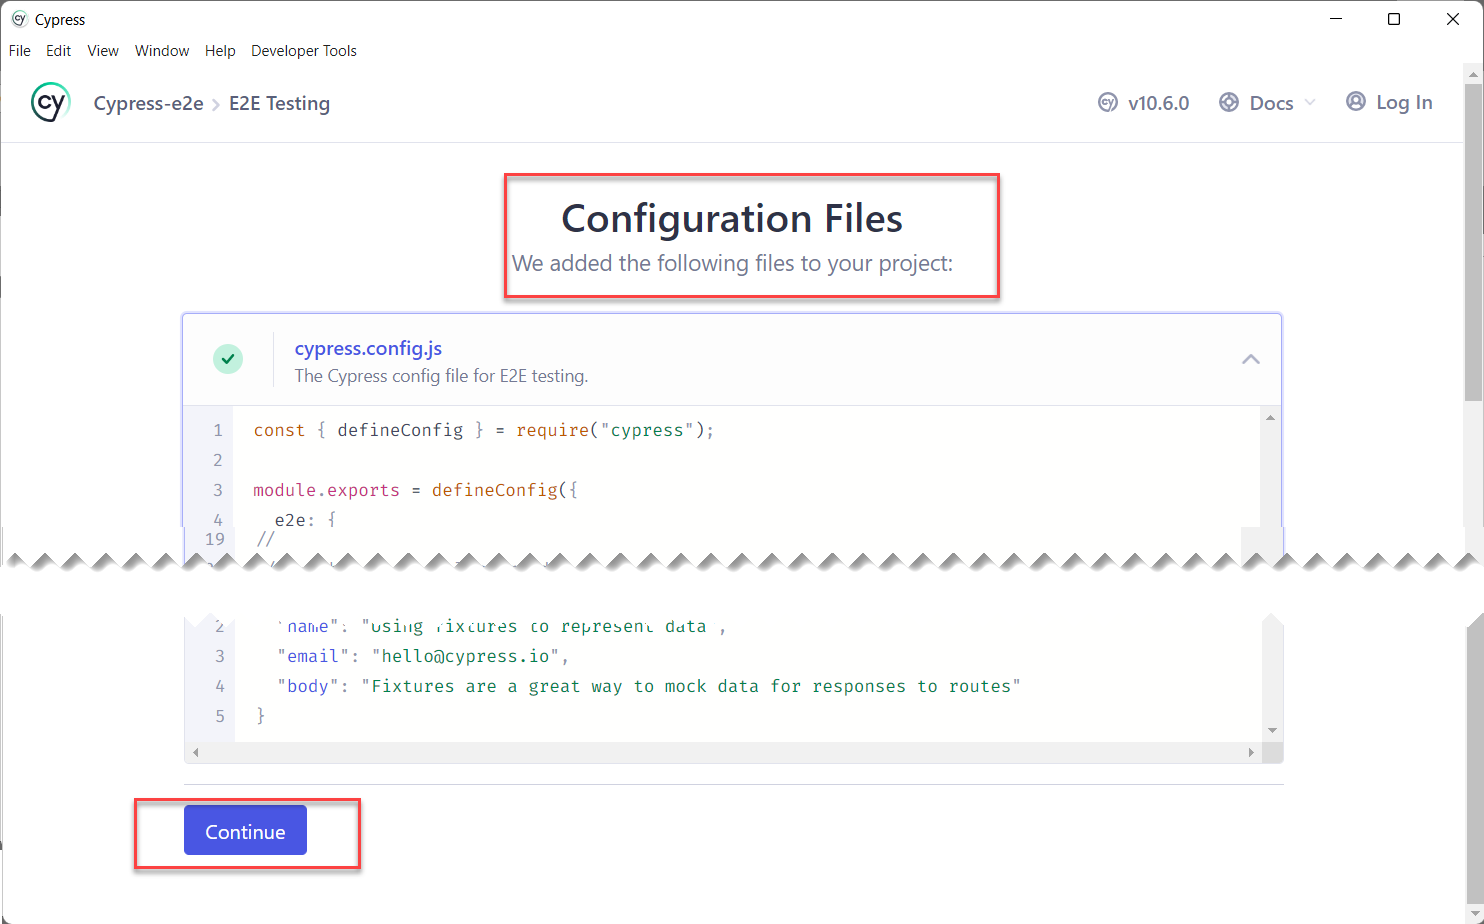
- Configuration Files
The configuration files window pops up, review them and Click continue. Cypress creates the configuration settings after this step.
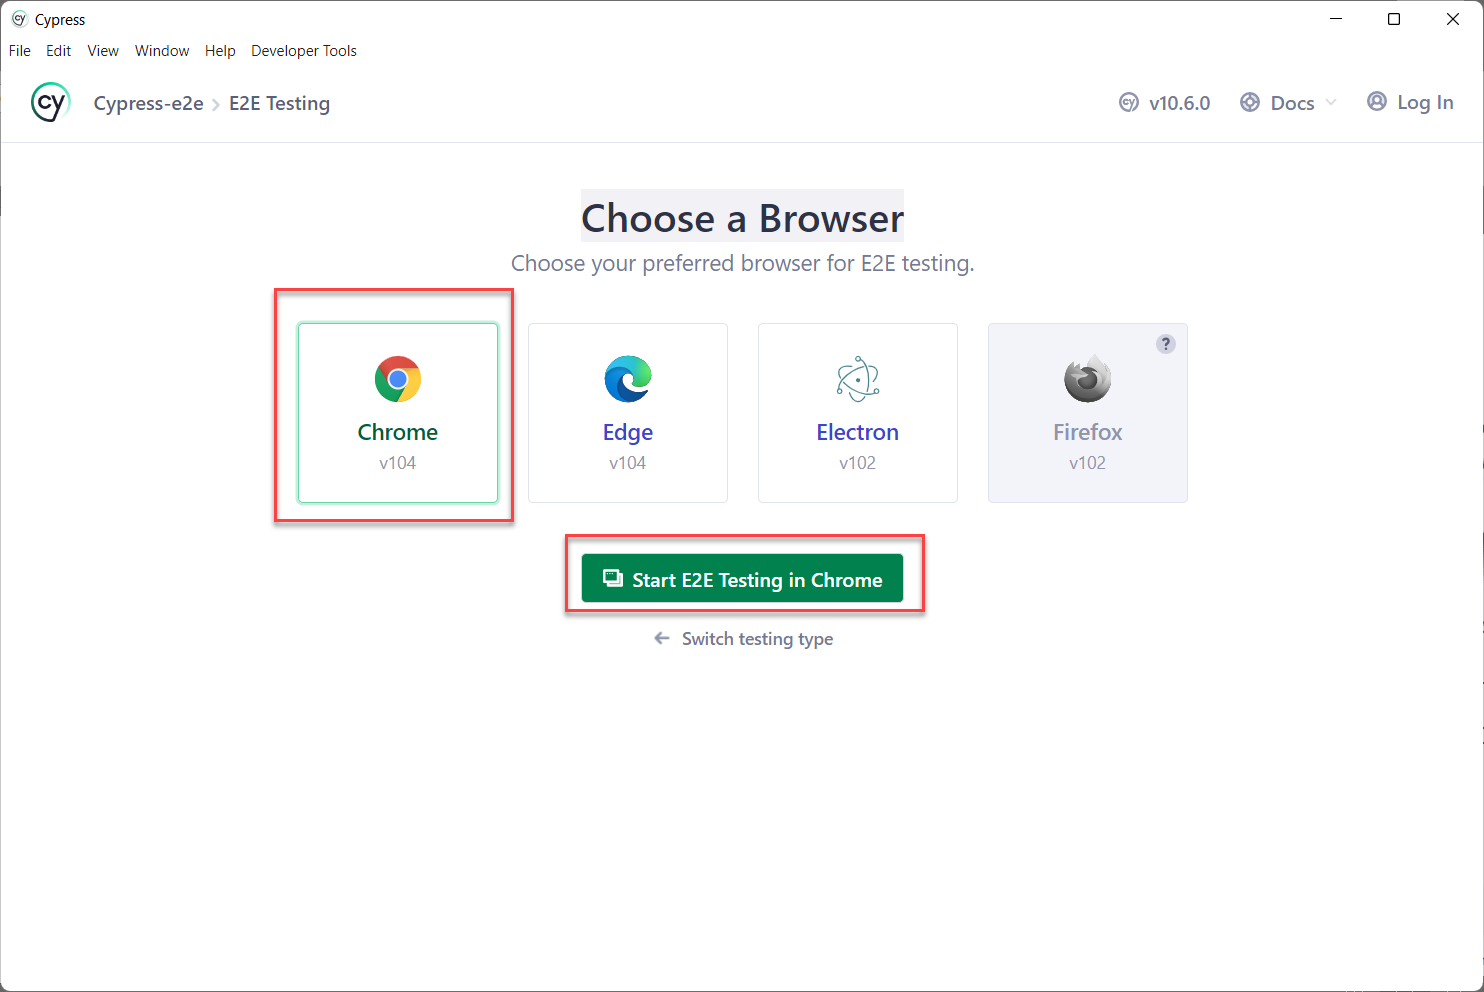
- Choose a Browser
Next, You need to choose the desired browser from the available options. For the demo purpose let’s choose Chrome and click Start e2e Testing in Chrome
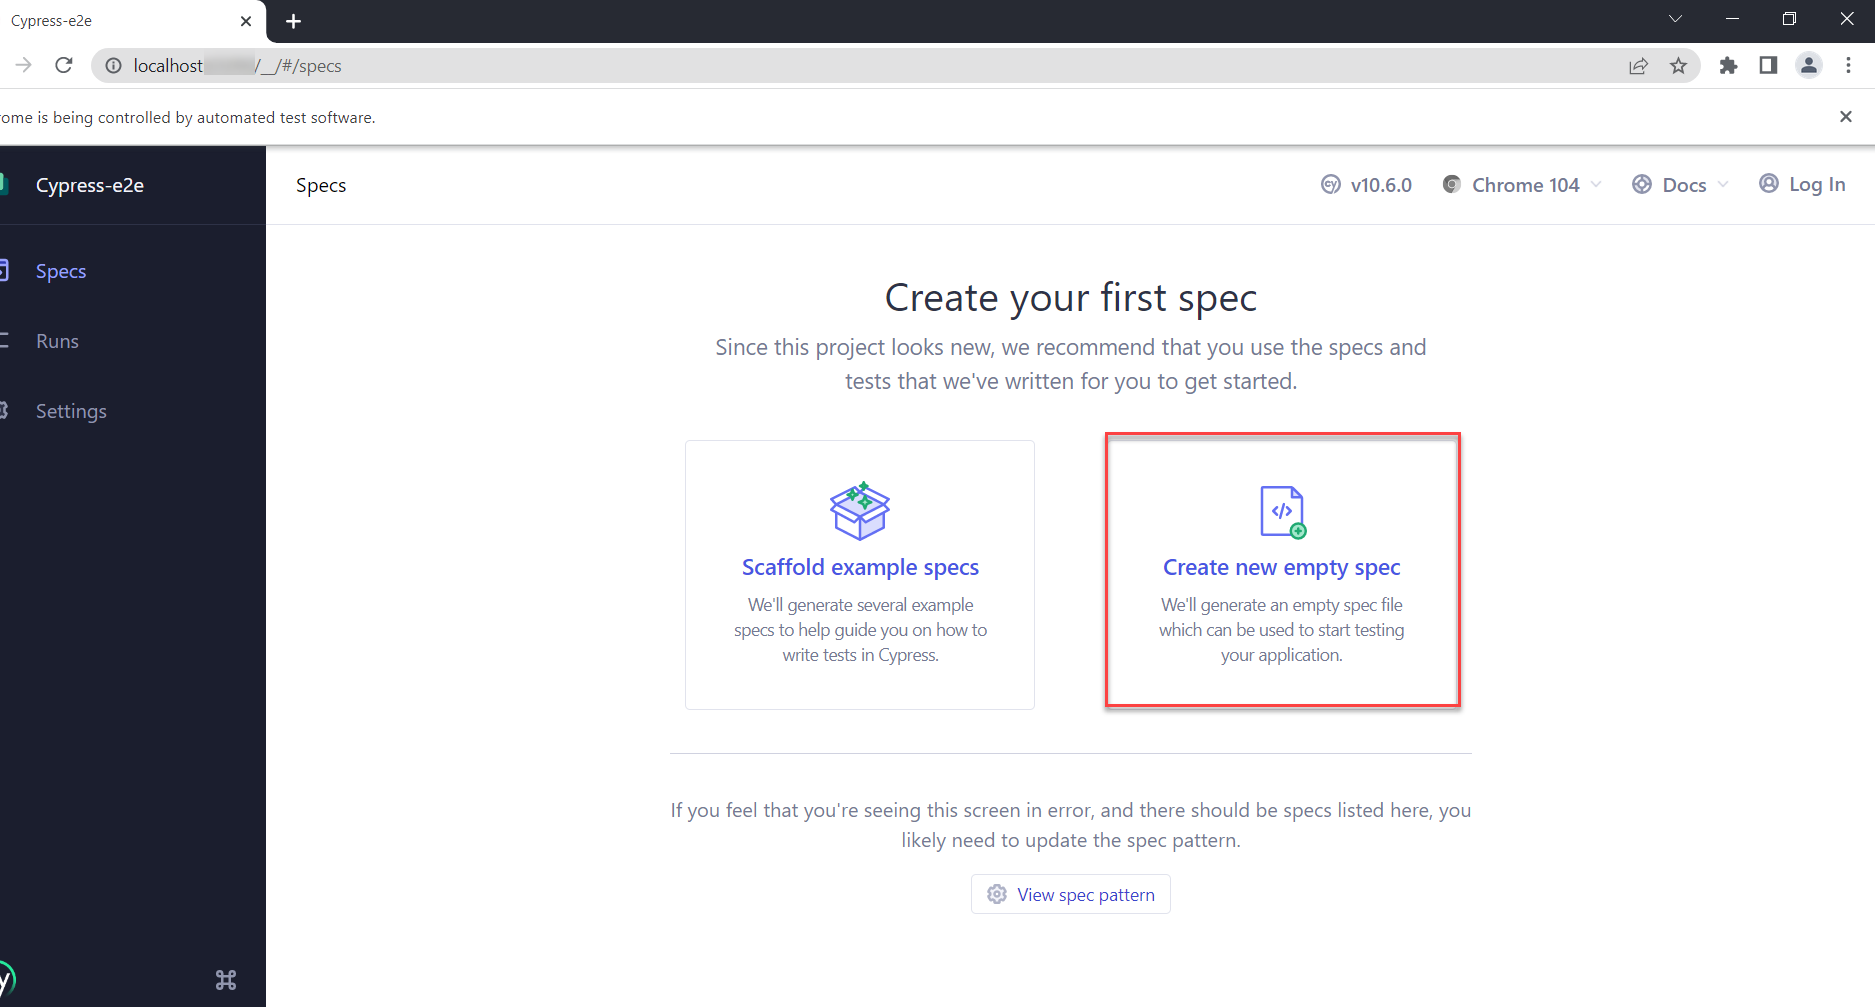
- The Cypress test runner window opens up, click create new empty spec.
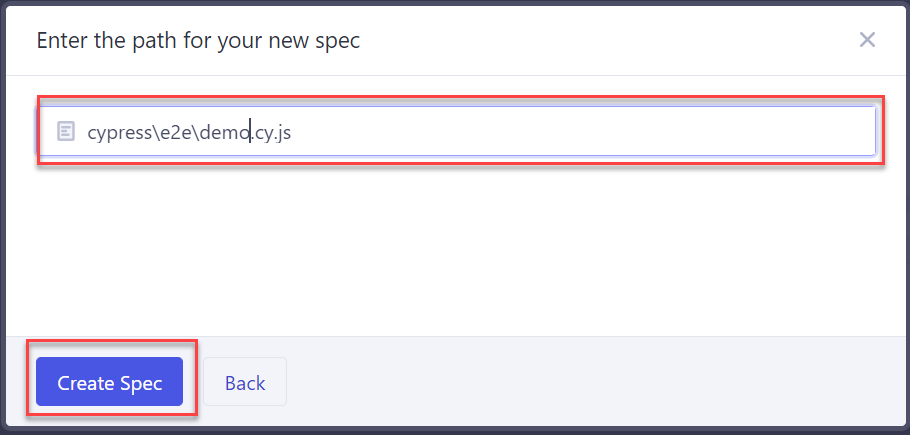
- Enter the desired spec name, and click on Create Spec
- Enter the name as demo.cy.js
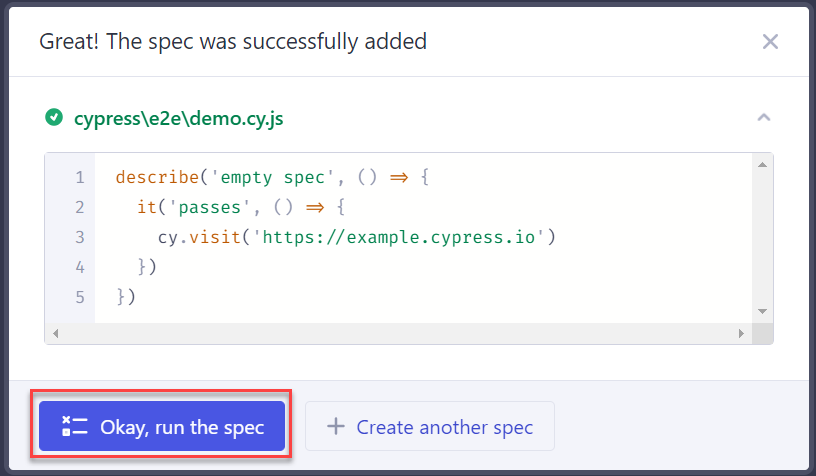
- The example spec will be created click Okay, run the spec.
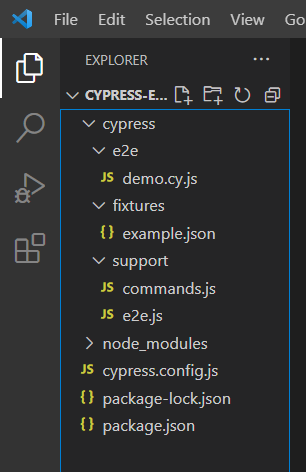
The demo tests start running. At this point, your project directory tree looks as shown below.
Understanding the Cypress directory and files
- e2e folder: Contains Cypress end-to-end specs
- fixtures folder: Any data which can be used inside the specs can be placed here
- support folder: Helper functions, utilities, any reusable code, and custom commands can be placed here.
- support/e2e.js: Great place to put the global configuration and reusable code
- support/commands.js: In this file, you can create custom commands or override existing commands
- cypress.config.js: This file contains run time configurations such as baseURL, reporter, videos, screenshot options, etc.
- package.json: This file tracks all installed dependencies and allows you to create a custom commands shortcut
Step 6: Create a sample test
You have given demo.cy.js as an example spec name, which is already created as part of Cypress setup. Let’s modify the demo.cy.js with actual use cases.
Let’s consider the scenario
- Navigate to Browserstack home and verify home page is loaded successfully
- Click on the Pricing menu, and verify if all the product names are listed.
Below is the cypress test spec for the above scenario
//demo.cy.js
describe('Browserstack Demo', () => {
beforeEach(() => {
cy.viewport(1280, 1000)
})
it('should verify home page', () => {
cy.visit('https://browserstack.com')
cy.get('#logo').should('be.visible')
cy.title().should('eq','Most Reliable App & Cross Browser Testing Platform | BrowserStack')
})
it('should verify Pricing page', () => {
cy.get('a[title="Pricing"]').first().click();
cy.get('a[data-item-id="live"]').should('contain.text','Live')
cy.get('a[data-item-id="automate"]').should('contain.text','Automate')
cy.get('a[data-item-id="percy"]').should('contain.text','Percy')
cy.get('a[data-item-id="app-live"]').should('contain.text','App Live')
cy.get('a[data-item-id="app-automate"]').should('contain.text','App Automate')
})
})
Home page verification
- cy.visit() Navigates to the BrowserStack home page
- cy.get() is chained with assertions should() to verify the visibility of the logo
- cy.title() is chained with the assertion (should) to verify the title is correct
Pricing menu verification
The click action is performed using cy.get().click() on the pricing menu
Once it is landed on the pricing menu, all respective locators text are asserted to verify the product listing on the pricing menu.
Step 7: Execute the test case
Cypress allows execution through the command line or using the Cypress window(UI)
Execute cypress UI tests using cypress window
- Enter the command npx cypress open
- Navigate to the Test runner window
- Click on demo.cy.js to start execution
Cypress test execution using command line
Use the below command to execute Cypress UI tests in the command line
npx cypress run --spec cypress/e2e/demo.cy.js
How Run Cypress Component UI Testing
Component testing is the test of the small component of the UI while it is in the development stage. This helps in faster delivery. Unlike end-to-testing, component testing will be carried out at the individual component level. The latest version of the Cypress (version 10 or above) supports Component testing. Cypress component testing is currently Beta and supports all major framework components such as React, Vue, Angular, etc.
- Install NodeJS
- Navigate to the download page
- Choose your operating system and download NodeJS (LTS recommended)
- Install the NodeJS binaries
- Install Visual Studio Code (optional but recommended)
- Navigate to VS Code download page
- Download and install
Step 1: Create a new folder and Open it in VSCode
- Create a new folder for component testing (ex: cypress-component-demo)
- Open the Folder in VSCode using the File menu > Open Folder
Step 2: Clone the Simple react App
As components need to be present locally, you need to create a sample react app and components
Note: if you are already having the component created in your development framework you can use the same.
On the VSCode terminal enter the below command
npm create vite@latest my-awesome-app -- --template react
Step 3: Install the dependencies
Switch to folder my-awesome-app and enter the below command to install the dependencies.
npm installThe above command clones the simple react app that can be used for component testing.
Step 4: Install the Cypress
Install Cypress using the below command
npm install cypress -D
Step 5: Configure Cypress for component testing
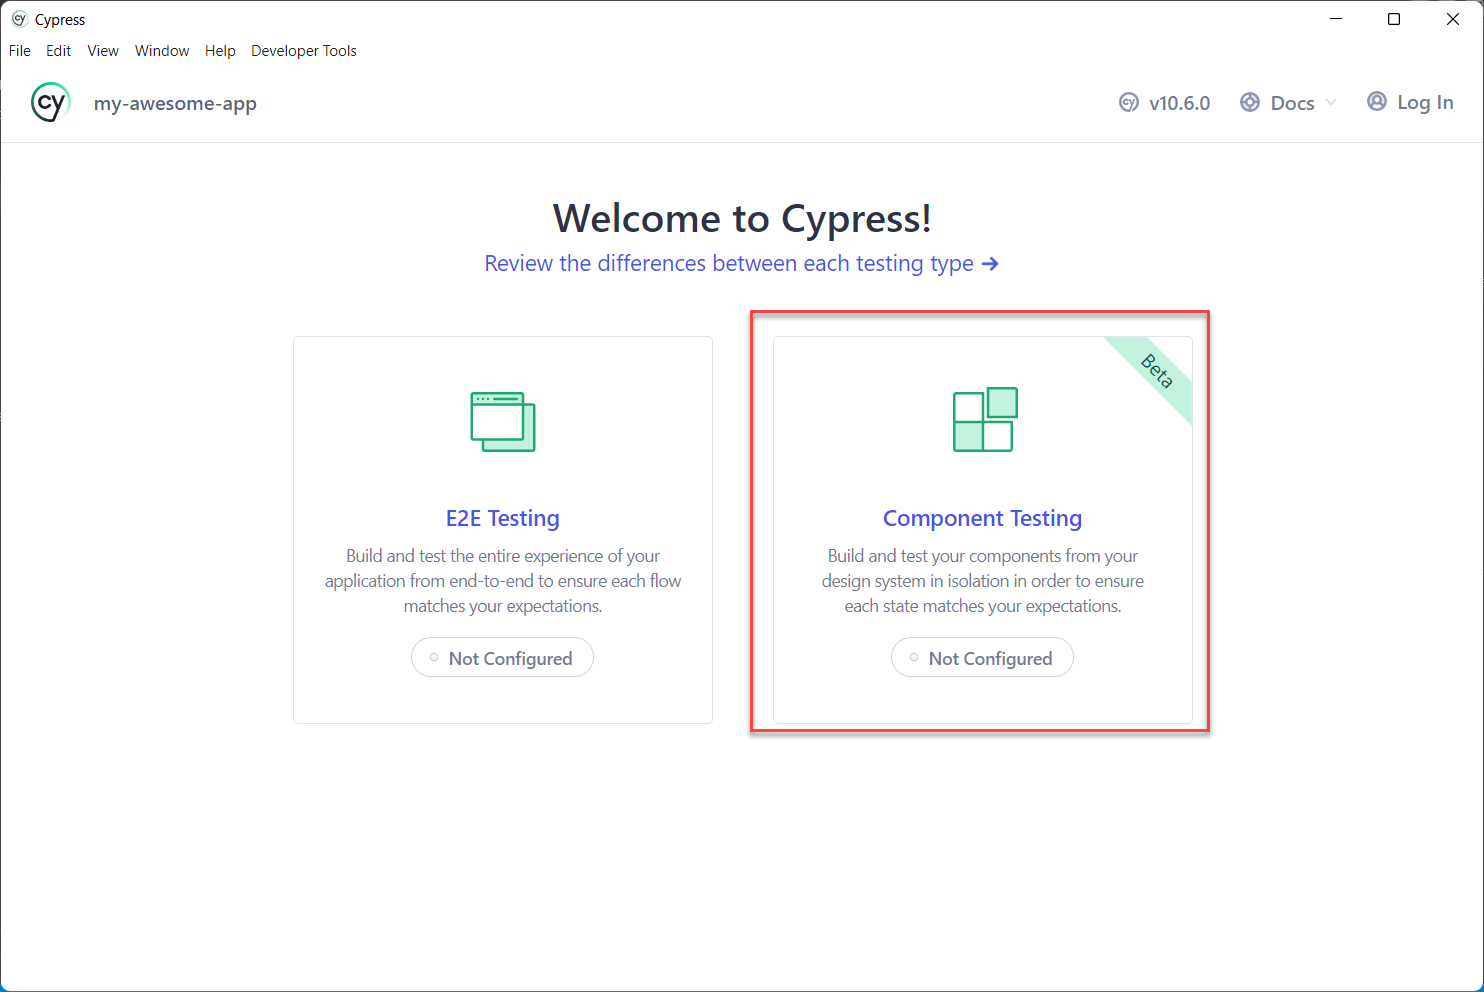
- Open Cypress
npx cypress open- Choose Component testing from the Cypress window
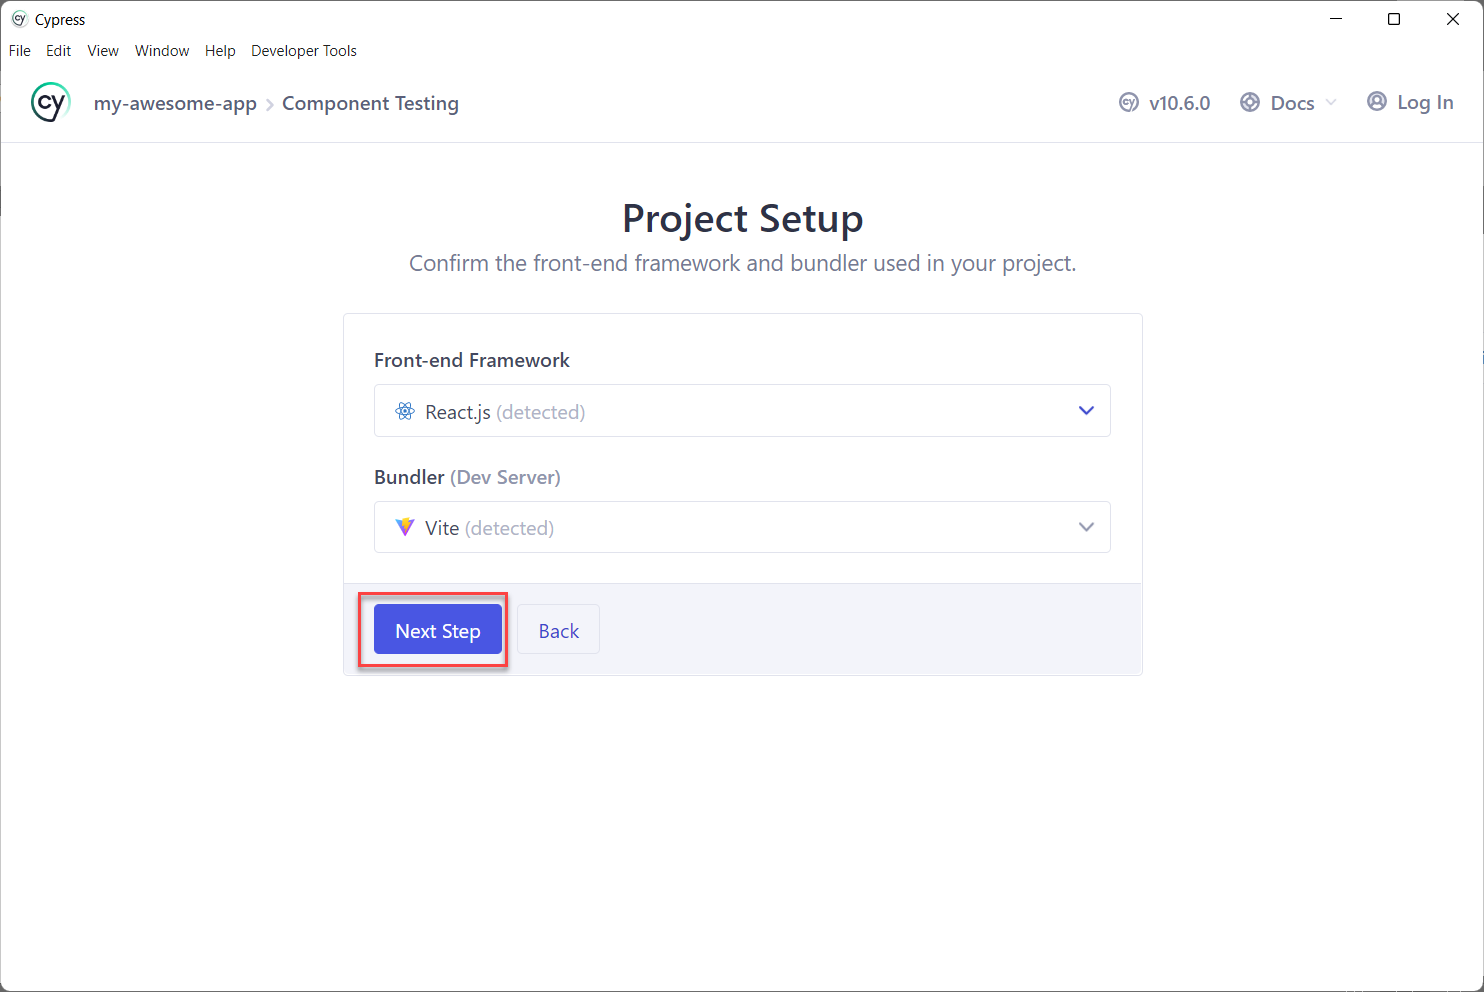
- The Project Setup window automatically detects the Framework and builder so click Next.
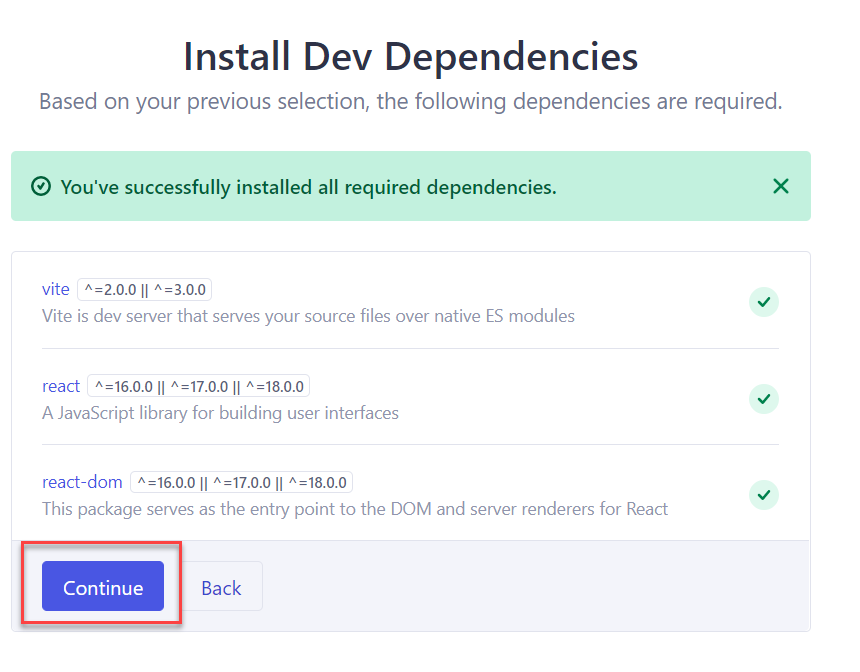
- Next, Cypress verifies all required dev dependencies are present. Click Continue
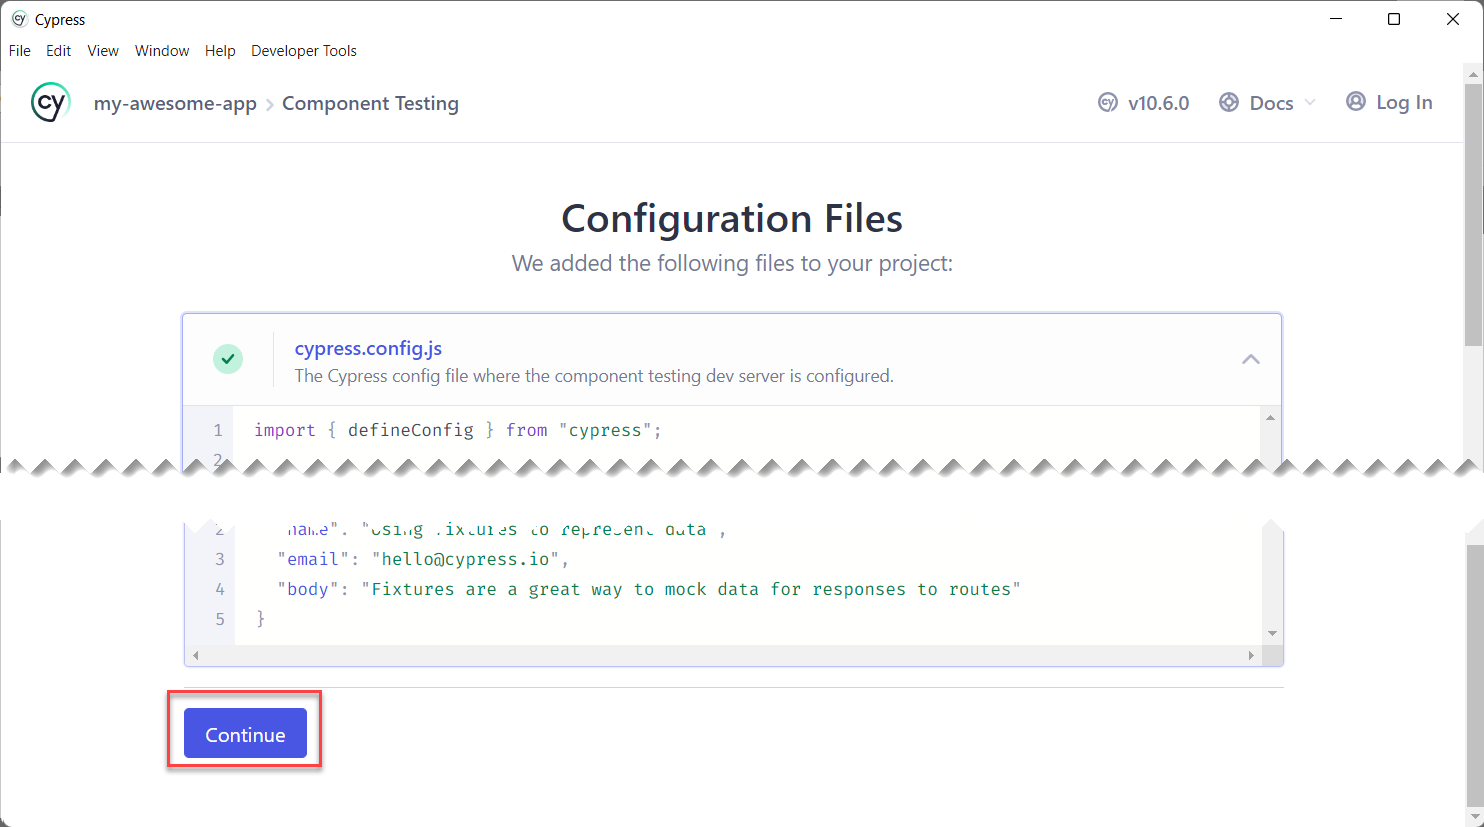
- Based on the installed framework and dependencies Cypress creates the configuration file. Review them, and clicks Continue.
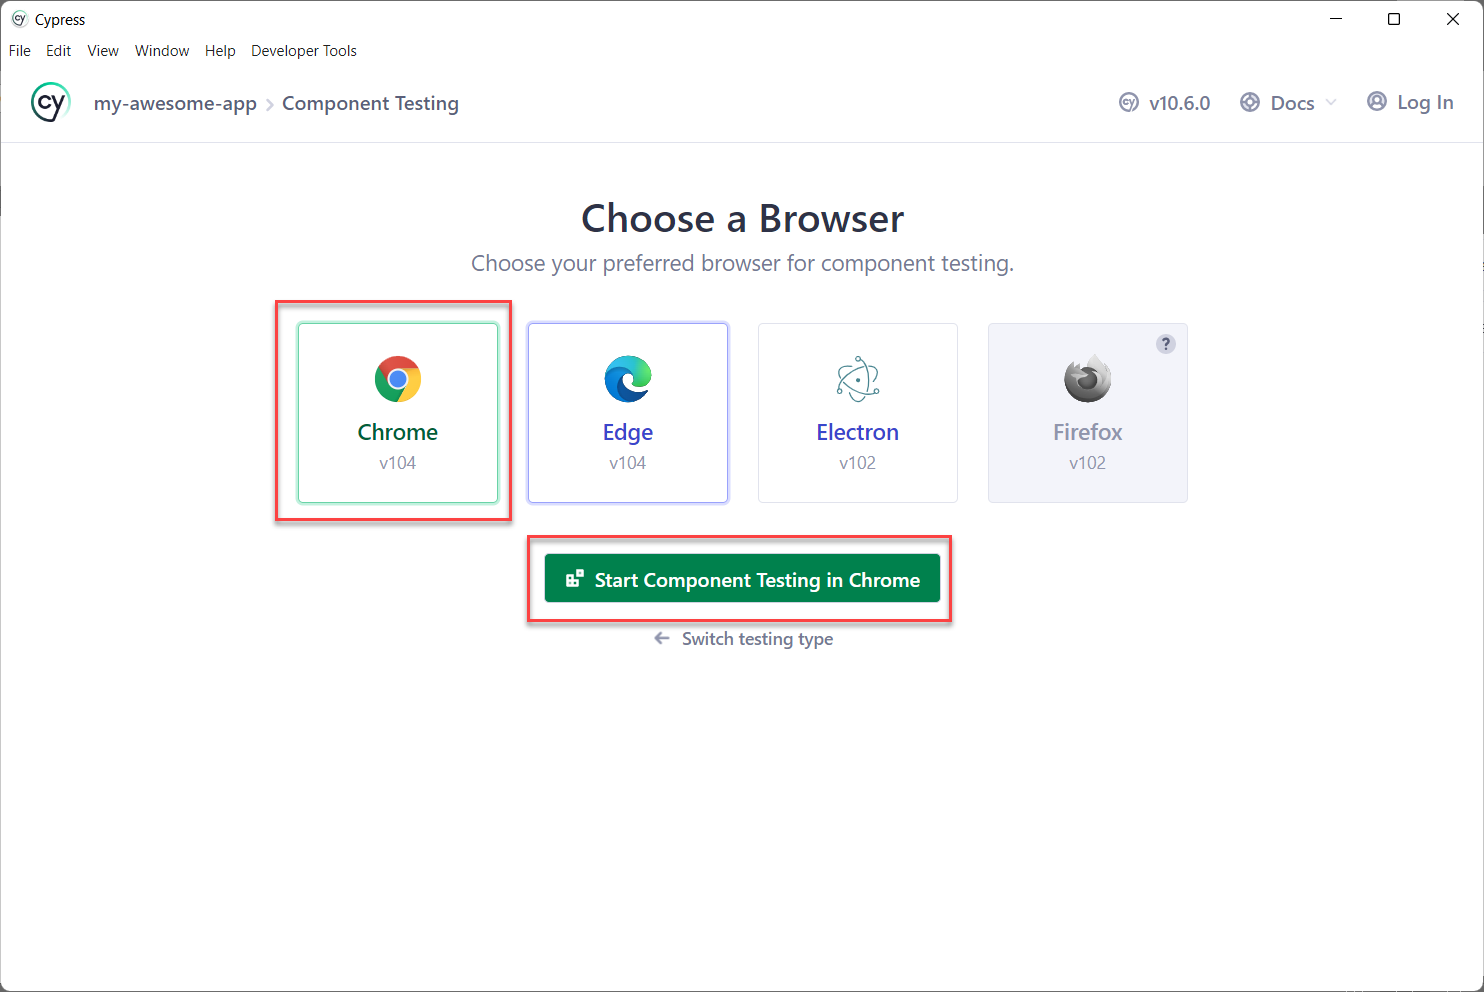
- Choose the browser
You can choose any browser, for simplicity choose Chrome and click Start Component Testing in Chrome.
At this point, the test runner shows up. Do not do anything, simply close the Cypress window.
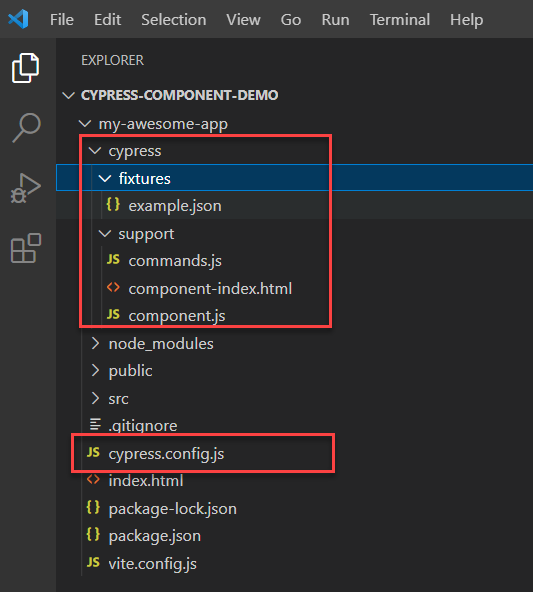
The Project Structure looks as below
Step 6: Create a simple component
Navigate to my-awesome-app/src and create a file with DemoComponent.jsx
Create a simple component with a greetings message
import { useState } from 'react'

export default function Demo({ greetings = 'Good Morning' }) {
const [greetingMessage] = useState(greetings)

return (
<div>
<div id='message'>
Hello Browserstack! {greetingMessage}
</div>
</div>
)
}
In the above code, the default greeting message is Hello Browserstack! Good Morning,
However, the demo function accepts optional parameter greeting messages you can pass it like Good Evening, etc.
Let’s test this using Cypress
Step 7: Create Cypress Component Test
Navigate to Cypress directory and create a directory with the name component.
Create a file inside the cypress/component folder and name it as DemoComponent.cy.jsx
Let’s create two test case
- Verify the default welcome message
- Verify the message by sending the parameter “Good Evening”
import Demo from '../../src/DemoComponent'
describe('Demo Component', () => {
it('Default Message', () => {
cy.mount(<Demo/>)
cy.get('#message').should('have.text','Hello Browserstack! Good Morning')
})
it('Good Evening Message', () => {
cy.mount(<Demo greetings='Good Evening'/>)
cy.get('#message').should('have.text','Hello Browserstack! Good Evening')
})
})
The above code, cy.mount() mounts your component
cy.get() is used for getting the locator on the browser and assertion is used for verifying the text
Step 8: Execute the Cypress component tests
- Open the Cypress window using
npx cypress open- Navigate to the Cypress test runner window
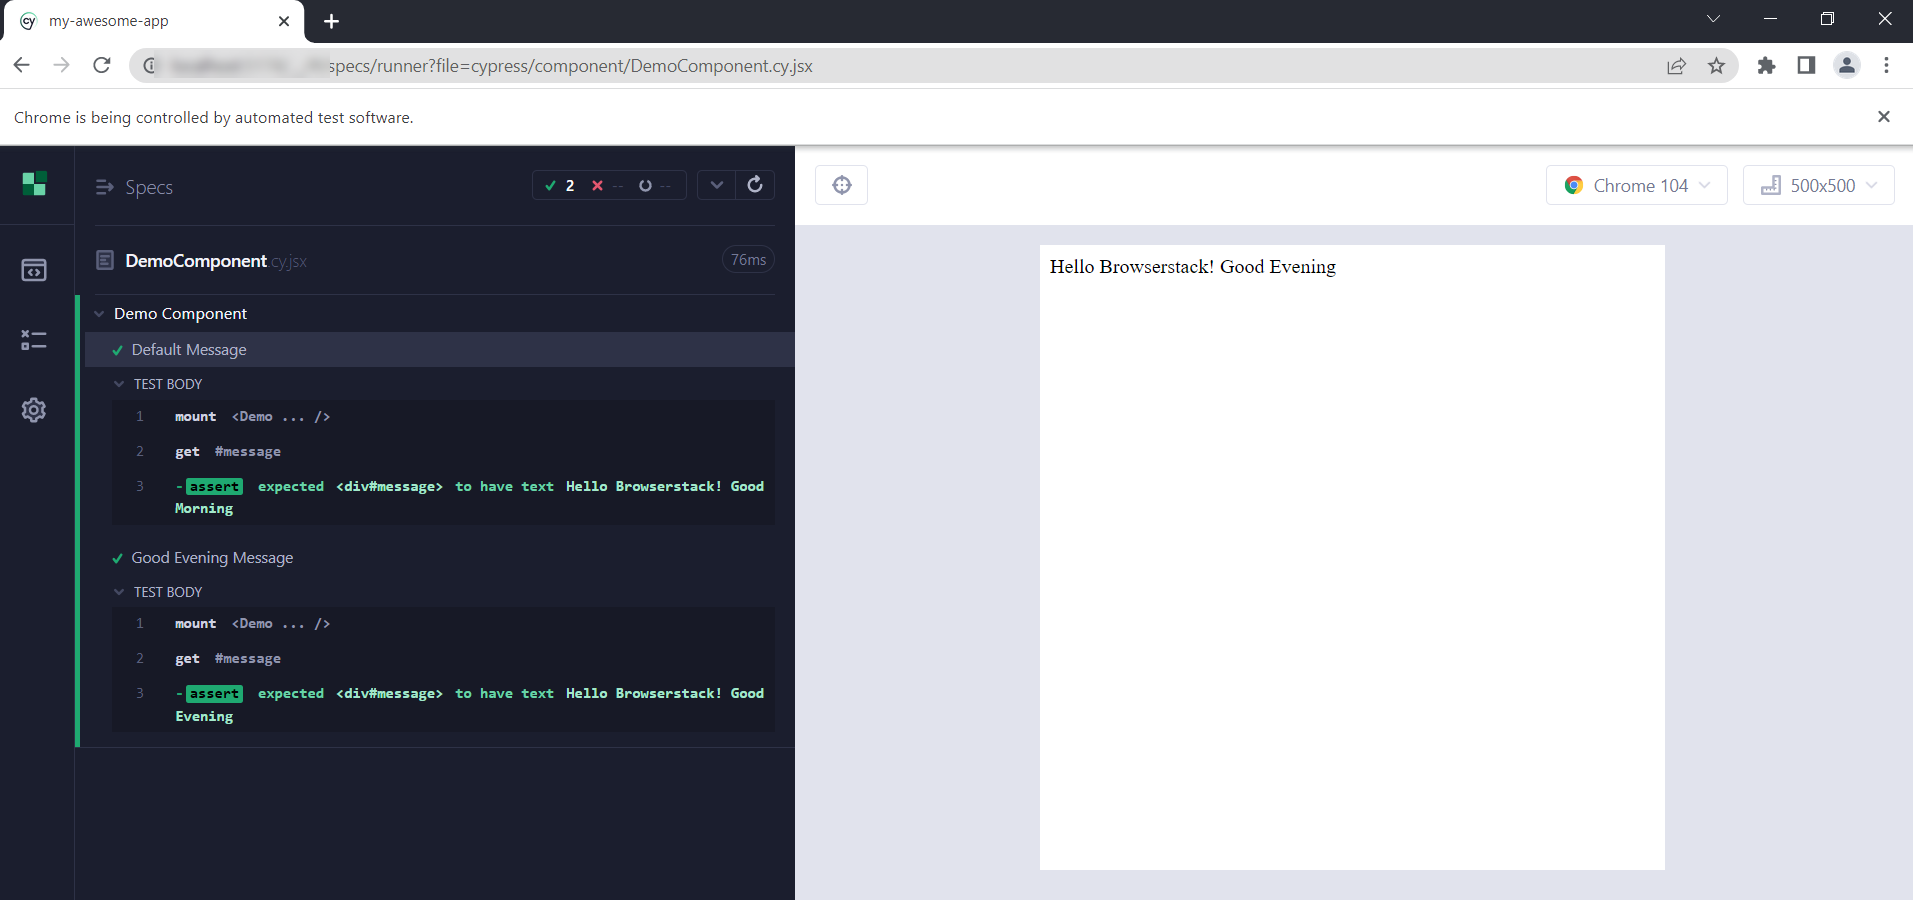
- Choose the DemoComponent.cy.jsx and execute the test
You can also use the Cypress command line tool to execute the test
npx cypress run --component
The above command executes component tests in headless mode and the results will be shown in command line.
Cypress Tips and Tricks
1. Cypress allows you to create both end-to-end tests and component tests in a single project.
2. Cypress end-to-end tests and component tests can be executed using the command line tool (CLI)
npx cypress run –e2e: Executes all end to end tests
npx cypress run –component: Executes all component tests
3. Cypress by default records the video of test execution and this can be turned off by adding video: false in your cypress.config.js
4. You can choose a browser via command line using the –browser option
npx cypress run --browser firefox
npx cypress run --browser edge
5. While opening the Cypress window you can skip the welcome window and directly open the test runner window by specifying the test type and browser
npx cypress open --component --browser chrome
Run End to End UI Tests on BrowserStack
1. Install BrowserStack using the below command
npm install -g browserstack-cypress-cli
2. Create a browserstack.json file using the below command
browserstack-cypress init
3. Open the browserstack.json file
- Add the username and access_key
- Specify the cypress.conf.js file path
4. Execute the Cypress tests on BrowserStack
browserstack-cypress run
Note: Browserstack now supports Cypress 10
