Cypress is a Node.js-based test automation tool that supports component, API, and end-to-end testing with developer-friendly features. While testing is crucial, reporting is equally essential without it, even extensive test coverage lacks value.
Overview
Cypress Reporter generates test reports in various formats, providing clear visibility and seamless CI/CD integration. These reports help analyze test execution, identify failures, and improve debugging with logs and screenshots.
Types of Cypress Reports
Here are the different types of Cypress reports:
- Console Reports: Display test results directly in the terminal for quick debugging.
- Cypress Dashboard: Provides cloud-based test reports with analytics and insights.
- HTML Reports: Generate visually structured reports for easy result analysis.
- JUnit XML Reports: Produce structured XML reports for CI/CD integration.
- Custom Reports: Allow tailored reporting formats based on project needs.
- Screenshot and Video Reports: Capture test execution for better debugging.
- Allure Reports: Create interactive and detailed test reports with rich visualization.
Importance of Cypress Test Report
Here are some reasons why Cypress test reports are important:
- Failure Insights: Help developers identify and fix issues efficiently.
- Quality Assurance: Highlight passed and failed tests to ensure standards.
- Performance Tracking: Capture execution time to optimize testing.
- Stakeholder Visibility: Provide structured, visual reports for clarity.
This guide covers Cypress Test Reports, their types, importance, and step-by-step instructions for generating Cypress HTML Reports in Version 10+ and 9 & below.
What is Cypress Test Report?
Cypress Test Reports offer a comprehensive summary of test executions, providing insights into which tests have passed, failed, their execution duration, and any encountered errors.
These reports play an important role in debugging and enhancing code quality by giving a clear overview of the testing outcomes.
Cypress supports multiple reporting frameworks and libraries, such as Mochawesome, JUnit, and TeamCity, catering to diverse reporting needs. These tools also allow for customization based on specific project requirements. Typically, Cypress test reports are generated as HTML pages, styled with CSS, making them visually appealing and easy to interpret.
Importance of Cypress Test Report
Cypress Test Reports play a crucial role in test automation by providing clear insights into test execution, failures, and performance. Here are some reasons why Cypress Test Reports are essential:
- Faster Debugging: Cypress Test Reports highlight failed tests, errors, and stack traces. This helps developers quickly identify and resolve issues without manual investigation.
- Quality Assurance: Reports ensure the application meets functional and performance standards by displaying passed and failed tests. They help teams track defects and maintain software reliability.
- Performance Optimization: Reports capture test execution duration, allowing teams to identify and optimize slow-running tests. This helps improve testing efficiency and speed up the CI/CD pipeline.
- Stakeholder Visibility: Structured and visual reports make test results understandable for non-technical team members. They help in better decision-making and project progress tracking.
- Seamless CI/CD Integration: Automated report generation enables continuous monitoring of test quality. It ensures timely feedback and maintains testing consistency in CI/CD workflows.
Types of Cypress Test Reports
Cypress provides diverse reporting options tailored to different testing and analysis needs. These reports help teams track test execution, debug issues, and communicate testing outcomes effectively. Below are the key types of Cypress test reports:
1. Console Reports
Below are some key features of Console reports:
- Displays real-time test execution details in the terminal.
- Useful for quick debugging and monitoring test progress during CI/CD runs.
2. Cypress Dashboard
Below are some key features of cypress dashboard:
- A cloud-based service offering in-depth test analytics and historical run data.
- Facilitates team collaboration and supports parallel test execution.
3. HTML Reports
Below are some key features of HTML Reports:
- Created using plugins like mochawesome for visually appealing, interactive summaries.
- Easy to share and integrate into CI/CD pipelines for streamlined reporting.
4. JUnit XML Reports
Below are some key features of JUnit XML Reports:
- Follows the standard XML format for test results.
- Ideal for integration with CI/CD tools and test management systems.
5. Custom Reports
Below are some key features of Custom Reports:
- Built using Cypress’s custom reporter API to meet specific project or organizational needs.
- Allows flexibility in format and content customization.
6. Screenshot and Video Reports
Below are some key features of Screenshot and Video Reports:
- Automatically captured during test failures to aid visual debugging.
- Provides a clear reproduction of issues and complements other report types.
7. Allure Reports
Below are some key features of Allure Reports:
- Generated using the Allure framework, offering detailed, interactive insights.
- Supports trend analysis and comprehensive test case documentation.
Read More: TestCafe vs Cypress: Core Differences
How to use the Cypress HTML reporter for Version 10
Cypress version 10 release has major changes, and hence to make the best use of maximum
Note: Below tutorial works for Cypress version 10 and above
Cypress always recommends having the latest version.
Pre-Requisite:
Basic Cypress Framework with Cypress Version 10
Step by Step Guide to Generate Cypress HTML reporter in Cypress version 10
Step 1: Install Cypress reporter, using Terminal install cypress-mochawesome-reporter, with command
npm i --save-dev cypress-mochawesome-reporter
Step 2: Configure Cypress Reporter
Navigate to your cypress configuration file, typically the name will cypress.config.js
Add the below line of code
//cypress.config.js

const { defineConfig } = require("cypress");


module.exports = defineConfig({

  reporter: 'cypress-mochawesome-reporter',

  e2e: {

    setupNodeEvents(on, config) {

      require('cypress-mochawesome-reporter/plugin')(on);

    },

  },

});
The reporter is mentioned as the ‘cypress-mochawesome-reporter’, which you installed in step 1.
Cypress 10 and above version has a separate part for e2e tests, inside that you need to add the required statement as shown above.
Step 3: Configure Support e2e.js
Navigate to cypress/support/e2e.js, and add the import statement using the command below.
import 'cypress-mochawesome-reporter/register';
The above Steps complete the basic HTML reporter setup
Step 4: Execute your tests
Execute your tests with the below command
npx cypress run --e2e
Alternatively, you can also execute using npm run test, if you have configured scripts in package.json
Step 5: View HTML reports
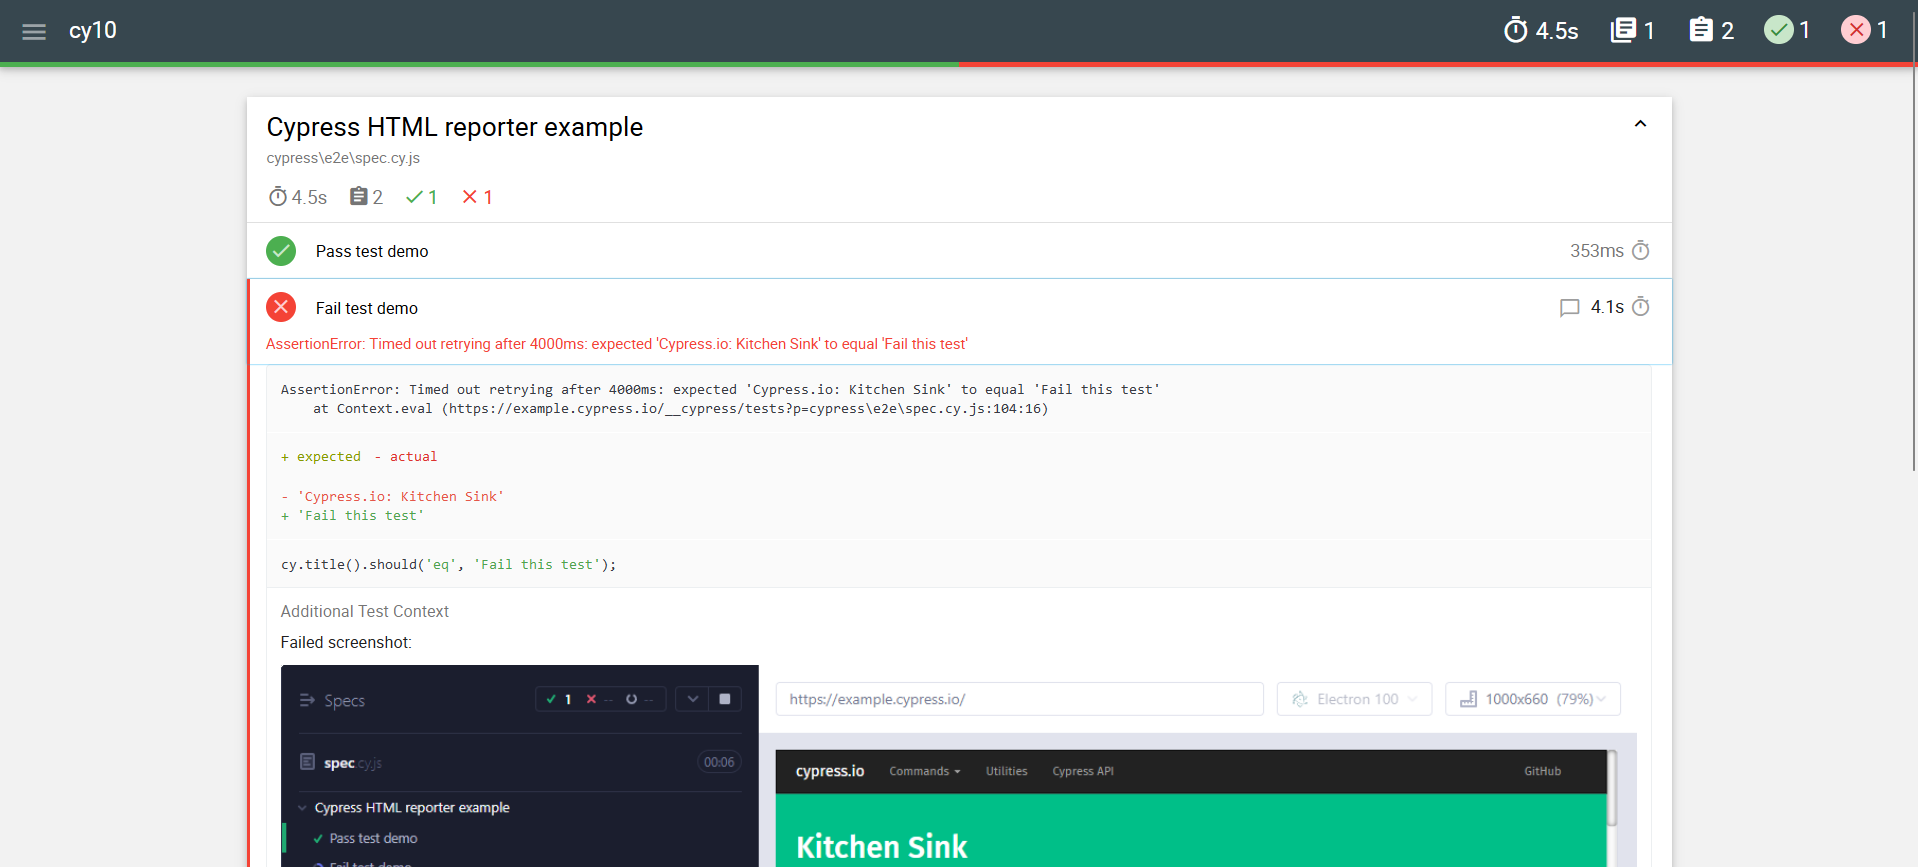
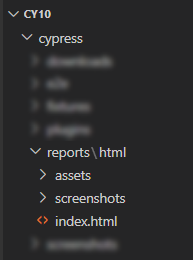
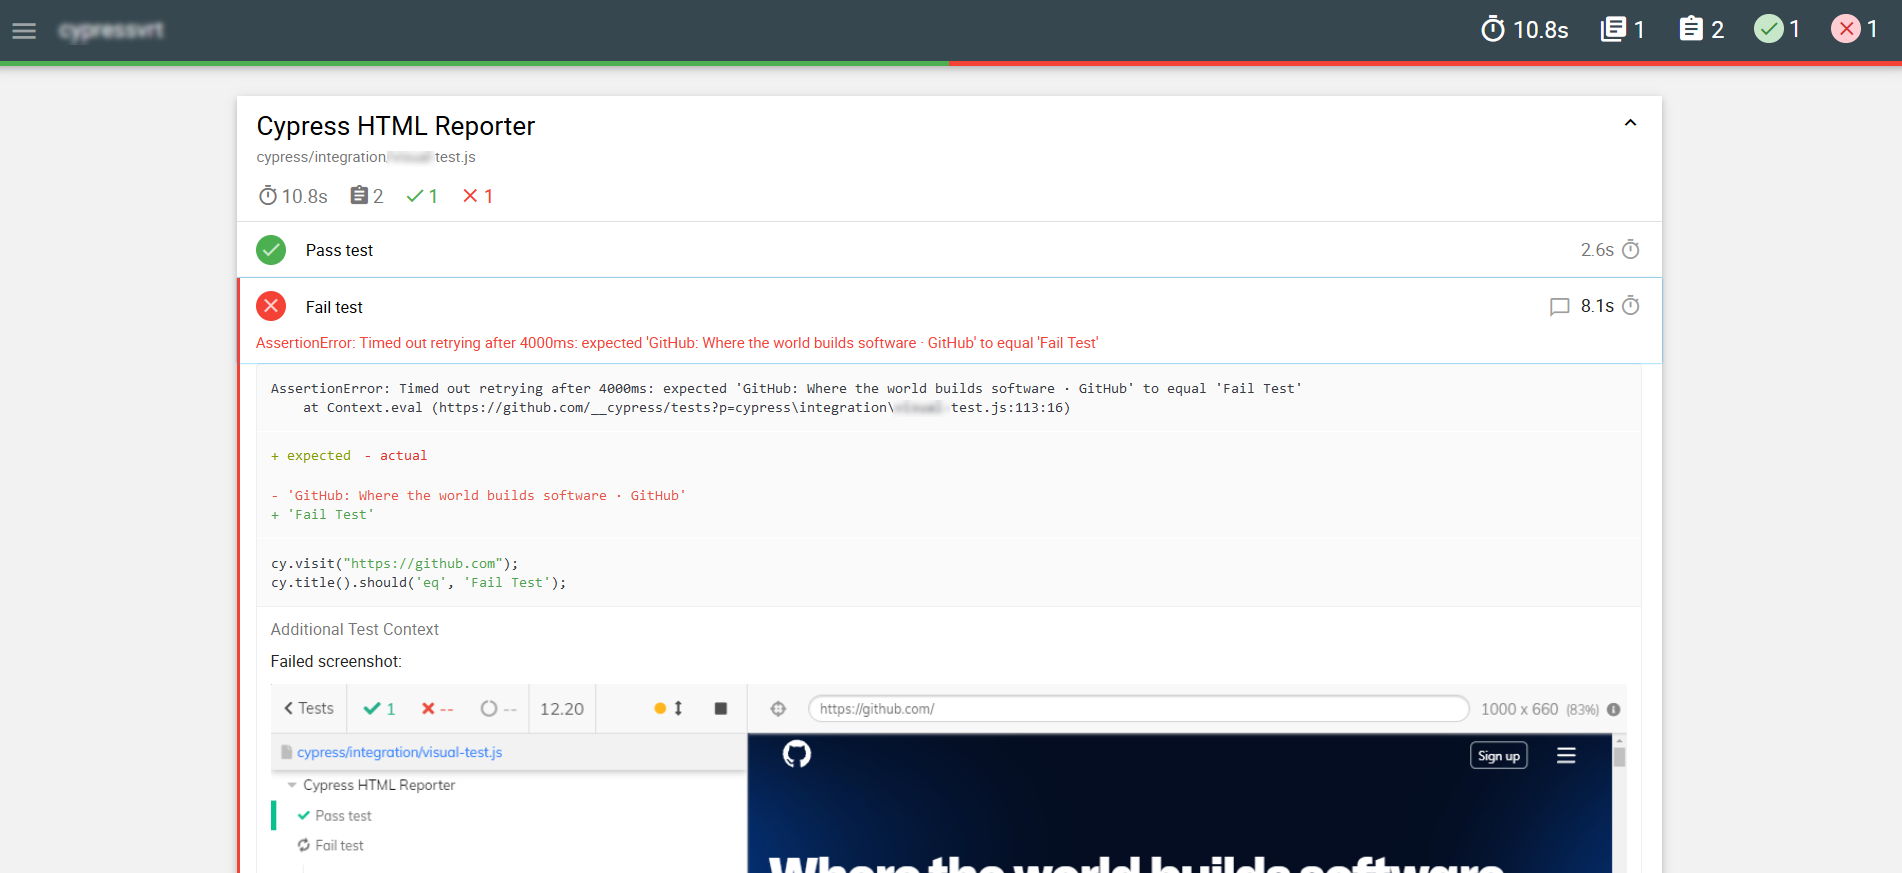
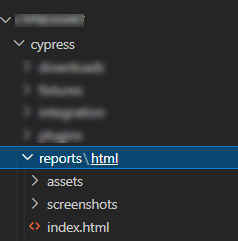
Once the execution is complete, Cypress Generates the HTML report. Navigate to the folder with the name “reports”, you will find the HTML report as seen below
Cypress Reports Folder VS Code explorer view
If you navigate to the reports folder, you can see the HTML file, along with that there are many other folders created such as screenshots, and asserts which are required for the HTML. If you need to share this report, then you need to share all the assets and screenshot folder as well, else the HTML reporter content will break. A simple solution for this is to create a report with in-line assets.
How to Create Simple Shareable HTML Reports in Cypress (Version 10 or above)
To create a shareable HTML report, you still need to follow Steps 1 to 3 mentioned in the previous section after that you need to follow the below step.
Navigate to Cypress Config File, Typically named cypress.config.js add the inline options
//cypress.config.js

const { defineConfig } = require("cypress");


module.exports = defineConfig({

  reporter: 'cypress-mochawesome-reporter',

  video: false,

  reporterOptions: {

    charts: true,

    reportPageTitle: 'Cypress Inline Reporter',

    embeddedScreenshots: true,

    inlineAssets: true, //Adds the asserts inline

  },


  e2e: {

    setupNodeEvents(on, config) {

      require('cypress-mochawesome-reporter/plugin')(on);

    },

  },

});
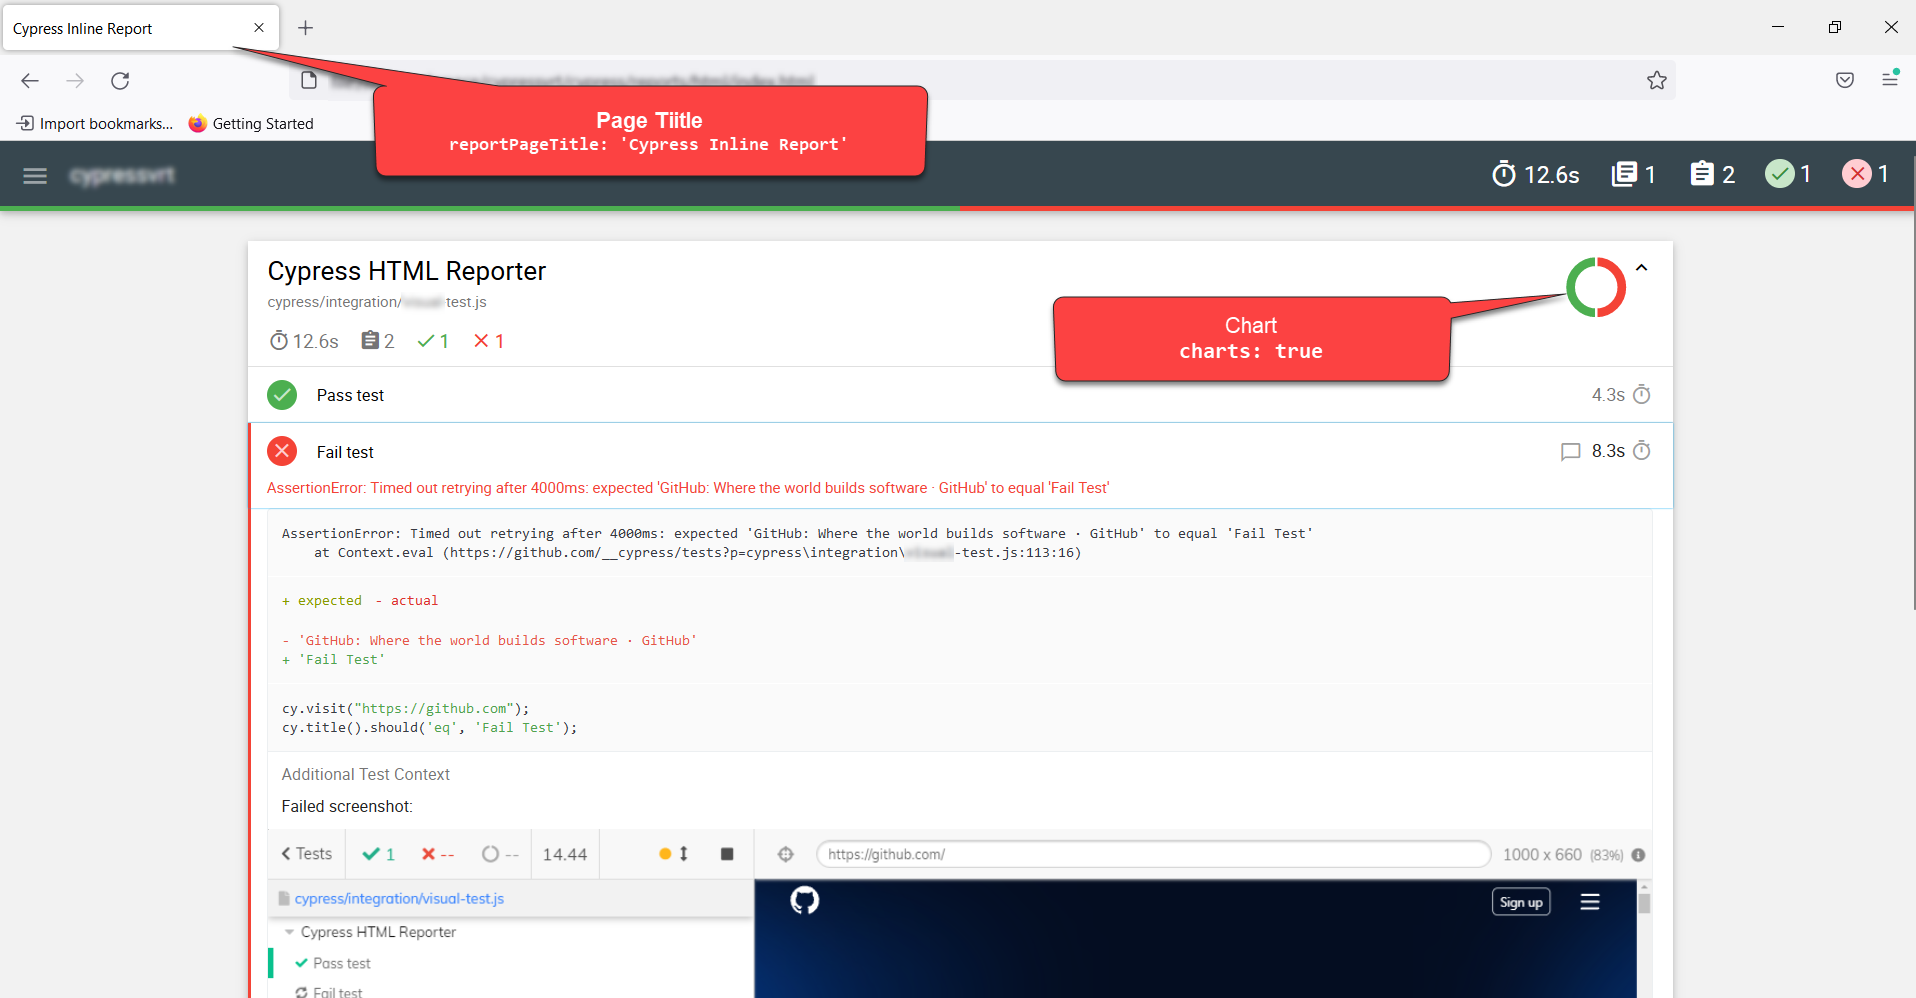
In the above code
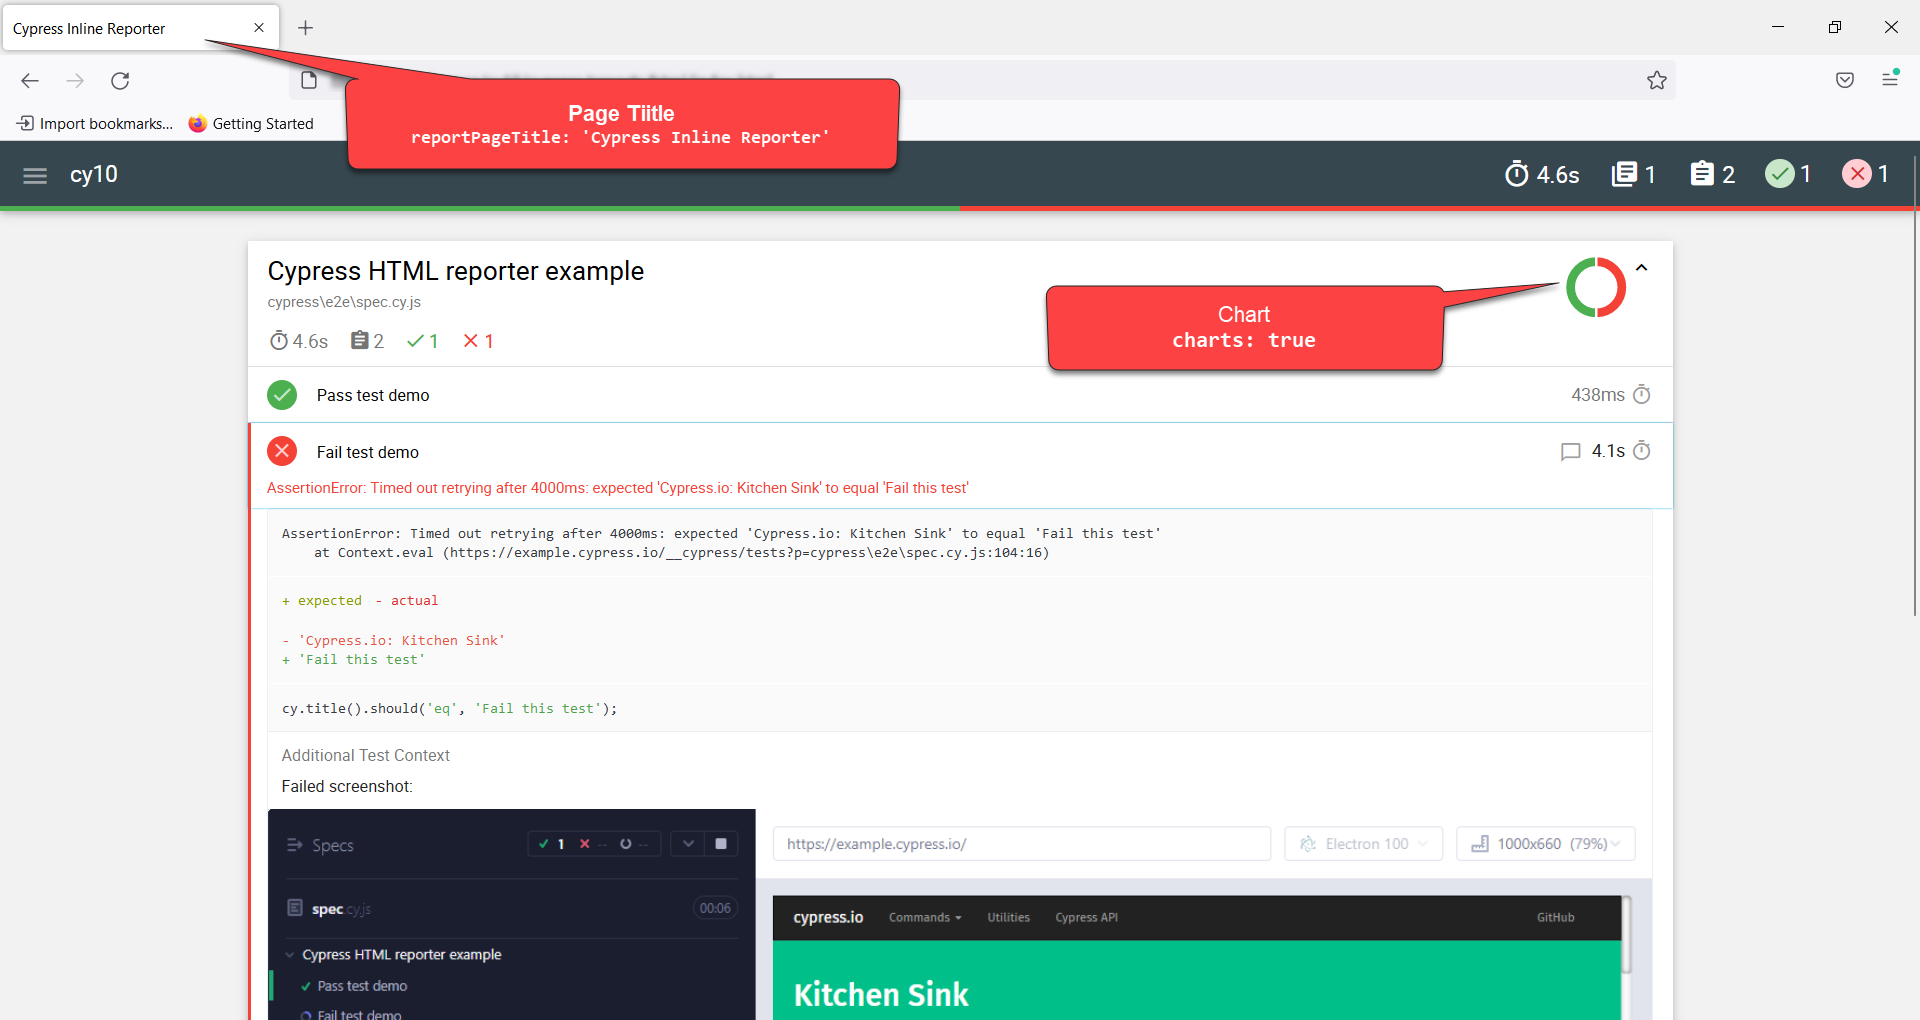
- charts: true – Genarates Chart in HTML report
- reportPageTitle: ‘Cypress Inline Reporter’- Report title will be set to the mentioned string
- embeddedScreenshots: true – Screenshot will be embedded within the report
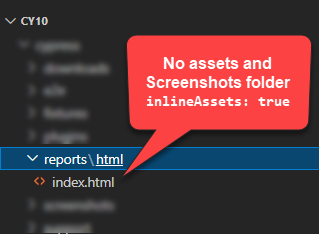
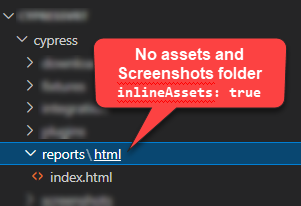
- inlineAssets: true – No separate assets folder will be created
Additionally, if you want to change the report directory use the reportDir option inside reporterOptions as seen below
For Example,
"reportDir": "cypress/report",
Sample HTML Inline Report
VS Code Explorer View for Reports folder
Note: The cypress-mochawesome-reporter, uses the Cypress before and after hook, if you override the before and after hook in your Cypress configuration file then the HTML report might not work in an expected way, Ensure that whenever you override the before/after hook you need to call beforeRunHook() or afterRunHook() functions of cypress-mochawesome-reporter as explained below.
//Example of overriding before and after hook with cypress HTML reporter

//cypress.config.js

const { defineConfig } = require('cypress');

const { beforeRunHook, afterRunHook } = require('cypress-mochawesome-reporter/lib');


module.exports = defineConfig({

  reporter: 'cypress-mochawesome-reporter',

  e2e: {

    setupNodeEvents(on, config) {

      on('before:run', async (details) => {

        console.log('override before:run');

        await beforeRunHook(details);

      });


      on('after:run', async () => {

        console.log('override after:run');

        await afterRunHook();

      });

    },

  },

});
How to Generate Cypress HTML reporter for Below Cypress Version 9 and below
Note: Below tutorial works only for Cypress Version 9 or below
How to use the Cypress HTML reporter for Cypress Version 9 and below
Step 1: Install cypress reporter
Using Terminal install cypress-mochawesome-reporter, with command
npm i --save-dev cypress-mochawesome-reporter
Step 2: Configure Cypress HTML Reporter
Navigate to the cypress.json file
{

  "reporter": "cypress-mochawesome-reporter",

}
Step 3: Import cypress-mocha-awesome reporter
Navigate to cypress/support/index.js file and add the below line of code
import 'cypress-mochawesome-reporter/register';
Step 4: Add an entry to plugin/index.js
Step 5: Execute your tests using the below command
npx cypress run
Alternatively, you can also execute using npm run test, if you have configured scripts in package.json
Step 6: View HTML reports
Once the execution is complete, Cypress Generates the HTML report. Navigate to the folder with the name “reports”, you will find the HTML report
If you navigate to the reports folder, you can see the HTML file, along with that there are many other folders created such as screenshots, and asserts which are required for the HTML.
If you need to share this report, then you need to share all the assets and screenshot folder as well, else the HTML reporter content will break. A simple solution for this is to create a report with in-line assets.
How to Create Simple Shareable HTML Reports in Cypress (Version 9 or below)
To create a shareable HTML report, you still need to follow Steps 1 to 3 mentioned in the previous section after that you need to follow the below step.
Navigate to Cypress Config File, cypress.json, and add the inline options
{

  "reporter": "cypress-mochawesome-reporter",

  "reporterOptions": {

    "embeddedScreenshots": true,

    "charts": true,

    "reportPageTitle": "Cypress Inline Report",

    "inlineAssets": true

  }

}
In the above code
- charts: true – Generates Chart in HTML report
- reportPageTitle: ‘Cypress Inline Reporter’ – Report title will be set to mentioned string
- embeddedScreenshots: true – Screenshot will be embedded within report
- inlineAssets: true – No separate assets folder will be created
Additionally if you want to change the report directory use the reportDir option inside reporterOptions
Example:
“reportDir”: “cypress/report”,
Example of Inline Report
VSCode Explorer view reports folder
Note: cypress-mochawesome-reporter, uses the Cypress before and after hook, if you override the before and after hook in your Cypress configuration file, then the HTML report might not work in an expected way. Ensure that whenever you override the before/after hook you need to call beforeRunHook() and afterRunHook() functions of cypress-mochawesome-reporter as seen below.
//Overriding before and after hook

//cypress/plugins/index.js

const { beforeRunHook, afterRunHook } = require('cypress-mochawesome-reporter/lib');


module.exports = (on) => {

  on('before:run', async (details) => {

    console.log('override before:run');

    await beforeRunHook(details);

  });


  on('after:run', async () => {

    console.log('override after:run');

    await afterRunHook();

  });

};
Conclusion
Cypress HTML reporter is helpful when you want to share with stakeholders, you can even integrate it with your CI/CD pipeline. Since it embeds the screenshots as well it is easy to debug and understand the failure scenarios.
BrowserStack is a cloud-based testing platform, that provides thousands of real devices for testing. BrowserStack records the videos and screenshots during the execution. Integrating Cypress Tests with BrowserStack requires only configuration changes, no need to change your test cases.


