Component testing lets you test individual UI components in isolation to verify if they work as intended. When you run tests in an isolated environment, Cypress drives faster feedback and seamless debugging, thereby helping you spot issues early in the development process.
Learn how to perform component testing effectively using Cypress with this step-by-step tutorial.
What is Component Testing?
Component testing is software testing level or category where each component of the applications is tested separately to ensure the components are working fine. This method is also called module testing.
Cypress is an Open Source test automation framework built with NodeJS and allows users to write JavaScript or typescript-based automation tests. Cypress’ recent version started supporting component testing. The addition of the component testing makes Cypress a complete testing tool considering the support for Component, API, and end-to-end tests. The module-level testing can be done using Cypress.
Read More: How to test UI components?
Why perform Component Testing with Cypress
Here are some reasons why you should perform component testing with Cypress:
- Quicker Feedback: Testing individual components makes the process faster and helps you identify issues and gain insights quicker.
- Isolated Testing: Testing in isolation reduces dependencies and makes debugging easier.
- Better Developer Experience: With Cypress’s interactive tools, you can debug and maintain components easily.
- Seamless CI/CD Integration: You can incorporate component tests into your CI/CD pipeline effortlessly.
Read More: How to test Vue components with Cypress?
Step-by-Step Guide to Component Testing in Cypress
Here’s a step-by-step tutorial on how to perform component testing effectively using Cypress:
Prerequisites:
Here are the prerequisites to perform component testing in Cypress
- Install NodeJS
- Navigate to the NodeJS download page
- Download the LTS version relevant to your operating system
- Install the NodeJS
- Install Visual Studio Code [optional but recommended]
Navigate to the Visual Studio Code download page, download, and install
Note: The VSCode installation is optional, you can use any IDE. For this demo, let’s use VSCode as IDE.
Now, that you have learned about the prerequisites for component testing in Cypress, here is a detailed tutorial to learn how to perform the tests.
Component Test Using Cypress: Steps
- Create a sample react application
- Install the required dependencies
- Install the Cypress test automation tool for component testing
- Open the Cypress
- Configure Component Testing in Cypress
- Create a Sample React Component
- Create Cypress Component Test
- Execute the Test to view the results
Step 1: Create a sample react application
The component testing needs the application code to be present locally on the machine. Component testing can be performed on an application that uses any modern framework such as Vue, React, and Angular. Considering the popularity. In this example, let us use React. The demo react application can be downloaded using the scaffold command.
- Open the Visual Studio Code
- Create a fresh folder (Ex: CypressComponentTestDemo)
- Open Terminal and Type the below command
npm create vite@latest my-awesome-app -- --template react
Step 2: Install the required dependencies
Using the VSCode terminal, navigate to my-awesome-app and install the dependencies using the below command.
npm install
Step 3: Install the Cypress test automation tool for component testing
Cypress needs to be installed to perform the Component testing; to install Cypress use the below command in the terminal.
npm install cypress -D
Step 4: Open the Cypress
Cypress needs to configure for component testing, use the below command to open the Cypress
npx cypress open
Step 5: Configure Component Testing in Cypress
When you open the Cypress, the Cypress window opens. You need to follow the onscreen instruction to configure Cypress to component testing
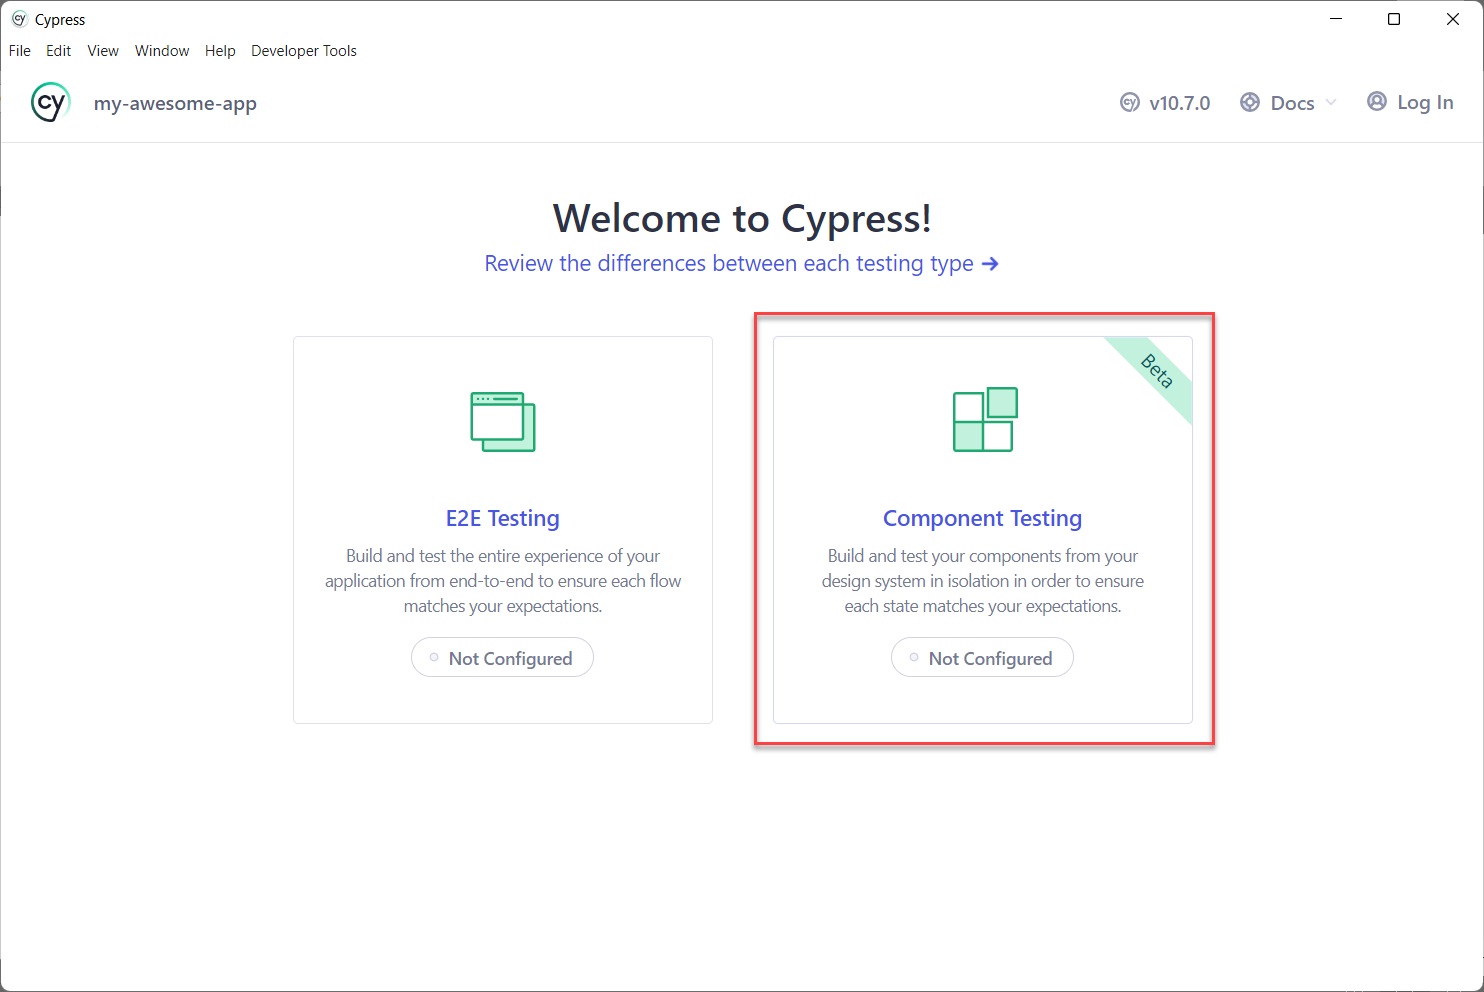
1- Choose Component Testing from the welcome window
The Welcome window provides two options namely end-to-end testing and component testing. Click Component Testing and Proceed to the Next.
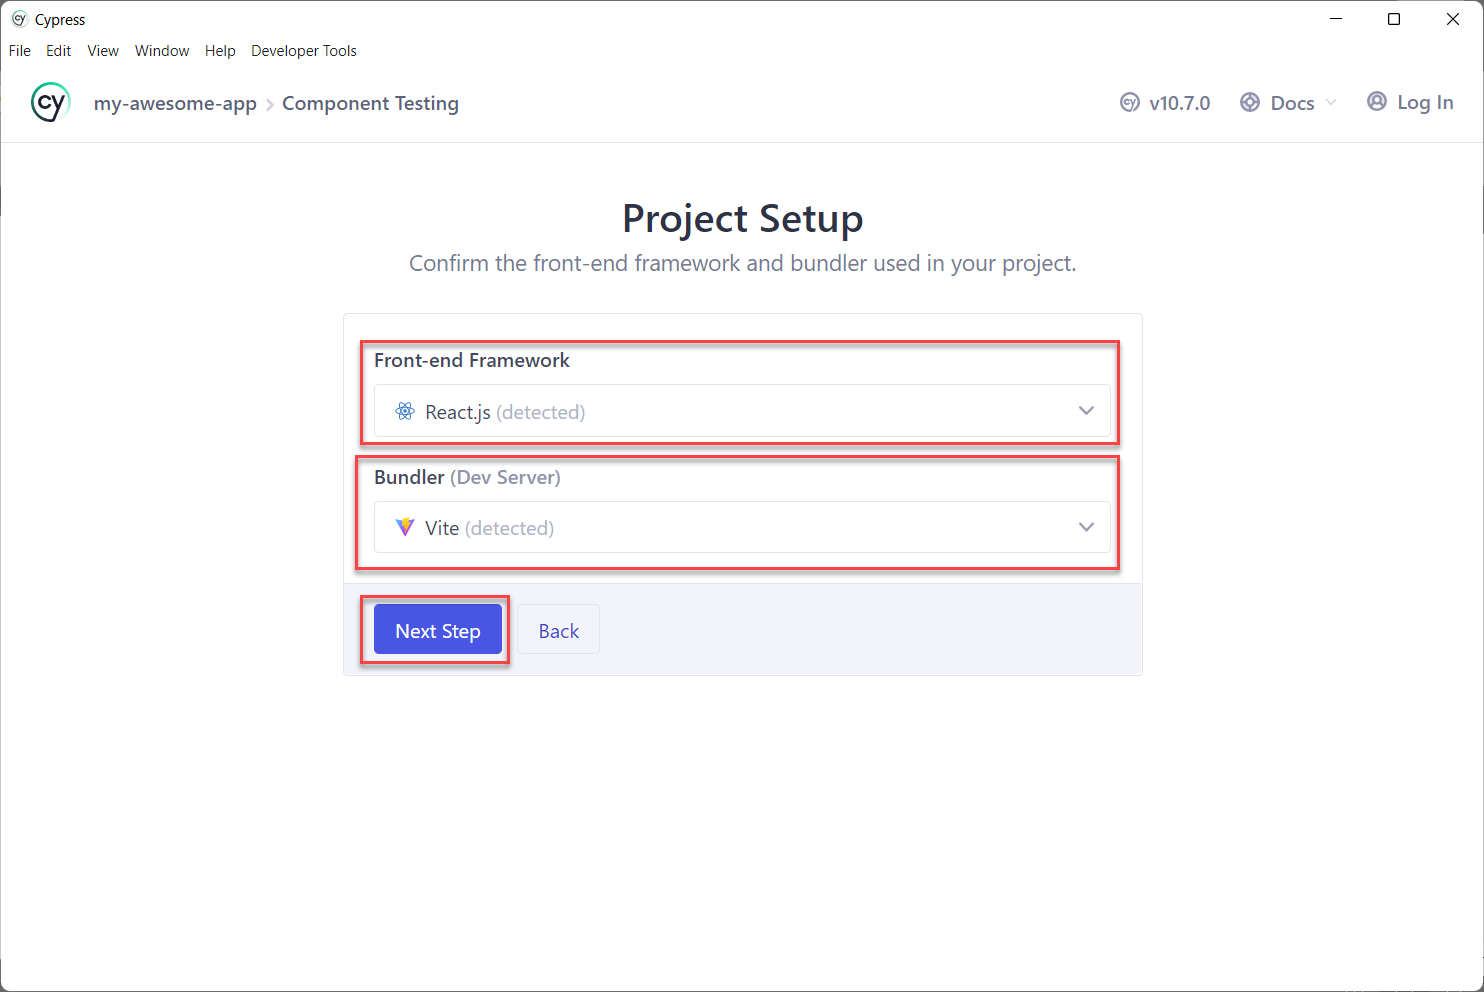
2- Project Setup window
Cypress requires the Front end framework information and bundler information for the component testing configuration. Since you have used the scaffold command, Cypress automatically detects both.
Click Next Step to continue.
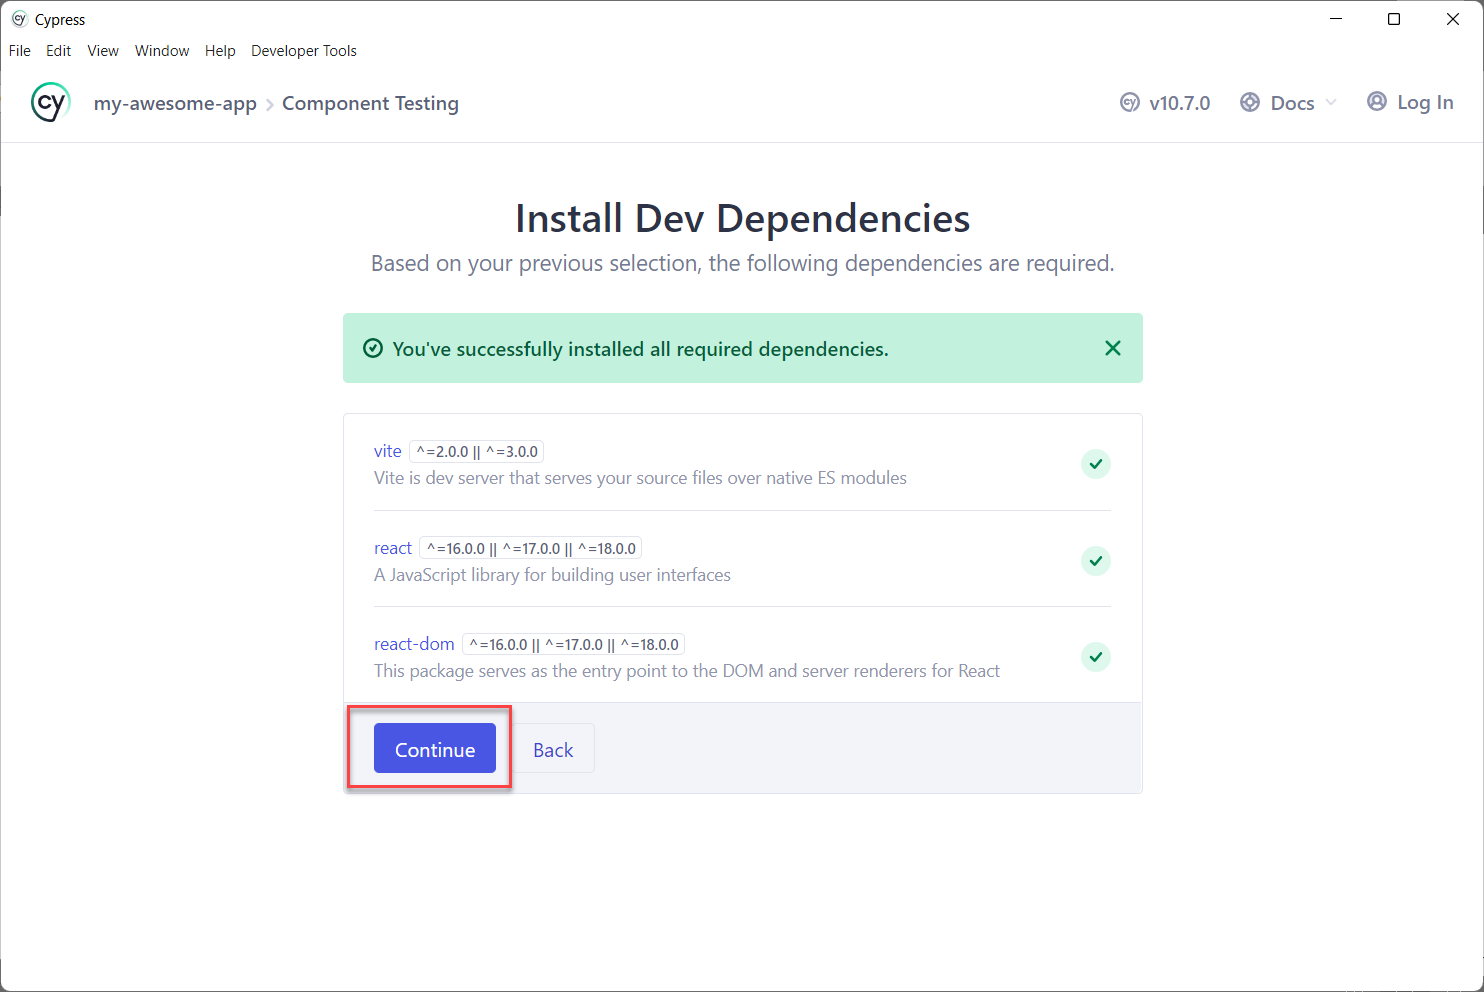
3- Install Dev Dependencies
Since you have used the scaffold command and then used the npm install in Step 2, all the required dependencies are installed; you can simply click Continue.
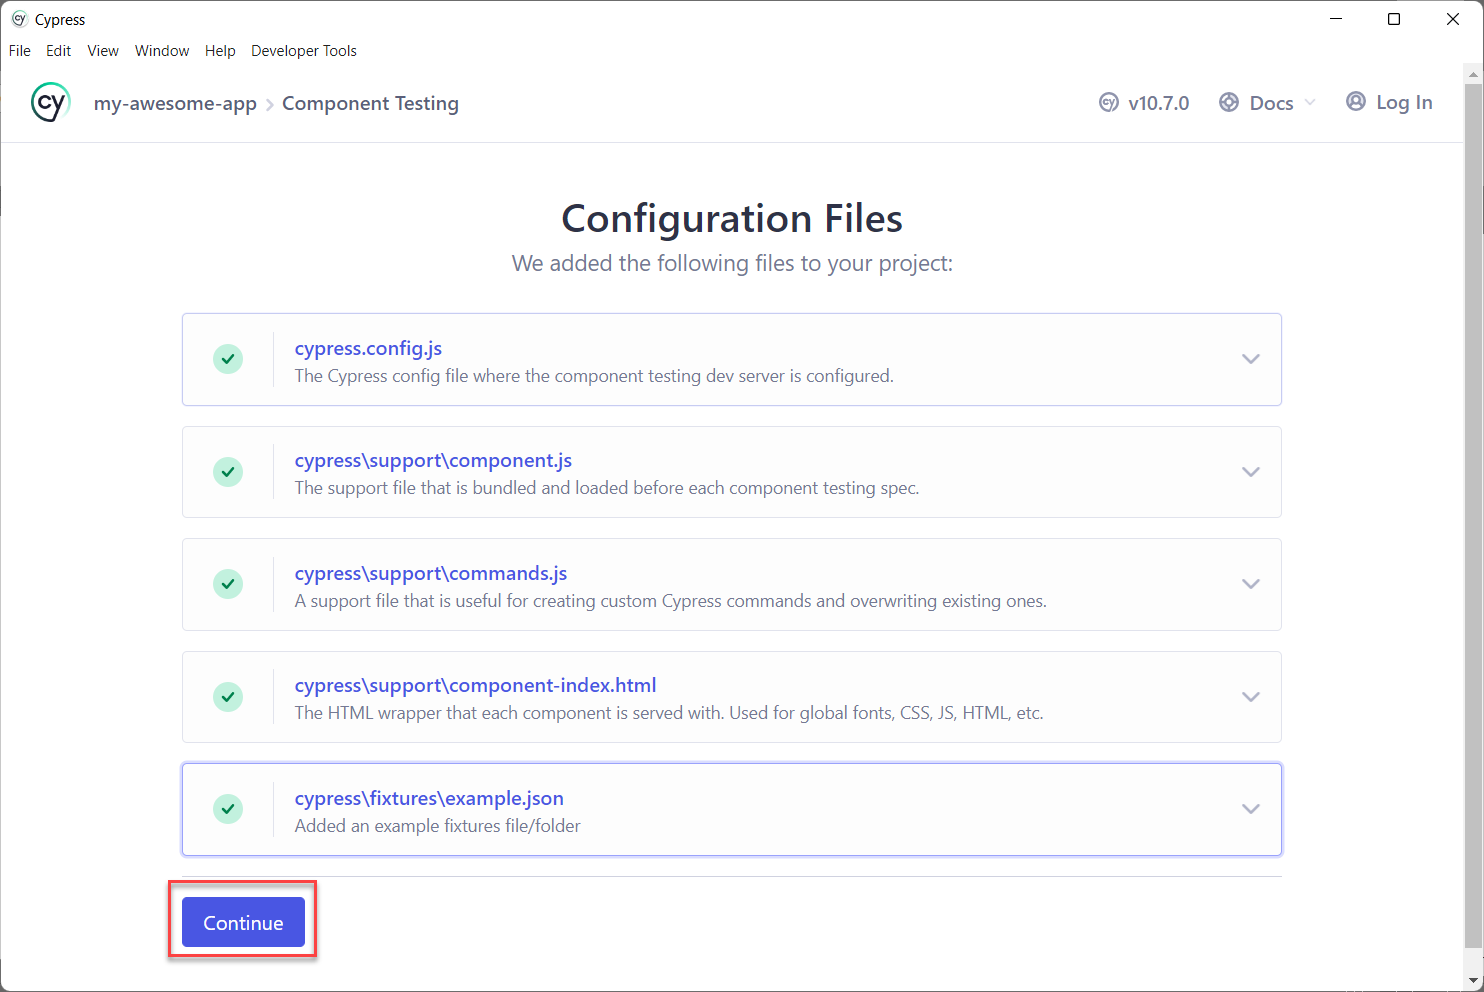
4- Configuration files
Cypress automatically creates the required basic configuration files, and they will be displayed in the “Configuration Files” window. Review all the files and click on Continue.
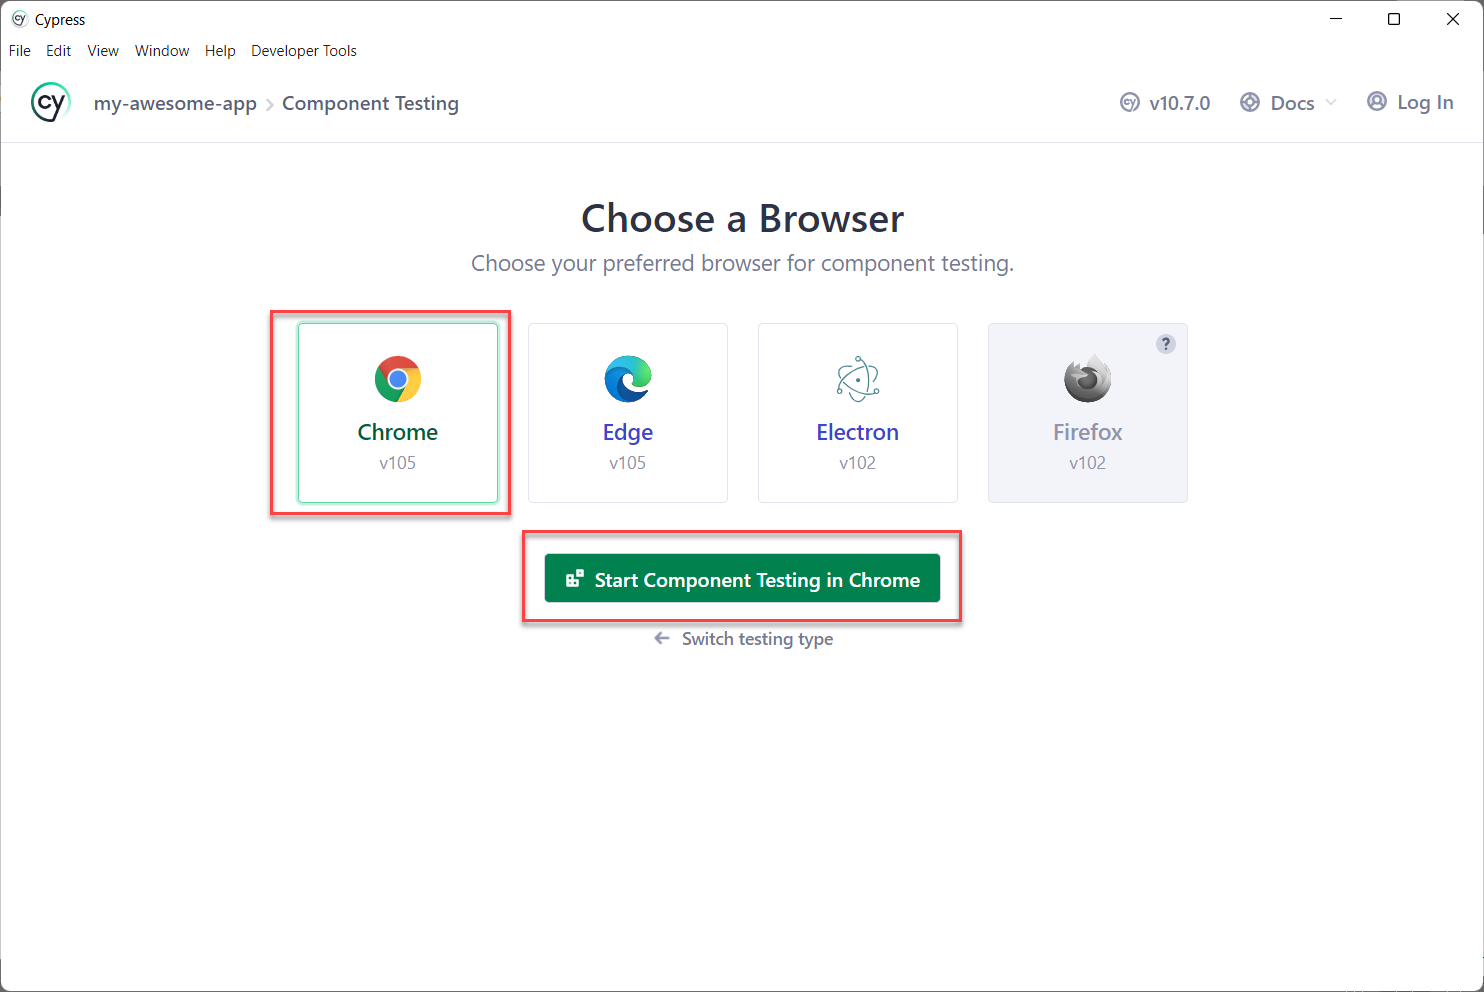
5- Browser option window
The main advantage of Cypress component tests is they will be executed on the real browser. For the purpose of this demo, let’s choose “Chrome” and click on Start Component Testing in Chrome.
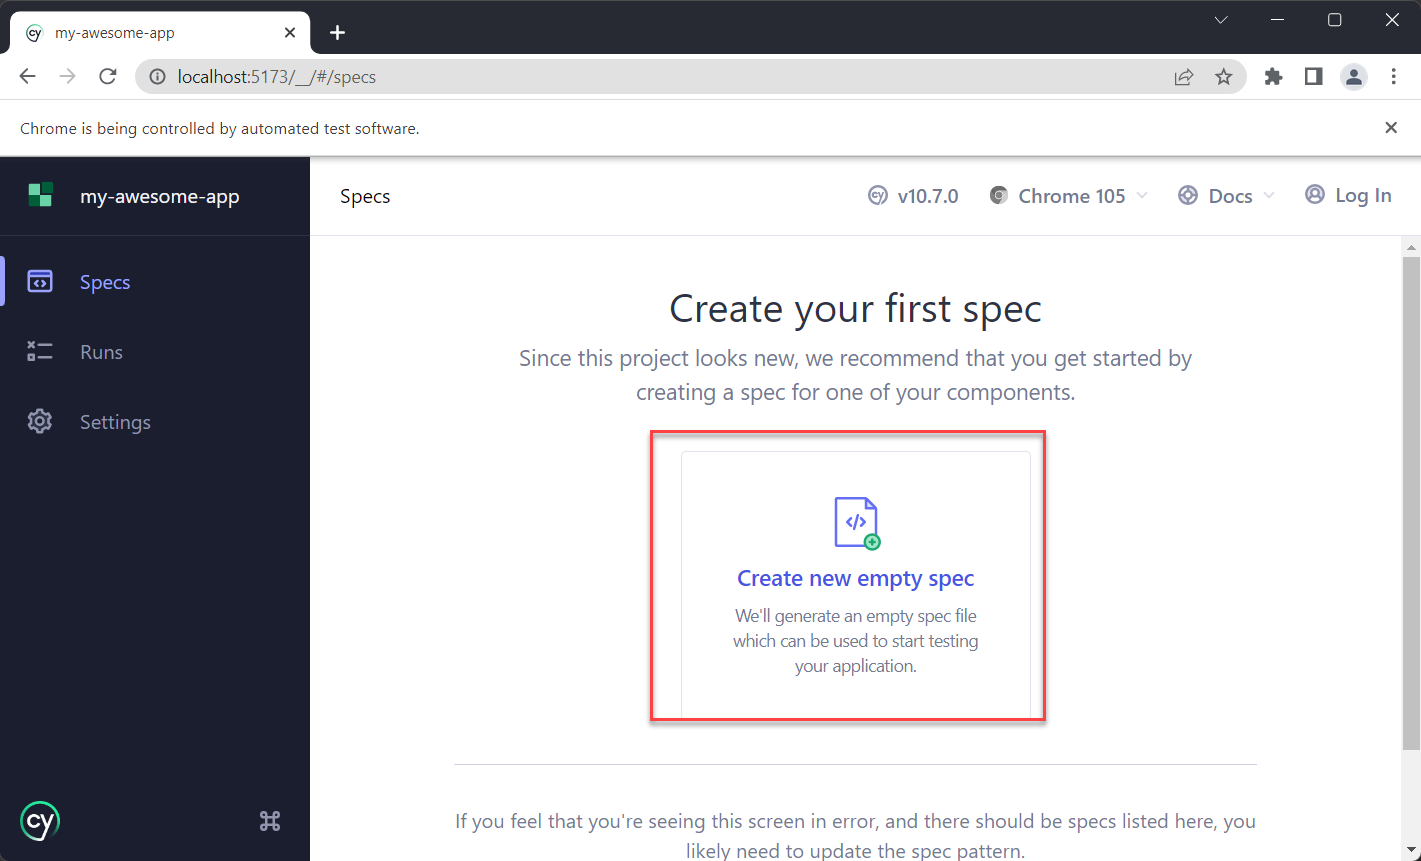
6- Create Sample Spec
Once you choose the browser option, the test runner window opens; select “Create new Empty spec”
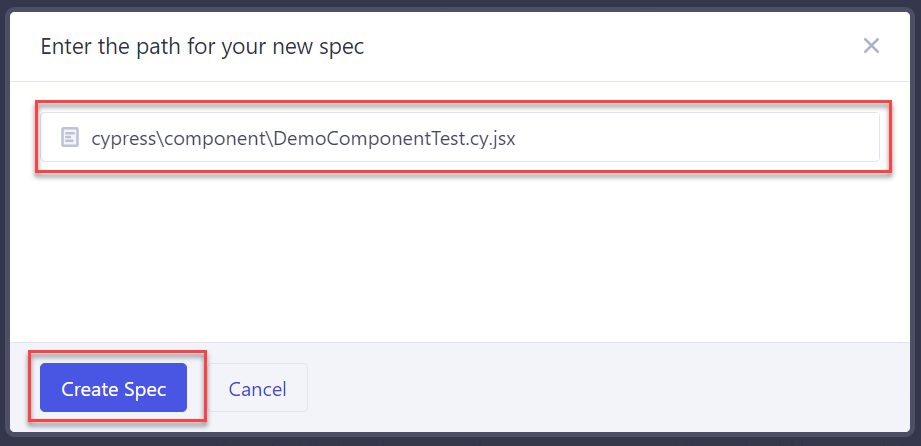
When Cypress asks for “Enter the path for new spec”, simply provide the Name for the Component test example: DemoComponentTest.cy.jsx
Note: Remember the file extension is .jsx (not .js)
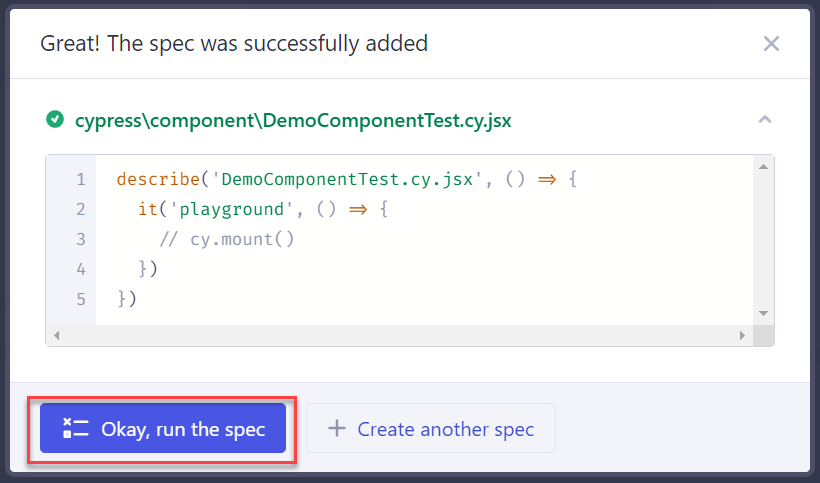
Click Create Spec and in the next step click “Okay, run the Spec”
Close the Cypress Test Runner for Now
Note: The DemoComponentTest.cy.jsx contains dummy tests, which are not real component tests, you will be creating the actual component tests following steps.
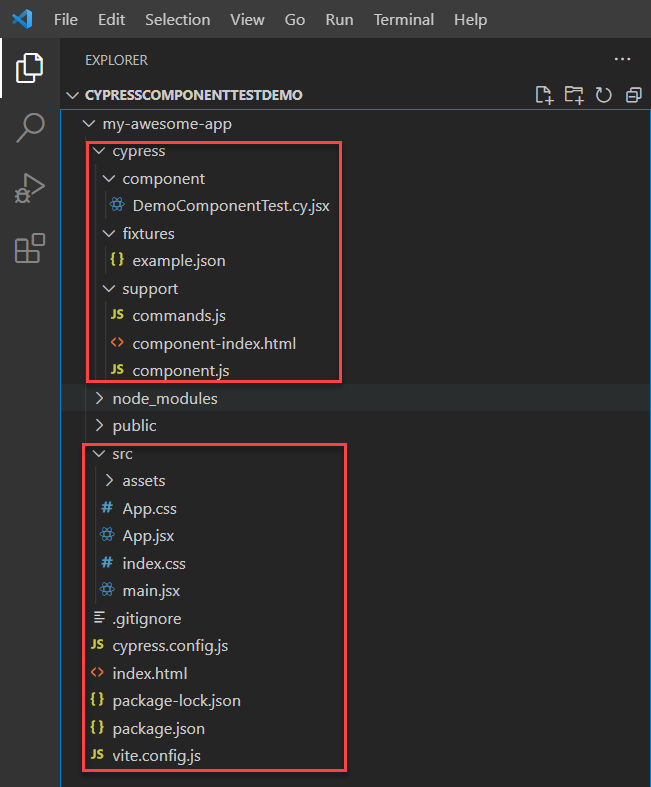
At this point, your project looks as shown below.
Understanding the Cypress Folder/File Structures
- Components folder: Contains Cypress component specs
- Fixtures folder: Any data which can be used inside the specs can be placed here
- Support folder: helper functions, utilities, any reusable code, and custom commands can be placed here.
- Support/component.js: Great place to put the global configuration and reusable code
- Support/commands.js: In this file, you can create custom commands or override existing commands
- Cypress.config.js: This file contains runtime configurations such as devServer, framework, bundler, reporter, videos, screenshot options, etc.
- Package.json: This file tracks all installed dependencies and allows you to create a custom commands shortcut
Step 6: Create a Sample React Component
Let’s create a simple React component that can be used for Cypress component testing later.
Navigate to src folder and create a new File with the name DemoComponent.jsx
Add the component code below:
//inside src/DemoComponent.jsx
import { useState } from 'react'
export default function Demo({ greetings = 'Good Morning' }) {
const [greetingMessage] = useState(greetings)

return (
<div>
<div id='message'>
Hello Browserstack! {greetingMessage}
</div>

<div id='date'>
<p>Today's date is: {new Date().toLocaleDateString()}</p>
</div>
</div>
)
}
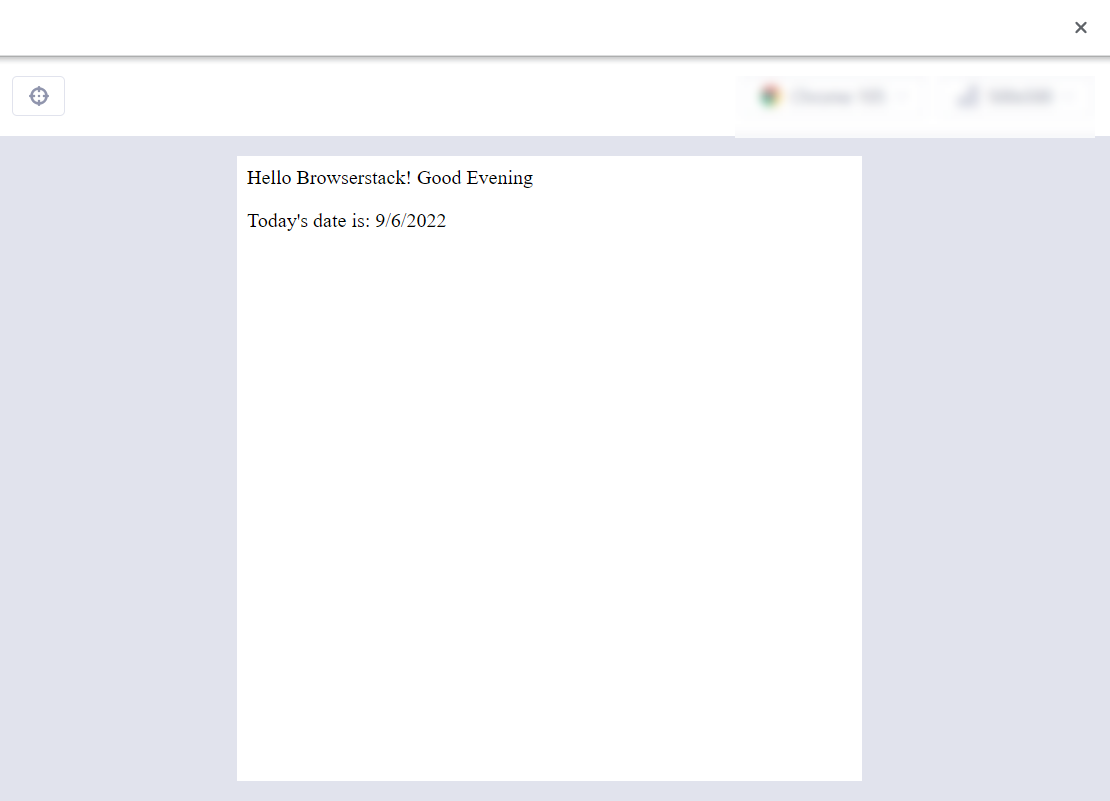
The above is the simplest React component, which displays the Greeting message and today’s date. The demo function optionally accepts the greeting message; if not specified, then it displays ‘Good Morning’.
Step 7: Create Cypress Component Test
In Step 5, you have created a sample spec with the name DemoComponentTest.cy.jsx, which can be located under the cypress/components directory that has a placeholder test. Let’s replace them with actual component tests.
There are two scenarios in our component:
- The default Greeting message.
- The custom Greeting message.
Let’s write the Cypress code for both scenarios.
In the DemoComponentTest.cy.jsx file, write two component test cases using Cypress syntax.
//DemoComponentTest.cy.jsx
import Demo from '../../src/DemoComponent'

describe('Demo Component', () => {
const dateNow = new Date().toLocaleDateString()
it('Default Message', () => {
cy.mount(<Demo/>)
cy.get('#message').should('have.text','Hello Browserstack! Good Morning')
cy.get('#date').should('have.text','Today\'s date is: '+ dateNow)
})
it('Good Evening Message', () => {
cy.mount(<Demo greetings='Good Evening'/>)
cy.get('#message').should('have.text','Hello Browserstack! Good Evening')
cy.get('#date').should('have.text','Today\'s date is: '+ dateNow)
})
})- The first test uses cy.mount(<Demo/>) to mount the demo component and to verify if the text is displayed correctly.
- The second test case sends an optional greeting parameter as Good Evening while mounting the Demo component, which will be passed to the Demo() function of DemoComponent and will execute the logic accordingly.
Step 8: Execute the Test to view the results
Open the Cypress with the below command
npx cypress open --component
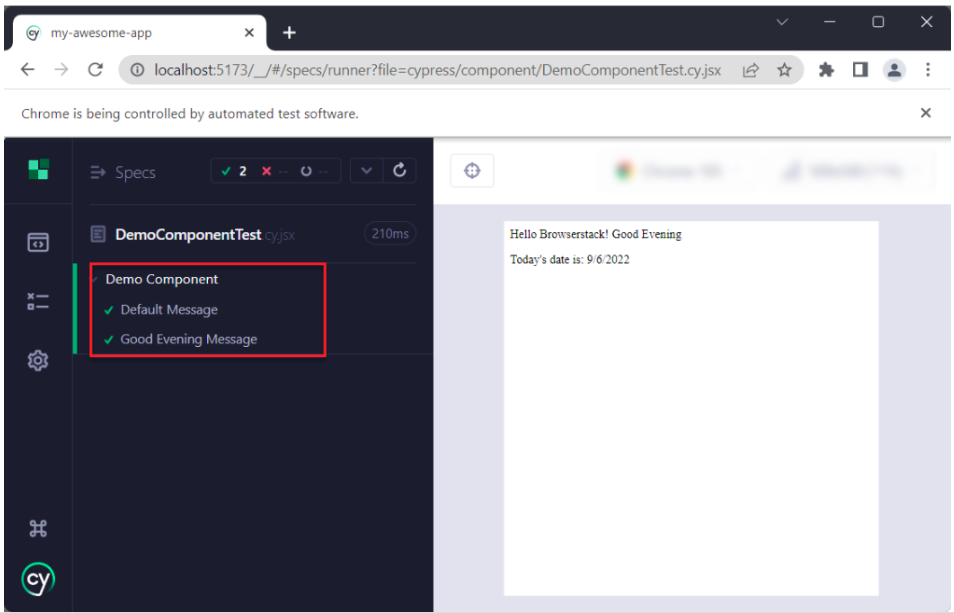
Choose the browser and execute the DemoComponentTest.cy.jsx tests.
The results look like below:
Cypress Component Testing Tips and Tricks
Here are some effective tips to improve your Cypress component testing:
- Execute component Tests in headless mode. Cypress component testing can be executed in headless mode, using the Cypress CLI. The Cypress CLI executes the test faster.
npx cypress run --component
- Execute Cypress component tests, directly in the headed mode without manually selecting the test files. Generally, the headed tests are executed on the browser, by choosing the browser and selecting the tests on the test runner window. You can skip all these parts completely and directly execute the tests using the below command.
npx cypress run --component --headed
- Open the test runner window directly by skipping the browser option. When you open the Cypress, every time you need to choose the test type as Component testing and then Browser as Chrome/Firefox/Edge, etc you can skip all these steps by specifying the open command options like below.
npx cypress open --component --browser chrome
- Execute single component tests. When you have multiple tests you can execute the single spec using the –spec command line option.
npx cypress run --component --spec cypress/component/DemoComponentTest.cy.jsx
- Use multiple configuration files in Cypress. You can have multiple configuration files in Cypress, while running the tests you can mention the configuration file name using the –config-file option.
npx cypress run --component --config-file some.config.js
- Specify configuration command line. Generally, the configuration file is used to define the Cypress configuration, however, Cypress allows to specify the configuration in the command line using the –config option.
npx cypress run --component --config video=false
- Test Reporter options. Cypress provides multiple reporter options such as Junit, XML, etc. You can specify the reporter using the –reporter option in Cypress
npx cypress run --component --reporter junit
Why use BrowserStack for Cypress Testing
Here’s why you should use BrowserStack for running tests on Cypress effectively:
- Cross-browser testing: Since Cypress runs on limited browsers (mostly Chrome-based), you can use BrowserStack to expand your Cypress tests to other browsers, such as Safari, Edge, IE, and more.
- Cloud Infrastructure: BrowserStack is a cloud-based platform that doesn’t require setting up or maintaining browsers or physical devices locally.
- Parallel Testing: Execute multiple Cypress tests simultaneously and accelerate test execution, as well as the release cycles with parallel testing.
- Real-device testing: Access a vast real-device cloud, to run your Cypress tests on 3500+ real device, browser, and OS combinations, and test under real user conditions.
- Integrations: BrowserStack offers seamless integrations with several CI/CD tools like Jenkins, Travis CI, Circle CI, and more.
- Scalability: BrowserStack supports real-device and parallel testing on a cloud-based infrastructure, letting you run hundreds of Cypress tests across different environments.
Conclusion
Cypress supports both component testing and end-to-end testing in a single framework, so the QA team doesn’t have to maintain the multiple frameworks which in turn reduces the maintenance effort.
The Cypress component testing supports major frameworks such as Angular, React, Vue, etc; but it is in beta stage. So, some features might not work as expected for all the supported frameworks. Cypress is still experiencing and adding new features to make it more flexible and stable.
Component testing prioritizes individual component, and therefore cannot actually validate the overall application functionality. The QA team needs to ensure the application functionality is working as expected before signing off on testing. Therefore it is important perform end-to-end testing on the app by simulating real-user conditions across different platforms.
Browserstack helps to test the application on thousands of real devices, without rewriting your existing tests. The cloud testing environment provides the infra with zero maintenance and cross-platform testing provides the confidence to release the code to production.
