Accurate time zone settings on your Mac ensure that system clocks, calendar events, app timestamps, and security protocols work without issues. Whether you’ve traveled, switched cities, or are testing apps across regions, knowing how to change your time zone in Mac helps avoid scheduling errors and ensures seamless workflows.
Overview
What Are Time Zone Settings on Mac?
- Control how your Mac displays local time across apps, logs, and files.
- Affect calendar events, meeting reminders, and security tokens.
- Can be managed automatically using location services or manually via preferences.
Why Do You Need to Change Time Zone on Mac?
- Accurate scheduling: Keeps meetings and reminders aligned with your actual location.
- App functionality: Ensures email, messaging, and development logs show correct timestamps.
- Travel readiness: Automatic adjustments help frequent travelers stay in sync.
- Data integrity & security: Prevents errors in file history, authentication tokens, and compliance-sensitive data.
How to Change Time Zone in Mac System Settings and Terminal
- System Preferences method: Adjust via “Date & Time” in System Settings. Choose automatic updates with Location Services or select a region manually.
- Command line method: Use Terminal commands to check current time zone, list available ones, and set a new zone. Suitable for developers and advanced users.
How to Test Different Time Zones on Mac Effectively
- Manual testing: Change your Mac’s settings and verify app behavior, timestamps, and logs.
- BrowserStack Live: Simulate time zones on real Mac devices hosted in the cloud without managing physical infrastructure.
- BrowserStack Automate with Selenium: Run automated test scripts across multiple time zones to validate time-sensitive workflows at scale.
This article covers what Mac time zone settings are, why changing them is important, step-by-step methods to update them via system preferences and terminal, and how to test different time zones manually or with BrowserStack.
What are the Timezone Settings on Mac?
Time zone settings on a Mac determine the local time displayed across the system, influencing everything from calendar events and reminders to application timestamps and log entries. Proper configuration ensures that your Mac accurately reflects the current local time, which is crucial for both personal and professional tasks.
Read More: How to change timezone in Chrome for testing
Date & Time Options in Mac
Apple provides a user-friendly interface to manage your Mac’s date and time settings. Accessible through System Preferences, the Date & Time pane offers comprehensive controls for configuring your time zone. Here’s a detailed look at the options available:
- Automatic Time Zone Setting:
- Set Time Zone Automatically: By enabling this option, your Mac uses location services to determine your current time zone automatically. This is useful for users who frequently travel or move between different time zones.
- Location Services: For automatic time zone settings to function correctly, ensure that Location Services are enabled. Navigate to System Preferences > Security & Privacy > Privacy > Location Services and verify that it’s active.
- Manual Time Zone Setting:
- Time Zone Tab: If you prefer to set your time zone manually, navigate to the Time Zone tab within the Date & Time pane.
- Map Selection: Click on the map to select your current location, or use the drop-down menu to choose your desired time zone from a list of available options.
- Precision Setting: Ensure that your selection accurately reflects your region to avoid discrepancies in time-sensitive applications.
- Date & Time Tab:
- Set Date and Time Automatically: Similar to the time zone setting, this option allows your Mac to synchronize with Apple’s time servers, ensuring precise timekeeping.
- Manual Date and Time Adjustment: If automatic settings are disabled, you can manually adjust the date and time by clicking on the respective fields and entering the correct values.
- Clock Options:
- Show Date and Time in Menu Bar: Customize how the date and time appear in your menu bar, including options for a digital or analog clock and whether to display the day of the week or the date.
By understanding and utilizing these settings, users can effectively manage the changing time zone on Mac to suit their needs.
Read More: How to change timezone for apps using Appium
Why Change Timezone Settings on Mac?
Adjusting the time zone on your Mac is not merely a superficial change—it has practical implications that can affect various aspects of your computing experience:
- Accurate Scheduling:
- Calendar Events: Ensuring that your Mac’s time zone matches your actual location prevents discrepancies in calendar appointments and reminders.
- Meeting Coordination: For professionals coordinating meetings across different regions, accurate time zone settings are crucial to avoid confusion.
- Application Functionality:
- Email Clients and Messaging Apps: Proper time settings ensure that timestamps on emails and messages are accurate, facilitating clear communication.
- Development and Testing: Developers and testers rely on correct time settings to debug applications, manage logs, and ensure that time-dependent functionalities operate as intended.
- Travel and Mobility:
- Frequent Travelers: Users who travel across time zones benefit from automatic time zone adjustments, reducing the need for manual changes and ensuring seamless transitions.
- Remote Work: With the rise of remote work, accurate time settings help synchronize work schedules with global teams.
- System Security:
- Security Protocols: Some security measures and protocols, such as token-based authentication systems that rely on time-sensitive tokens, depend on accurate time settings to function correctly.
- Data Consistency:
- File Timestamps: Accurate time zones ensure that file creation and modification timestamps are consistent, which is essential for version control and data management.
Understanding the importance of changing time zone on Mac underscores the necessity of maintaining accurate and up-to-date time settings to enhance both personal productivity and professional reliability.
Read More: How to perform internationalization testing
How to Change Time Zone Settings on Mac?
System Settings
The most straightforward way to change the time zone on your Mac is via the System Preferences. Follow these steps:
Step 1. Open System Preferences:
- Click over the Apple logo in the top-left corner of your screen.
- Select System Preferences from the drop-down menu.
Step 2. Navigate to Date & Time:
- Within the System Preferences window, click on Date & Time.
Step 3. Unlock Settings:
- If the settings are locked, then click on the padlock icon in the bottom-left corner.
- Enter your admin credentials (username and password) to make changes.
Step 4. Select the Time Zone Tab:
- Click on the Time Zone tab at the top of the Date & Time window.
Step 5. Choose Your Time Zone:
- Automatic Setting: Check the box labeled Set time zone automatically using current location. Make sure that the Location Services are enabled for this option to work.
- Manual Setting: If you prefer to set the time zone manually, uncheck the automatic option. Click on the map and then choose your region or use the drop-down menu to choose your time zone from the list.
Step 6. Confirm Changes:
- Once you’ve selected your desired time zone, close the System Preferences window. Your Mac will update the time accordingly.
Command Line Settings
Changing the time zone via the command line offers a powerful alternative for those who prefer using the terminal or need scripting capabilities. Here’s how to do it:
Step 1. Open Terminal:
- Navigate to Applications > Utilities > Terminal or use Spotlight Search by pressing Command + Space and typing “Terminal“.
Step 2. Check Current Time Zone:
- Enter the below command to display the current time zone:
bash

sudo systemsetup -gettimezone
- You may be asked to enter your admin password.
Step 3. List Available Time Zones:
- To view a list of supported time zones, use:
bash

systemsetup -listtimezones
- This command will output all recognized time zones, which you can reference for setting a new one.
Step 4. Set a New Time Zone:
- Use the following command, replacing TimeZone with your desired time zone (e.g., America/New_York):
bash

sudo systemsetup -settimezone "America/Los_Angeles"
Step 5. Verify the Change:
- Confirm that the time zone has been updated by re-running:
bash

sudo systemsetup -gettimezone
Step 6. Restart Affected Services (Optional):
- While not always necessary, restarting certain applications or services can ensure that they recognize the updated time zone settings.
Note: Using the command line to change the time zone requires administrative privileges. Ensure you have the necessary permissions before proceeding.
By mastering both system settings and command-line methods, users can efficiently manage the process of changing time zone on Mac, catering to various scenarios and preferences.
Read More: How to inspect element on Mac
How to Test Different Timezones on Mac?
Testing your Mac’s behavior under different time zones is essential for developers, testers, and users who manage applications sensitive to time settings. Accurate time zone testing ensures that applications function correctly across different regions, handling date and time data appropriately.
Method 1. Manual Method using Mac device
Manual testing involves manually changing the time zone settings on your Mac and observing the behavior of applications and system functions. Here’s how to approach it:
Step 1. Change Time Zone Settings:
- Follow the steps outlined in the System Settings or Command Line Settings sections to set a new time zone.
Step 2. Verify Application Behavior:
- Open and use applications that rely on time data, such as calendars, email clients, and scheduling tools.
- Check timestamps on files, messages, and logs to ensure they reflect the new time zone accurately.
Step 3. Test Time-Dependent Features:
- For developers, test features like scheduled tasks, time-based triggers, and logging mechanisms to confirm they operate correctly under the new time zone.
Step 4. Revert to Original Time Zone:
- After testing, revert to your original time zone settings to maintain consistency in your daily workflow.
Advantages:
- Immediate Feedback: Directly observe how changes impact your system and applications.
- No Additional Tools Needed: Utilize built-in Mac functionalities without requiring external software.
Disadvantages:
- Time-Consuming: Manually switching time zones can be tedious, especially when testing multiple regions on multiple browsers and Mac devices.
- Potential for Human Error: Manual changes increase the risk of inconsistencies or oversights during testing.
Method 2. Changing Timezones using Manual Testing in BrowserStack Live
BrowserStack is a cloud-based testing platform that gives access to actual devices and browsers for testing purposes. It supports configuring various time zones to match user environments accurately.
Configuring Time Zones in BrowserStack: For manual testing, BrowserStack Live lets you choose your preferred MacOS device and browser and change system settings to modify time zones. After modifying the time, you can test your web app to see if it functions as intended.
Step 1. Sign up on BrowserStack.
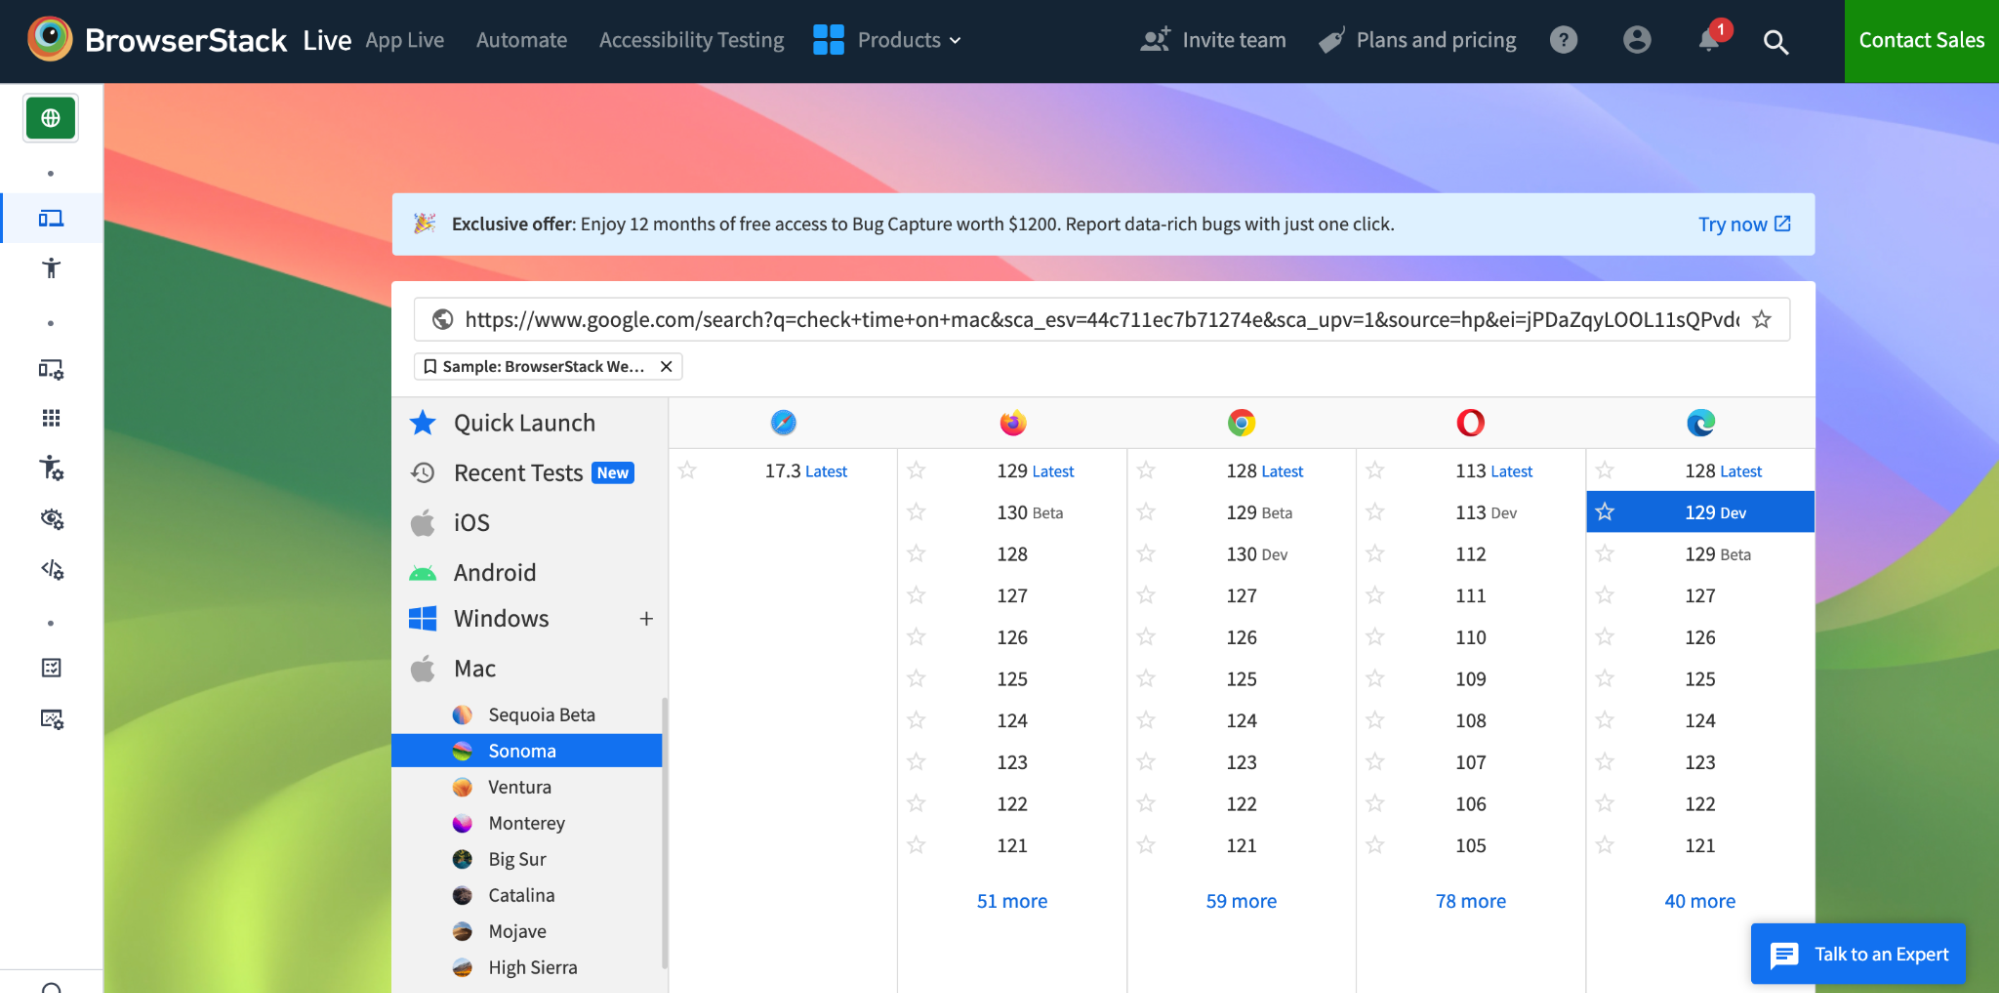
Step 2. Select a Mac Device and preferred browser.
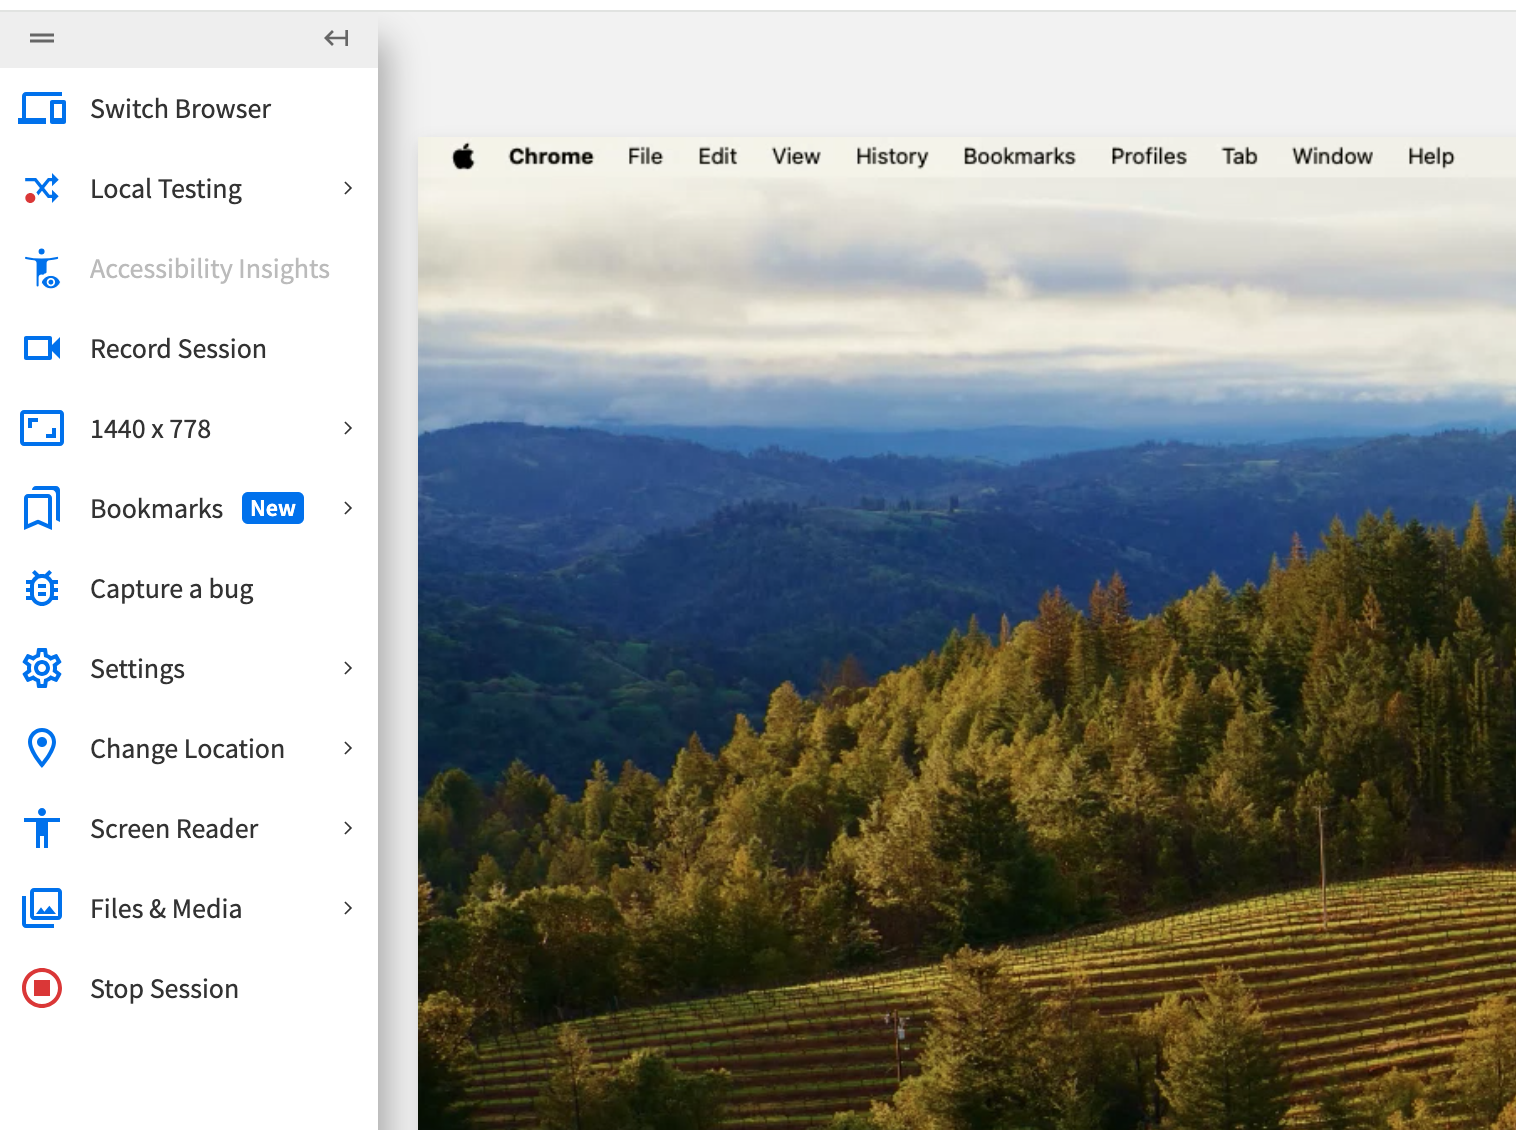
The said device and Browser opens in BrowserStack Real Device Cloud.
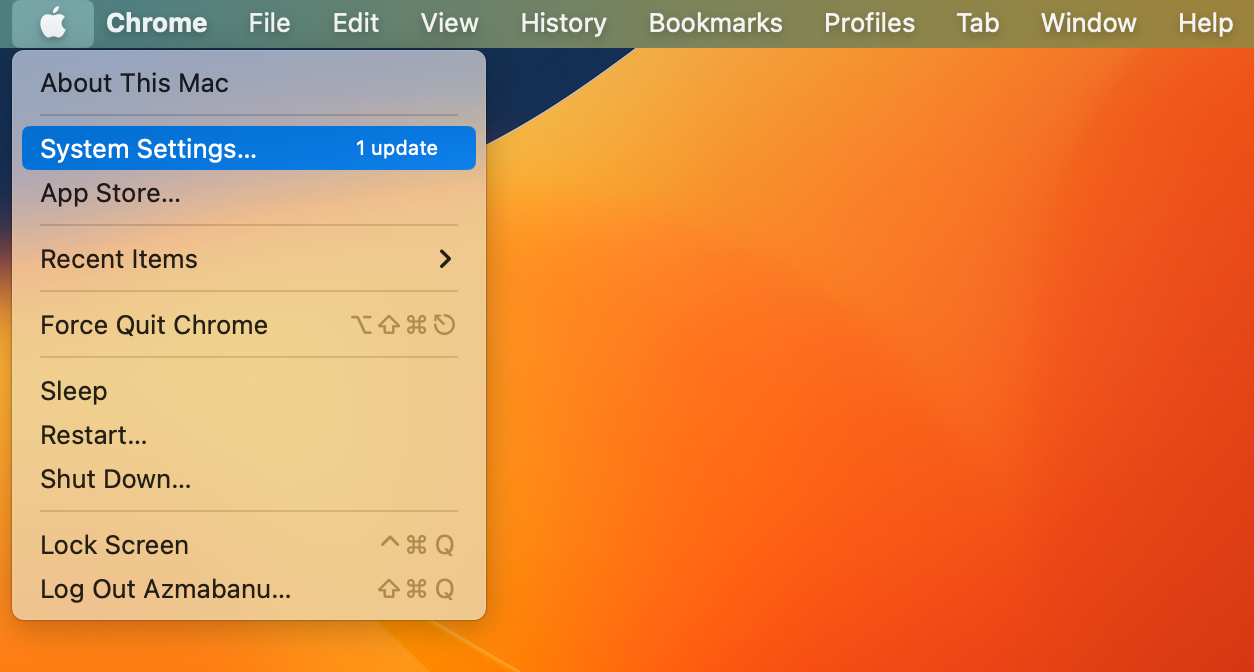
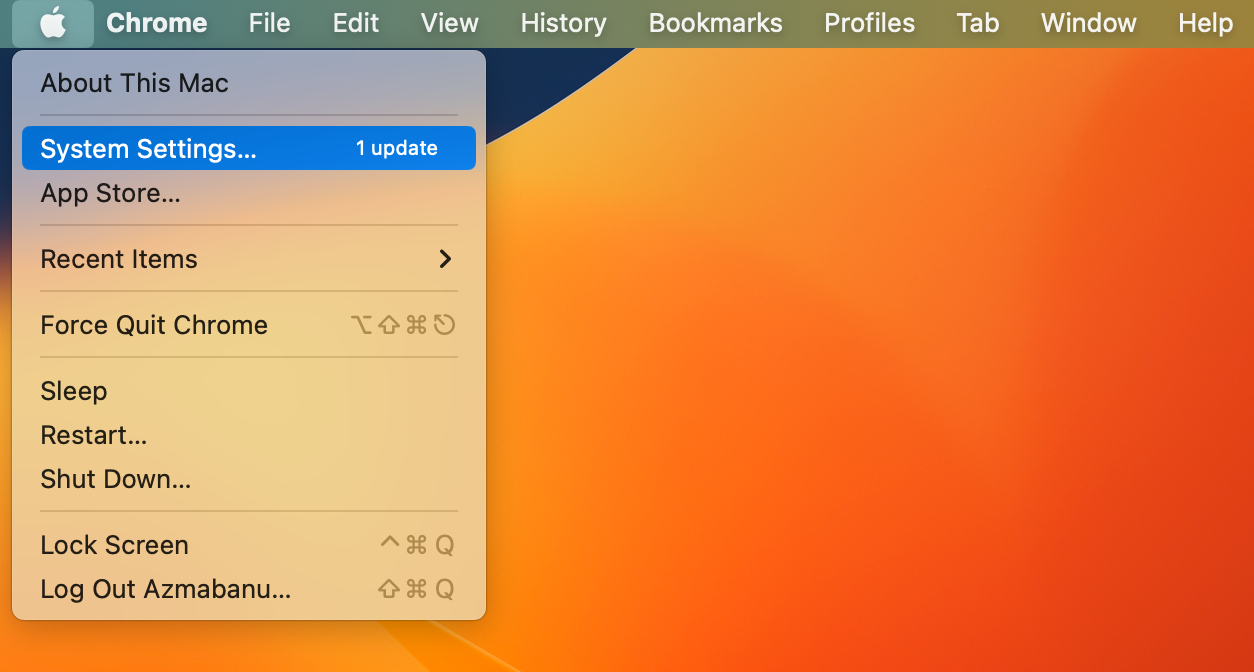
Step 3. Click on the Apple icon towards Top Left Corner and Select System Settings.
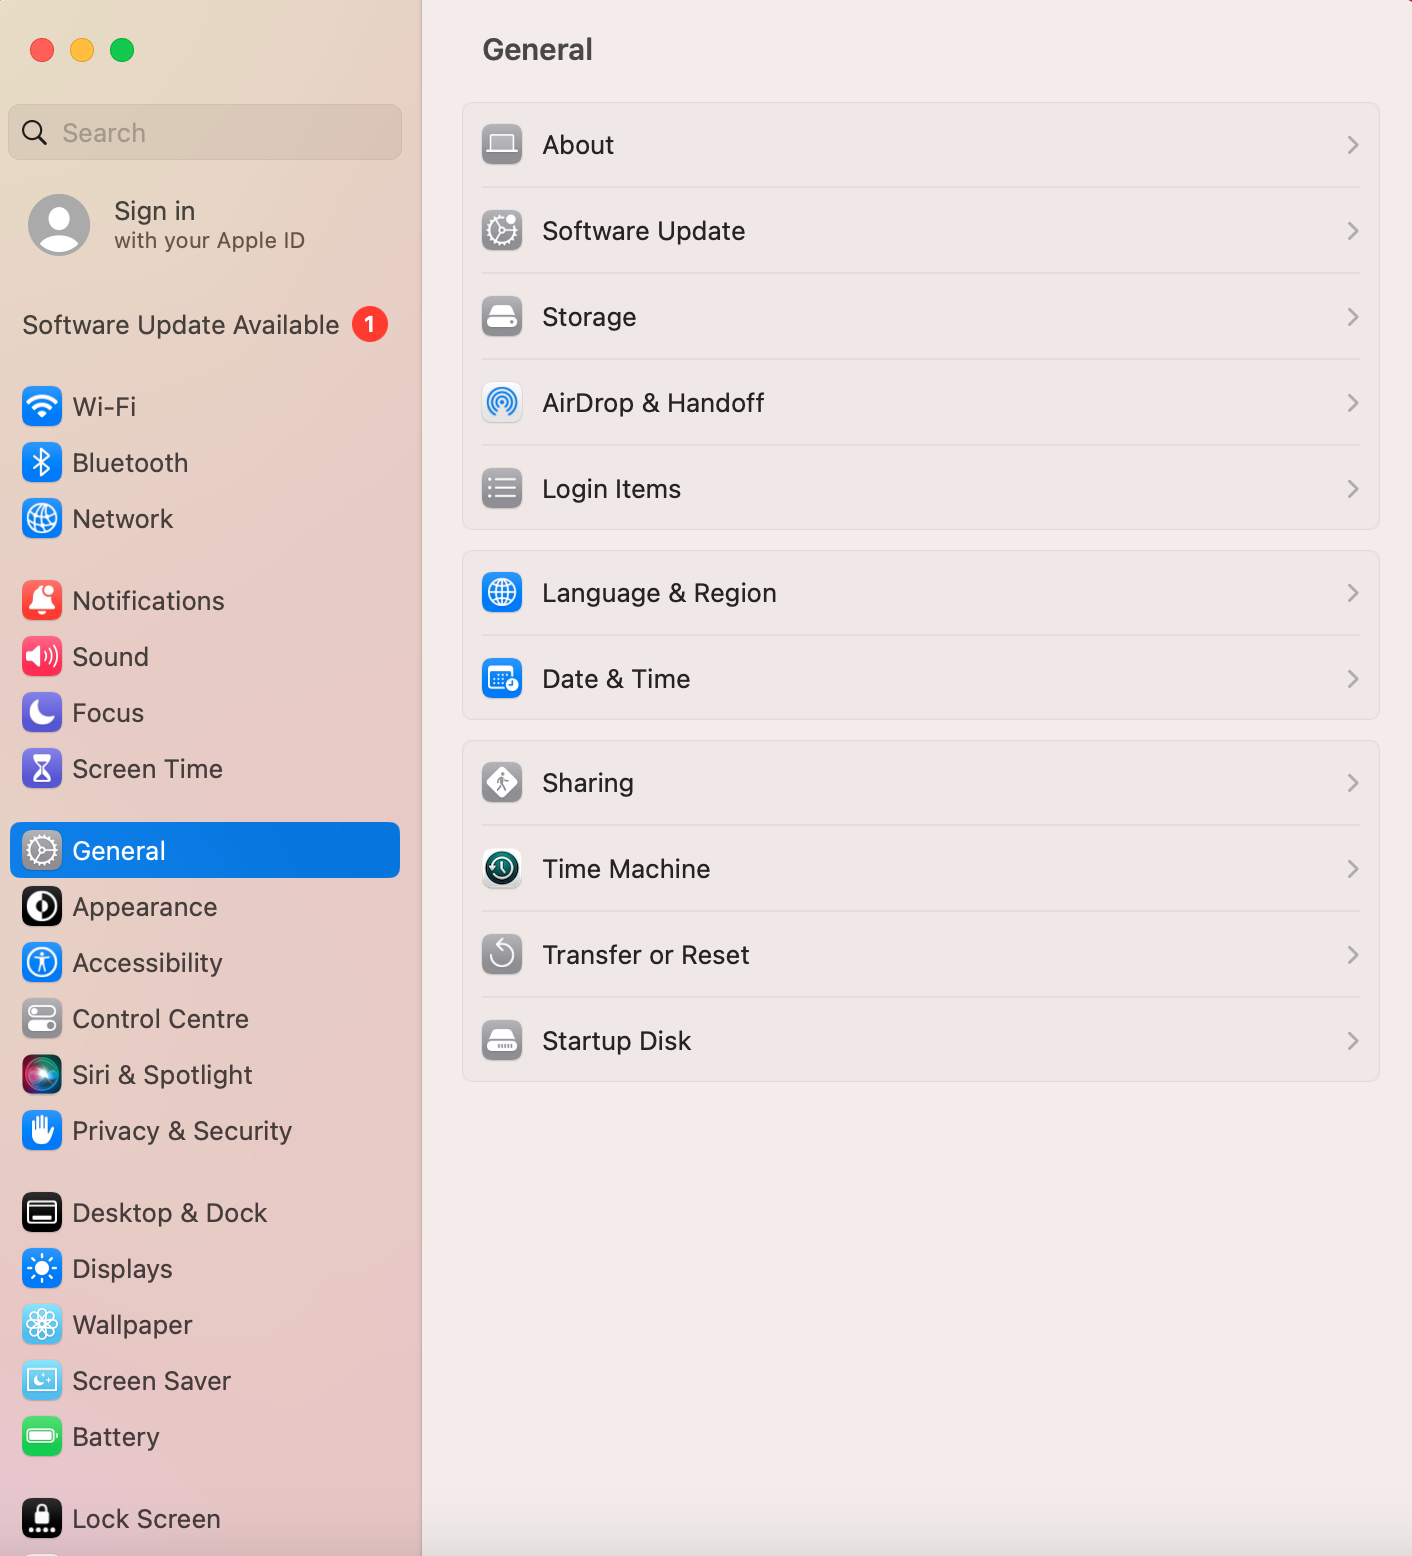
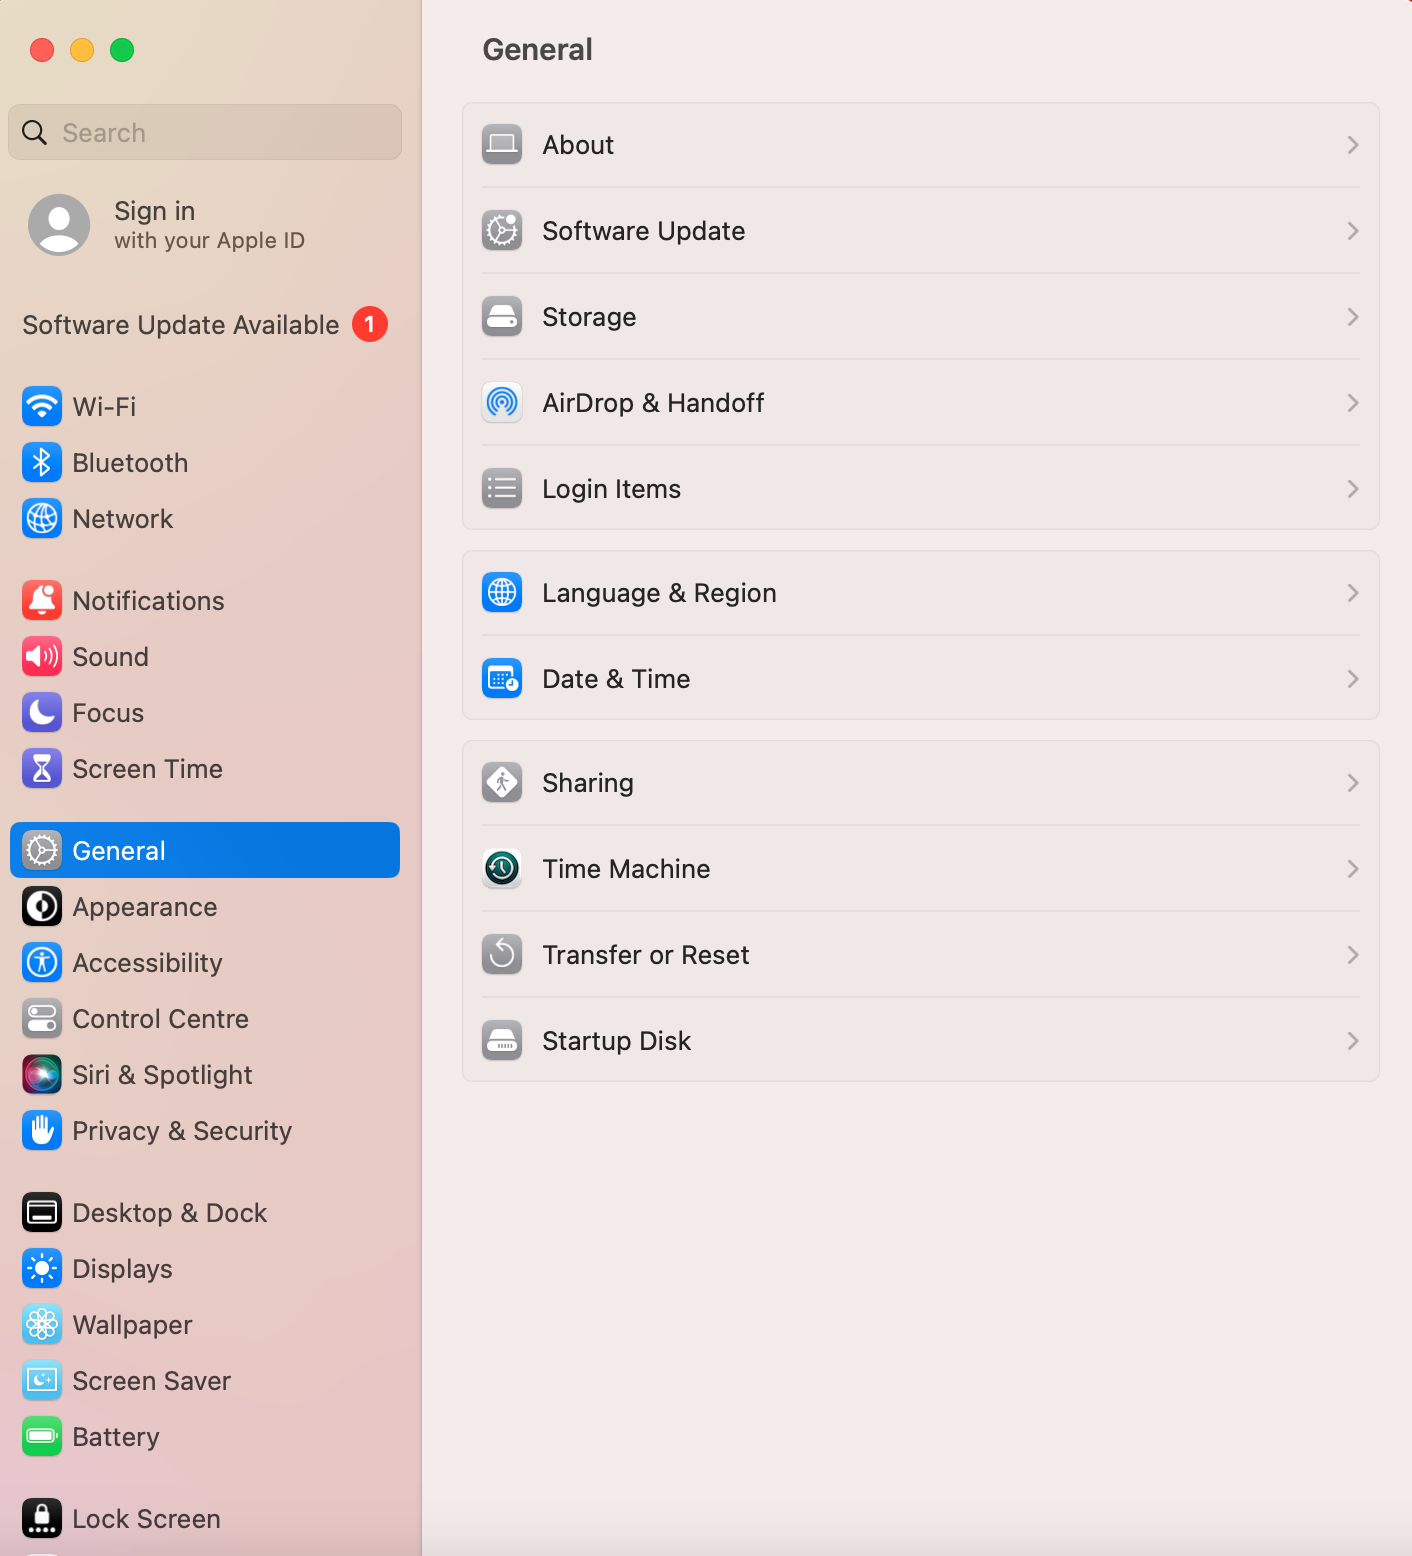
Step 4. Select the ‘General’ option within System Settings.
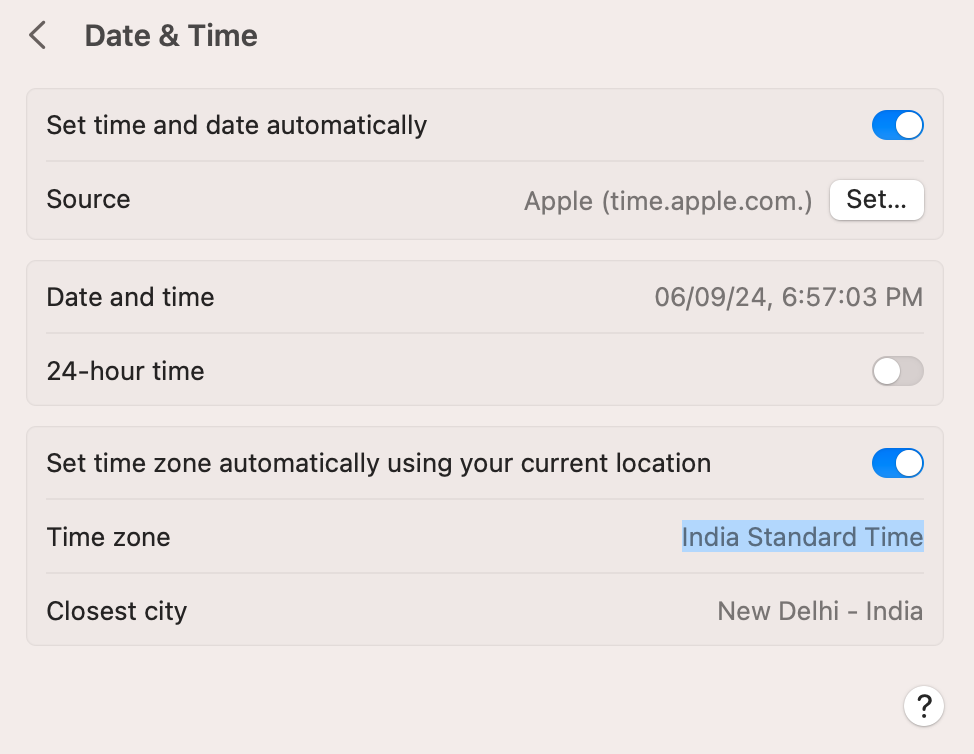
Step 5. On the right side, click on ‘Date & Time’ option.
Step 6. In the Date and Time section, you can change the timezone by choosing your preferred Country. You could also change the ‘Closest City’ to a value that you prefer.
This method enables you to modify and test timezone settings across multiple browsers and OS versions on devices hosted in the BrowserStack cloud, eliminating the need for physical infrastructure.
Method 3. Changing Timezone on Mac using Selenium Automation on BrowserStack Automate
Leveraging test automation tools like BrowserStack Automate can streamline the process of testing different time zones on your Mac for a more efficient and scalable approach.
If you’re using Selenium for automated testing, BrowserStack Automate allows you to specify the desired time zone in your test scripts.
Example Configuration: for Python
from selenium import webdriver

desired_cap = {

'browser': 'Chrome',

'browser_version': 'latest',

'os': 'OS X',

'os_version': 'Big Sur',

'timezone': 'America/New_York',

'name': 'Timezone Test'

}

driver = webdriver.Remote(

command_executor='https://<username>:<access_key>@hub-cloud.browserstack.com/wd/hub',

desired_capabilities=desired_cap

)
Automate Multiple Time Zones
By iterating through a list of time zones, you can automate tests across different regions without manual intervention.
Refer to this documentation on how to test a website in different timezones during Selenium tests in Automate.
Benefits of using BrowserStack to test various Time Zones?
When it comes to ensuring the highest quality for your applications, BrowserStack stands out as the ultimate testing platform. Here’s why BrowserStack is the go-to choice for developers and QA teams:
- Real Devices, Real Results
Test on actual devices, not emulators, for accurate results and to catch bugs in real-world conditions. - Zero Setup, Zero Maintenance
Instant cloud access to real devices, eliminating setup and maintenance so your team can focus on testing. - Parallel Testing for Speed
Run thousands of tests simultaneously, reducing build times and speeding up bug detection. - Top-notch Security
Devices are wiped after each test, and BrowserStack meets SOC2 and GDPR standards for data security. - Wider Coverage, Less Effort
Access 20,000+ devices, ensuring your app works across various combinations without managing hardware.
By adopting automated testing tools, you can ensure that changing time zones on Mac becomes a streamlined and efficient process, empowering your team to deliver robust and reliable applications with confidence.
Conclusion
Mastering how to change the time zone on Mac is a fundamental skill that enhances both personal and professional computing experiences.
You can either opt for the intuitive System Preferences, the powerful command-line interface or test the time zone changes using advanced testing tools like BrowserStack.
It makes testing seamless to ensure your web app functions as intended across various devices and browsers for different time zones.


