Automate Visual Tests on Browsers without Web Drivers
By Sebastian Viquez, BrowserStack Champion - August 28, 2023
Automated UI and Visual testing play a crucial role in ensuring the quality and functionality of web applications. However, testing in browsers that lack native web browser drivers and support, such as DuckDuckGo or Brave, presents a unique and new challenge.
This article explores an alternative approach to successfully run automated UI and Visual tests on these browsers, enabling developers and testers to validate their applications at the UI and Visual level on these privacy-focused browsers.
Understanding the Challenge
Web drivers, like Selenium WebDriver, are commonly used to automate UI tests on various browsers. Unfortunately, not all browsers offer official web driver support, often due to their emphasis on privacy and security. Browsers like DuckDuckGo and Brave may not provide dedicated web drivers, making it challenging to automate UI tests directly.
You can always automate and validate at the Network level, using tools to intercept and manipulate network traffic. This allows you to automate browser interactions indirectly but not at the UI level.
A Possible Solution
Some of these browsers offer extensions that you can use along with other browsers, like Chrome, Firefox, Safari, and Edge. For instance: chrome://extensions/
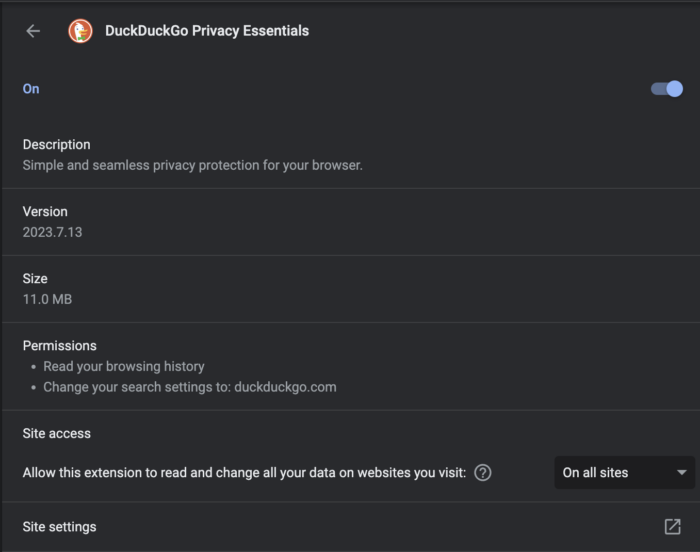
This means you can always install the extension and run tests. Let’s see the scenario and step-by-step process.
We use Selenium with TestNG in Java and Percy by BrowserStack on MacOS in this scenario.
The first step will be to install the Privacy Browser extension. Look for the extension based on your current browser, download it, and enable it.
Second step, look for the /Extensions/ folder in your Mac (you can use the Command + Spacing bar and look for “Extensions”) to find the extension file path. Once you find it, copy the path to allocate the Privacy Browser extension in your automated browser instance. You can do this in your BrowserFactory Class, for instance:
private static ChromeDriver getChromeInstance() {


ChromeOptions options = new ChromeOptions();
    options.addArguments("--load-extension=/Users/UserName/Library/Application Support/Google/Chrome/Default/Extensions/bkdgflcldnnnapblkhphbgpggdiikppg/2023.7.13_0");
    return new ChromeDriver(options);


}
In the above example, ChromeOptions() function is used to pass an argument using options.addArguments, so we can pass the extension file location and properly install once we instantiate the driver.
Finally, within your SpecsBaseClass, call the Chrome driver from the BrowserFactory Class and set the driver instance:
driver.set(BrowserFactory.createInstance("chrome"));
DriverFactory.getInstance().setDriver(driver.get());
(driver.get()).navigate().to("https://YourSite.org/");
Once you have done this, you can refresh the page (to properly load the extension) by using:
(driver.get()).navigate().refresh();Or navigate through tabs after loading the extension:
ArrayList<String> tabs = new ArrayList<>((driver.get()).getWindowHandles());
(driver.get()).switchTo().window(tabs.get(0));
As a note, refreshing the tab where your script runs will do it, but there are tests where you need to navigate to other tabs or the original tab to keep the focus. For these scenarios, the above can help.
And that’s it! Now you can run a sample test,
@Test
public void ShopCheck() {

    homepage.CheckShop();


}
This will run your test, open the target URL, install the extension, refresh your page to properly allocate the extension, and run the script in your Privacy Browser.
The Visual Testing aspect
In today’s rapidly evolving digital landscape, delivering seamless user experiences has become paramount for web applications. With many browsers, devices, and operating systems, ensuring consistent visual quality across all platforms is challenging.
Visual testing has emerged as a powerful solution to address this challenge. Percy, by BrowserStack, is a state-of-the-art visual testing platform designed to streamline the visual testing process for web applications. Percy allows developers and testers to swiftly identify and resolve visual discrepancies introduced by code changes, missing or dynamic content by capturing and comparing visual snapshots. For instance:

Can you tell the difference? How long did it take you? You may miss changes on similar pictures, image changes, or simply dynamic content, but Percy will highlight these for you in just a few seconds:
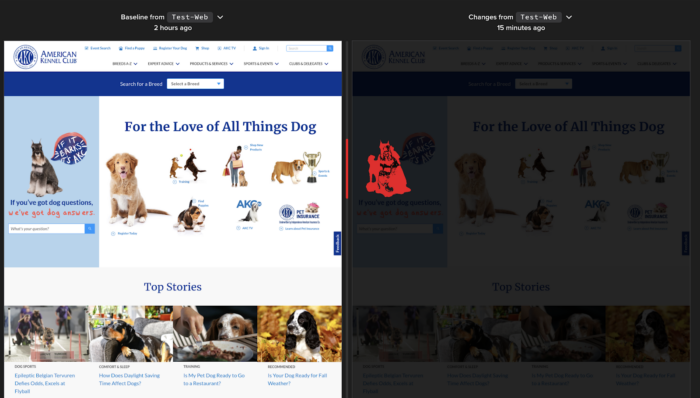
Percy offers an easy-to-set starting guide here https://docs.percy.io/docs/getting-started. Please take a look before continuing.
Going back, what you will find when running visual tests on Privacy Browsers, like the ones mentioned above, are missing elements, ads, forms, banners, and JS. Overall third-party vendors’ content may be blocked due to their privacy settings.
For instance, in the following example, the snapshot from the left was taken using a Privacy Browser extension, and the one on the right is a regular Chrome instance. You can tell just by looking into these snapshots the number of elements that changed, moved, or are not even showing:
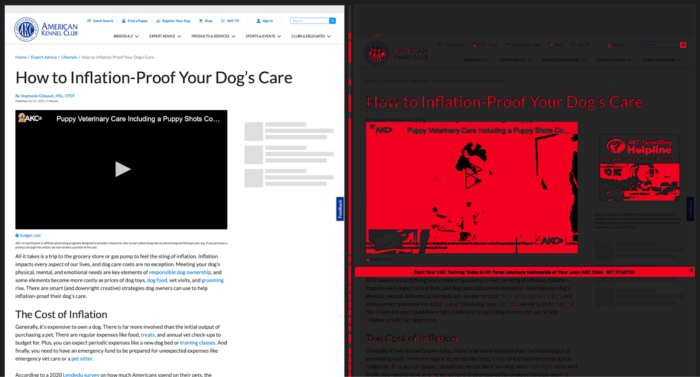
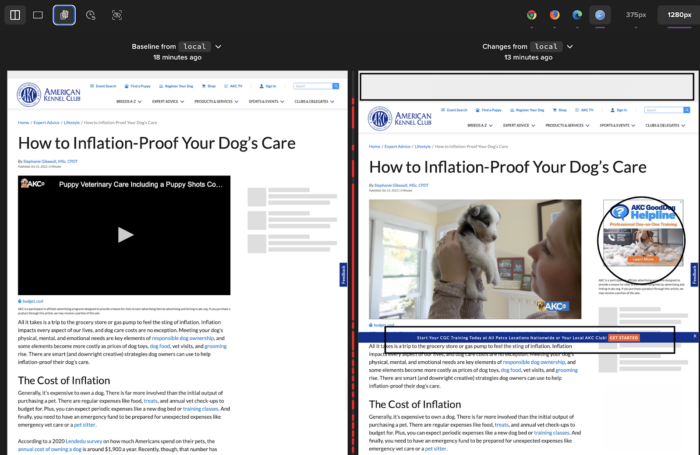
In some cases, you will be able to notice some differences, but you may miss others, and this is where Percy comes into play, especially in this type of scenario where you may get a lot of missing content.
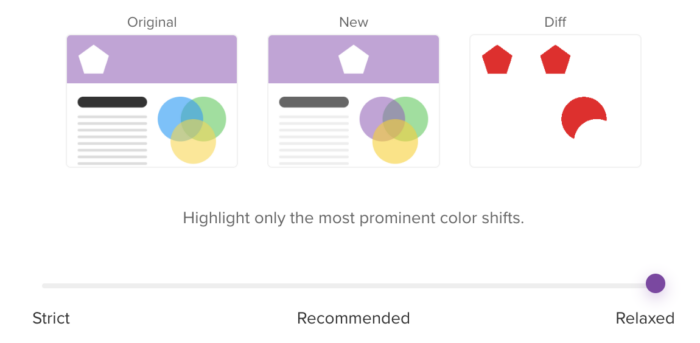
As a note, you can always change how visual changes appear on your builds snapshots. This can be useful based on your testing approach. This can be done from your Project Settings Menu > Advanced Options section:
Also, if you have dynamic elements in your website, you can ignore certain regions of your website by using the Ignore Region Functionality. For more information, we recommend taking a look at this doc > Freezing animations & Ignore Regions.
One of the cool features of this framework is how easy it is to change from browser to browser and mobile views. There’s no need for additional scripts or changes. Just a single click on the top right corner and that’s about it.
Wrapping Up
Its strongly recommended to have a combination of locators and visual validations across your sites instead of just doing one or the other. There’s no need to repeat yourself, in the sense of validating over and over again the same locators in some of your tests. When following POM best practices, you may fall into this without even realizing that you have already validated the existence of a particular element.
The same goes for validating or running visual tests. There is no need to validate all your existing project pages. NO, validate and verify based on your network traffic, high-risk areas, or business-critical pages. This should be the approach, and you can easily do this using Percy’s features and matching algorithm as needed.
Remember, testing is not only about finding bugs, testing is about providing solutions and finding new ways to improve the products and services we support, and the overall team effort.

