With the growing demand for applications that serve, delight and retain users, the need for automation testing has become prominent. As users expect that a new app version with advanced features will be launched every few weeks, automation testing helps application development and testing professionals deliver high-end apps within tight deadlines.
Appium is widely used for automated mobile app testing. It helps execute automated tests on native and hybrid apps for faster and accurate results. This article will explore how to perform automated app testing using Appium Desktop.
What is Appium Desktop?
Appium Desktop is an open-source Graphical User Interface (GUI) application used for automated mobile application testing. It is supported by Windows, Mac, and Linux.
Appium Desktop has two main components:
- Appium Server
- Appium Desktop Inspector
While the Appium Server is used to run the automation test scripts, Appium Desktop Inspector is used for identifying the UI elements of the application under test.
Appium Desktop provides a GUI for the Appium Server. This GUI tool allows you to start and stop the Appium server and view the logs. The Inspector can also get the properties of the elements in your mobile app.
Why use Appium Desktop?
Appium Desktop is an ideal tool for automated testing of native, mobile web, and hybrid applications because of the following features:
- It is open-source, which means testers can save the money that otherwise goes into costly licenses for tools and frameworks
- Using Appium Desktop, testers can connect a mobile device and perform automated tests on it
- Appium Desktop Inspector lets testers inspect web elements and identify their id and other details, which makes testing simpler and more accurate
- It allows testers to perform actions directly on the application and record them to generate the code that can be used for testing and debugging
- It lets testers pre-set configurations by setting up the desired capabilities for a more convenient testing process
Getting started with Appium Desktop
Before starting with the setup, it is essential to install and set up other prerequisite tools, as Appium Desktop is not a standalone testing tool.
To begin with, do the following:
- Install Java and set up the environment variables
- Install Android Studio and set up Android environment variables
- Install Eclipse IDE for Java
- Install Appium Desktop from this link and download the Appium Jars for Eclipse
Downloading Appium Desktop
Here is how you can download the Appium Desktop:
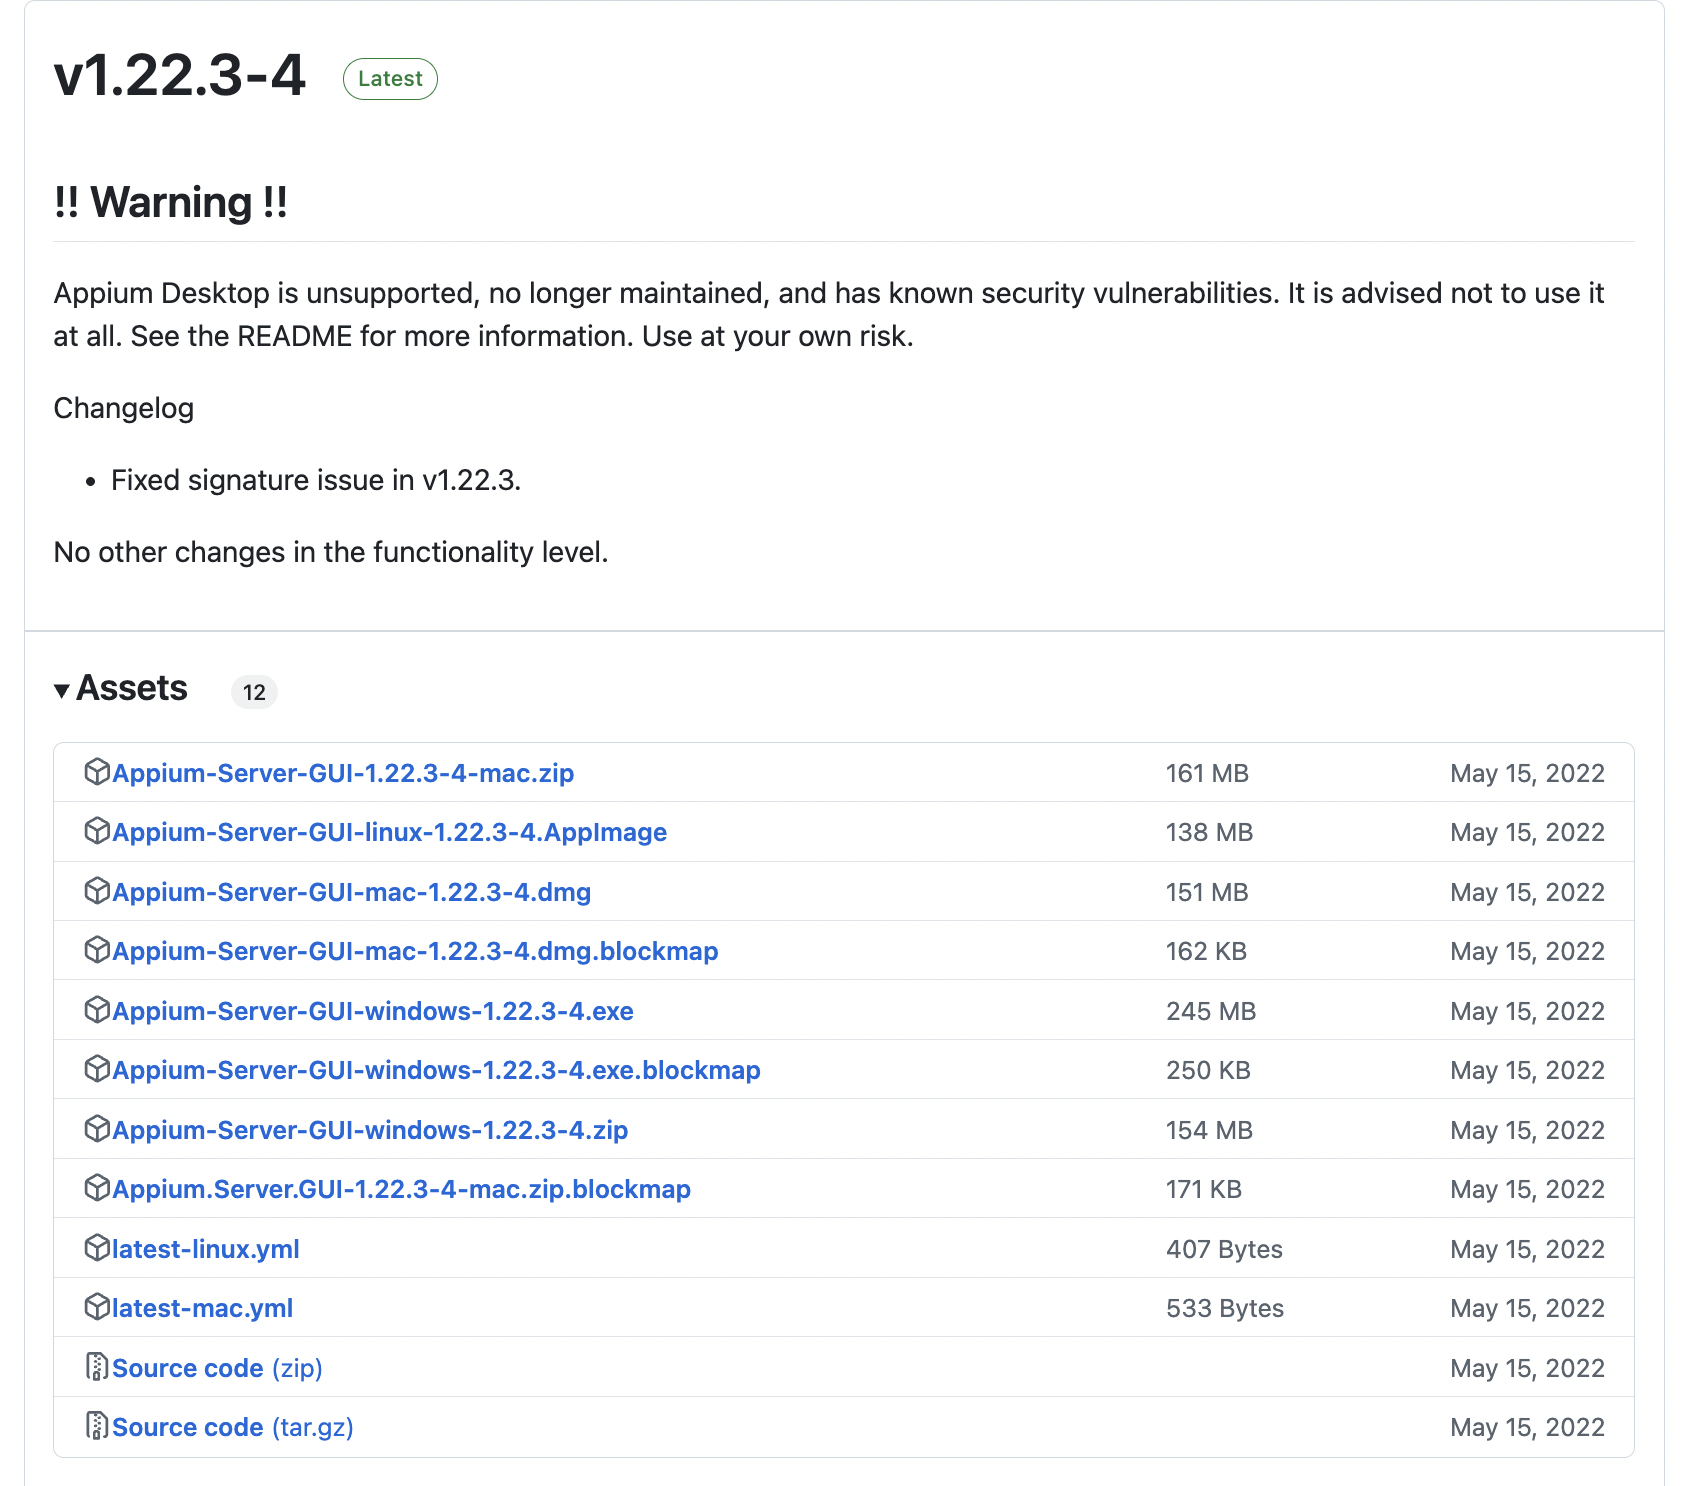
Step 1: As mentioned earlier, visit Appium Desktop’s GitHub page by clicking on this link.
Step 2: This page has all the versions of Appium Desktop. You can download the latest version, which is usually mentioned at the top of the page.
Step 3: Under the ‘Downloads’ section of the latest release, you can find various Appium Server GUI packages for Windows, Mac, Linux etc. Select the Windows version, download and save it on your PC.
With this step, the downloading process for Appium Server GUI is completed.
Here is how you can install it:
Step 1: Open the folder location where the Appium Server GUI is downloaded. Double-click on the exe to start installing
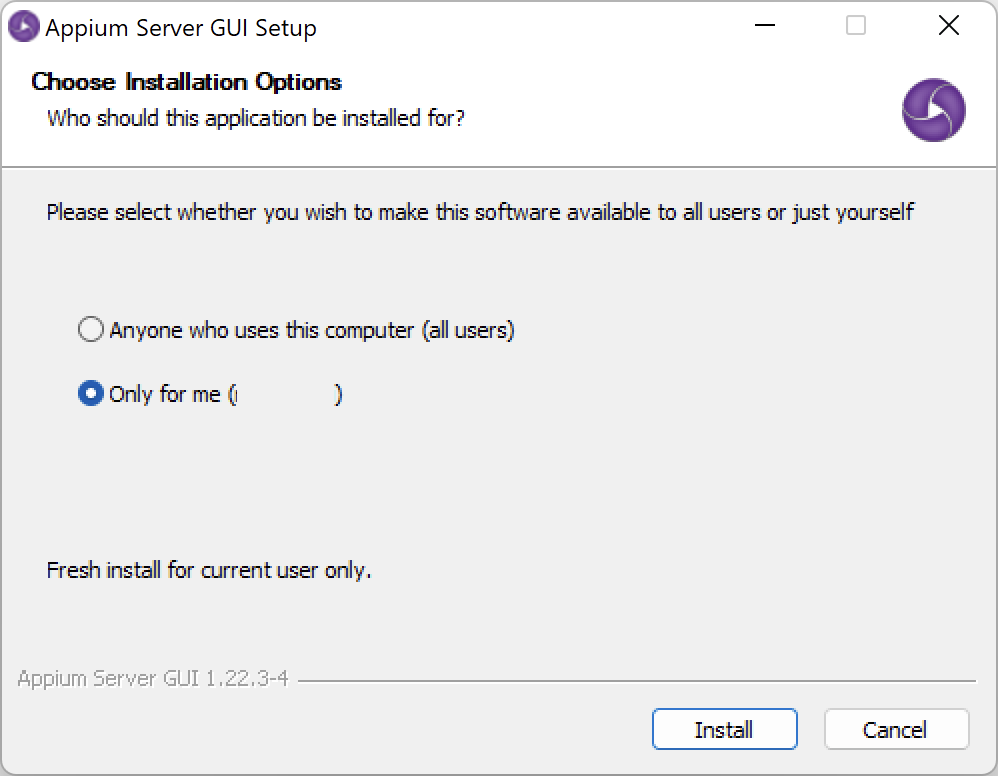
Step 2: You will be provided with Installation Options. Choose accordingly and then simply, click on the Install button
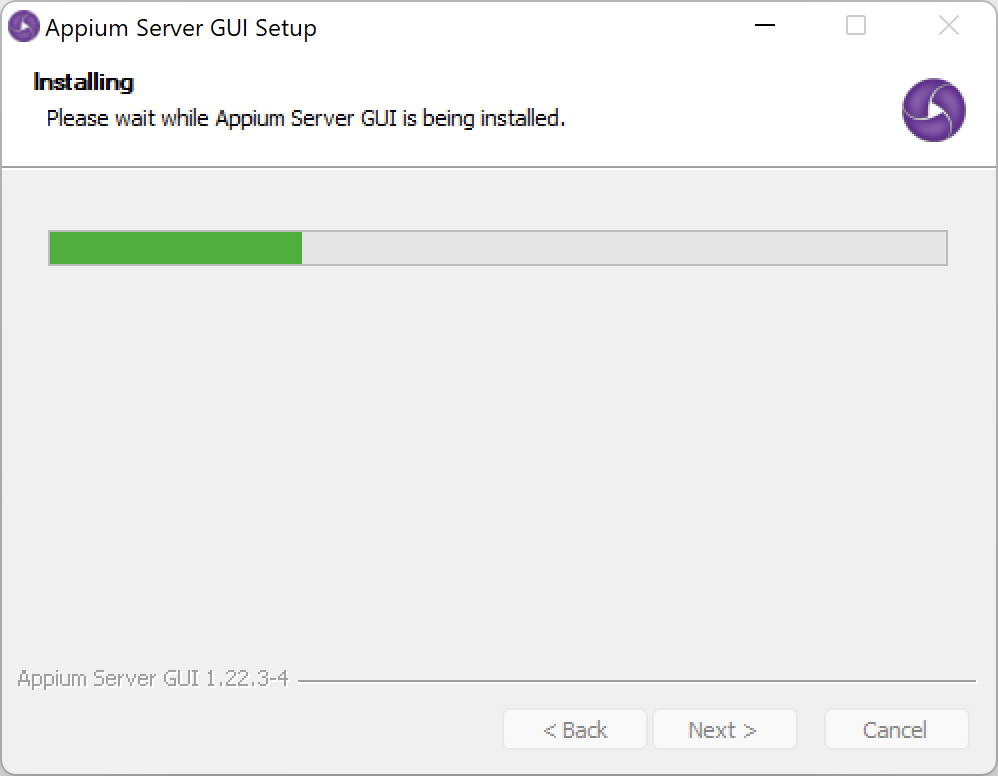
Step 3: Appium Setup window will displayed as below, when the installation process starts
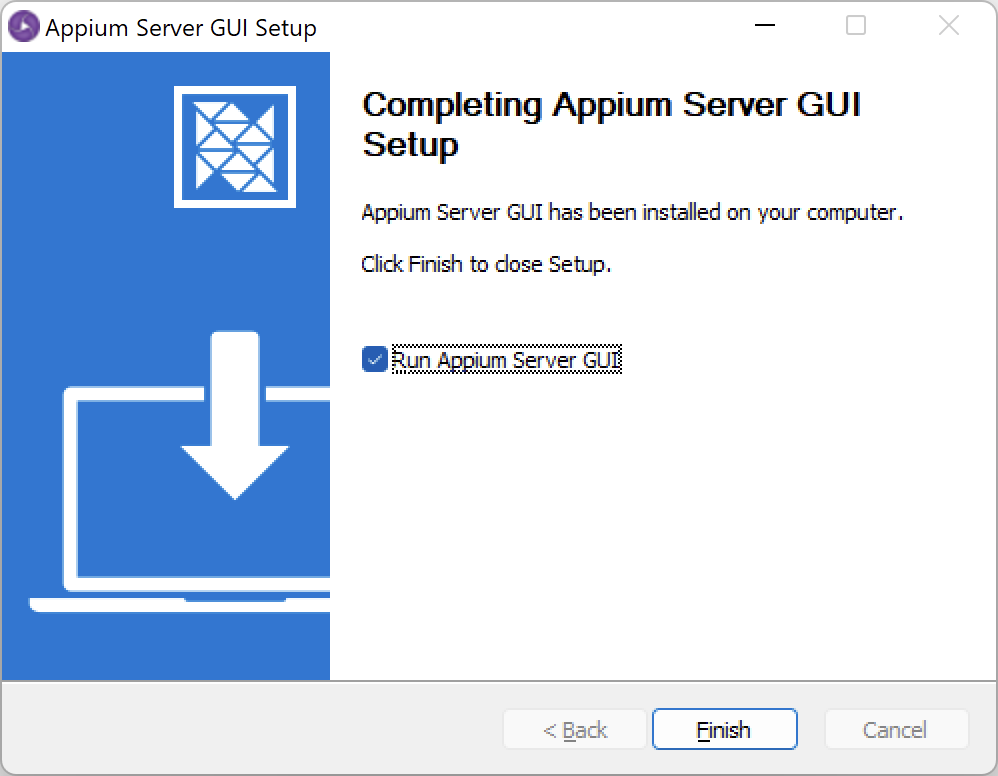
Step 4: Once the process is complete, you will see the below Appium Setup window
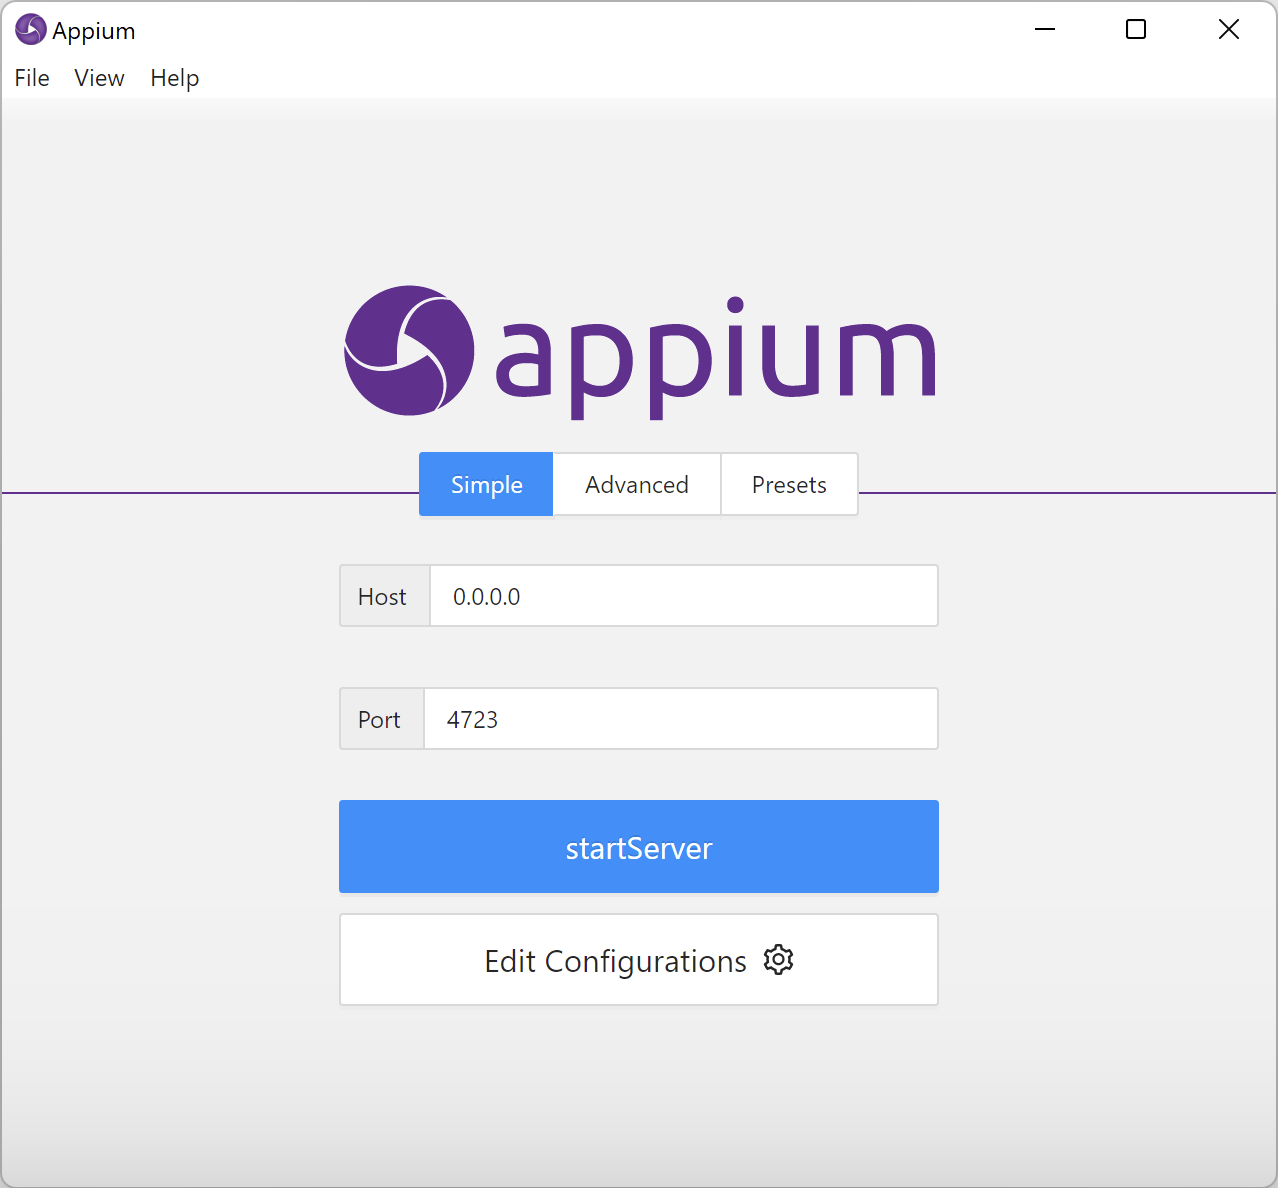
Step 5: Now, select the Run Appium Server GUI checkbox and click ‘Finish’. Appium Start screen will be displayed.
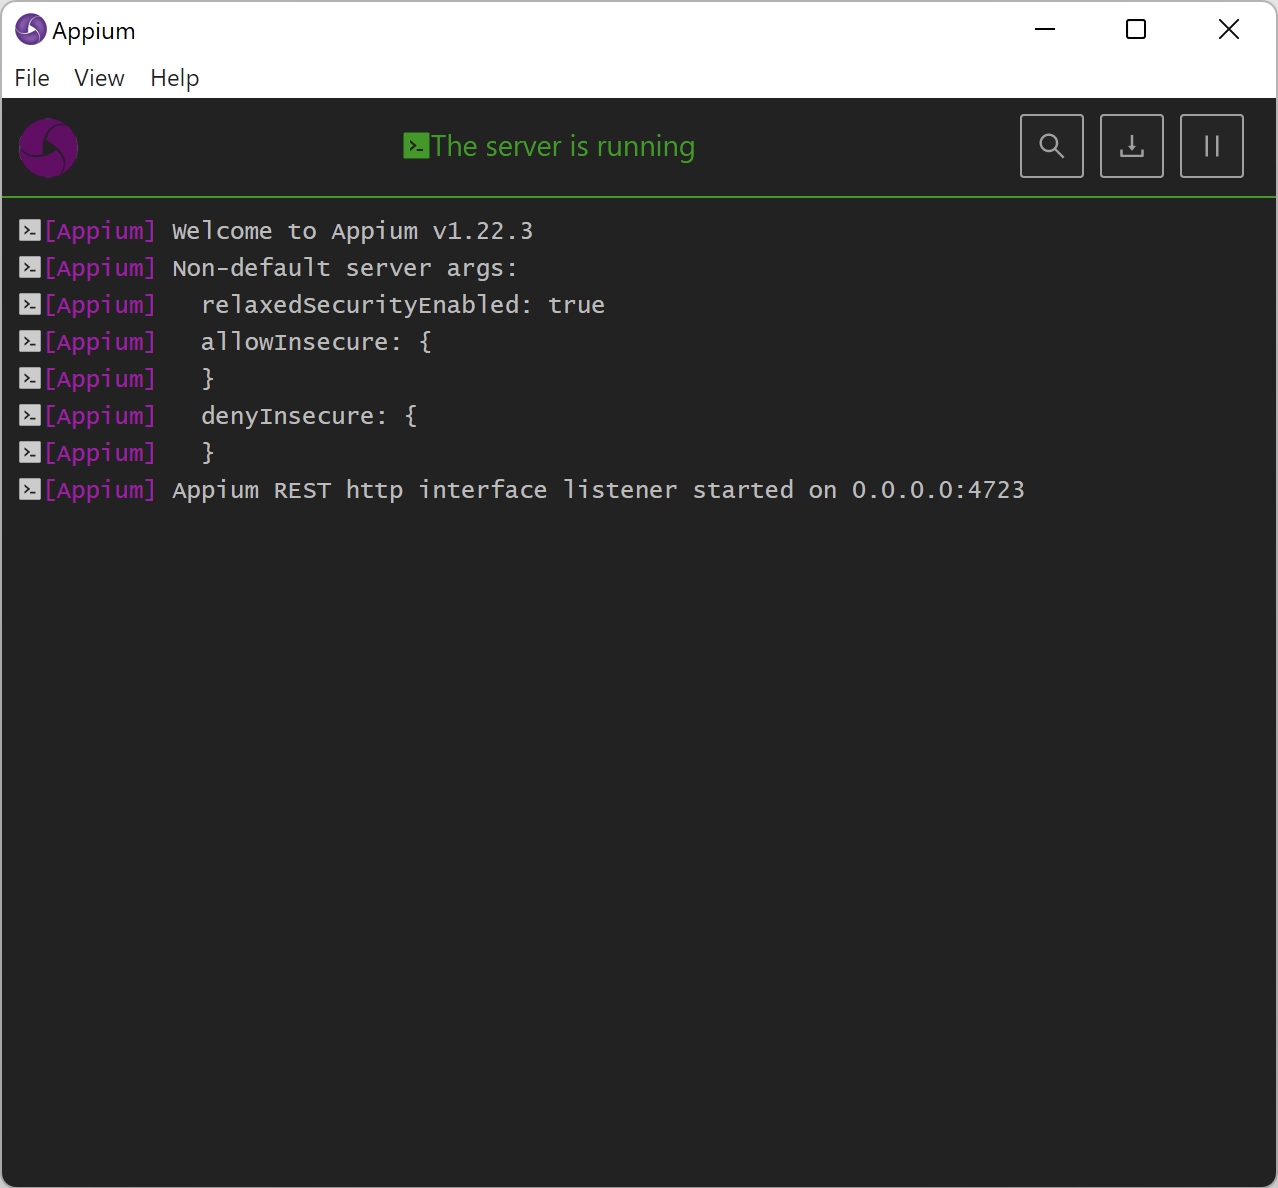
Step 6: To check if the installation process has been successful, click startServer button. The Appium server will then start and ‘The server is running’ message will be displayed in Appium window.
This means the Appium Desktop has been successfully installed.
Step 7: Now, click Stop Server button to stop the Appium server
Once the Appium Server stops, you can close the Appium Server GUI window. With this we complete the download and installation process.
What is Appium Server GUI
Appium Server GUI is a graphical interface for the Appium Server. It is mainly used to start and handle the Appium server without the requirement of command-line commands.
Starting Appium Server
Having installed the Appium Desktop app, put the Host and Port values to start the Appium Server.
Getting the mobile phone’s details
To test the application on a mobile phone, Appium requires the device details (Device ID/ UDID, Android Version) in addition to the appPackage and appActivity names of the application to be tested. Testers can get the Device ID by connecting it to the desktop and running ADB devices command on the command prompt.
Writing the Appium Test Script
To write the Appium Test Script, create a new project in Eclipse. Create the package and class to start writing the test script code.
In this script,(which opens the Google Chrome app on the Android mobile phone under test) the tester needs to set the Desired Capabilities and instantiate the Appium Driver.
public class AppiumTesting {

public static void main(String[] args) {

//Setting Desired Capabilities
DesiredCapabilities caps = new DesiredCapabilities();
caps.setCapability("deviceName", “Phone");
caps.setCapability("udid", "//Mention the UDID of phone");
caps.setCapability("platformName", "Android");
caps.setCapability("platformVersion", "8.0");
caps.setCapability("appPackage", "com.android.chrome");
caps.setCapability("appActivity", "com.google.android.apps.chrome.Main");
caps.setCapability("noReset", "true");

//Instantiating Appium Driver

try {
AppiumDriver<MobileElement> driver = new AndroidDriver<MobileElement>(new URL("//Mention host url"), caps);

} catch (MalformedURLException e) {
System.out.println(e.getMessage());
}
}

}
The UDID of the mobile phone, Android version, appPackage and appActivity details (for the Google Chrome app, in this example), fetched in the above section has to be used in the above code for setting Desired Capabilities and instantiating Appium Driver.
Run this script and the Google Chrome App will be opened on the connected mobile device.
Run Appium Tests on Real Devices for Free
Starting Appium Desktop Inspector
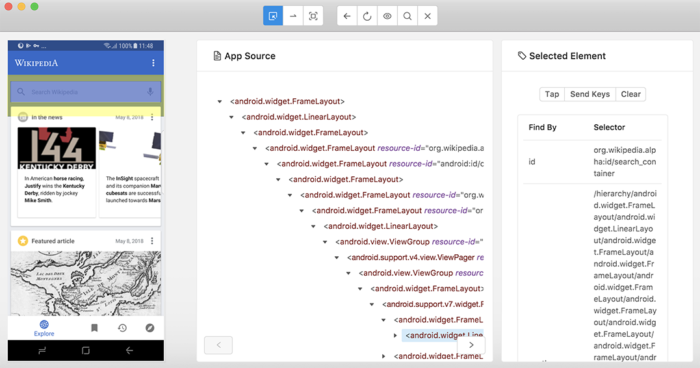
Appium Desktop Inspector is used to identify the UI elements of the application being tested. It works well with both real devices as well as simulators or emulators.
After starting with the Appium Server, the tester can start the Inspector Session by clicking on the Search icon on the Appium logs screen.
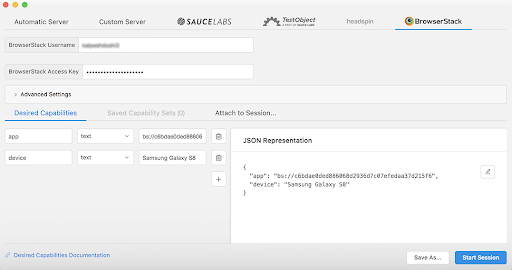
Then by entering the Desired Capabilities details provided by BrowserStack App Automate, begin with the inspection of elements for the desired app and record the session on the cloud, as the connection with the device is established.
Inspecting UI Elements using Appium Desktop Inspector
To explore the inspecting of UI Elements with Appium Desktop Inspector, let’s consider a scenario that opens the Wikipedia App and inspects its Search Bar.
As soon as the tester highlights the search bar using the cursor, they will get the details of the selected element. These details can be used in the script to perform tests on that specific element.
Code Snippet:
driver.findElement(By.id("org.wikipedia.alpha:id/search_container")).click();By running the code above, the tester will get the text “Google”, which has been written on the Search bar of the Wikipedia App, printed on the console.
This is how one can use Appium Desktop to run test scripts in order to perform automated testing of mobile applications.
Conclusion
Appium Desktop enables accurate and comprehensive automated testing of hybrid, native and web applications, thus ridding them of bugs, anomalies, and any issues that may harm the user experience. Of course, all Appium tests are best to run on real mobile devices because monitoring apps in real user conditions generates 100% accurate results, every time.
BrowserStack App Automate offers cloud-based access to both the latest and legacy devices (Android, iOS, and Windows) installed with real operating systems. App Automate also requires no additional setup, helping testers save precious time and meet their deadlines that much faster. Run Appium tests on thousands of real devices so that the app becomes truly cross-platform compatible.
Useful Resources for Appium
Tutorials
- How to perform Parallel Test Execution in Appium?
- Appium Visual Testing: The Essential Guide
- How to run Appium iOS Tests on Real Devices?
- How to perform Debugging in Appium
- How to Run Your First Appium Test Script
- How to report bugs in Appium UI Testing?
- How to run Appium Tests on macOS?
- XPath in Appium: Tutorial
- How to Analyze Appium Logs
- How to perform Drag and Drop using Appium
- How to test mobile app in Landscape or Portrait mode using Appium
- How to Run Same Script in Multiple Devices using Appium
- How to change Time Zones for Mobile App Testing using Appium
- How to Perform Localization of Mobile Apps using Appium
- What is Appium Inspector? (Benefits & How to Use it?)
- How to run Appium tests on Android devices
- How to scroll down to an element in Appium
- How to Download and Install Appium
- How to set up your Appium Grid
- How to test Biometric authentication using Appium?
- How to use touch actions in Appium?
- How to Automate a Real E2E User Flow involving App and Browser with Appium
- How to Inspect Element using UIAutomatorViewer in Appium
- How to Test Flutter Apps Using Appium Automation
- Understanding Appium Desktop: Tutorial
- Appium Tutorial for Mobile Application Testing
- React Native and Appium Tutorial
- Understanding FindElements in Appium
Best Practices, Tips, and Tricks
- Appium Best Practices Every Developer Must Know
- Effective Locator Strategies in Appium
- Top Appium Commands every Developer must know
- Desired Capabilities in Appium
- Overcoming Top Challenges faced in Appium Automation
Getting Started with
- Getting Started with Appium and NUnit framework
- WebdriverIO Tutorial: Getting started with Test Automation using Selenium and Appium
- Appium with Python: Getting Started with App Automation Testing
- Appium with Java: Getting Started to Run Automated Tests
- Test Windows Desktop App using Appium-Compatible WinAppDriver
