Ensuring that your Android app performs flawlessly across various devices is crucial. While Android Studio offers robust testing capabilities for developers, relying solely on emulators or in-house device testing is often not enough.
Testing on real devices is critical to understanding how your app behaves in real-world conditions—accounting for varied hardware, software versions, and network conditions.
This article explores how to test Android apps using Android Studio, focusing on real device testing through BrowserStack’s App Live and App Automate features.
What is Android App Testing?
Android app testing involves validating the functionality, performance, and usability of an application across different Android devices.
Testing helps identify bugs, ensure compatibility across different screen sizes and OS versions, and optimize the app’s performance. Proper testing is essential for delivering a smooth and bug-free user experience, which can significantly impact your app’s success.
Significance of Testing on Real Devices
While emulators in Android Studio provide a great starting point for testing, they cannot fully replicate the behavior of an app on a real device.
Real devices have different configurations, screen sizes, and hardware components, which can all impact how an app performs. Testing on real devices ensures that your app runs smoothly in real-world conditions, covering:
- Different Android versions (from older OS versions to the latest updates).
- Hardware differences, including processor speeds, memory constraints, and unique device-specific features.
- Network conditions, such as 3G, 4G, 5G, and WiFi performance.
- Power consumption, heat generation, and battery performance.
Testing on real devices helps avoid unpleasant surprises once your app is in users’ hands, which is why it’s a crucial step in the development process.
Different Methods to Test Android Apps in Android Studio
There are several methods to test Android apps in Android Studio, each with its strengths and some of which are:
Method 1: USB Debugging
USB Debugging is the most straightforward method for testing an Android app on a real device using Android Studio. Here’s how to do it:
Step 1: Enable Developer Mode on your Android device.
Step 2: Connect the device to your computer via a USB cable.
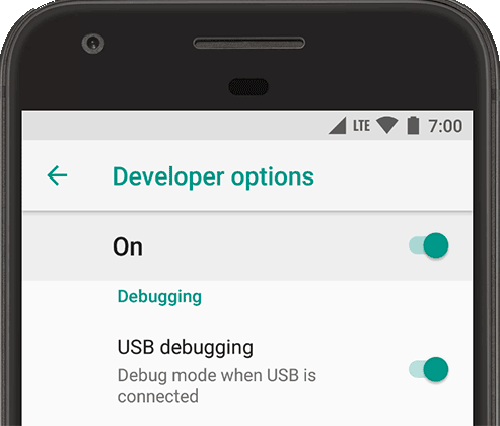
Step 3: Enable USB Debugging from the Developer Options on your device.
Step 4: In Android Studio, select your connected device from the device dropdown.
Step 5: Run the app directly on the device by clicking the Run button.
This method allows you to debug and test your app in real-time on a connected physical device.
Method 2: Emulators
Android Studio’s built-in Emulator allows developers to test their apps on virtual devices that simulate different screen sizes, Android versions, and hardware configurations.
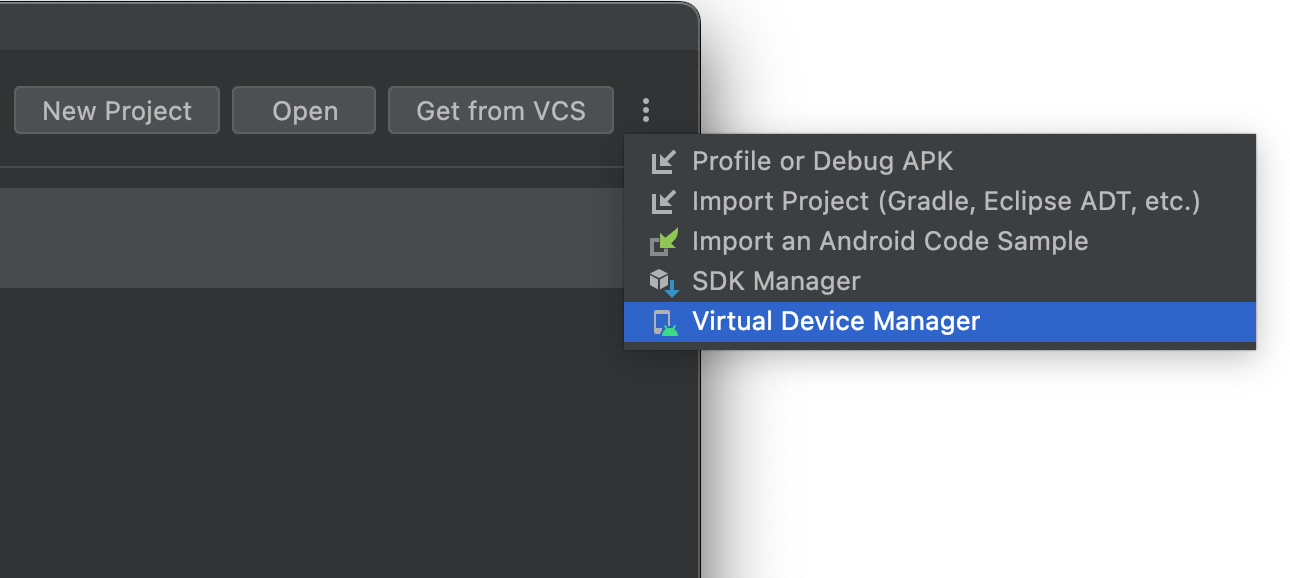
Step 1: Go to AVD Manager in Android Studio.
Step 2: Create a new virtual device with the necessary configurations (screen size, resolution, and Android version).
Step 3: Run your app on the emulator.
While emulators are useful for basic testing, they do not offer the same accuracy as testing on a real device. Performance issues like network latency, hardware limitations, and device-specific bugs are hard to replicate on emulators.
Method 3: JUnit Tests
JUnit is a popular framework for unit testing in Java-based applications, including Android apps. JUnit tests allow you to run tests on individual components of your app, such as methods and classes, ensuring they work as expected.
To create a JUnit test:
Step 1: Open Android Studio and right-click on the class you want to test.
Step 2: Select Generate Test and choose the JUnit test configuration.
Step 3: Write and run your test cases to verify specific functionalities.
JUnit tests are ideal for validating core logic, but they don’t interact with the UI or simulate user actions on the device.
Read More: How to write JUnit Test Cases
Method 4: Instrumented Tests (using Espresso, UI Automator, etc.)
Instrumented tests run on real devices or emulators and are used to simulate user interactions with the app. Popular frameworks for instrumented testing include:
- Espresso: Provides simple APIs for testing UI interactions such as clicks, swipes, and text inputs.
- UI Automator: Automates UI tests across apps and supports testing interactions with system apps, such as the Settings menu.
These tests run in real environments and validate the user interface, ensuring that the app behaves correctly from a user’s perspective.
Read More: Android App Automation using UIAutomator
Method 5: Firebase Test Lab
Firebase Test Lab is a testing platform that lets you test Android apps on real and virtual devices hosted by Google.
To use Firebase Test Lab:
Step 1: Upload your app’s APK to the Firebase console.
Step 2: Select the devices and OS versions you want to test.
Step 3: Run tests such as Robo tests (which explore the app’s UI) or your own instrumented tests.
Firebase Test Lab offers good device coverage, but it’s limited in terms of customization and real-time interaction during testing.
Method 6: Testing Android Apps Using BrowserStack
While the methods mentioned above are useful, they come with limitations—particularly when scaling testing across multiple devices.
This is where BrowserStack comes into play. BrowserStack enables real device testing without the need to maintain an in-house device lab or deal with the complexities of setting up emulators.
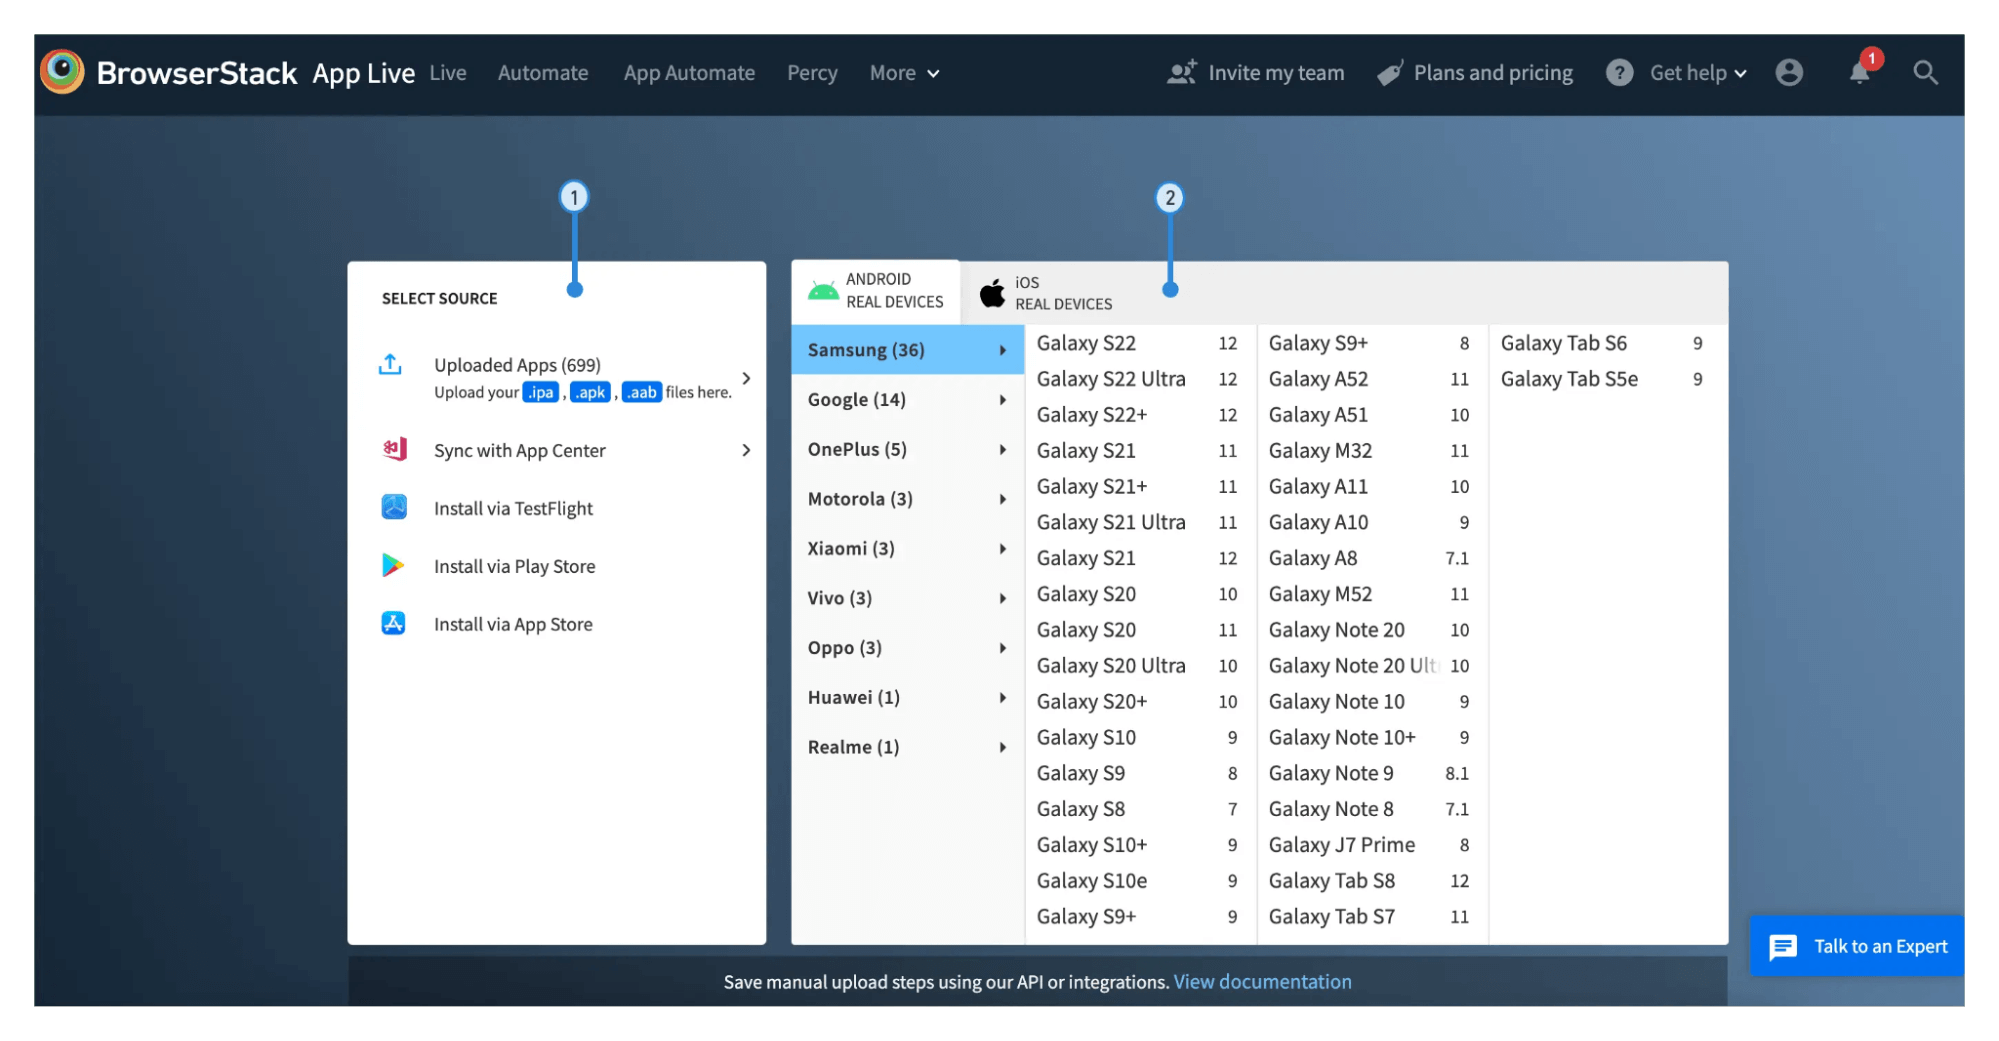
You can test your app on hundreds of real Android devices hosted in the cloud, ensuring that your app works seamlessly across all possible device combinations.
Integrating BrowserStack with Android Studio for Real Device Testing
BrowserStack integrates smoothly with Android Studio, allowing developers to run tests on real Android devices directly from their local environment.
To integrate BrowserStack with Android Studio for real device testing:
Step 1: Sign up for a BrowserStack account.
Step 2: Install the BrowserStack plugin for Android Studio.
Step 3: Configure your project to run tests on real devices by setting up the App Automate service.
Step 4: Upload your APK file and run automated tests across multiple devices in parallel, gaining insights into how the app performs under different conditions.
With this setup, you can debug, interact with, and verify your app on real devices directly from your development environment.
For more details, refer to this documentation on how to integrate Android Studio with BrowserStack App Live.
Running Manual and Automated Tests on Remote Devices
BrowserStack’s App Live allows developers to run manual tests on real Android devices. You can interact with the application in real-time, capturing screenshots, logging bugs, and analyzing performance under different network conditions.
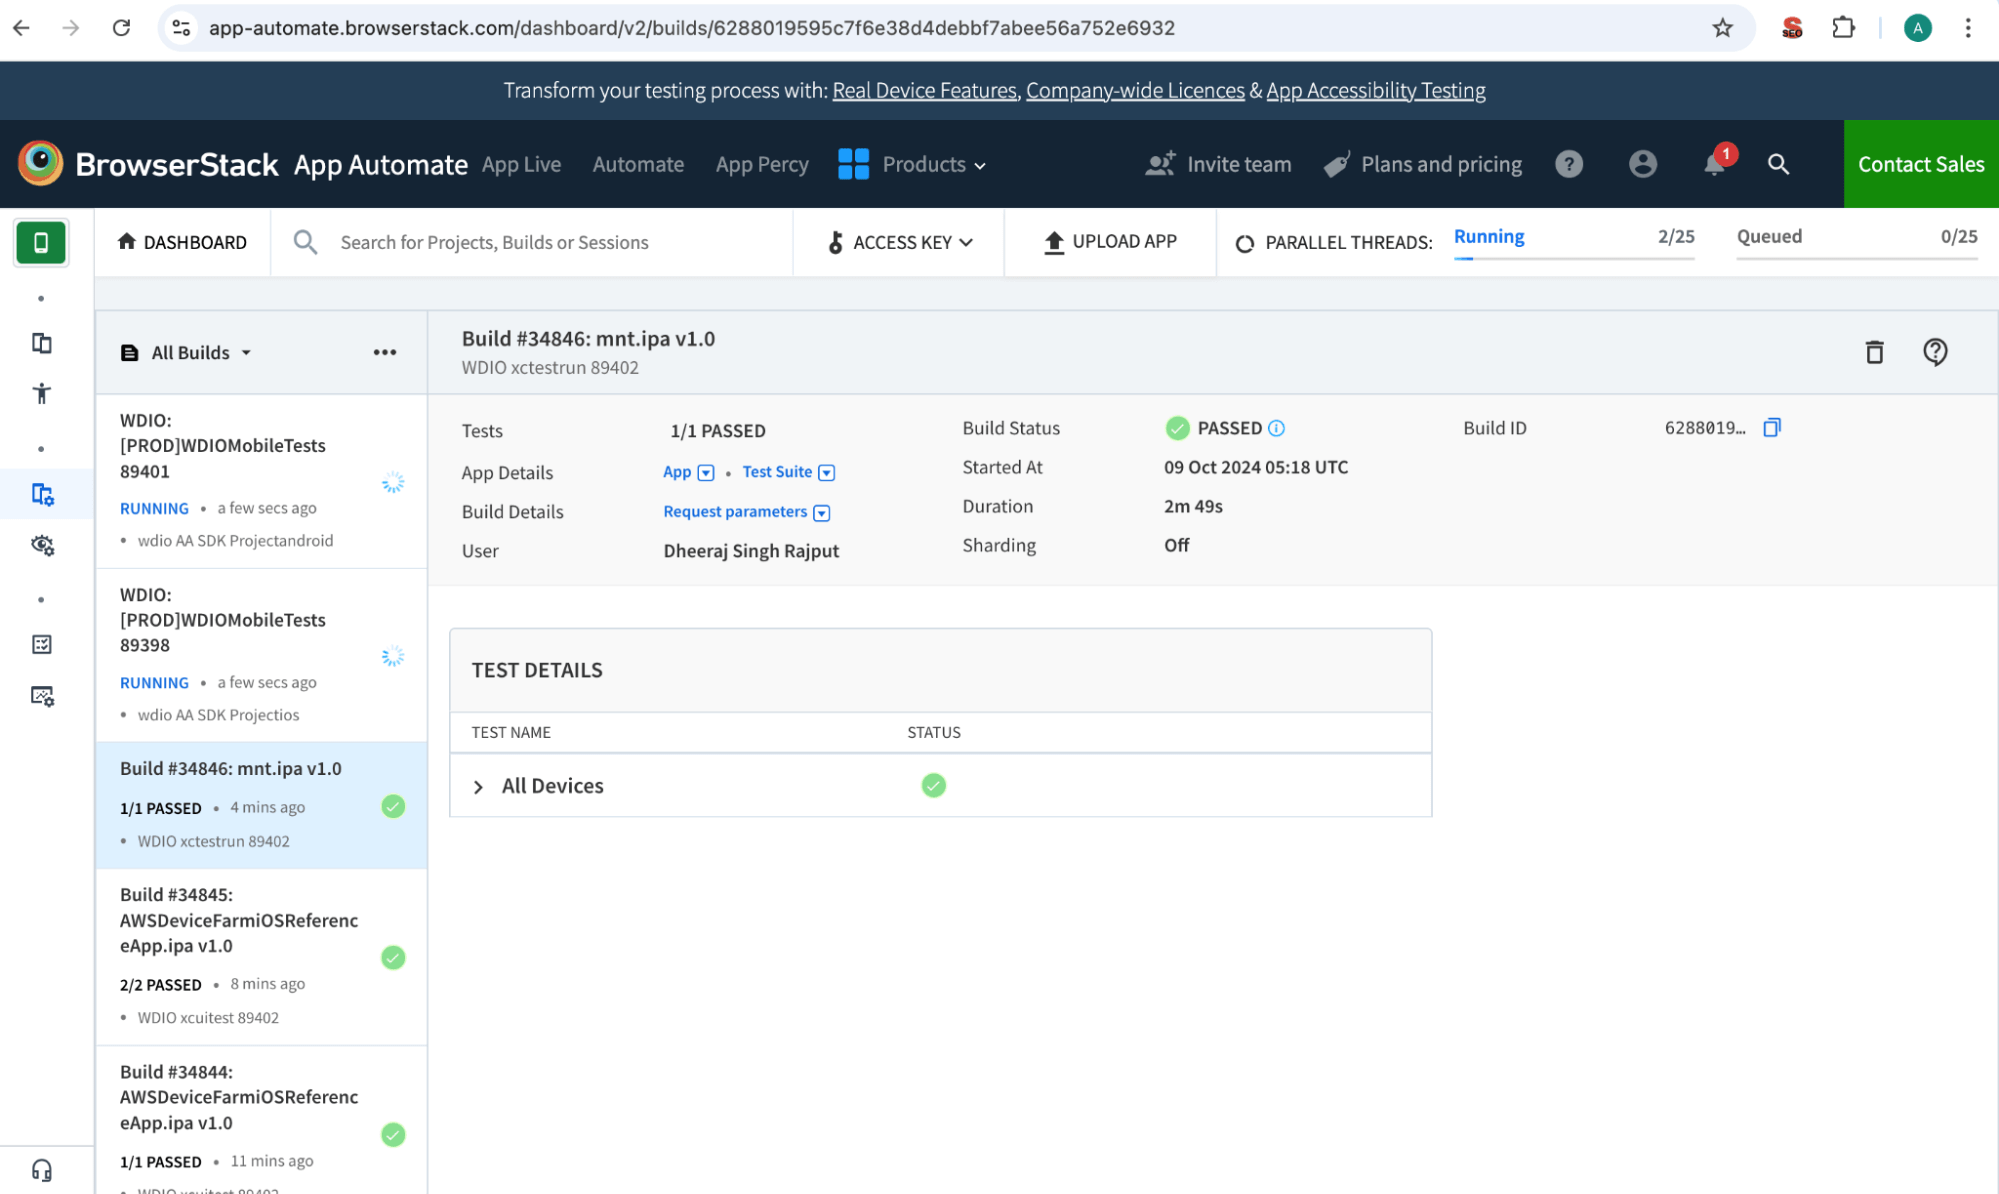
For automated testing, App Automate provides support for frameworks like Espresso and Appium. Developers can write automated scripts and execute them on a wide range of real Android devices, gaining insights from detailed reports and logs generated after each test run.
Why Choose BrowserStack for Testing Android Apps on Real Devices
When it comes to testing Android apps on real devices, BrowserStack offers several advantages over traditional methods:
- No Setup Required: Unlike setting up physical device labs or configuring emulators, BrowserStack requires zero setup. You can start testing instantly on a wide range of real Android devices.
- Easy-to-Use Interface: The platform’s intuitive interface allows both manual testing and automated testing to be carried out efficiently, with a minimal learning curve.
- Vast Android Device Availability: BrowserStack provides access to hundreds of real Android devices, allowing you to test your app on a comprehensive range of phones, tablets, and OS versions.
- Scalability: Whether you need to run manual tests on a single device or execute automated tests across multiple devices in parallel, BrowserStack can scale with your project’s needs.
- Supports Both Manual & Automation Testing: With App Live for manual testing and App Automate for running automation frameworks like Espresso, Appium, and UI Automator, BrowserStack covers all testing bases.
Conclusion
Testing your Android app on real devices is essential for ensuring that it performs flawlessly in diverse, real-world conditions. While Android Studio provides several built-in methods for testing, tools like BrowserStack elevate your testing strategy by offering access to hundreds of real Android devices without the need for complex setups.
By integrating BrowserStack with Android Studio, developers can seamlessly run both manual and automated tests, ensuring that their apps are ready for production. With its ease of use, scalability, and device availability, BrowserStack is the perfect choice for teams looking to test Android apps thoroughly and efficiently.


