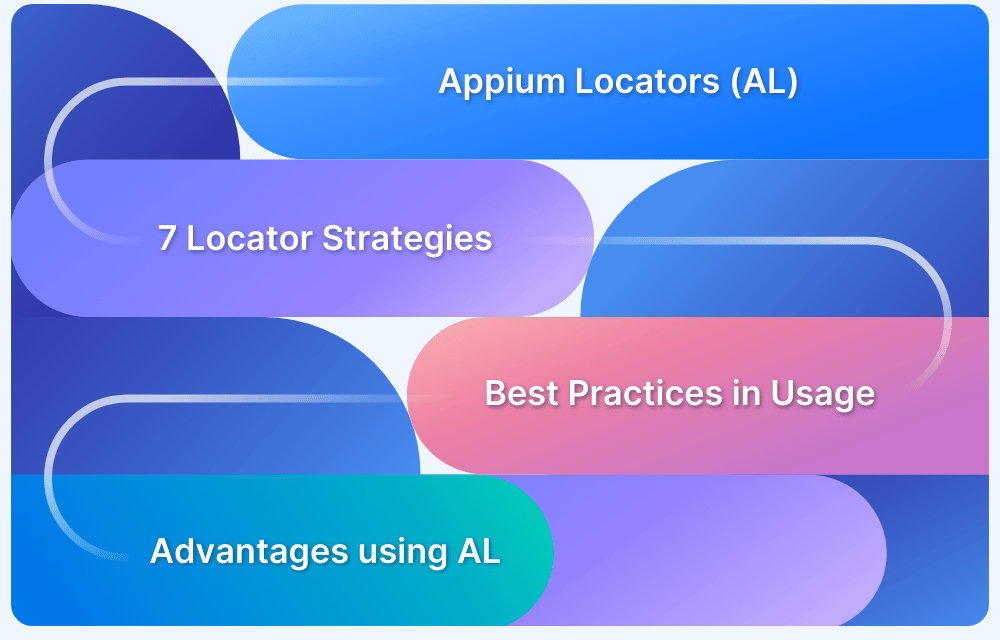
UI Automator helps automate Android app testing. It allows creating tests that can interact not only with the app but also with system-level features like notifications, settings, or other apps.
Overview
What is a UIAutomator?
- Android testing framework for automating app and system-level interactions.
- Works without needing app source code.
- Supports cross-app UI testing: notifications, settings, other apps.
- Ideal for functional and end-to-end Android UI testing.
UIAutomator Key Features
- Interact with visible UI elements across apps.
- Access system-level UI (permissions, notifications, quick settings).
- Works independently of app context.
- Compatible with AndroidX Test libraries.
- Runs on real devices and emulators without root access.
Core UIAutomator APIs
- UiCollection: Enumerate container elements; target sub-elements.
- UiObject: Represents visible UI elements.
- UiScrollable: Scroll through container items.
- UiSelector: Query and locate UI elements.
- Configurator: Set key test parameters.
Advantages of UIAutomator
- Supports cross-app and system-level testing.
- Works independently of the app source.
- Runs on real devices and emulators.
- Compatible with AndroidX Test and other frameworks (Espresso, JUnit).
Read this guide in detail to learn more about the Android UI Automator, its uses, features, and implementation with a step-by-step explanation.
Introduction to Android UI Automator Framework
UI Automator is a framework suitable for cross-app functional UI testing across the installed apps. The APIs of UIAutomator lets you interact with visible elements on a device, regardless of which Android Activity is in focus. Thus, this lets you perform operations like opening the Settings Menu or the App Launcher in a test device.
UI Automator doesn’t need access to the source code of the application in order to work. Due to this, the script can navigate and interact with the application tray, settings application, third-party applications, or any other app you want to.
The key features of the UIAutomator testing framework are as follows:
- An API to retrieve the state information and perform necessary operations on the target device.
- APIs which support cross-app UI testing.
Read More: What is Android UI Testing?
UI Automator APIs in Android
With UIAutomator APIs, you can write robust tests without knowing the implementation details of the app that you are testing. Use the below set of APIs to capture UI components across multiple apps:
- UiCollection: This API helps to enumerate a container’s UI elements for counting or targeting sub-elements by their visible text or content-description property.
- UiObject: Represents a visible UI element on the device.
- UiScrollable: Searches for items in a scrollable UI container.
- UiSelector: Used to query more than one target UI element on a device.
- Configurator: Let you set the key parameters for UIAutomator tests that are running.
Now that you know what UIAutomator is and its various APIs, let’s understand how to perform Android App Automation using UIAutomator.
Test Android Apps using Appium
Android App Automation using UIAutomator
Before starting with creating a test with Android UI Automator, configure the test source code location and project dependencies.
Step 1: In the build.gradle file of your Android app module, set a dependency reference to the UIAutomator library by using the below code.
android {
...
defaultConfig {
...
testInstrumentationRunner "android.support.test.runner.AndroidJUnitRunner"
}
...
}
dependencies {
...
androidTestCompile 'com.android.support.test.uiautomator:uiautomator-v18:2.1.2'
androidTestCompile 'com.android.support.test:runner:0.5'
}
Read More about AndroidJUnitRunner
Step 2: Ensure that the project compiles correctly. After that, add a new class in module/src/androidTest: using the code below.
@RunWith(AndroidJUnit4.class)
public class YouTubeTestScenario {
@Test
public void watchVideo() throws Exception {
// TODO
}
}
UI Automator allows the user to interact with visible elements of the screen. In order to optimize testing, inspect the target app’s UI components and ensure that they are accessible. Each element has certain characteristics, such as content-description, class, resource-id, text, etc.
Step 3: To interact with the visible elements, launch the uiautomatorviewer tool follow the below steps:
- Launch the target application. Let’s take a youtube app in this case on a physical device (Mobile phone)
- Connect the device to your development machine.
- Open a terminal or a command line and navigate to the <android-sdk>/tools/ directory.
- Run the tool with this command:
$ uiautomatorviewer
Step 4: Let’s build a scenario for app automation.
- Launch the Youtube application.
- Click on the search icon in the search field to initiate a search.
- Enter the text “Browserstack” in the search field
- Launch the Webinar “The pesticide paradox” ;
- Watch the initial 40 seconds of the video.
Step 5: Before starting any interaction with the screen elements, initiate a UiDevice object to represent the current state of the mobile screen using the below command.
UiDevice mDevice = UiDevice.getInstance(InstrumentationRegistry.getInstrumentation());
Step 6: As a next step, click on the search icon in the search field of the YouTube App to initiate the search.
Step 7: After finding the icon resource-id, use the waitForExists method to make the element clickable from the moment it is visible.
UiObject icon = mDevice.findObject(new UiSelector().resourceId("com.google.android.youtube:id/menu_search"));
icon.waitForExists(TIMEOUT);
icon.click();
Step 8: Use the setText method to type the desired search keyword.
UiObject editText = mDevice.findObject(new UiSelector().text("Search YouTube"));
editText.waitForExists(TIMEOUT);
editText.setText("browserstack");
mDevice.pressEnter();
In this example, we’ve used a single criterion for searching web elements on the screen. However, It is also possible to combine a few more elements as seen in the code below
UiObject video = mDevice.findObject(new UiSelector()
.resourceId("com.google.android.youtube:id/title")
.text("The pesticide paradox"));
Step 9: At last, let’s now wait a few seconds and start watching the video.
synchronized (mDevice) {
mDevice.wait(40000);
}Executing Android UI Automator Test Case
You can run UIAutomator tests either from Android Studio or from the command line. Ensure to specify AndroidJUnitRunner as the default instrumentation runner in the project.
Advantages of UI Automator Framework
UI Automator supports interaction with Android device UI components at both the application and system levels. Here are some of the core advantages of using the UI Automator framework:
- Cross-App UI Testing: UI Automator can interact with multiple apps during a single test flow that involves system settings, notifications, or third-party apps.
- Access to System UI Elements: UI Automator directly supports the system-level components such as permission dialogs, notifications, quick settings, and more.
- No App Context Needed: It works independently, i.e, interaction with other apps are possible even if they weren’t developed in-house or are not part of the same app under test.
- Integrates with AndroidX Test: Works effectively with AndroidX Test libraries and test runners that supports smoother automation workflows with other testing tools like Espresso or JUnit.
- Runs on Real Devices and Emulators: Works perfectly across real devices and emulators without requiring root access or special device configurations.
Limitations of UI Automator Framework
While UI Automator is powerful for system-level and cross-app testing, developers still need to face certain limitations, such as:
- Limited to Android API 18 and Above: UI Automator is supported only on devices running Android 4.3 (API level 18) or higher. This restricts its usability on older devices, which are still available in the market.
- Slower Compared to Espresso: UI Automator operates at the device UI layer, which makes it slower than frameworks like Espresso, which interact more directly with app components.
- Limited Gesture Support: It lacks support for more complex multi-touch interactions like pinch, zoom, drag-and-drop, etc.
- Weaker Synchronization with App Threads: It doesn’t automatically synchronize with the UI threads or background tasks. This means developers have to explicitly add a wait condition like Until.hasObject(…) to ensure reliable test execution.
BrowserStack offers 3000+ real browsers and devices for manual and automation testing. QAs can test Android apps on thousands of real mobile devices, both latest and legacy. They can integrate seamlessly with the BrowserStack cloud via numerous testing frameworks – Appium, Espresso, XCUITest, or EarlGrey.
Testers can execute Android app automation to verify multiple native device features – geolocation testing, push notifications, preloaded images, network simulation, in-app purchase, time zones, languages, etc.
Simply sign up for free, select the device-operating combination required and start testing. The entire process is built to provide convenience, efficiency, speed, and accuracy to testers and developers alike. With a wide range of integrations and debugging tools, BrowserStack is built to not just identify bugs, but resolve them quickly.
Run Appium Tests on Real Devices
How to Use UI Automator for Android UI Testing with Kotlin and AndroidX?
UI Automator is a powerful testing framework provided by Google for Android UI testing. It allows interaction with both your app and system UI components, making it ideal for testing conditions like permissions, notifications, and multi-app workflows. When combined with Kotlin and AndroidX Test, it offers a concise, modern approach to writing end-to-end UI tests.
Here are some of the steps to be followed for using UI Automator with Kotlin and AndroidX:
Step 1: Set Up Your Project for UIAutomator
Firstly, add all the dependencies to your build.gradle (app-level) file:
dependencies {

androidTestImplementation("androidx.test.uiautomator:uiautomator:2.2.0")

androidTestImplementation("androidx.test:core:1.5.0")

androidTestImplementation("androidx.test.ext:junit:1.1.5")

androidTestImplementation("androidx.test.espresso:espresso-core:3.5.1")

}
Step 2: Create an Android Instrumentation Test Class
Now, create a new test class inside the androidTest directory. Consider the file location as src/androidTest/java/com/yourpackage/ExampleUiAutomatorTest.kt.
package com.yourpackage


import androidx.test.ext.junit.runners.AndroidJUnit4

import androidx.test.platform.app.InstrumentationRegistry

import androidx.test.uiautomator.By

import androidx.test.uiautomator.UiDevice

import androidx.test.uiautomator.Until

import org.junit.Before

import org.junit.Test

import org.junit.runner.RunWith


@RunWith(AndroidJUnit4::class)

class ExampleUiAutomatorTest {


private lateinit var device: UiDevice


@Before

fun setUp() {

     device = UiDevice.getInstance(InstrumentationRegistry.getInstrumentation())

     device.pressHome()

}


@Test

fun openAppAndClickButton() {

     val context = InstrumentationRegistry.getInstrumentation().targetContext

     val packageName = context.packageName


     val intent = context.packageManager.getLaunchIntentForPackage(packageName)

     intent?.addFlags(Intent.FLAG_ACTIVITY_CLEAR_TASK)

     context.startActivity(intent)


     device.wait(Until.hasObject(By.pkg(packageName).depth(0)), 5000)


     val startButton = device.findObject(By.text("Start"))

     startButton.click()

}

}
Step 3: Use Selectors to Locate UI Elements
To help you locate UI elements, UI Automator supports efficient selectors through the BySelector API, such as:
- By.text(“…”) – locate by visible text
- By.desc(“…”) – for content-description
- By.res(“com.example:id/button”) – by resource ID
- By.clazz(“android.widget.Button”) – by class name
Combine multiple selectors to simplify the search and target the correct UI element. For example, to find a button with a specific resource ID and class name, you can merge the selectors like this:
val button = device.findObject(By.res("com.example:id/start_button").clazz("android.widget.Button"))

button.click()
Step 4: Run the Test
You can run the test in two ways:
- From Android Studio: Right-click on the test class or method and then select Run ‘ExampleUiAutomatorTest’. Choose a physical device or emulator with API 18+.
- From the command line: Run the command line:
./gradlew connectedAndroidTest
Step 5: Wait for UI Changes
Use device.wait(…) with a condition and timeout to wait for elements or changes in the UI before interacting with elements.
device.wait(Until.hasObject(By.text("Next Screen")), 3000)Here, the next screen appears with changes after 3 seconds.
Step 6: Work with System UI
In real-world testing, there can be a need to handle system-level elements like permission popups, notification panels, or quick settings toggles. In this case, UI Automator can interact with both your app and the system UI, which most of the testing tools can’t do effectively.
These are mainly useful in cases like:
- App requests permissions like location, camera, etc.
- Validation of behavior initiated by the notifications.
- Test interactions involving system dialogs or settings.
Example 1: Dismissing a permission dialog
val allowButton = device.findObject(By.text("Allow"))

allowButton?.click()
Example 2: Opening notifications
device.openNotification()

device.wait(Until.hasObject(By.text("New Message")), 3000)Why Test Android Apps Using BrowserStack App Automate?
Testing Android apps on different devices, screen sizes, and OS versions is important for delivering a seamless user experience. However, maintaining such a diverse test environment in-house is costly and complex. This is where BrowserStack App Automate becomes a feasible solution. It allows you to run automated tests on real Android devices that are hosted on the cloud.
By integrating with popular testing frameworks like Appium, Espresso, XCUITest, and UI Automator, App Automate offers better compatibility with your existing test suite. It becomes ideal for catching bugs that emulators might miss.
Key Features of BrowserStack App Automate
Some of the main features of using BrowserStack App Automate are:
- Real Device Cloud: Run automated tests on a wide range of real Android devices with different OS versions, screen resolutions, configurations, etc.
- Framework Compatibility: Supports Appium, Espresso, UI Automator, XCUI Test, and Detox, allowing you to use the test framework of your choice without changes.
- CI/CD Integration: Integrates with popular CI/CD tools like Jenkins, GitHub Actions, GitLab, CircleCI, and Azure DevOps for automated workflows.
- Device Logs & Video Recording: Get detailed device logs, video recordings, screenshots, and performance data for every test session, which is used for debugging failures.
- Validate native device features: Testers can execute Android app automation to verify multiple native device features – geolocation testing, push notifications, preloaded images, network simulation, in-app purchase, time zones, languages, etc.
Conclusion
Automated UI testing helps to check that Android apps function perfectly across diverse devices and user conditions. Tools like UI Automator support both app and system UI, making them ideal for end-to-end testing.
While it has certain limitations, pairing it with modern frameworks and cloud platforms boosts test coverage and reliability. Advanced tools like BrowserStack App Automate provide real device access, seamless integrations, and detailed test reports by maintaining device configurations.


