Integrate GitHub Actions with BrowserStack
Learn how to integrate your GitHub Actions workflow with the BrowserStack device cloud to run all your Cypress tests.
You can find the BrowserStack GitHub Actions in the GitHub Marketplace. The two Actions are used to set up the required environment variables in the runner environment and set up BrowserStack Local tunnel connection which will be used to route all browser traffic from BrowserStack’s device cloud to the runner environment which hosts your web application.
In this guide, we will cover the following sections:
- Set up BrowserStack Username and Access-key as GitHub Action Secrets
- Set up a workflow to run your tests on BrowserStack
- Use BrowserStack’s
setup-envGitHub Action to set up useful environment variables - Sample test script depicting the use of environment variables as BrowserStack capabilities
- Sample GitHub workflow showing a BrowserStack test
Set up GitHub secrets in your repository
You need to have username and access-key from BrowserStack to be able to run tests on the BrowserStack infrastructure. This section shows how to set them as Secrets in your GitHub repository. You can sign-up for free trial if you do not have an existing account.
If you want to test your open source project on BrowserStack, then sign-up here for lifetime free access to all our products.

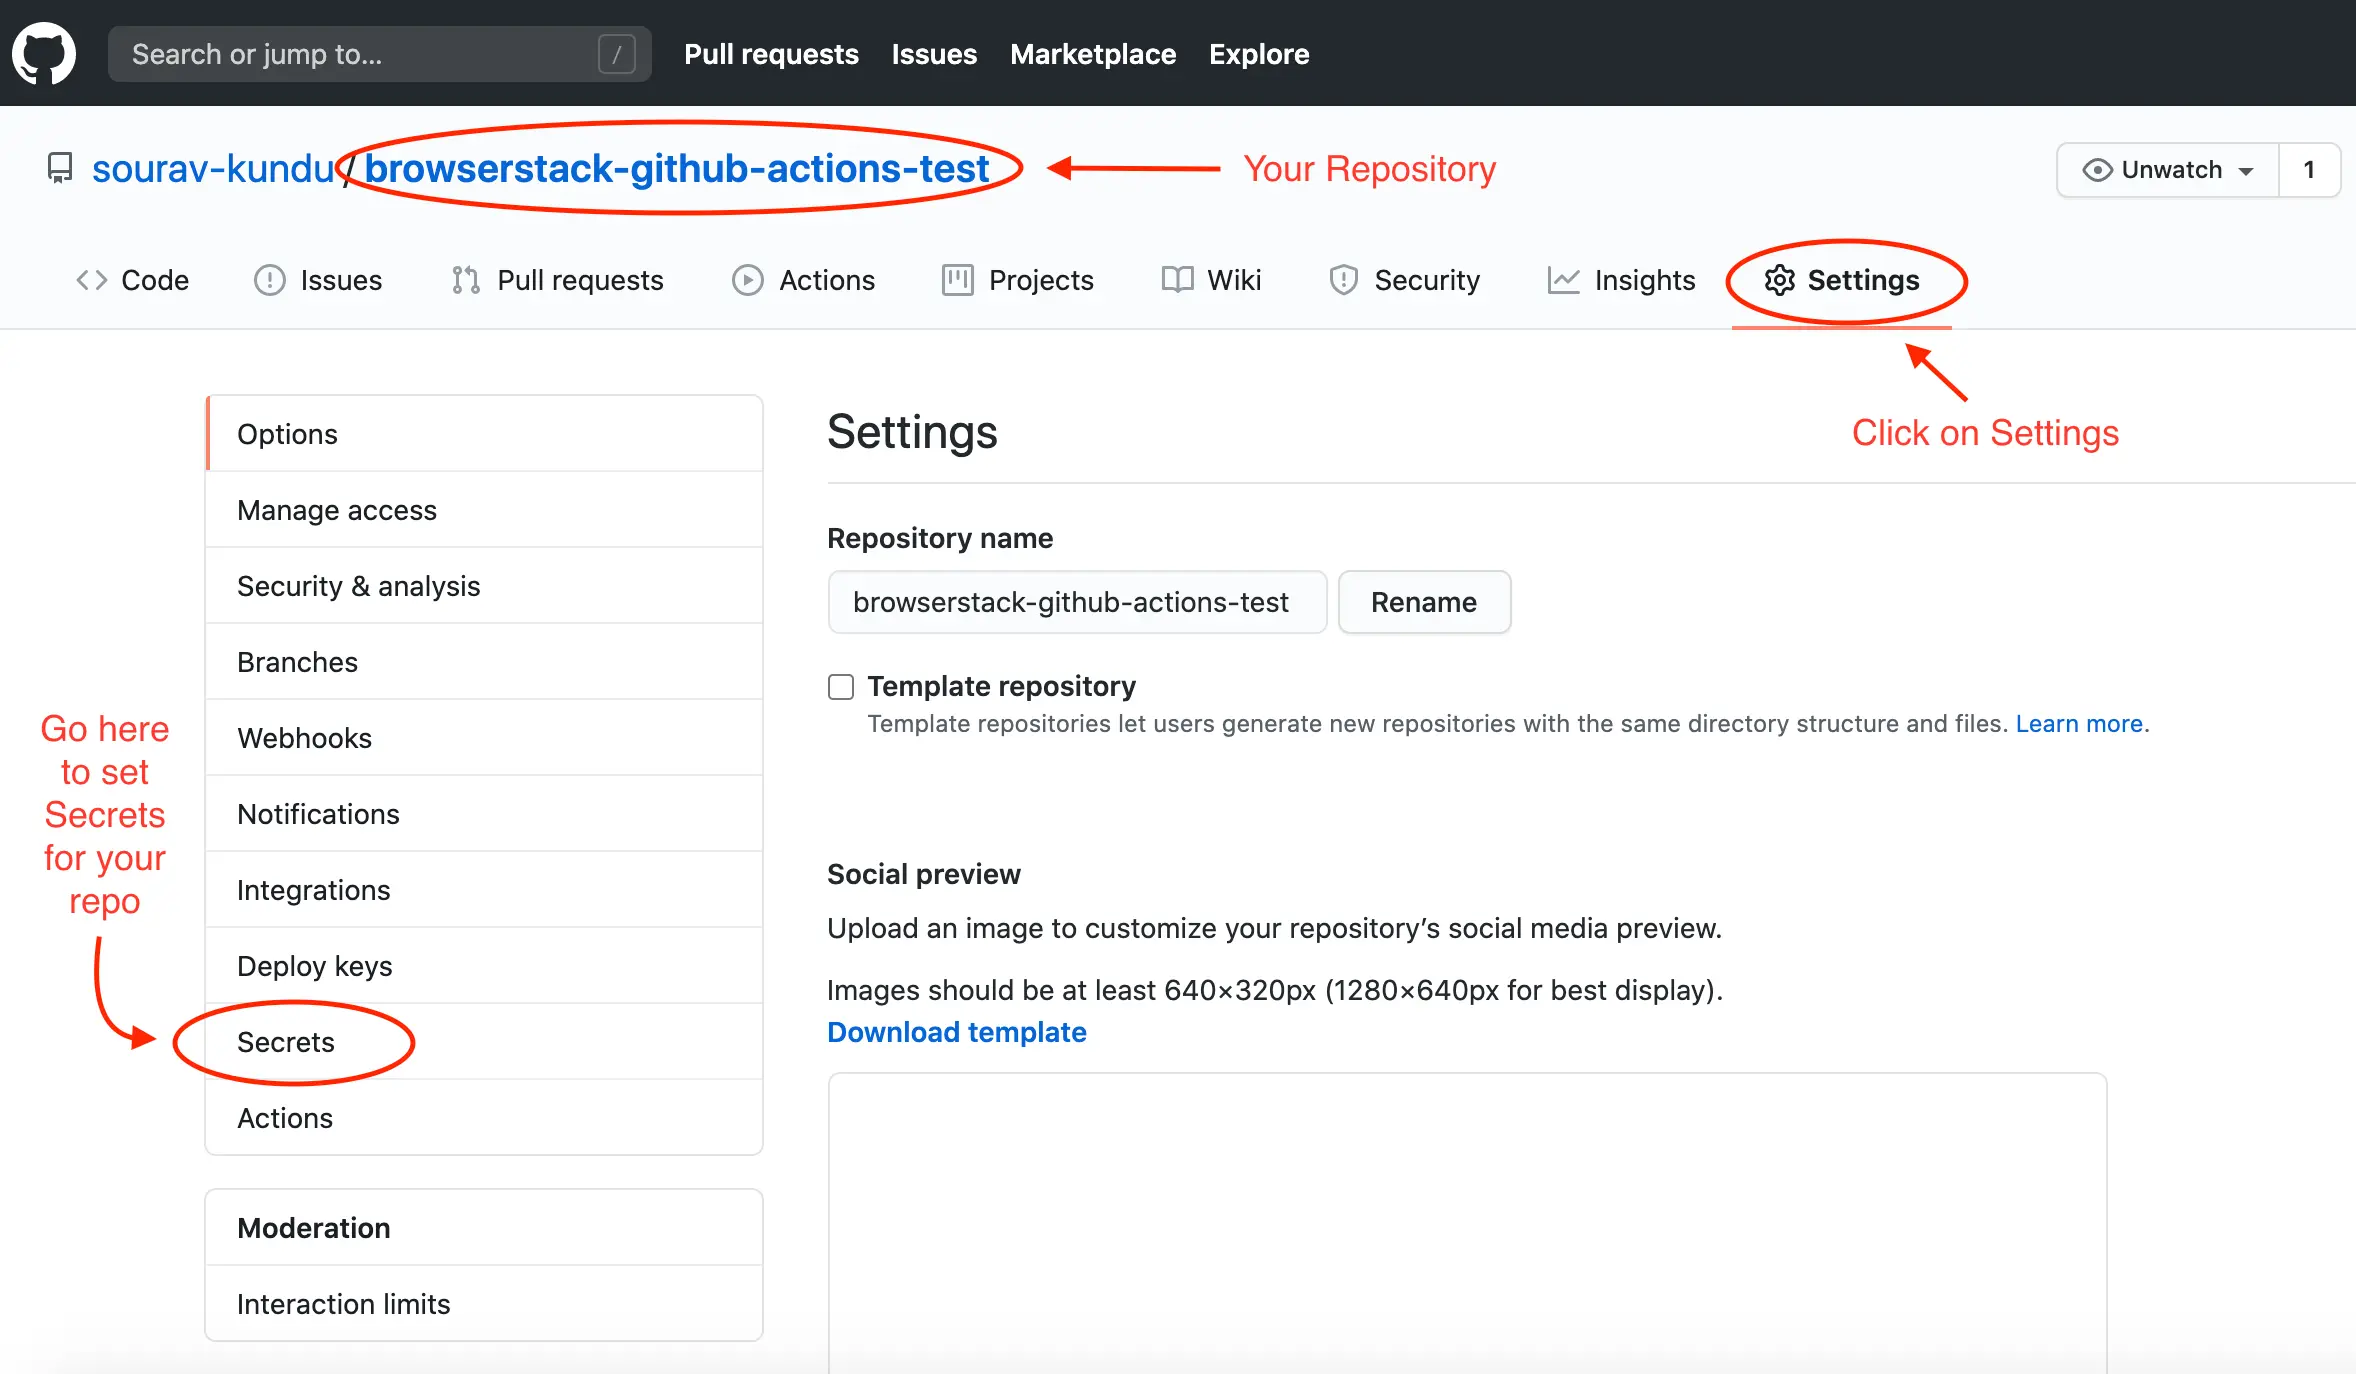
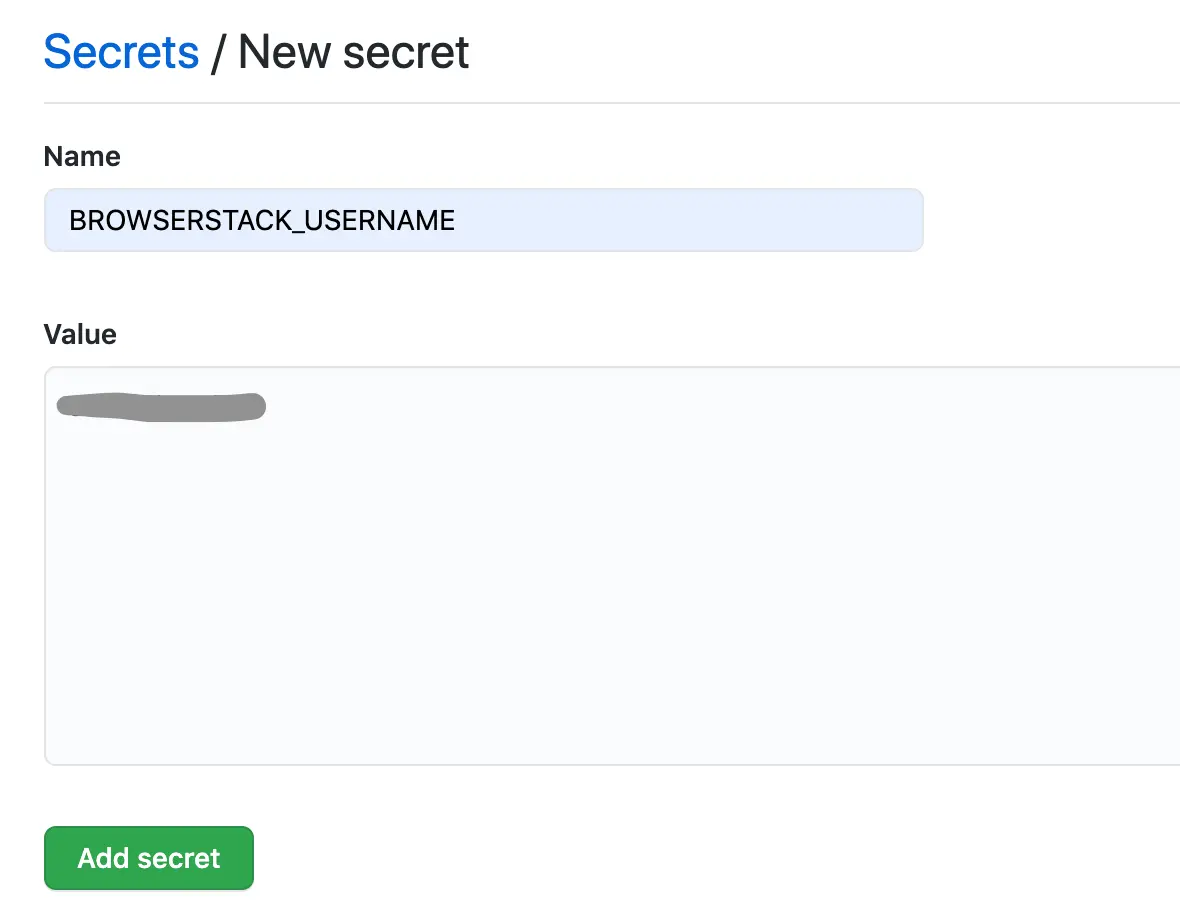
As the image above suggests, navigate to Settings in your repository and there you will find the Secrets option in the left-hand pane. Navigate to Secrets and add new secrets as shown in the following image:

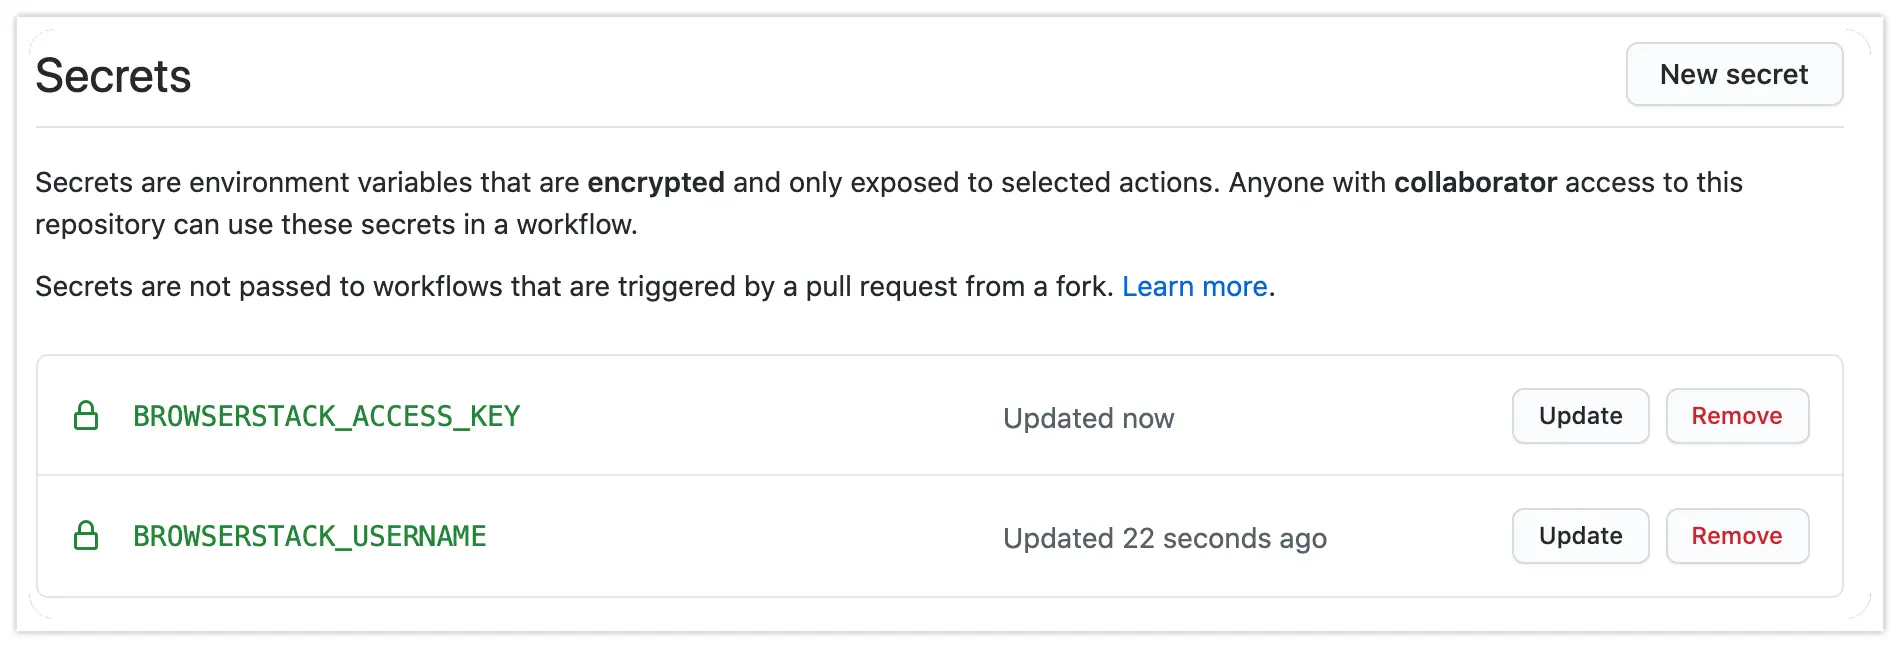
Add YOUR_USERNAME as the BROWSERSTACK_USERNAME secret and similarly, add YOUR_ACCESS_KEY as the BROWSERSTACK_ACCESS_KEY secret. After competing these two steps, the secrets page should contain entries like this:

Set up a GitHub workflow to run BrowserStack tests
Perform the following steps to run BrowserStack tests from GitHub Actions (Check out the sample GitHub workflow):
- Create the workflow file(s)
<filename>.ymlin the.github/workflowsdirectory in your repository. (Check out how to create GitHub Workflow files) - The starting of the workflow specifies on what events the workflow must run. We recommend you to run on both
pushandpull_requestso that you have a 1:1 build mapping against every commit - You can run on any GitHub Actions runner e.g.
ubuntu-latest(You can also host your own runners) - In the initial workflow steps, you must build your web application and start the web server on the runner
- Thereafter, invoke
setup-envBrowserStack Action to set up environment variables in the runner - Run the test scripts from the workflow. (You can visit the Sample Test section to see how you can use the environment variables in your test script to set BrowserStack capabilities)
Use BrowserStack GitHub Actions in your workflow
You can find the BrowserStack GitHub Actions in the GitHub Marketplace. The following two Actions are used to set up the required environment variables in the runner environment and set up BrowserStack Local tunnel connection which will be used to route all browser traffic from BrowserStack’s device cloud to the runner environment which hosts your web application.
You can find the Action’s GitHub repository. This Action should be invoked from the runner environment before any other BrowserStack Action is invoked. This Action sets up the following environment variables in the runner environment which will later be used by other BrowserStack Actions and also in your test scripts to set BrowserStack specific capabilities:
-
BROWSERSTACK_BUILD_NAME: By default, this variable will be populated with a name for your build consisting of workflow run specific data. For e.g.
Onpull_request→[<Branch-Name>] PR <PR#>: <PR-title> [Workflow: Workflow#]will be set -
BROWSERSTACK_PROJECT_NAME: By default, the repository name will be set -
BROWSERSTACK_USERNAME: Input ofusernamewill be set, to be used in test scripts. -
BROWSERSTACK_ACCESS_KEY: Input ofaccess-keywill be set, to be used in test scripts.
Inputs
-
username: (Mandatory) Your BrowserStack username to be passed ideally as a GitHub Secret -
access-key: (Mandatory) Your BrowserStack access-key to be ideally passed as a GitHub Secret -
build-name: (Optional) Sets the environment variableBROWSERSTACK_BUILD_NAME- Default is BUILD_INFO which will be replaced with meaningful workflow related information
- You can pass any string. E.g.
build-name: 'my-string' - You can also use a string along with the keyword BUILD_INFO in the input
E.g.build-name: 'string1 - BUILD_INFO - string2'
-
project-name: (Optional) Sets the environment variableBROWSERSTACK_PROJECT_NAME- Default is REPO_NAME which will be replaced with the repository name
- You can pass any string that you want to set as the
BROWSERSTACK_PROJECT_NAME
E.g.project-name: 'My Project Name Goes Here'
Usage
      - name: 'BrowserStack Env Setup'
        uses: 'browserstack/github-actions/setup-env@master'
        with:
          username:  ${{ secrets.BROWSERSTACK_USERNAME }}
          access-key: ${{ secrets.BROWSERSTACK_ACCESS_KEY }}
          build-name: 'BUILD_INFO'
          project-name: 'REPO_NAME'
Or, pass the required arguments only:
      - name: 'BrowserStack Env Setup'
        uses: 'browserstack/github-actions/setup-env@master'
        with:
          username:  ${{ secrets.BROWSERSTACK_USERNAME }}
          access-key: ${{ secrets.BROWSERSTACK_ACCESS_KEY }}
- The setup-env Action is a pre-requisite for any other BrowserStack related Actions.
- This action should be invoked prior to the execution of tests on BrowserStack to be able to utilise the environment variables in your tests.
- You have to use the environment variables set in this Action in your test script (Sample test script).
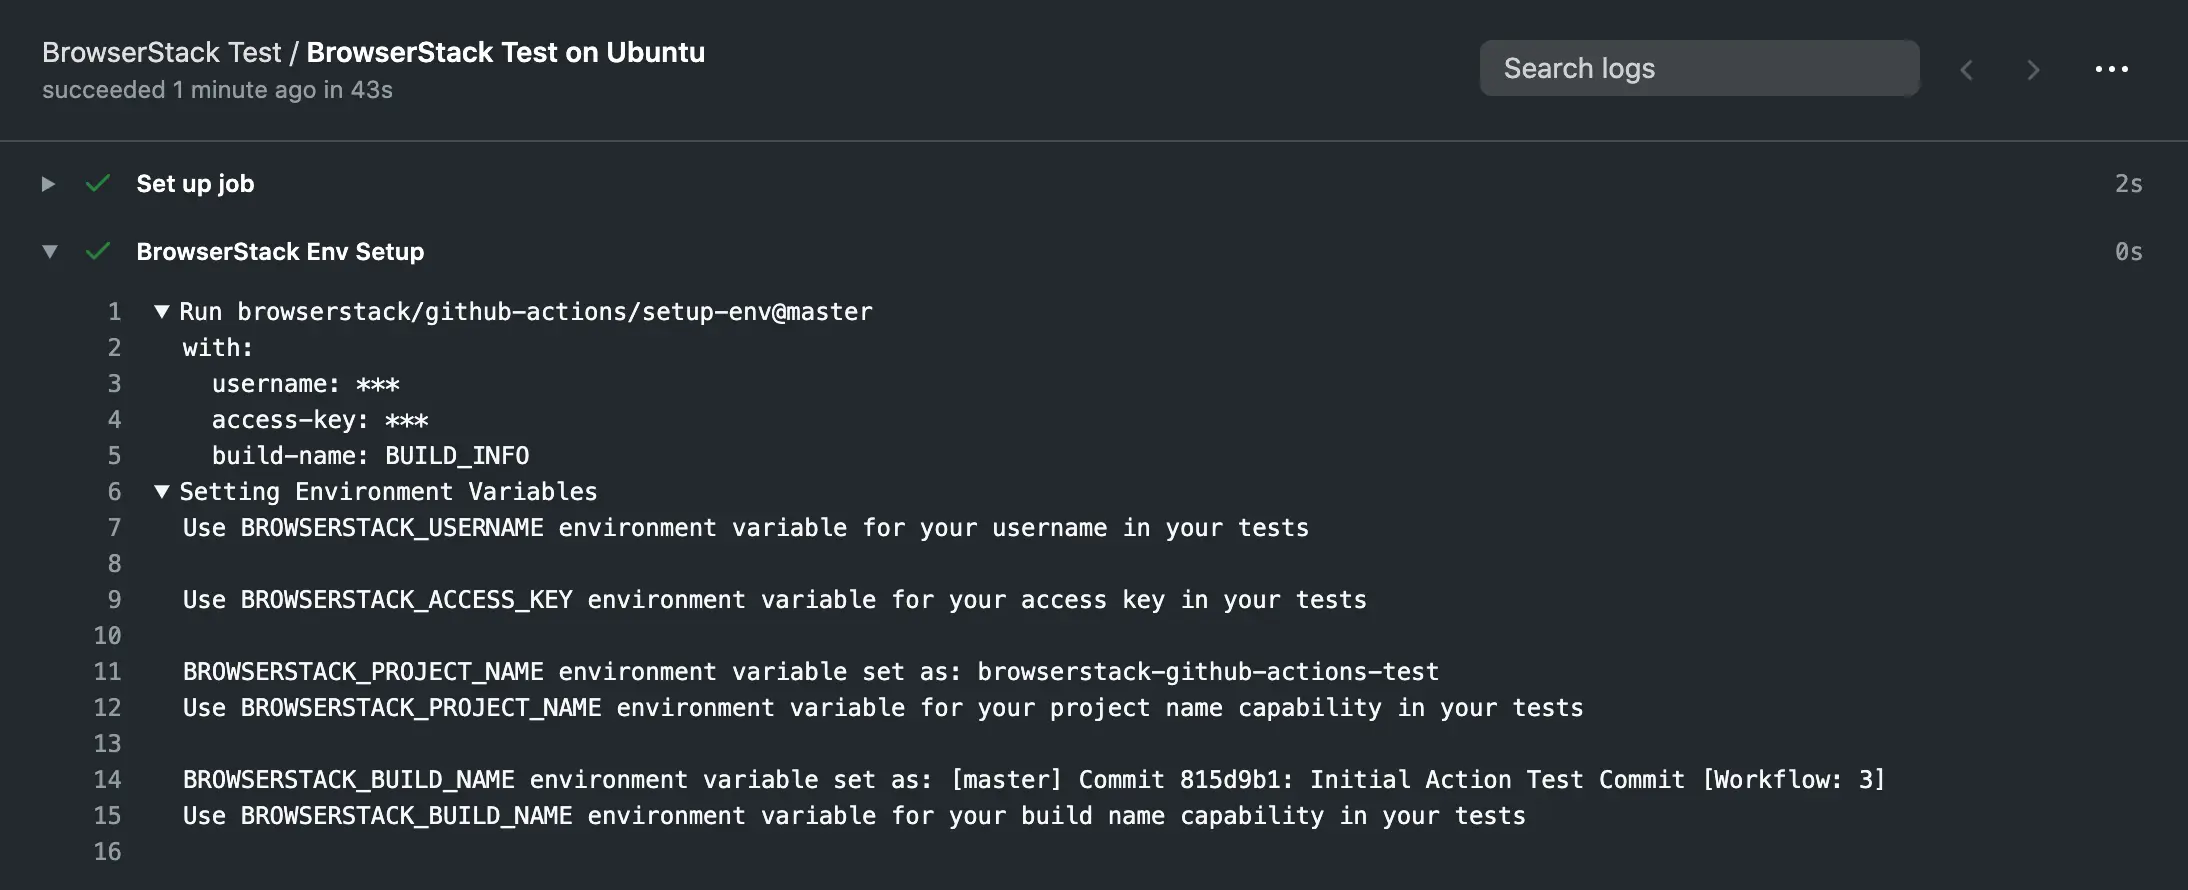
The console logs of GitHub Workflow, on running this Action is as follows:

Sample browserstack.json Configuration file for integration
You can use the following configuration file in your tests to integrate your Cypress test suite with BrowserStack. Integrate your existing Cypress tests with BrowserStack
{
  "browsers": [{
      "browser": "chrome",
      "os": "Windows 10",
      "versions": ["latest", "latest - 1"]
    },
  ],
  "run_settings": {
    "cypress_config_file": "./cypress.config.js",
    "cypress_version": "12.3",
    "npm_dependencies": {
      "cypress": "12.3",
      "npm-package-you-need-to-run-tests-1": "^1.2.1",
      "npm-package-you-need-to-run-tests-2": "^7.1.6-beta.13"
    },
    "project_name": "Cypress sample build",
    "build_name": "Build no: 1",
    "parallels": 5,
    "exclude": ["some-folder/test.js", "static/*.pdf"]
  }
}
Sample GitHub workflow showing a BrowserStack test
name: 'BrowserStack Test'
on: [push, pull_request]
jobs:
  ubuntu-job:
    name: 'BrowserStack Test on Ubuntu'
    runs-on: ubuntu-latest  # Can be self-hosted runner also
    steps:

      - name: 'BrowserStack Env Setup'  # Invokes the setup-env action
        uses: browserstack/github-actions/setup-env@master
        with:
          username:  $
          access-key: $

# The next 3 steps are for building the web application to be tested and starting the web server on the runner environment
      - name: 'Checkout the repository'
        uses: actions/checkout@v2

      - name: 'Building web application to be tested'
        run: npm install

      - name: 'Running application under test'
        run: ./node_modules/.bin/http-server -p 8099 &

      - name: 'Installing browserstack-cypress-cli'
        run: npm install -g browserstack-cypress-cli

      - name: 'Running test on BrowserStack with local testing enabled'  # Invokes the actual test script that would run on BrowserStack browsers
        run: - run: BROWSERSTACK_LOCAL=true browserstack-cypress run # See sample test script above
If you are building and running your web application in a separate workflow job and the tests on a different job, then (this is NOT the recommended way of integrating GitHub Actions with the BrowserStack cloud):
- You need to invoke the
browserstack/github-actions/setup-env@masterGitHub Action in the job where your application is being built and run - You need to invoke the
browserstack/github-actions/setup-env@masterGitHub Action also in the job where test scripts will run because this Action sets up the environment variablesBROWSERSTACK_USERNAME,BROWSERSTACK_ACCESS_KEY,BROWSERSTACK_BUILD_NAMEandBROWSERSTACK_PROJECT_NAME, which are to be used in your test scripts
Local testing Setup
You can set up local testing using the following methods:
Make changes in the BrowserStack configuration file:
Add the following parameter to the Browserstack.json file
...
{
  "connection_settings": {
    "local": true,
    "local_mode": "always-on"
  }
}
...
Set the BROWSERSTACK_LOCAL environment variable to true inside the workflow file:
...
  #Setting BROWSERSTACK_LOCAL to true before executing the test
  - run: BROWSERSTACK_LOCAL=true browserstack-cypress run
...
Additional References
Below are some quick links for your ready reference:
- Migrate your existing test-suite to run on BrowserStack
- Get started with Selenium testing in the language/framework of your choice
- Name and organise your tests
- If you face errors while trying to start the local binary, visit the link with the relevant error code that you received in the GitHub Actions console:
We're sorry to hear that. Please share your feedback so we can do better
Contact our Support team for immediate help while we work on improving our docs.
We're continuously improving our docs. We'd love to know what you liked
- RESOURCES
We're sorry to hear that. Please share your feedback so we can do better
Contact our Support team for immediate help while we work on improving our docs.
We're continuously improving our docs. We'd love to know what you liked
Thank you for your valuable feedback!