How to create a custom dashboard
Learn to build a custom dashboard.
Follow these steps to create a custom dashboard.
- Select Dashboards from the menu and click Create dashboard.
- Select a widget from the options or click View more widgets.
- Select a widget you want to add to your dashboard. In this example, the Failure Categories widget is selected.
- Configure the widget using the available options and click Done. Each widget has a different set of configurations. In the Failure Categories widget, you can set a widget name, add a description, choose a visualization, include or exclude failure categories, and add filters.
- Click Add Widgets to include more widgets in your dashboard. Repeat Step 3 to Step 4 until you have added all the widgets you need in your custom dashboard. You can also rearrange or resize the widgets according to your preference.
- Click Save and finish.
- Give a name to the dashboard. If you want the dashboard to be accessible to everyone in your organization, switch on the Pubic dashboard toggle button. Click Done.
Clone widgets
If you need more than one widget of the same type on a custom dashboard while you build or edit a dashboard, you can use the clone option to build it much faster. These widgets of the same type could be to track data from different projects, builds, users, etc.
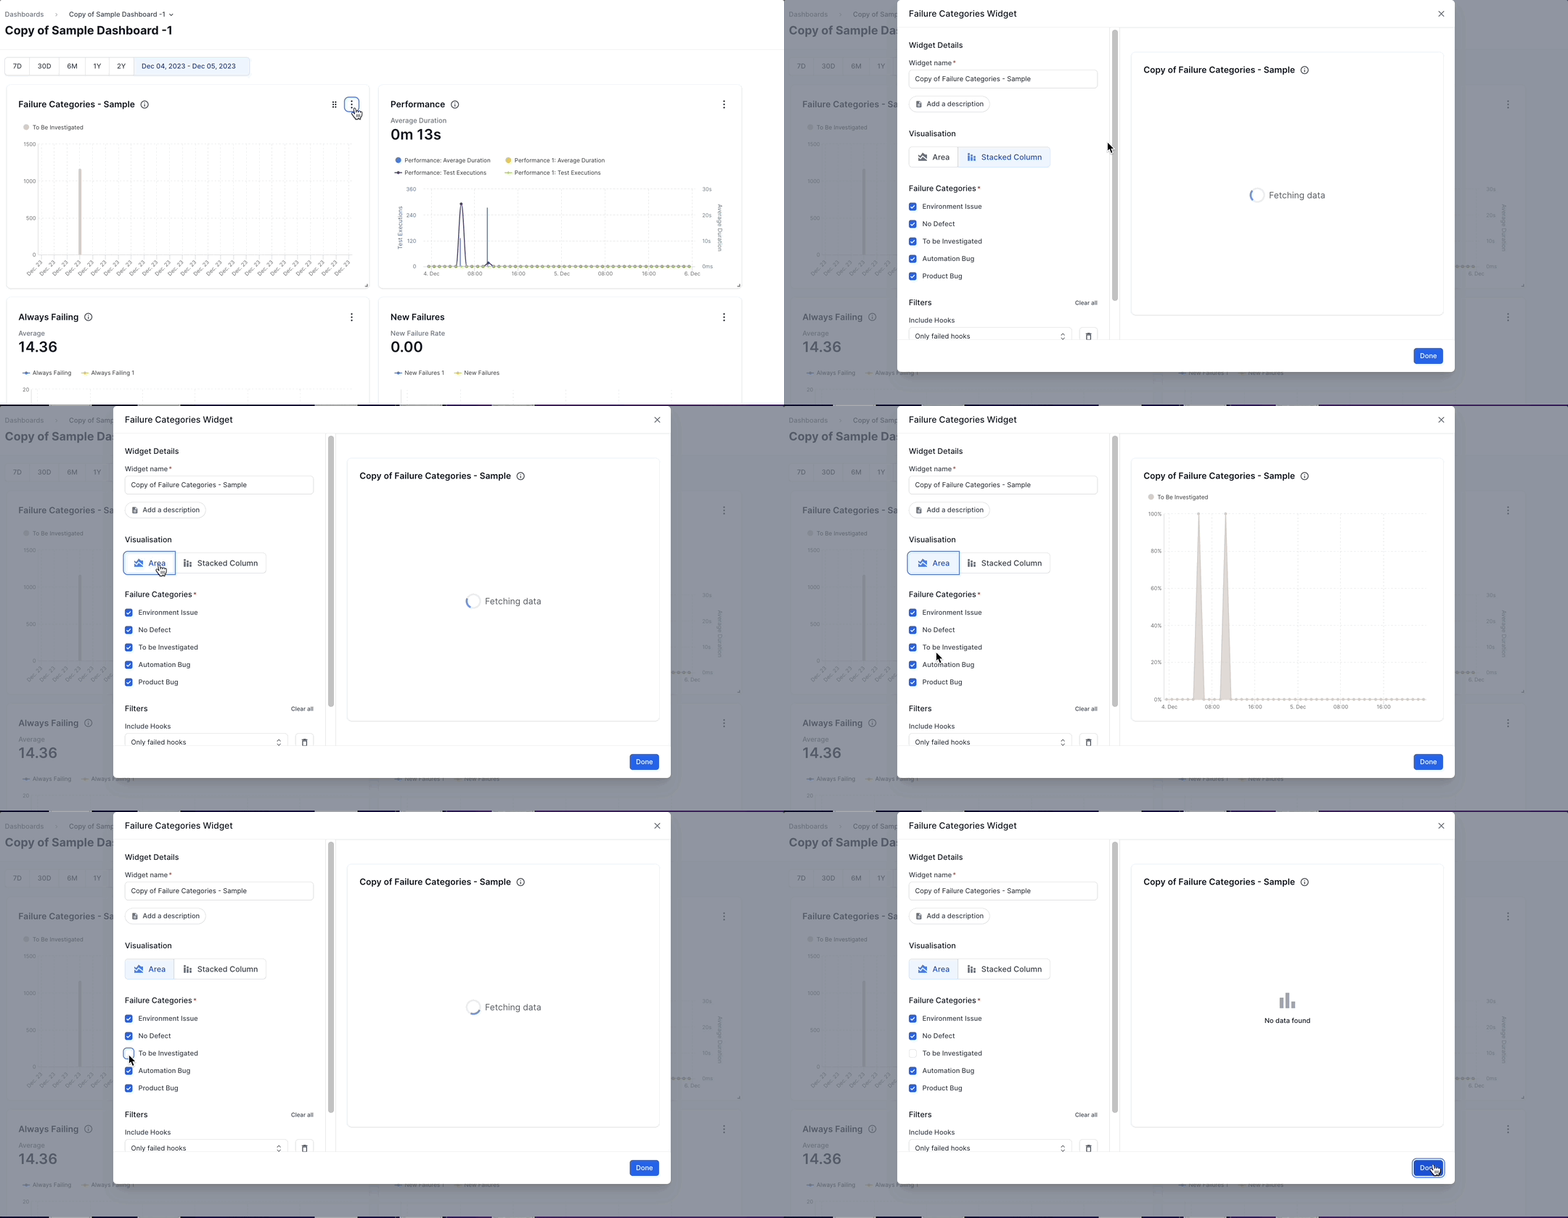
Follow these steps to clone a widget while building or modifying a custom dashboard:
- Click the kebab menu on the right-hand side of a widget and select Clone.
- Give the new widget a suitable name. Configure the widget using the available options and click Done.
- Click Save.
You can also view the steps in the following GIF.

The new widget gets added to the custom dashboard.
Clone dashboards
If you are building a new custom dashboard which is quite similar to an existing dashboard, you can use the clone option to build it much faster.
Follow these steps to clone a custom dashboard:
- Select Dashboards from the menu and click the dashboard you want to clone from.
- Click the kebab menu on the right-hand side and select Clone dashboard.
- Name the cloned dashboard appropriately.
- Switch the Public dashboard toggle button on or off if you want to modify the access level of the dashboard.
- Click Done.
A copy of the dashboard gets created. You can edit the dashboard to fine-tune the new dashboard according to your requirements.
We're sorry to hear that. Please share your feedback so we can do better
Contact our Support team for immediate help while we work on improving our docs.
We're continuously improving our docs. We'd love to know what you liked
We're sorry to hear that. Please share your feedback so we can do better
Contact our Support team for immediate help while we work on improving our docs.
We're continuously improving our docs. We'd love to know what you liked
Thank you for your valuable feedback!