XPath in Appium: Tutorial
By Mohammed Waseem, Community Contributor - October 17, 2022
A web application, native or hybrid application, consists of various elements that make up the entire user interface for that particular application. During the testing, the automation tools make use of locators that helps in identifying a particular element in an application. These locators in Appium can range from a regular class name, accessibility ID, Xpath, etc. In this article, we will discuss how to use XPath in Appium to locate elements while writing test scripts.
What is XPath?
Before getting into the specifics, it is necessary to understand what exactly an XPath is and how it helps as a locator.
XPath is nothing but XML Path or an expression language that is used to query or transform XML documents. The XPath consists of the following properties:
- One of the many ways to locate UI elements in web or mobile applications
- Xpath is a World Wide Web consortium recommendation.
- Xpath has a path-like syntax that helps in navigating through the UI elements of an application.
Even though Xpath is one of the locators for UI elements, it is not one of the conventional choices of many Quality Assurance professionals or Mobile/Web app testing professionals. Let’s examine some of the advantages and disadvantages of using Xpath in testing.
Advantages and Limitations of using XPath
| Advantages of using Xpath | Limitations of using Xpath |
|---|---|
| Built-in Functions – XPath comes with around 200 built-in functions for string values, boolean values, etc. | If the UI elements of the application constantly change during development. The XPath makes the changes expensive with each build. |
| Xpath allows you to create selectors for complex problems where you can search for elements where only the text is available. | Xpath is untidy and slow compared to other locators for UI elements in an application. |
How do you use Xpath in Appium?
In a conventional setting, you may have to go through the following steps – not necessarily in the exact order.
- Getting the Appium server started
- Creating the desired capabilities
- Choosing the environment, OS, etc.
- Starting up the Emulator through the Android App
- Creating a test script in a different environment
- And making sure all the system dependencies and test dependencies are already installed and running.
Note: Sometimes unforeseen circumstances or mere slight system dependencies can significantly hinder running a simple Appium script.
To avoid this, you can simply use Browserstack App Automate by following the steps written below.
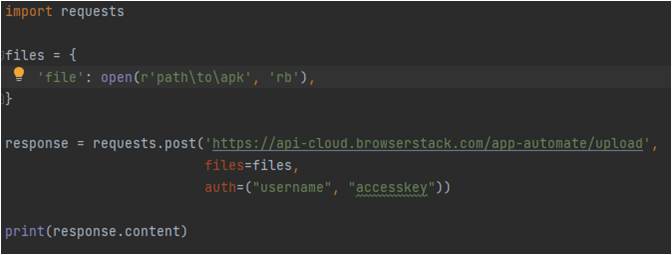
Step 1 Download a sample app, or you can also upload your own application. Using the following Python script.
[python]

import requests


files = {

    'file': open(r'C:\Users\waseem k\Downloads\WikipediaSample.apk', 'rb'),

}


response = requests.post('https://api-cloud.browserstack.com/app-automate/upload',

                         files=files,

                         auth=("mohammadwaseem_r3b75X", "JxCJvHgZM5cxPrir6zHS"))


print(response.content)


[/python]
Step 2 The output will give you a URL for the application that you have uploaded. You will use that URL in the script given below to run a sample build using Appium and Xpath.
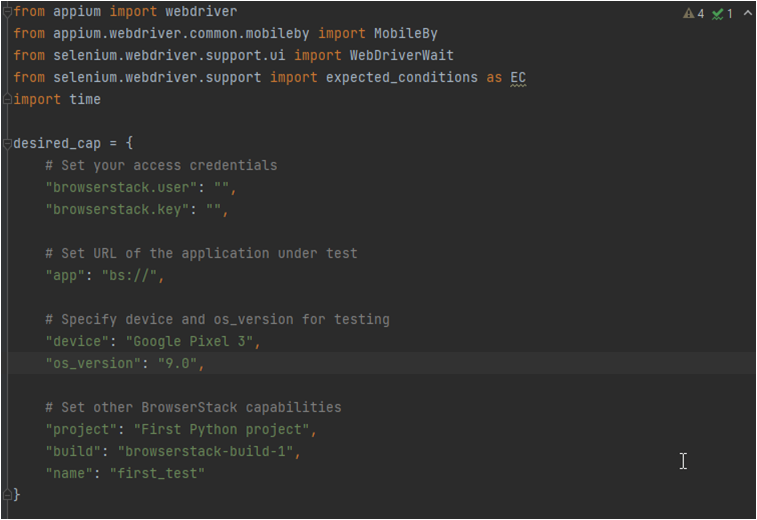
Step 3 Use the following Python Script to run the Appium test using Xpath.
[python]

from appium import webdriver

from appium.webdriver.common.mobileby import MobileBy

from selenium.webdriver.support.ui import WebDriverWait

from selenium.webdriver.support import expected_conditions as EC

import time


desired_cap = {

    # Set your access credentials

    "browserstack.user": "",

    "browserstack.key": "",


    # Set URL of the application under test

    "app": "bs://c700ce60cf13ae8ed97705a55b8e022f13c5827c",


    # Specify device and os_version for testing

    "device": "Google Pixel 3",

    "os_version": "9.0",


    # Set other BrowserStack capabilities

    "project": "First Python project",

    "build": "browserstack-build-1",

    "name": "first_test"

}


[/python]
Note: You will need to install dependencies like Appium in Python and describe the desired capabilities as shown in the script.
Step 4 The sample test will install the application on the device and search for the keyword given in the script. And in the end, add Asserts for the results in the list.
[python]

# Initialize the remote Webdriver using BrowserStack remote URL

# and desired capabilities defined above

driver = webdriver.Remote(

    command_executor="http://hub-cloud.browserstack.com/wd/hub",

    desired_capabilities=desired_cap

)


# Test case for the BrowserStack sample Android app.

# If you have uploaded your app, update the test case here.

search_element = WebDriverWait(driver, 30).until(

    EC.element_to_be_clickable((MobileBy.XPATH, "(//*[(@content-desc='Search Wikipedia')])[1]"))

)

search_element.click()

search_input = WebDriverWait(driver, 30).until(

    EC.element_to_be_clickable((MobileBy.XPATH, "(//*[(@text='Search Wikipedia')])[1]")

))

search_input.send_keys("Browserstack")

time.sleep(5)

search_results = driver.find_element_by_xpath("//*[(@resource-id='org.wikipedia.alpha:id/page_list_item_container')])")

assert (len(search_results) > 0)

# Invoke driver.quit() after the test is done to indicate that the test is completed.

driver.quit()


[/python]
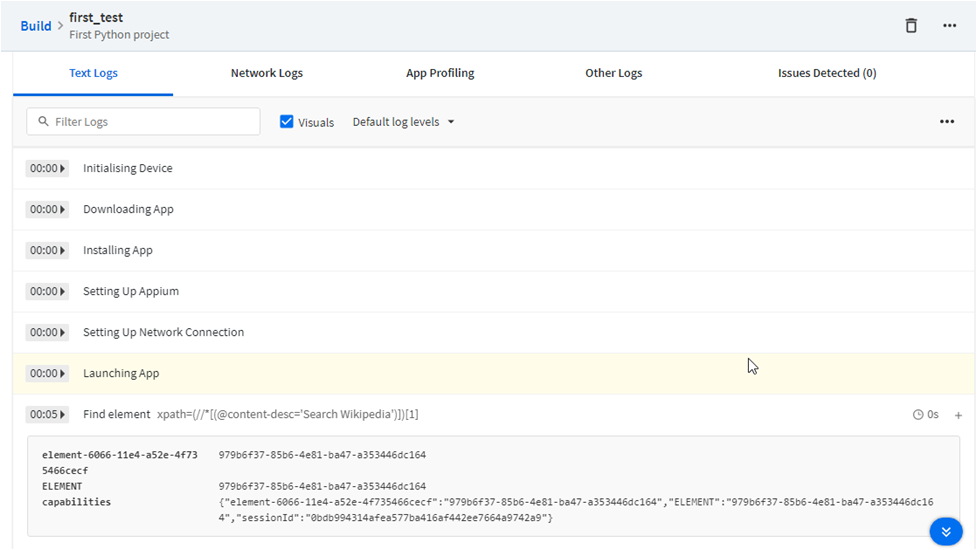
Step 5 You can display the results in the dashboard, as seen below.
Conclusion
There is no hard and fast rule for using any specific selector to locate a UI element in a web or mobile application. So is the case with Xpath, be it in Appium or selenium. As a wise QA professional, you must always rely on project requirements and, based on those, create your testing strategies. Even though XPath in test scripts may not be a wise choice in the QA community, Appium saves the day.
