How to perform Visual Regression Testing using Protractor
By Priyanka Bhat & Ganesh Hegde, Community Contributors - October 21, 2022
Protractor is a NodeJS-based open source test automation tool, managed by Google Team. Protractor uses Selenium Webdriver under the hood. As Protractor wraps Selenium in its framework, it is very easy to use and feature-rich. It is mostly used for End to end testing.
Using a Protractor for Visual Testing makes testing easier and quicker. Visual Testing works by comparing Base screenshots and actual screenshots. Visual Comparision requires less coding knowledge and less effort.
This article explains Visual Regression Testing using Protractor, covering two methods of Visual Validation Testing
- Using protractor-image-comparison NPM package
- Using Protractor with Percy Web-based image comparison tool
Protractor Visual Testing using protractor-image-comparison
Pre-Requisite
Step by Step Guide to using Image Comparison in Protractor
Follow the steps below to perform Visual Regression Tests in Protractor:
Step 1: Install protractor-image-comparison NPM package
Using the below command install the image comparison NPM package
npm install --save protractor-image-comparisonStep 2: Configure Protractor Image Comparison Plugin
Navigate to protractor.config.js, which is typically located in the root of your Project. Add the below code to it.
//protractor.conf.js
const { join } = require('path');
exports.config = {

plugins: [
{
// The module name
package:'protractor-image-comparison',
options: {
baselineFolder: join(process.cwd(), './baseline/'),
formatImageName: `{tag}-{logName}-{width}x{height}`,
screenshotPath: join(process.cwd(), '.tmp/'),
savePerInstance: true,
autoSaveBaseline: true
},
},
],
framework: 'jasmine',
specs: ['./protractor-visualtest.js'],
directConnect: true,
}
In the above code,
- baselineFolder : Baseline image folder name
- formatImageName : Image file name
- screenshotPath : Actual and diff image files path
Once you complete the above set up, write the simple image comparison test.
Step 3: Write the Protractor Visual Test
//protractor-visualtest.js
describe('Protractor Visual Test Demo', () => {
it('Navigate to BrowserStack Homepage', async() => {
await browser.waitForAngularEnabled(false);
await browser.get('https://www.browserstack.com'); await browser.imageComparison.saveScreen('examplePaged', { /* some options*/ });
expect(await browser.imageComparison.checkScreen('examplePaged', { /* some options*/ })).toEqual(0);
});
});
Let’s look at the above code
- await browser.get(‘https://www.browserstack.com’); : Navigates to https://www.browserstack.com
- await browser.imageComparison.saveScreen(‘examplePaged’, { /* some options*/ }); : Takes the screenshots for the screen
- expect(await browser.imageComparison.checkScreen(‘examplePaged’, { /* some options*/ })).toEqual(0); : Compares actual image with the base images
Step 4: Execute Protractor Visual Test
Use the below command to execute your protractor test
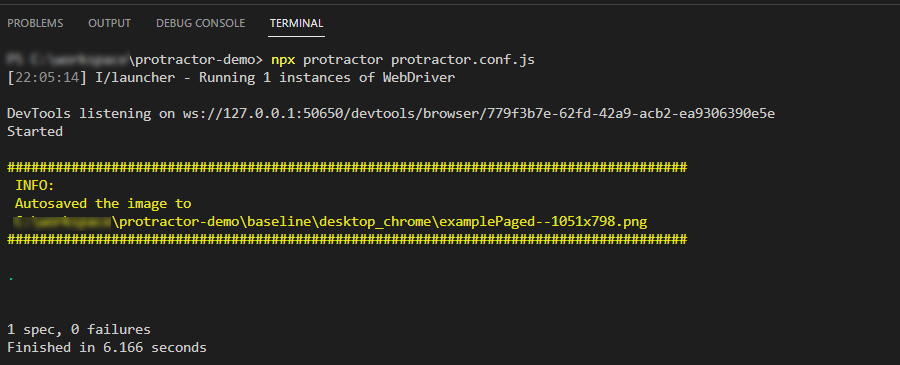
npx protractor protractor.conf.jsThe first time when you execute the test, it captures the baseline screenshot, which helps to compare with actual screenshot in future runs.
Step 5: Run the test again to see the difference.
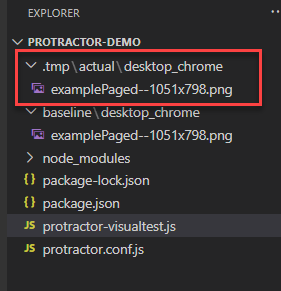
After the second run, you will see the actual image captured in .tmp folder.
If tests are successful, that means no difference between the base screenshot and the actual screenshot, the console log shows the test passed result.
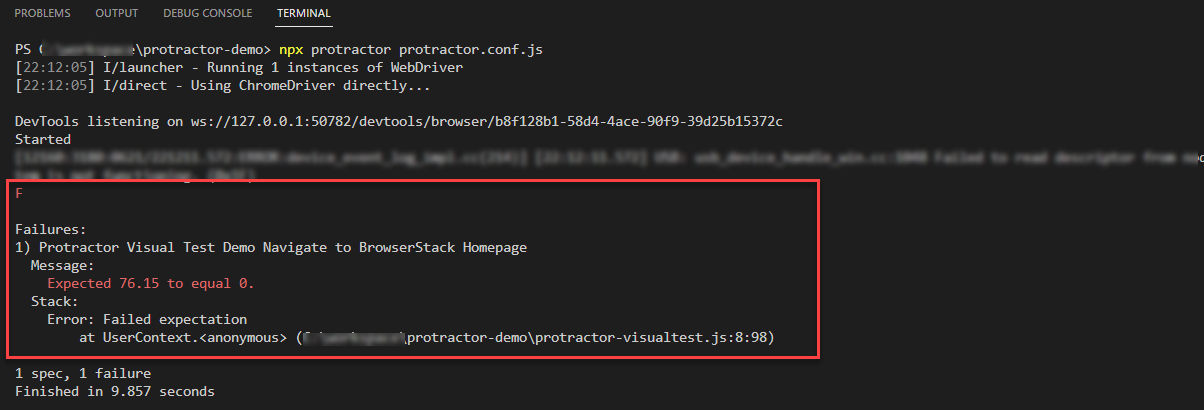
If there are any failures, then the console log shows the failed test result.
Example of Failed Test Result
- Command-line output
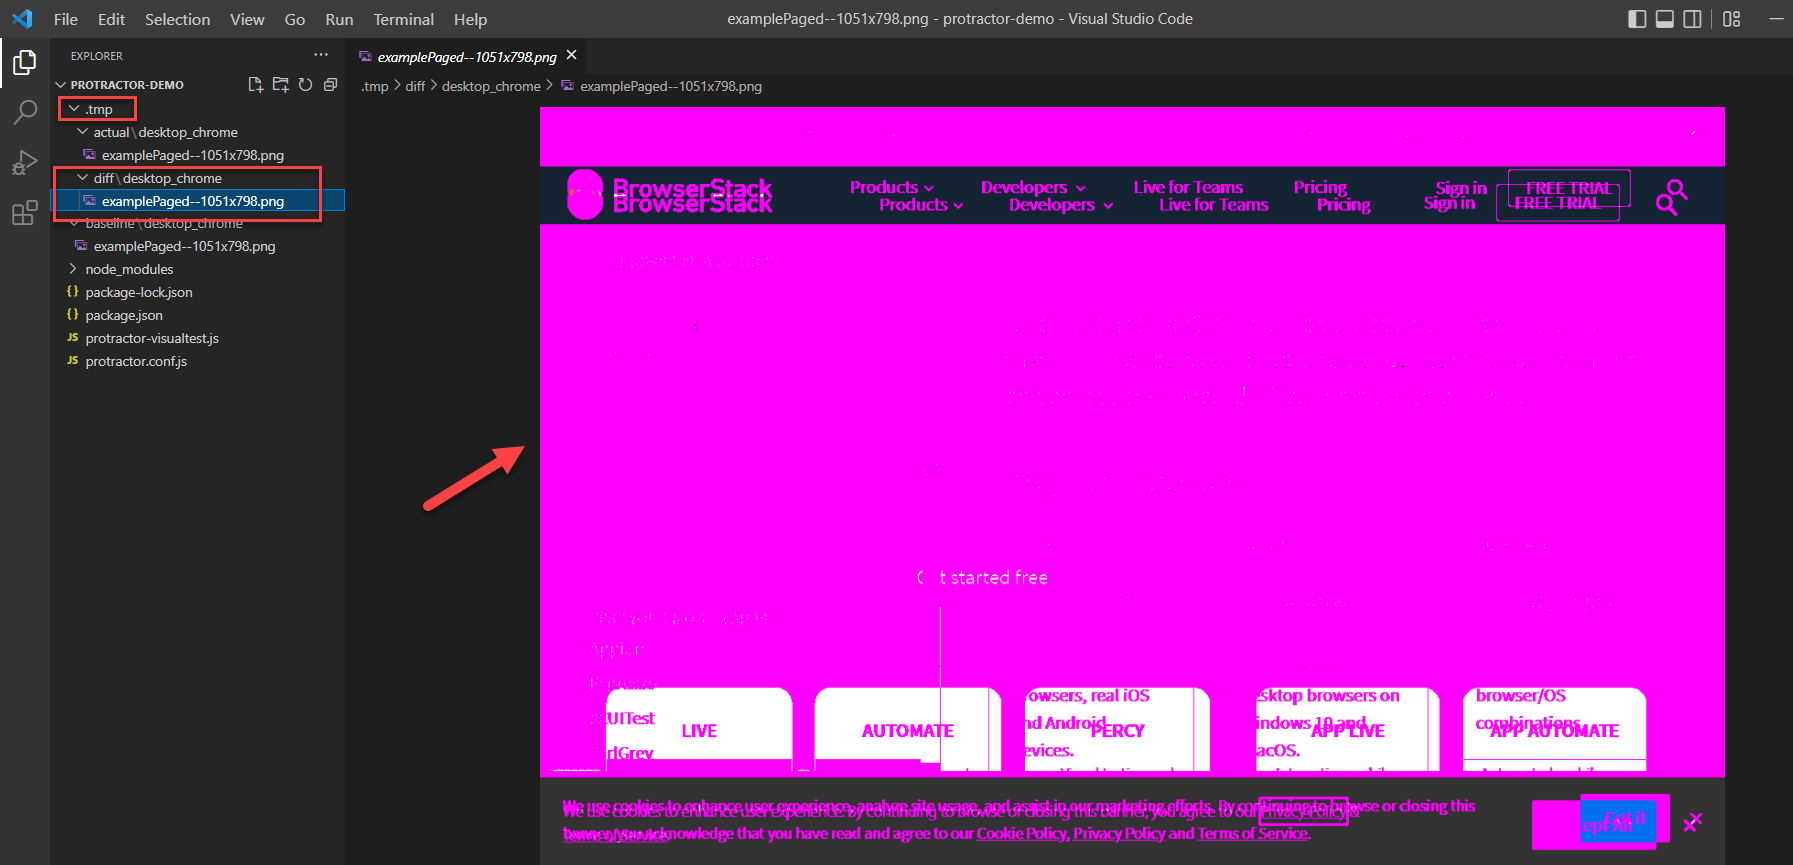
In the explorer window. Inside the .tmp folder, the folder name diff will be created, which contains the difference between both the images
- Explorer window output
Visual Comparison in Protractor for Specific Element
You can perform Visual Testing in Protractor for Single Element using the protractor image comparison package. The package provides saveElement and checkElement functions. These two functions help you to compare the specific element in the Visual Screenshot testing.
Sample code for Visual Testing Specific Element in Protractor
//protractor-visualtest.js
describe('Protractor Visual Test Demo', () => {
it('Navigate to BrowserStack Homepage', async() => {
await browser.waitForAngularEnabled(false);
await browser.get('https://www.browserstack.com'); await browser.imageComparison.saveElement(element(by.css('a[href="/pricing"]')), 'PricingButton', { /* some options*/ });
expect(await browser.imageComparison.checkElement(element(by.css('a[href="/pricing"]')), 'PricingButton', { /* some options*/ })).toEqual(0);
});
});
How to Perform Protractor Visual Testing Using Percy
Percy is a most popular tool for Visual Validation Testing. Percy provides an online dashboard that helps to review, approve and reject the compared images. Percy provides visual comparison across the browser. This helps in cross-browser visual validation in the protractor.
Step by Step guide using Percy in Protractor
Step 1: Install the required packages using the below command
npm install --save-dev @percy/cli @percy/protractorStep 2: Create a Simple Percy Test
Let’s create a simple test to take a screenshot of BrowserStack home page and validate them.
//protractor-visualtest.js
const percySnapshot= require('@percy/protractor');
describe('Protractor Visual Test Demo', () => {
it('Navigate to BrowserStack Homepage', async() => {
await browser.waitForAngularEnabled(false);
await browser.get('https://www.browserstack.com');
await percySnapshot('BrowserstackHomePage');
});
});
Step 3: Set the PERCY_TOKEN environment variable
- Login to Percy using your credentials (If you don’t have them already, create a new)
- Create a New Project
- Navigate to Project Settings
- Copy PERCY_TOKEN
- Set the environment variable
To set the environment variable, use the commands below based on your terminal:
- Powershell
$env:PERCY_TOKEN="<your_token>"
- Windows Command Line
set PERCY_TOKEN=<your_token>- Mac/Linx/Unix-based Terminal
export PERCY_TOKEN=<your_token>Step 4: Execute Percy Protractor Visual Test using the below command
npx percy exec -- protractor protractor.conf.jsWait until Execution completes, Once Execution is completed, the command line output will be shown with the build URL.
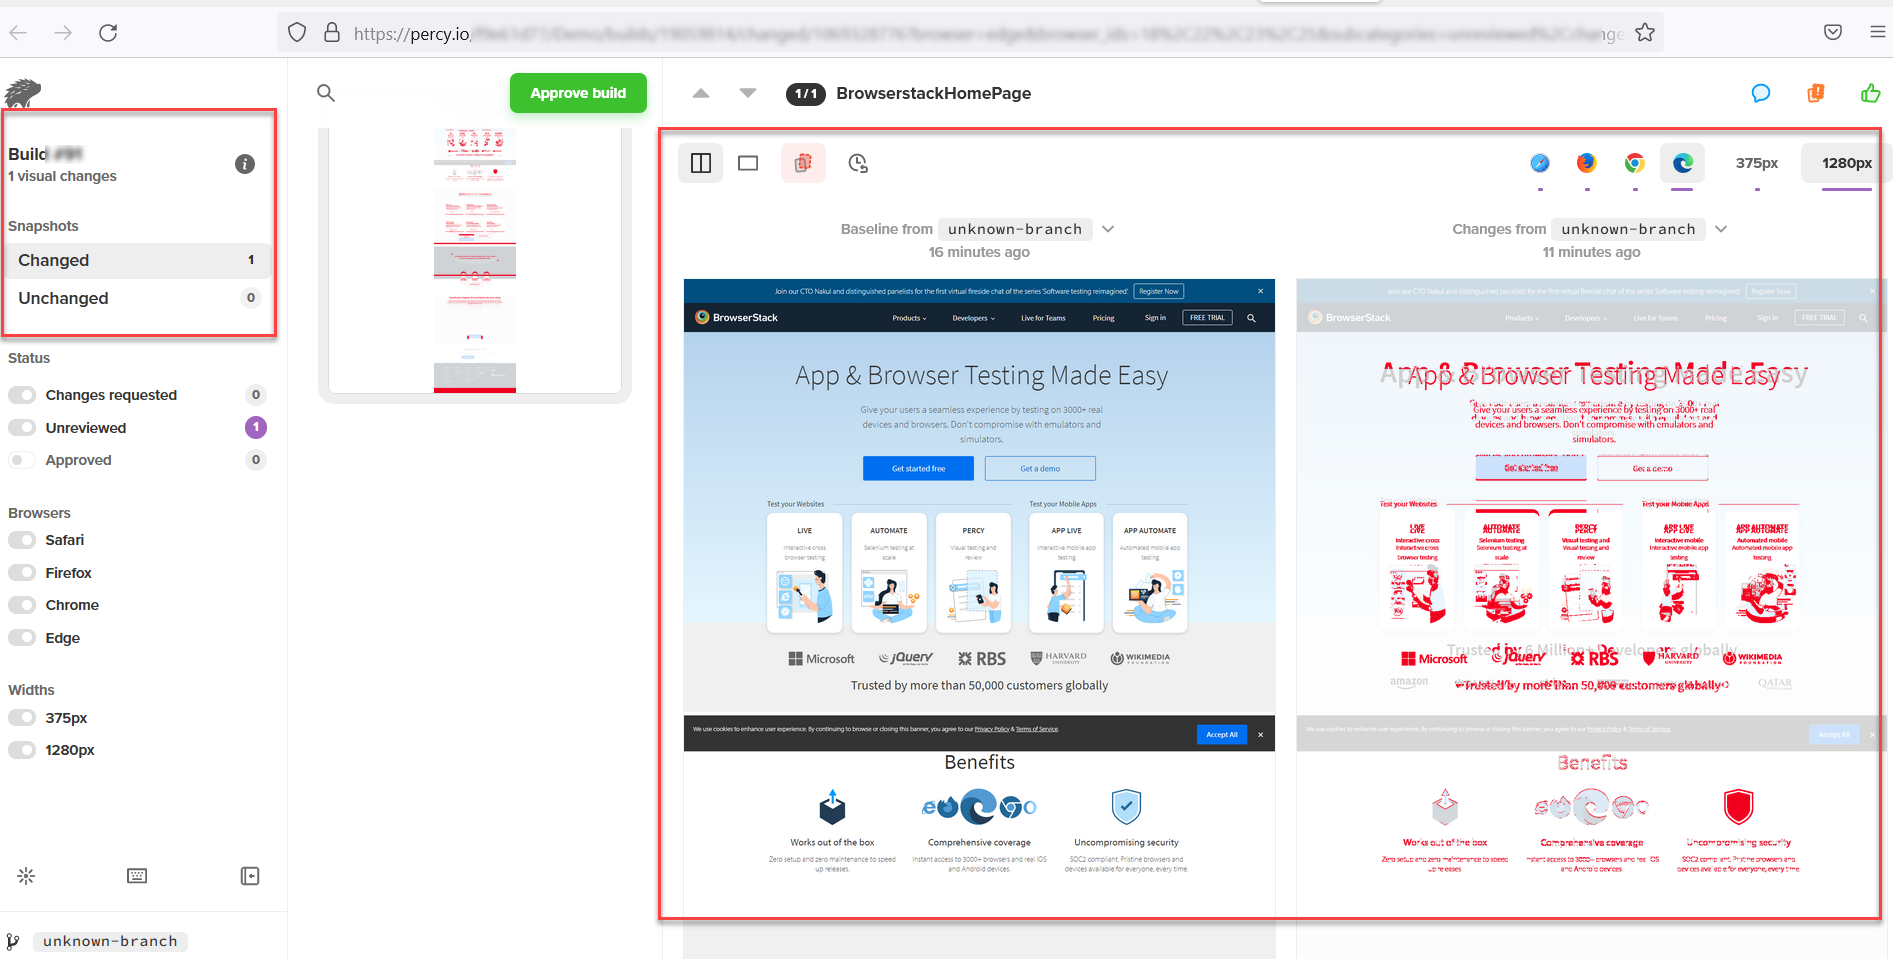
Navigating to the build URL, you can view the Test results. Percy Dashboard Shows the difference if there any as seen below
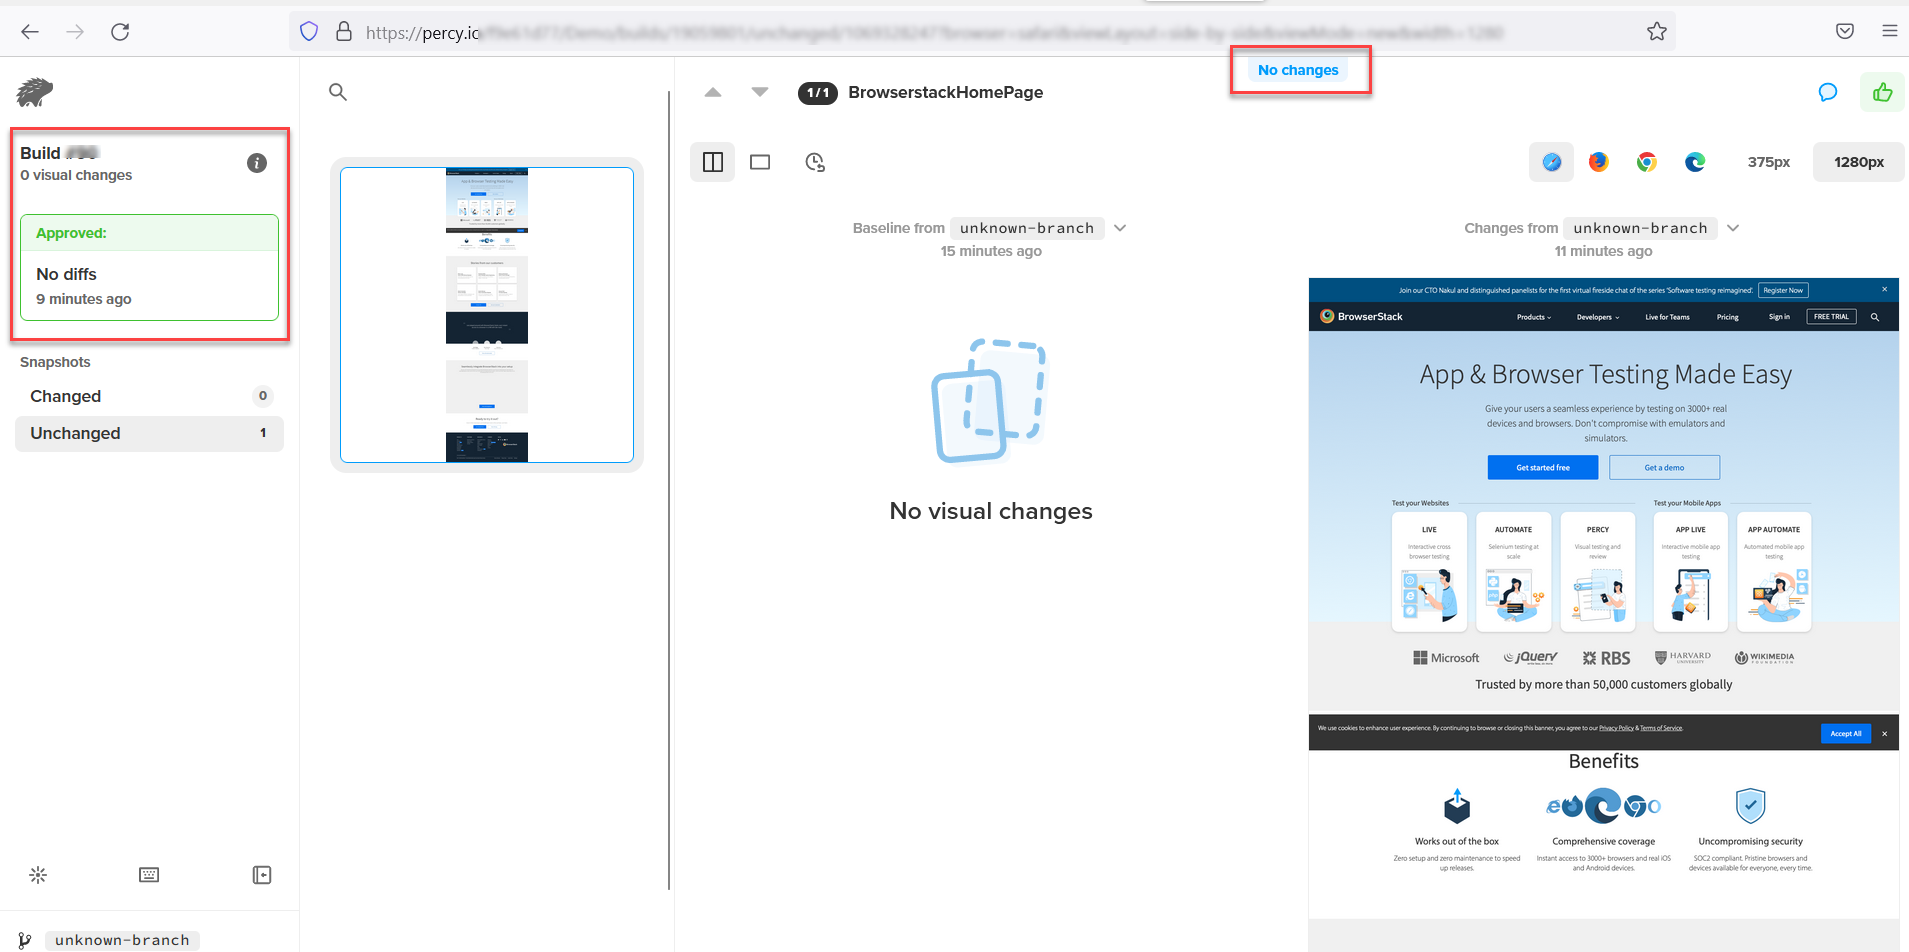
If there is no difference, Percy shows the message “No Changes“
Protractor Visual Testing is the best way to test the User Interface of the web application, it’s easy and not very time-consuming. The recent development in the protractor is not very impressive.
Protractor Team Decided to Stop the Development of the Protractor framework and stopped releasing any new features. The community plugin which was supporting protractor also now stopped its development. The plugin which we are using for the visual regression testing protractor-image-comparison is deprecated however it is available to install but is not maintained.
Must Read: Top 5 Alternatives to Protractor
Since Protractor is depreciated, you need to think of migrating to another framework. When it comes to finding Protractor alternatives there are many in the market, but you need to think of migration effort and features they are offering. NightWatchJS is one such framework, which has features close to the Protractor.
Just like Protractor, NightwatchJS is also built on top of Selenium so most of the features will be available in NightWatchJS as well. It’s worth exploring NightWatchJS when you look for a new framework after Protractor.
You can run Visual Regression Tests with Nightwatch using Percy, just like Protractor.
