How to set no_proxy Environment Variable
By Gopal Kaushal, Community Contributor - January 2, 2025
Proxy settings are important in managing data traffic between the internet and a client in networking. It forwards client requests to the destination servers and can function as an intermediary for security, caching, and access control. There are instances where traffic should bypass the proxy, like internal services or trusted sites.
This is where no_proxy environment variables come in, where network administrators can further fine-tune which types of traffic should bypass proxy handling for efficient and secure network communications.
- What is the NO_PROXY Environment Variable?
- How NO_PROXY Interacts with Other Proxy Settings?
- How to Configure the NO_PROXY Environment Variable?
- Windows
- macOS
- Linux
What is the NO_PROXY Environment Variable?
The NO_PROXY environment variable is used within the network configuration to specify a list of addresses or domains that must bypass proxy servers. When a client or application communicates with the internet, it usually routes through a proxy server.
However, there would be occasions when specific destination addresses, like internal servers, local addresses, or trusted domains, must not go through the proxy. The NO_PROXY variable allows for the exclusion of addresses that are directly accessed without going through the proxy.
NO_PROXY defines a comma-separated list of domains, IP addresses, or networks that the proxy would not process. For example, If NO_PROXY=localhost,192.168.1.0/24 was specified, then any request to localhost or at any address in the 192.168.1.0 subnet would bypass the proxy for a direct connection.
By default, most systems will proxy all requests through the proxy if it is configured. The NO_PROXY variable allows more granular control by defining exceptions for certain traffic. That helps improve performance for trusted or local resources while maintaining the benefits of a proxy for other traffic.
Read More: What does configure Proxy mean
How NO_PROXY Interacts with Other Proxy Settings?
When you configure proxy settings, you set the following environment variables:
- HTTP_PROXY: Specifies the proxy server for HTTP traffic.
- HTTPS_PROXY: The proxy server for HTTPS traffic.
- FTP_PROXY: Specifies the proxy server for FTP traffic.
The NO_PROXY variable is used in combination with these. For any request that matches an entry in the NO_PROXY list, the system will bypass the configured settings (HTTP_PROXY or HTTPS_PROXY) in case of that specific request and route it directly to the destination, bypassing the proxy server.
For example, if your system is configured with:
HTTP_PROXY=http://proxy.example.com:8080
NO_PROXY=localhost,example.com
Whatever requests are made to localhost or example.com, bypass the proxy server proxy.example.com and connect directly, while every other request continues to go through the proxy server for routing purposes.
This selective proxy routing optimizes network performance and minimizes the extraneous load on the proxy server by ensuring that only non-local traffic is proxied.
Read More: What is a Proxy Port
How to Configure the NO_PROXY Environment Variable?
Configuring the NO_PROXY environment variable involves defining the list of addresses or domains that should bypass the proxy server. System-specific methods can be used on different operating systems, such as Windows, macOS, and Linux.
Below are the steps for setting up NO_PROXY on each platform:
Windows
On Windows, the NO_PROXY variable can be set via the Command Prompt or PowerShell and through system environment settings.
Using Command Prompt:
To set NO_PROXY temporarily in the Command Prompt, use the set command:
cmd

set NO_PROXY=localhost,127.0.0.1,.example.com
This will set NO_PROXY for the duration of the session. Once you close the Command Prompt, the setting will be lost.
Using PowerShell:
In PowerShell, use the $env command to set NO_PROXY for the session:
powershell

$env:NO_PROXY="localhost,127.0.0.1,.example.com"
To set NO_PROXY permanently:
- Open the Start menu and search for Environment Variables.
- Select Edit the system environment variables.
- In the System Properties window, click Environment Variables.
- Under User variables or System variables, click New.
- Add NO_PROXY as the Variable name and a comma-separated list of domains or addresses as the Variable value (for example, localhost,192.168.0.0/16).
- Click OK to save.
macOS
On macOS, NO_PROXY can be set using the Terminal.
To set NO_PROXY for the current terminal session:
bash

export NO_PROXY="localhost,127.0.0.1,.example.com"
This setting will persist for the duration of the session.
To make the setting permanent, add the export command to your shell’s configuration file (for example, .bash_profile, .zshrc, or .bashrc, depending on the shell you use). Open the appropriate file and add the following:
bash

export NO_PROXY="localhost,127.0.0.1,.example.com"
Then, run the following to apply the changes:
bash

source ~/.bash_profile
Or
bash

source ~/.zshrc
Linux
On Linux, NO_PROXY is configured similarly to macOS, typically using the shell’s configuration files.
To set NO_PROXY for the current terminal session:
bash

export NO_PROXY="localhost,127.0.0.1,.example.com"
To make it permanent, add the export command to your shell’s configuration file, such as .bashrc, .bash_profile, or .zshrc. Open the file in a text editor and add:
bash

export NO_PROXY="localhost,127.0.0.1,.example.com"
Then, reload the file:
bash

source ~/.bashrc
Or
bash

source ~/.zshrc
Supported Formats and Syntax for Exclusions
The NO_PROXY variable supports a variety of formats to specify the domains or IP addresses that should bypass the proxy. Here are the key formats and syntaxes:
Specific Hostnames
A list of specific domain names or hostnames:
bash

export   NO_PROXY="localhost,127.0.0.1,.example.com"
- localhost: Excludes the local machine.
- 127.0.0.1: Excludes the local loopback IP address.
- .example.com: Excludes any subdomains of example.com (wildcard).
IP Addresses
You can specify individual IP addresses:
bash

export NO_PROXY="192.168.1.1,10.0.0.0/24"
- 192.168.1.1: Excludes traffic to a specific IP.
- 10.0.0.0/24: Excludes all addresses in the 10.0.0.0 subnet.
Wildcards for Domains
Use a leading dot (.) to match all subdomains of a domain:
bash

export NO_PROXY=".example.com"
This will bypass proxies such as example.com, subdomain.example.com, and any other subdomains of example.com.
Multiple Entries
Use commas to separate multiple exclusions:
bash

export  NO_PROXY="localhost,127.0.0.1,.example.com,192.168.0.0/16"
This specifies a list of hostnames, IP addresses, and subnets.
Excluding Entire Network Ranges
You can specify IP address ranges using CIDR notation:
bash

export  NO_PROXY="192.168.0.0/16,10.0.0.0/8"
This excludes entire address ranges.
Use Cases for the NO_PROXY Environment Variable
The NO_PROXY environment variable is helpful in a variety of network configurations and scenarios where certain traffic needs to bypass the proxy server. Below are some common use cases:
- Bypassing Proxy for Internal Network Traffic: Internal servers often don’t need to be routed through a proxy in enterprise environments. The NO_PROXY variable ensures that local network addresses or internal resources (for example, intranet, file servers, database servers) are accessed directly, improving speed and reducing unnecessary proxy traffic.
- Excluding Localhost and Loopback Addresses: When testing applications locally or performing development tasks, routing traffic through a proxy can create issues. By excluding localhost and 127.0.0.1, developers can ensure that traffic to the local machine does not go through a proxy.
- Avoiding Proxy for Specific Subdomains: Sometimes, only specific subdomains of a domain need to bypass the proxy, while other parts of the domain should be proxied. The NO_PROXY variable can specify wildcard exclusions for subdomains.
- Accessing Trusted External Services Directly: Certain trusted external services, such as APIs or cloud services, may require direct connections for performance or security reasons. By excluding these services from the proxy, users or systems can directly access them without the overhead of proxy routing.
- Reducing Proxy Load for Frequently Accessed Addresses: When a proxy server handles a large amount of traffic, it can become a bottleneck. Excluding frequently accessed addresses, such as trusted internal servers or public content delivery networks (CDNs), from the proxy can reduce the load and improve performance.
- Enhancing Security for Sensitive Resources: In some cases, certain sensitive resources may need to bypass the proxy for security reasons. This could include direct access to private databases, internal monitoring systems, or secure communication endpoints.
- Handling Proxy Exceptions in Cloud Environments: In cloud environments, such as AWS or Azure, some services may need to be accessed directly without the proxy, primarily when services like databases or internal APIs are hosted within the cloud. The NO_PROXY variable ensures these cloud-based resources are not routed through an external proxy.
- Development and Testing Scenarios: During development, there may be a need to bypass the proxy for certain testing environments (for example, local test servers and mock services). Using NO_PROXY, developers can easily exclude these environments from proxy routing.
- Improving User Experience for Certain Applications: In some applications, especially those that require real-time data or persistent connections (for example, VoIP, gaming, or video streaming), proxy routing can add unwanted latency or cause disruptions. Using the NO_PROXY variable, traffic for these applications can be excluded from the proxy.
Read More: How to Test Website on Mobile Locally
Best Practices for Using the NO_PROXY Environment Variable
While there are several uses for the NO_PROXY variable, understanding the right way to use it is crucial. Here are some best practices to follow:
- Use Specific Exclusions, Not Broad Ranges: When defining exclusions in the NO_PROXY variable, avoid broad IP ranges or large subnets, as they could unintentionally bypass the proxy for more traffic than intended. Instead, be as specific as possible to control which traffic bypasses the proxy. This ensures better security and performance.
- Keep NO_PROXY Configurations Minimal: Limit the entries in the NO_PROXY list to only the essential domains, IP addresses, or ranges that must bypass the proxy. Overloading the list with too many exclusions can lead to errors, making it difficult to manage and increasing the risk of misconfigurations. Regularly review and update the list to ensure it remains relevant.
- Ensure Proper Format and Syntax: The NO_PROXY variable relies on correct formatting for the exclusions to work as intended.
Always use proper syntax, such as separating addresses with commas, using wildcard prefixes for subdomains (for example, .example.com), and specifying IP ranges with CIDR notation (for example, 192.168.0.0/16). Misformatting can result in excluded traffic not bypassing the proxy as expected. - Test Configuration Changes Thoroughly: Before deploying NO_PROXY changes to production environments, thoroughly test the configurations in a staging or controlled environment.
This ensures that the traffic is correctly routed according to the exclusions and no unintended routes are created. Testing helps avoid network disruptions or performance issues. - Use NO_PROXY for Internal Services: NO_PROXY is best suited for internal services, such as local addresses or trusted internal domains, that do not require proxy routing. Excluding these from the proxy improves performance and avoids unnecessary proxy load.
Be cautious not to use NO_PROXY for external services that could undermine security or create routing issues. - Monitor and Log Exclusions: To ensure that exclusions are functioning as intended, set up monitoring and logging for requests that bypass the proxy.
This will help identify issues, track performance, and ensure traffic is routed correctly. Logs can also be useful for troubleshooting when problems arise with network routes. - Keep NO_PROXY in Sync with Proxy Settings: Ensure that NO_PROXY configurations are consistent across different environments (for example, development, staging, production).
Inconsistent settings can lead to confusion and routing issues, making it harder to maintain network performance. Synchronizing across environments helps prevent these problems.
How to perform Local Testing using BrowserStack?
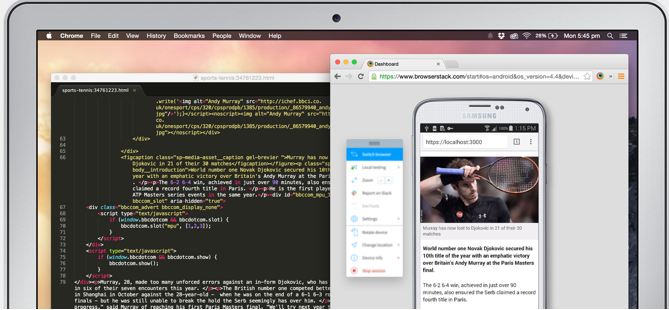
The BrowserStack Local Testing platform creates a secure tunnel between your local development environment and the BrowserStack Cloud, allowing you to test web and mobile apps hosted on internal servers, localhost, or behind firewalls and proxies. This lets you test your applications across real browsers and mobile devices without exposing them publicly.
You can test multiple branches simultaneously, run automated tests through CI/CD pipelines, and test HTML files directly from your local machine without needing to host them.
With Local Testing, you can test within your network’s security protocols, including support for proxies, VPNs, firewalls, and SSL-encrypted connections. For enterprises, BrowserStack offers advanced controls such as IP whitelisting and monitoring features to enforce security policies.
This ensures your testing process is both efficient and compliant with organizational security standards while maintaining confidentiality until your app is ready for release.
When testing in local environments or internal networks, it’s essential to ensure that tests bypass the proxy where needed. BrowserStack provides a secure, effective way to test applications hosted on internal servers, development machines, or behind various network protections, such as proxies and firewalls.
Steps to use BrowserStack for Local Testing:
Step 1. Download and Install BrowserStackLocal:
- Visit the documentation page Set up Local Testing in BrowserStack Live and follow the instructions to install the BrowserStackLocal app on your system.
- Once you launch the app, you can see the app icon in the menu bar.
Step 2. Connect the BrowserStackLocal App with Automate or Live:
- Connect the BrowserStack Local app with BrowserStack Live for manual testing or Automate to run automated test scripts.
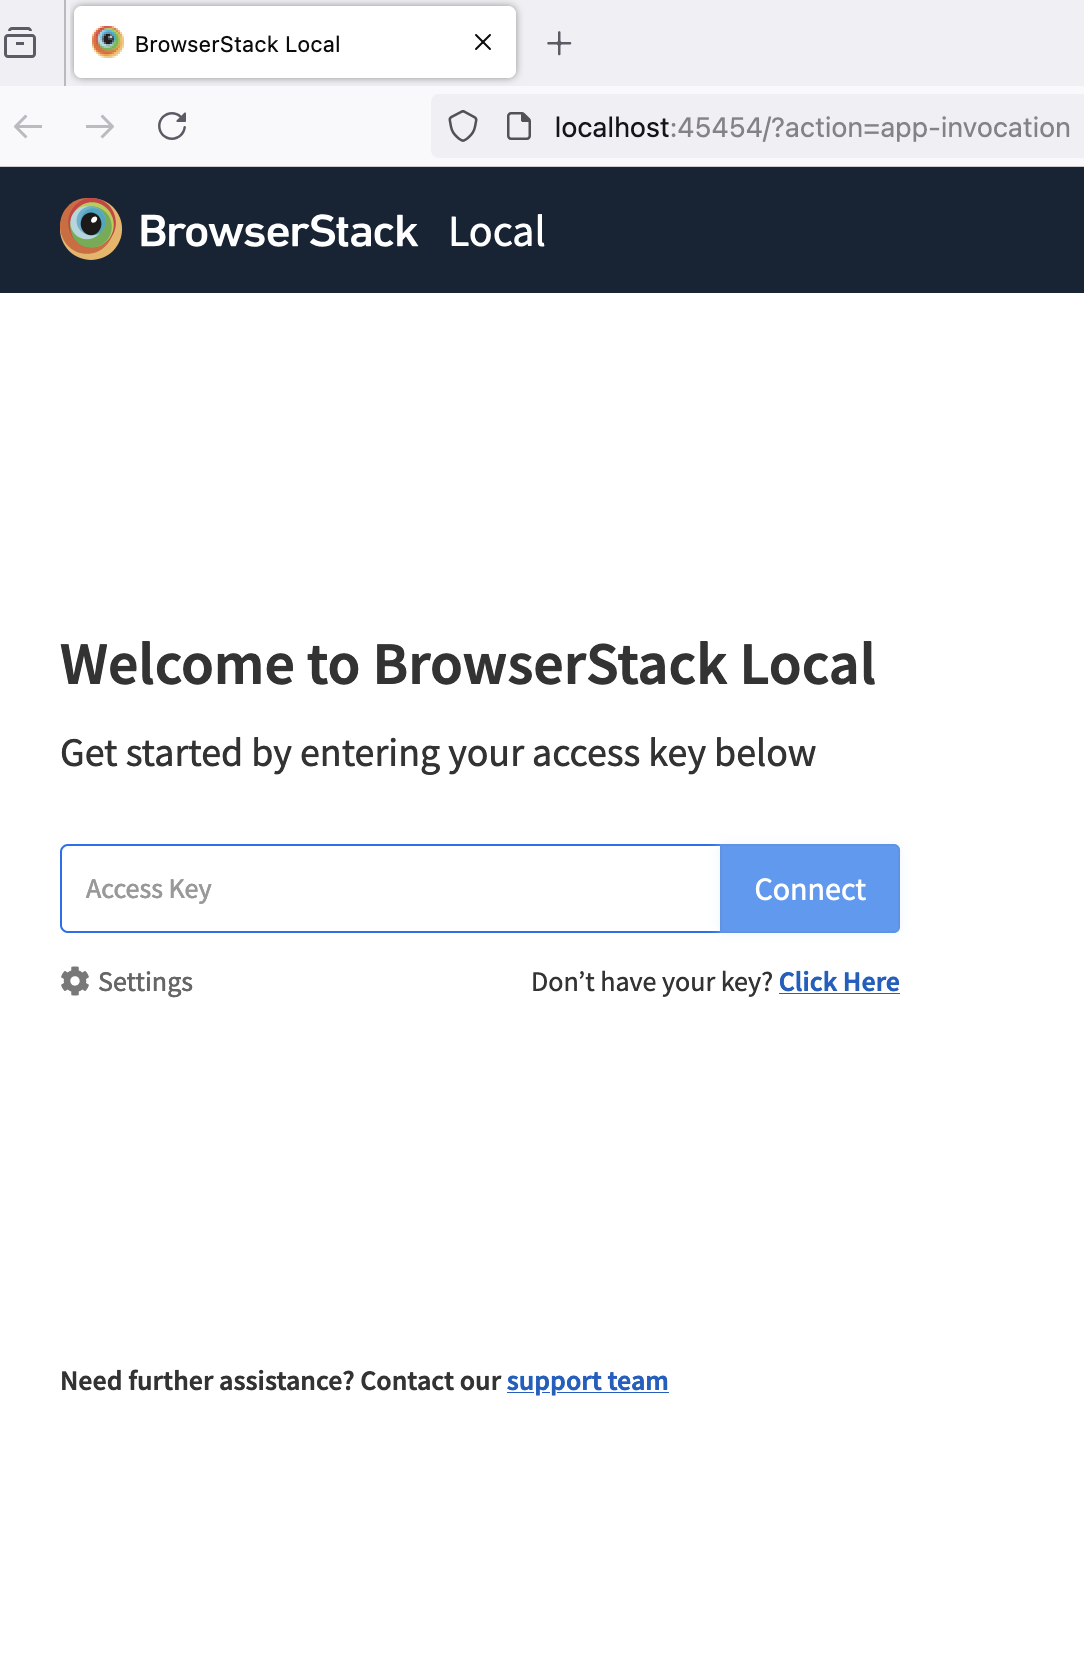
- You can do so by clicking on Connect or directly choosing the Launch option to connect to BrowserStack Live or Automate.
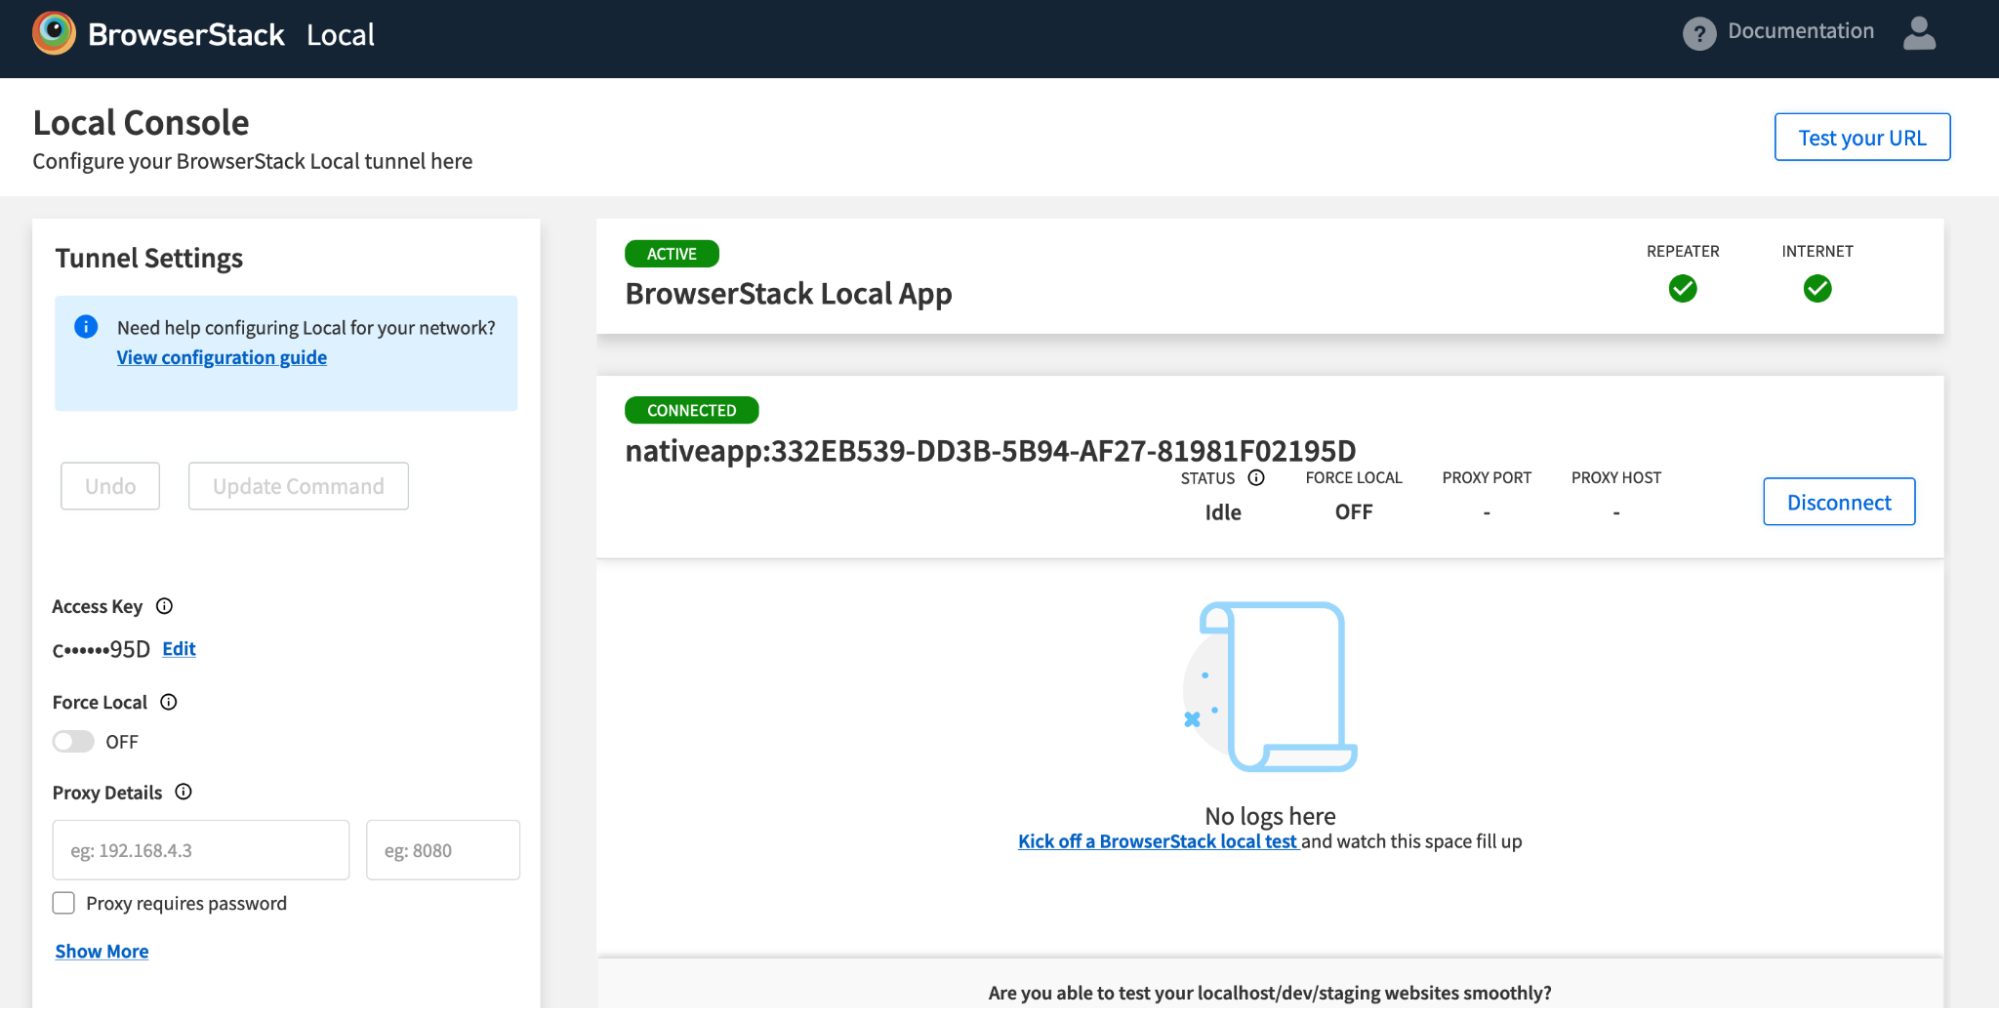
- Provide the necessary credentials to connect to BrowserStack. Once you are connected, the dashboard will show you the following.
Step 3. Run the Tests: Start running your manual or automated tests. BrowserStack will establish a secure connection to your local server, enabling testing even if your app is behind proxies, VPNs, SSL encryption, or firewalls.
Refer to more details on this documentation on Local testing internal information
How to set Proxies for Local Testing using BrowserStack?
Follow these steps to set up proxies for local testing using BrowserStack:
Step 1. Download and Install BrowserStack Local Testing
- Visit the BrowserStack website and download the BrowserStack Local Testing binary.
- Install the binary on your local machine based on your operating system (Windows, macOS, or Linux).
Step 2. Start BrowserStack Local with Proxy Settings
1. Open your terminal or command prompt.
2. Start the BrowserStack Local binary with the necessary proxy settings using the following flags:
- proxy-host for the proxy server address.
- proxy-port for the proxy server port number.
- proxy-user and –proxy-pass if your proxy requires authentication.
Example command:
bash

./BrowserStackLocal --key YOUR_ACCESS_KEY --proxy-host proxy.example.com --proxy-port 8080 --proxy-user yourUsername --proxy-pass yourPassword
This establishes a secure connection between your local environment and BrowserStack’s testing infrastructure.
Step 3. Integrate BrowserStack Local into Your Test Setup
If you use BrowserStack App Automate or App Live, ensure the BrowserStack Local binary is correctly integrated into your test scripts. This allows your traffic to pass through the proxy, enabling you to test websites or applications behind a firewall or requiring specific proxy configurations.
Refer to documentation on Local Testing for App Live.
Step 4. Run Your Tests
Once BrowserStack Local is running with the proxy settings in place, start your tests. The tests will now route through the configured proxy server, simulating your local network conditions during testing.
Step 5. Verify and Troubleshoot
After completing the tests, verify that the proxy settings are working as intended. If issues arise, double-check your proxy configurations and ensure that BrowserStack Local is correctly set up to tunnel your traffic through the proxy.
Step-By-Step Instructions
To ensure local testing works seamlessly when proxies are involved, you can follow one of the below steps:
- Configure Local Host to Use –no-proxy: You can use any of the above discussed methods to configure NO_PROXY environment variable for localhost or the address internally used to access the application.
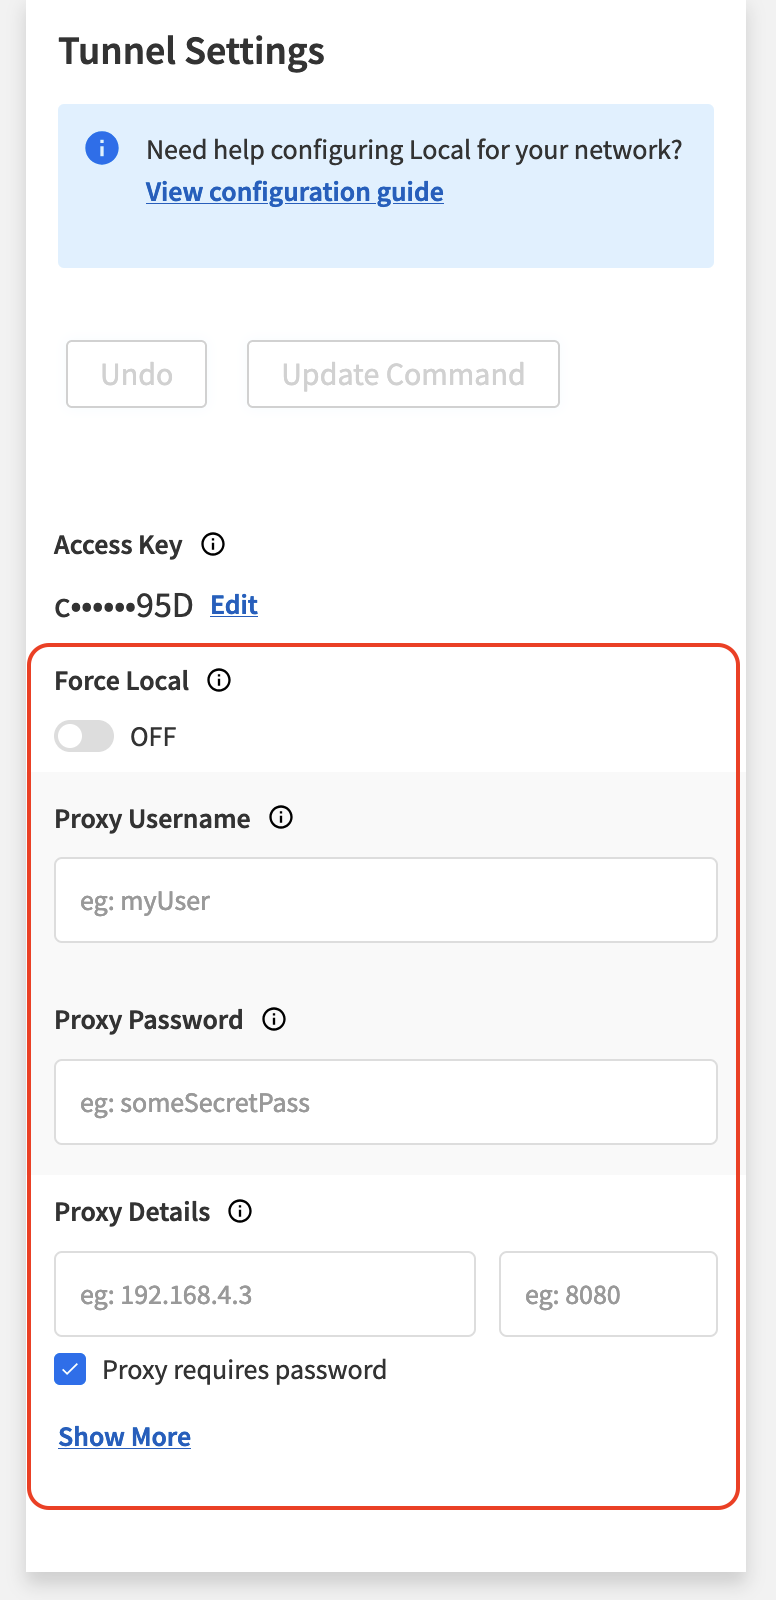
- Configure Proxy Settings in the BrowserStack Local Binary: Pass proxy arguments directly from the dashboard of Browserstack Local.
By setting up these configurations, you can ensure that your local and internal applications are securely tested through BrowserStack, even when complex network environments like multiple proxies and SSL encryption are in place.
Conclusion
Incorporating the NO_PROXY environment variable into your network configuration allows you to exclude certain traffic from proxy routing, ensuring faster access to trusted internal services or local resources.
It is vital for optimizing network performance and security, providing an efficient way to manage proxy settings across your infrastructure. When configured correctly, it enables smooth and direct communication with specific destinations, reducing the load on your proxy server and improving overall network reliability.
Combine the NO_PROXY setup with robust testing tools like BrowserStack to ensure your applications perform flawlessly across all environments.
