Selenium is a popular tool for automating web applications, and IntelliJ IDEA is one of the best IDEs for Java development.
Overview
Steps to Install Selenium in IntelliJ:
- Install IntelliJ IDEA (Community or Ultimate Edition)
- Create a new Java or Maven project
- Add Selenium WebDriver dependencies (via Maven or manually)
- Configure your project structure and build path
- Write your first Selenium test script
- Run and validate the script using JUnit or TestNG
This guide provides a comprehensive walkthrough of installing and configuring Selenium within IntelliJ, enabling efficient test development and execution.
What is IntelliJ?
IntelliJ IDEA is a feature-rich Integrated Development Environment (IDE) for Java development. It offers a suite of coding, debugging, and testing tools, streamlining the software development process. Its compatibility with Selenium makes it a top choice for automation testing.
Pre-requisites to Install IntelliJ with Selenium Webdriver
Before setting up Selenium, ensure the following requirements are met:
Step 1. Java Installation and Setup (JDK)
- Download and install the Java Development Kit (JDK)
- Verify installation using the following terminal commands:
Java -version

Javac  -version
- Set the JAVA_HOME environment variable.
- Search for “Environment Variables” in Local, and Click on Edit Environment Variable for your account.
- Under System Variables, click on NEW button.
- In the Variable name field, enter as JAVA_HOME and in the Variable value field, browse the directory where the latest JDK is installed.
- Click OK to save the changes.
Step 2. IntelliJ IDEA Installation (Community/Ultimate)
Download and install IntelliJ IDEA, either the Community or Ultimate edition.
Step 3. JDK Configuration in IntelliJ
- Open IntelliJ and go to File -> Project Structure -> Project -> SDKs.
- Select the installed JDK to ensure compatibility.
Read More: How to integrate Jenkins with Selenium?
How to Download & Install IntelliJ?
To begin, the IntelliJ IDEA IDE must be acquired and installed. While this process is simple, it requires adherence to specific steps for a successful setup.
- Visit the official JetBrains website to download the IntelliJ IDEA installer.
- Select the appropriate operating system and edition (Community or Ultimate).
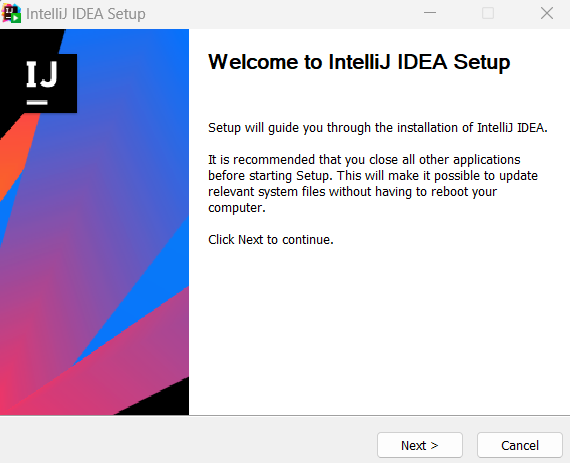
- Once the download is successful, run the .exe (Windows) file and start the installation setup. In the following screen, click on NEXT.
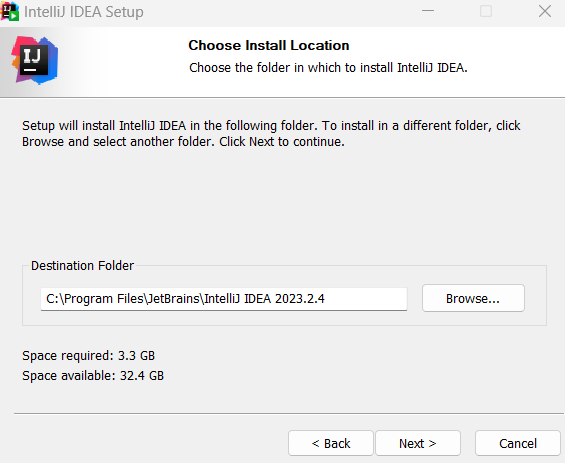
- Choose the installation directory by clicking on Browse.
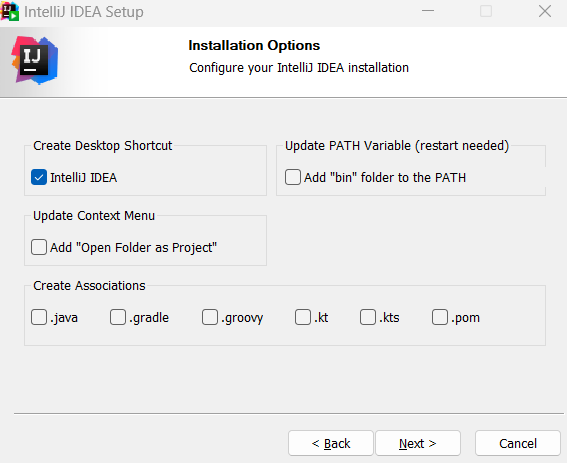
- Check the box and configure any desired options, then click on NEXT.
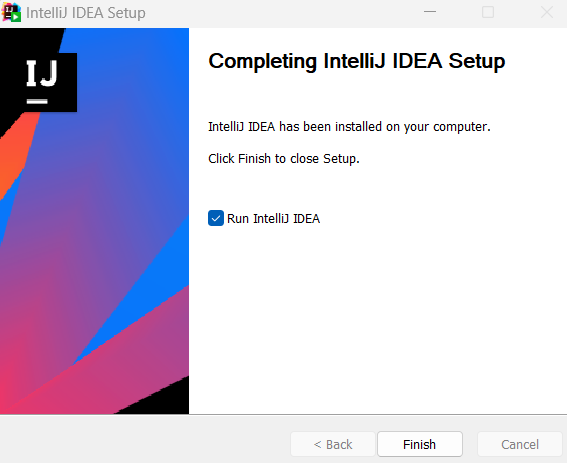
- Complete the installation process by clicking on FINISH button.
Setting up a new Selenium Project in IntelliJ
To begin writing Selenium tests within IntelliJ, a project tailored for this purpose must be created. The following steps will guide you through the necessary configurations.
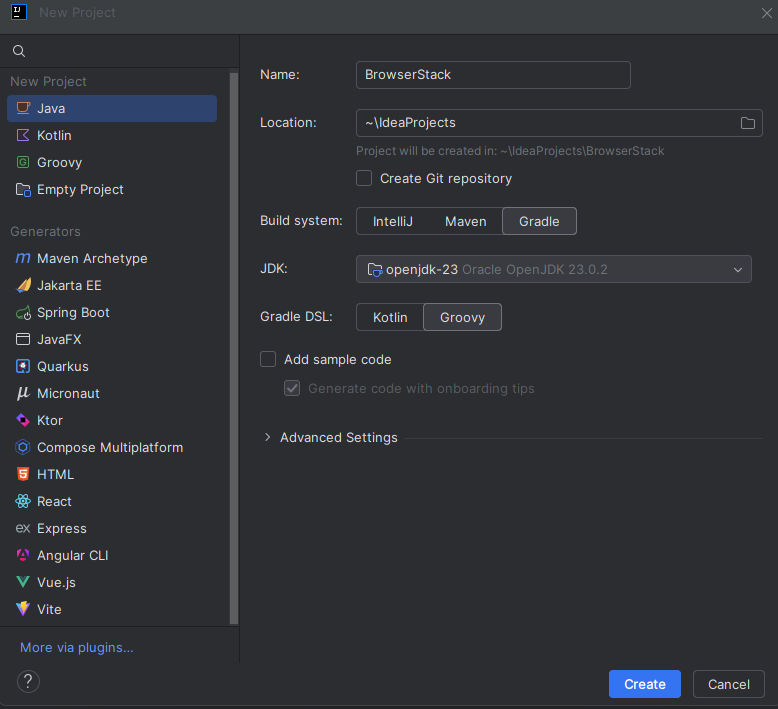
1. Open IntelliJ. On the welcome screen, click on New Project, or else follow the path below to create the project.
Path: File -> New -> Project
2. Enter a project name and change its location if necessary by clicking on the folder icon.
3. Choose Java as the project language.
4. Select the installed JDK version from the drop-down.
5. Ensure the JDK is configured in Project Structure.
6. Click Create.
Read More: How to install Selenium Python on macOS?
Installing Selenium WebDriver
The WebDriver component is the core functionality of Selenium testing. The following will describe the various ways to incorporate the Selenium WebDriver into the IntelliJ environment.
Step 1. Adding Selenium JARs Manually
- Download Selenium JAR files from Selenium official website.
- In IntelliJ, navigate to Project Structure > Libraries > Add JARs.
Step 2. Using Maven to Add Selenium Dependencies:
- Add the following dependencies to the pom.xml file.
<dependencies>

        <!-- Selenium Java Dependency -->

        <dependency>

            <groupId>org.seleniumhq.selenium</groupId>

            <artifactId>selenium-java</artifactId>

            <version>4.20.0</version>

        </dependency>

    </dependencies>
- IntelliJ will automatically download the required dependencies.
Step 3. Using Gradle to Add Selenium Dependencies:
- Add the selenium dependency to the build.gradle file.
dependencies {


    // Add Selenium dependency

    implementation 'org.seleniumhq.selenium:selenium-java:4.21.0' // Use latest version

}
- Gradle will download and add the dependency.
Downloading WebDriver Executables
Each web browser requires its corresponding WebDriver executable to facilitate automated testing. The following outlines the download and setup procedures for commonly used browsers.
ChromeDriver (For Chrome)
- Download the chromedriver.exe from the ChromeDriver website.
- Set the Path to the ChromeDriver executable on your Windows system.
- To Set up the driver in your script:
System.setProperty("webdriver.chrome.driver", "C:\\path\\chromedriver.exe");
Note:
On Windows: “C:\\Path\\to\\ chromedriver.exe”
On macOS/Linux: “/path/to/ chromedriver”
GeckoDriver (For Firefox)
- Download the geckodriver from Mozilla GitHub repository.
- Set the Path to the GeckoDriver executable on your Windows system.
- To set up the driver in your script:
System.setProperty("webdriver.gecko.driver", "C:\\path\\to\\geckodriver.exe");
EdgeDriver (For Microsoft Edge)
- Download the msedgedriver.exe from Microsoft WebDriver website.
- Place the executable in a directory included in the system’s PATH.
SafariDriver (For Safari on macOS)
SafariDriver is built into macOS, and it can be enabled in different ways.
1. Path to enable SafariDriver
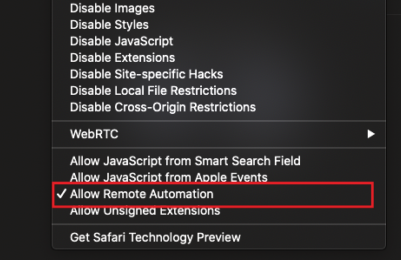
- Navigate to Safari – > Preferences – > Advanced tab. Check the Show Develop menu in menu bar.
- Click Develop menu and select Allow Remote Automation.
2. Enable SafariDriver via Terminal
Open the Terminal and run the following command:
safaridriver –enable
Writing and Running a Sample Selenium Test
With the environment configured, verifying its functionality through a simple test is essential. The following outlines the steps to create and run a sample Selenium script.
Writing a Basic Selenium Test:
Here is a code to write a basic Selenium test.
import org.openqa.selenium.WebDriver;

import org.openqa.selenium.chrome.ChromeDriver;


public class SeleniumTest { public static void main(String[] args)

{

    // Set the path to the ChromeDriver executable

    System.setProperty("webdriver.chrome.driver", "path/to/chromedriver.exe");


    // Create a new instance of the Chrome driver

    WebDriver driver = new ChromeDriver();


    // Navigate to Google

    driver.get("https://www.google.com");


    // Print the page title

    System.out.println("Page Title: " + driver.getTitle());


    driver.quit(); // Close the browser

}

}
Running the Test in IntelliJ
- Right-click on the test class or method and select Run or Click on green triangle run icon at the top right corner of IntelliJ, or press Shift + F10 to run the test.
- IntelliJ will execute the test and display the results in the console.
- If there are any errors or exceptions, they will also be displayed here, which will be helpful in diagnosing issues.
Explanation
- The program sets the path to the ChromeDriver executable.
- Make sure to replace “path/to/chromedriver.exe” with the actual path on your system.
- A new instance of the Chrome browser is created using the new ChromeDriver().
- The browser navigates to https://www.google.com.
- The program retrieves the title of the current page using driver.getTitle().
- The title is printed to the console by System.out.println.
- The browser is closed with driver.quit().
Output
Configuring IntelliJ for Better Selenium Development
Specific configurations can be applied to optimize the Selenium development workflow within IntelliJ. These adjustments aim to streamline the coding and debugging processes.
Enable Auto-import for Dependencies
- Configure IntelliJ to automatically import necessary classes.
- To enable Auto-import, navigate to Preferences > Build, Execution, Deployment > Maven.
Setting Up Logs and Debugging
- Configure logging frameworks for Selenium and the application.
- Utilize IntelliJ’s debugging tools to step through the selenium code.
Read More: Java Debugging Tools and Techniques
How to integrate Selenium with a Test Framework in IntelliJ?
For organized and maintainable tests, integrating Selenium with a test framework is crucial. This section details how to configure IntelliJ to work seamlessly with popular frameworks.
JUnit Integration
- IntelliJ provides built-in support for JUnit.
- To use JUnit in the Maven project, Add the following dependency in the pom.xml file:
<dependency>

    <groupId>junit</groupId>

    <artifactId>junit</artifactId>

    <version>4.13.2</version> <!-- Use the latest version -->

    <scope>test</scope>

</dependency>
- Use the @Test annotation to write and execute test cases.
TestNG Integration
- Install the TestNG plugin for IntelliJ. Add the TestNG dependency to the project (In pom.xml file)
Read More: Understanding Jest Parameterized Tests
<dependency>

    <groupId>org.testng</groupId>

    <artifactId>testng</artifactId>

    <version>7.7.0</version> <!-- Use the latest version -->

    <scope>test</scope>

</dependency>
- Use @Test to define and execute TestNG test cases.
Why use BrowserStack for Selenium Tests?
BrowserStack Automate provides a cloud-based platform for running Selenium tests across a vast range of real browsers and operating systems. This eliminates the need to maintain local testing infrastructure, ensuring thorough test coverage and faster feedback cycles.
Using BrowserStack Automate, you can,
- Test across 3500+ real browsers and devices
- Ensure cross browser compatibility without maintaining test infrastructure
- Run Selenium tests on the BrowserStack cloud for faster, scalable automation
- Integrate seamlessly with CI/CD tools like Jenkins, GitHub, and more
- Accelerate debugging with video recordings, logs, and screenshots
Conclusion
Setting up Selenium in IntelliJ is a straightforward process that empowers developers to create and execute automated web tests efficiently. It is especially helpful when using Maven or Gradle for dependency management.
By following the steps outlined in this guide, one can establish a robust testing environment. BrowserStack Automate enables to run Selenium tests on a wide variety of real devices, OS, and browsers without the need for physical infrastructure.
