Cypress is a Javascript-based test automation tool that is shipped with an MIT open source license. Cypress makes it easy to automate the modern web applications built with React, Angular, Vue, etc. It can be used for any web application where advantages include ease of setup, automatic waits, multiple reporters, etc.
Web forms are widespread in web applications and are used to collect information or data from the user. Forms are typically built with input fields, checkboxes, radio buttons, etc. Some of the examples of Forms are:
- Sign up forms
- Complaint or grievance forms
- Event registration forms
- Survey forms
Since automation is the best way to check the form filling and submitting actions, let’s learn how we can go about testing it using Cypress.
How to handle Forms in Cypress
Cypress provides an easy way to handle the form elements such as input fields, checkboxes, and radio buttons, etc. Cypress also provides a command to check and uncheck checkboxes and submit the form.
Handling input fields using Cypress
The input fields are standard in web forms, as it is effortless to capture the user input. Input fields are generally text-based.
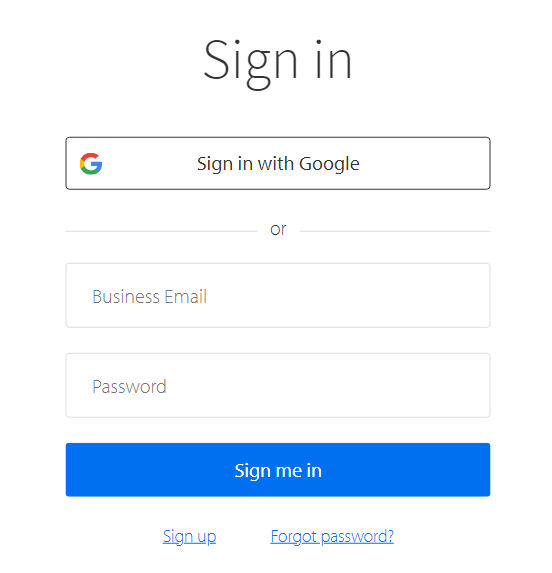
Example of user input fields
As you can see in the above example, usernames and passwords are input text box fields. The user name is a plain text box field, and the password is a masked text box field.
When you inspect the above fields the HTML code looks as shown below.
Understanding the input fields
Text Input Field
In the above HTML code, we can see the attribute “type=text” for the user name <input> tag, This means that the input field is the plain text input field.
Password input fields
The password HTML code has the attribute type=”password”, This is similar to text input fields but the character will be masked with asterisks (*).
Automate Input fields using Cypress
  it('should type username and password', () => {

    cy.visit('https://www.browserstack.com/users/sign_in')

    cy.get("#user_email_login").type("someone@example.com")

    cy.get("#user_password").type("somepassword")

  })
In the above code, cy.get() command returns the web elements, by identifying the element uniquely on the webpage. The type() command performs the type action on the element.
Text area Input field
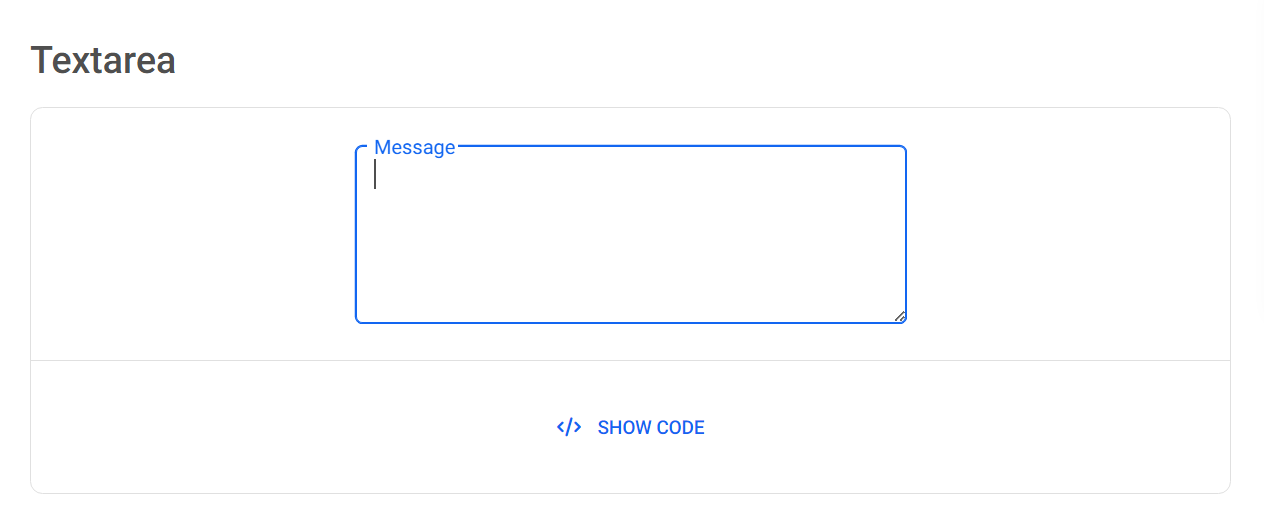
The text input fields provide the single-line input, similarly, the text area provides the multi-line input.
Example of Textarea
HTML Code
Unlike <input> tag the text area uses <textarea> tag, and provides the multi-line input.
Automate Text area Input Fields with Cypress
it('should type in textarea', () => {

    cy.visit('https://mdbootstrap.com/docs/standard/extended/textarea/')

    cy.get("#textAreaExample1").type("This is firstline\n This is the second line")

  })
In the above code, using the cy.get() we are locating the text area element in the webpage and then typing the multiline text inside the text area using the .type() command.
Clear the form fields in Cypress
Cypress provides a .clear() command to clear the input fields, which means if you wish to clear already typed text or default text you can use the .clear() command. This works on input fields which allows typing the text. Example single text input fields or text area input fields
Syntax:
cy.get('<selector>').clear()
Example:
cy.get('#textarea1").clear()
Checkboxes in Form controls
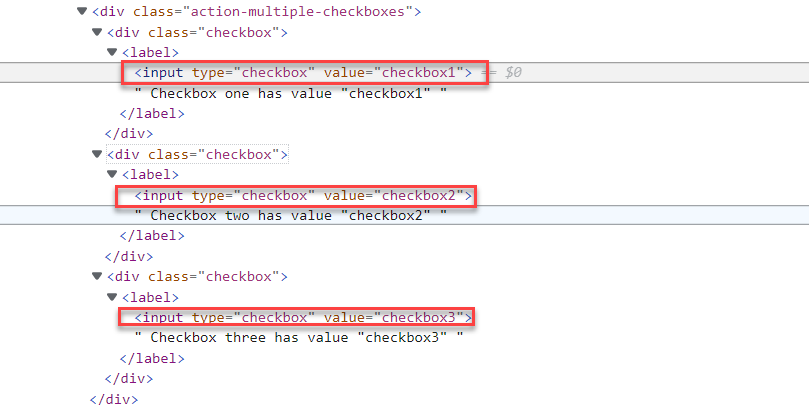
Checkboxes are very common in web forms, Checkboxes are defined with <input> tag and the attribute type=”checkbox”.
Example of Checkboxes in Forms
Checkbox HTML Code
Automate Checkboxes in Cypress
Cypress provides multiple options to automate checkboxes. The .check() and .uncheck() commands can be used to check or uncheck the checkbox.
  it('should check the checkbox', () => {

    cy.visit('https://example.cypress.io/commands/actions')

    cy.get('[class="action-multiple-checkboxes"] [type="checkbox"]').check("checkbox1");

  })
The .check() command is used for checking the checkbox, we are sending the attribute value “checkbox1” to .check() command.
Read More: How to Test HTML Code in a Browser?
Uncheck checkboxes using Cypress
.uncheck() command can be used for unchecking the checkboxes.

  it('should uncheck the checkbox', () => {

    cy.visit('https://example.cypress.io/commands/actions')

    cy.get('[type="checkbox"]').uncheck("checkbox1");

  })

})
An alternative way to check and uncheck checkboxes
As you can see when you click on the checkboxes it toggles between check and uncheck, you can simply send the click() event to perform the check and uncheck.
  it('should checkboxes check using click', () => {

    cy.visit('https://example.cypress.io/commands/actions')

    cy.get('[class="action-multiple-checkboxes"] [type="checkbox"][value="checkbox1"').click();

  })
In the same way, you can use the .click() command to uncheck if the check box is already checked.
Radio button in forms using Cypress
The radio button is generally provided to the user to choose a single option out of many. For example gender radio buttons you can either select male, female or other. The radio button in Cypress works the same way as checkboxes.
The .check() and uncheck() command can be used for radio buttons as well.
Radio Button Example
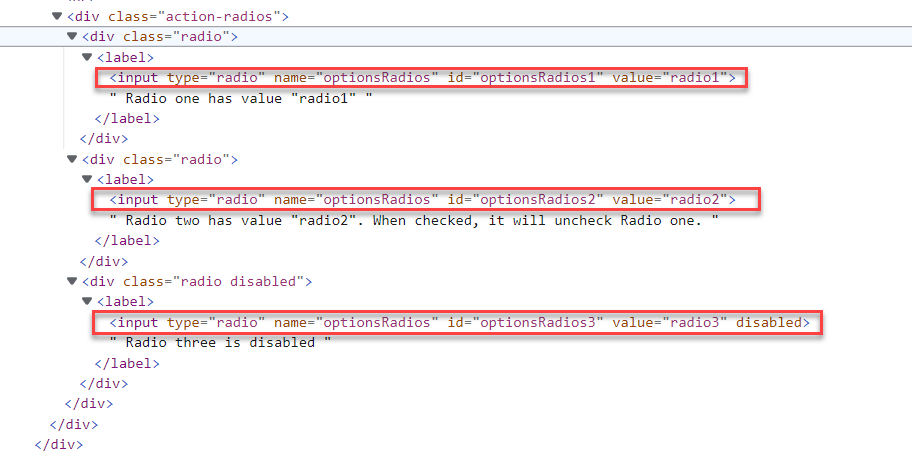
HTML Code
In the above HTML code, you can see the radio buttons are defined with <input> tag and attribute type=”radio”. When the attribute type is the radio, you can only have one radio button checked at any time.
Automate Radio buttons in Forms using Cypress
  it('should checkboxes check using click', () => {

    cy.visit('https://example.cypress.io/commands/actions')

    cy.get('[type="radio"]').check("radio1");

  })
In the above code, we are using the check() command, and the value of the first radio button is passed to the check command i.e “radio1”
Alternative way to check the Radio Button
Like Checkboxes, you can also use the click command to check the radio button
For example, the above code can be rewritten to use the .click() command as below
cy.get('[type="radio"][value="radio1"]').click();
Drop Down in webforms
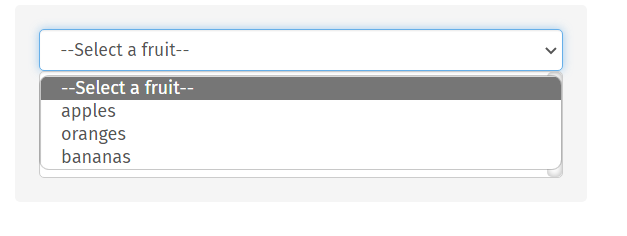
The Dropdown helps to select the option from the available list, for example, I have a fruit drop-down with options like apples, oranges, and bananas. From this I can choose the fruit I like using the drop-down.
Example of Dropdown
The HTML code for the dropdown can be viewed below
As you can see in the above HTML code, the drop-down is defined using the <select> tag, and the child elements are defined using the <option>. The Cypress provides the select() command to select the drop-down
Automate Form Dropdown using Cypress
  it('should select oranges from dropdown', () => {

    cy.visit('https://example.cypress.io/commands/actions')

    cy.get('select').eq(0).select("oranges")

  })
In the above code, we are using the .select() command with values to choose the option from the dropdown. The .select() command accepts the “options” as a parameter in our case it is “oranges” and chooses the options accordingly.
Submit Form using Cypress
The Submit button in the Form is a button that of type=submit. Like the type of input based on the type attribute in the <input> tag, the type of button changes based on the type attribute of <button> tag.
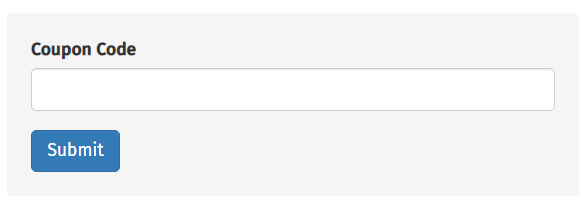
Example of Form Submit
HTML Code for Submit
As you can see in the above image, we have one text field and a submit button. When we inspect the Submit button HTML code looks as shown below
Automate the form submit button using Cypress
Submit action can be performed on Cypress using two ways
- .submit() command
- .click() command
Method 1: Using .submit() command
Using this method you need to perform the submit action for the form. That means instead of using the locator of submit button you need to get the locator of <form> tag. In our case, the form locator is form.action-form.
Cypress code to Automate Submit
  it('should submit the form', () => {

    cy.visit('https://example.cypress.io/commands/actions')

    cy.get('form.action-form').submit();

  })
Method 2: Using .click() command
In this method, you need to perform a click action using the Submit button locator. In our case it is button[type=”submit”]
Cypress code to Automate the Form Submit using the Click
  it('should submit the form', () => {

    cy.visit('https://example.cypress.io/commands/actions')

    cy.get('button[type="submit"]').click();

  })
Form Reset and Cancel button In Cypress
The Reset button’s main functionality is to Reset the form to the default state. For example, if you have form fields to enter multiple inputs, if you want to clear them all at once, you can press the reset button.
Some forms allow for cancellation of the form, using the cancel button. When you click the Cancel button, the web page generally navigates to the previous screen.
Handling the Reset and Cancel button in Cypress
Handling reset and cancel is similar to handling any other button. So considering this
You need to get the button selector using the .get() command and perform the click action
Syntax:
cy.get('<selector>').click()
Example:
cy.get('#reset').click()
cy.get('#cancel').click()
Closing Notes
Though web forms are fundamental functionality, it is one of the most critical parts of the web application. Web forms may greatly impact the business if it doesn’t work expectedly.
For example, if you have a web form to sign up the user, and if it is not working. Webforms need to be tested thoroughly on all supported browsers and platforms. Browserstack provides real devices on the cloud and helps to get accurate results that you can rely on.
- Cypress tests are restricted to execute parallelly on local machines but Cypress tests can be executed parallelly on BrowserStack.
- Browserstack’s parallel testing executes the Cypress tests on multiple devices and provides the instant execution report.
