In 2012, a simple software glitch caused Knight Capital to lose $440 million in just one hour, nearly bringing down a company that had taken 17 years to build. While writing tests may seem tedious and messy, it is essential.
This guide explores the basics of setting up Ginkgo, writing tests, and running them, giving you a strong foundation for creating reliable test suites in Golang.
What is Ginkgo?
Ginkgo is a Behavior-Driven Development (BDD) testing framework for Golang. It provides expressive syntax and powerful tools to write, organize, and run tests efficiently, making it a popular choice among Golang developers.
Ginkgo works hand-in-hand with the Gomega matcher library, which provides an extensive set of matchers for making assertions in tests. Together, they form a powerful duo that enables developers to test complex systems with ease.
Ginkgo’s focus on modularity and hierarchy means you can organize your tests logically using Describe, Context, and It blocks. Here’s a simple Describe block to illustrate Ginkgo’s syntax:
```go

Describe("Calculator", func() {

    Context("Addition operation", func() {

        It("adds two positive numbers", func() {

            result := 3 + 5

            Expect(result).To(Equal(8))

        })


        It("adds a positive and a negative number", func() {

            result := 5 + (-2)

            Expect(result).To(Equal(3))

        })

    })

})


```This structure improves test readability and makes maintaining tests over time far more manageable.
Why Use Ginkgo for Testing in Golang?
Ginkgo stands out among testing frameworks due to its rich feature set and developer-friendly approach, making it ideal for building maintainable and scalable test suites in Go.
Reasons to Use Ginkgo:
1. Encourages Behavior-Driven Development (BDD): Ginkgo is rooted in the principles of BDD, which focus on testing the behavior of software from the user’s perspective. This approach ensures tests align with business requirements, making it easier to verify that the application works as expected.
2. Highly Readable Syntax: The syntax provided by Ginkgo is expressive and intuitive, resembling natural language. This makes test cases easy to write and understand, even for team members who may not be deeply technical, fostering better collaboration.
3. Logical Test Organization: Ginkgo offers a clear hierarchy for structuring tests using constructs like `Describe`, `Context`, and `It`. These constructs enable developers to group related tests, define scenarios, and specify expected outcomes in a way that is both logical and easy to navigate.
4. Integration with Gomega for Assertions: The seamless pairing of Ginkgo with the Gomega Matcher library allows developers to write concise and powerful assertions. This eliminates ambiguity in test results and provides a wide range of matchers to validate outcomes effectively.
5. Support for Advanced Testing Features: Ginkgo’s capabilities go beyond basic testing. It includes parallel test execution to speed up large test suites, customizable hooks for setup and teardown, retry mechanisms for flaky tests, and rich CLI options for focused testing, randomization, and debugging. These features make it a comprehensive tool for both simple and complex projects.
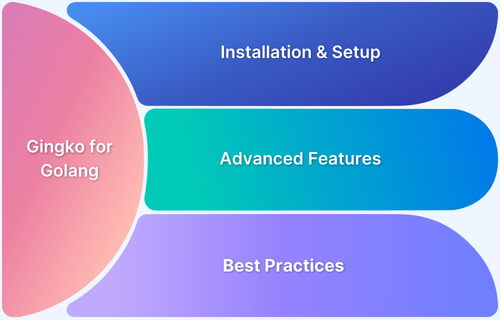
Installation and Setup of Ginkgo in Golang
Follow these simple steps to install the necessary dependencies and set up your testing environment.
Steps to Install & Setup Gingko in Golang:
- Install Ginkgo and Gomega
- Bootstrapping a Suite
- Adding Specs to a Suite
Step 1: Install Ginkgo and Gomega
Ginkgo uses [Go modules](https://go.dev/blog/using-go-modules). If you already have a go.mod file set up, you can add Ginkgo to your project by running the following commands:
```bash

go install github.com/onsi/ginkgo/v2/ginkgo

go get github.com/onsi/ginkgo/v2

go get github.com/onsi/gomega/...

```These commands will fetch Ginkgo, install the `ginkgo` executable to your `$GOBIN` directory, and add it to your `$PATH`. They will also download the core Gomega matcher library along with its supporting libraries. The currently supported major version of Ginkgo is `v2`.
After installation, you should be able to run `ginkgo version` in your terminal to verify the CLI is correctly installed and see the version number.
Note: Ensure the `ginkgo` CLI version matches the Ginkgo version in your `go.mod` file. You can achieve this by running `go install github.com/onsi/ginkgo/v2/ginkgo` from your project’s root directory.
Step 2: Bootstrapping a Suite
Say you have a package named `calculator` that you’d like to add a Ginkgo suite to. To bootstrap the suite run:
```bash

cd path/to/calculator

ginkgo bootstrap

Generating ginkgo test suite bootstrap for calculator in:

  calculator_suite_test.go

```


This will generate a file named `calculator_suite_test.go` in the `calculator` directory containing:


```go

package calculator_test


import (

  . "github.com/onsi/ginkgo/v2"

  . "github.com/onsi/gomega"

  "testing"

)


func TestCalculator(t *testing.T) {

  RegisterFailHandler(Fail)

  RunSpecs(t, "Calculator Suite")

}

```
`RegisterFailHandler(Fail)` is the key connection between Ginkgo and Gomega. Without using dot-imports, it would be written as `gomega.RegisterFailHandler(ginkgo.Fail)`. This line informs Gomega, the matcher library, to invoke Ginkgo’s `Fail` function whenever a test failure is encountered.
The `RunSpecs()` function is then used to initiate the test suite, providing it with the `*testing.T` instance and a description of the suite. It is important to call `RunSpecs()` only once, as Ginkgo will handle invoking `*testing.T` for you.
With the bootstrap file in place, you can now run your suite using the `ginkgo` command:
```bash

ginkgo


Running Suite: Calculator Suite - path/to/calculator

==========================================================

Random Seed: 1634745148


Will run 0 of 0 specs


Ran 0 of 0 Specs in 0.000 seconds

SUCCESS! -- 0 Passed | 0 Failed | 0 Pending | 0 Skipped

PASS


Ginkgo ran 1 suite in Xs

Test Suite Passed

```Under the hood, `ginkgo` is simply calling `go test`. While you can run `go test` instead of the `ginkgo` CLI, Ginkgo has several capabilities that can only be accessed via `ginkgo`.
Step 3: Adding Specs to a Suite
Although you can write all your specs directly in `calculator_suite_test.go`, it’s generally better to organize your specs into separate files. This approach is especially useful when testing packages with multiple files.
For example, if your `calculator` package includes a `adder.go` model and you want to test its functionality, you can generate a test file as follows:
```bash

ginkgo generate adder

Generating ginkgo test for Calculator in:

  adder_test.go

```This will generate a test file named `adder_test.go` containing:
```bash

package calculator_test


import (

  . "github.com/onsi/ginkgo/v2"

  . "github.com/onsi/gomega"


  "path/to/calculator"

)


var _ = Describe("Adder", func() {


})

```As with the bootstrapped suite file, this test file is in the separate `calculator_test` package and dot-imports both `ginkgo` and `gomega`. Since here testing the external interface of `adder`, Ginkgo adds an `import` statement to pull the `calculator` package into the test.
Let’s add a few specs, now, to describe our adder model’s ability to add integers:
```go

var _ = Describe("Adder", func() {

var calc calculator


BeforeEach(func() {

calc = calculator{}

})


Describe("Adding two numbers", func() {

Context("when both numbers are positive", func() {

It("should return the correct sum", func() {

Expect(calc.Add(2, 5)).To(Equal(7))

})

})


Context("when either number is negative", func() {

It("should return an error", func() {

_, err := calc.Add(-2, -5)

Expect(err).To(MatchError("negative numbers are not allowed"))

})

})

})

})


```The `Adder` test suite uses Ginkgo’s `Describe` and `It` blocks to organize and execute the test cases.
Code Explanation:
Here’s a detailed explanation of the functions used:
1. Describe:
This block groups related test cases, providing a descriptive label for the tests within it. For example, `”Adder”` describes the overall functionality being tested, while nested `Describe` blocks further organize specific scenarios like adding numbers or handling errors.
2. It:
Each `It` block represents an individual test case with a clear description of what it is verifying. For example:
- `”should return 7″` tests if the `Add` function correctly calculates the sum of `2` and `5`.
- `”should return an error“` checks if the `Add` function throws an error when negative numbers are provided.
3. Expect:
This function from Gomega is used to assert the expected outcome of a test:
- `Expect(calculator.Add(2, 5)).To(Equal(7))` ensures that the sum of `2` and `5` equals `7`.
- `Expect(err).To(MatchError(“negative numbers are not allowed”))` validates that the error message matches the expected text.
With the tests in place, the next step is to define the `adder` file. Create a new file named `add.go` and add the following code:
```go

package calculator


import "errors"


func Add(a int, b int) (int, error) {

if a < 0 || b < 0 {

return 0, errors.New("negative numbers are not allowed")

}

return a + b, nil

}


```Assuming a `calculator.Add` model with this behavior you can run the tests:
```bash

ginkgo

Running Suite: Calculator Suite - path/to/calculator

==========================================================

Random Seed: 1634748172


Will run 2 of 2 specs

..

Ran 2 of 2 Specs in 0.000 seconds

SUCCESS! -- 2 Passed | 0 Failed | 0 Pending | 0 Skipped

PASS


Ginkgo ran 1 suite in Xs

Test Suite Passed

```Advanced Features of Gingko
Here are the core features of Gingko which makes it an advanced testing framework:
1. Focused and Pending Tests
Ginkgo makes it easy to narrow down your focus during development:
- Focused Tests: Add an `F` prefix (such as, `FIt`, `FDescribe`, `FContext`) to run only specific tests while skipping the others. This is useful for debugging specific scenarios.
- Pending Tests: Mark tests as pending using `PIt`, `PDescribe`, `PContext`, or by leaving the test body empty. Pending tests are skipped during execution and serve as placeholders for tests yet to be implemented.
2. Lifecycle Hooks
Ginkgo provides hooks for managing setup and cleanup:
- `BeforeSuite` and `AfterSuite`: Execute once before and after all tests in a suite. Ideal for global initialization or cleanup, such as setting up a database connection.
- `BeforeEach` and `AfterEach`: Run before and after every individual test case. Perfect for preparing and cleaning up resources specific to each test, like resetting mocks or clearing temporary data.
3. Table-Driven Tests
Ginkgo simplifies repetitive test scenarios by supporting table-driven tests:
- Define a reusable test structure using the `Table` and `Entry` constructs.
- Pass multiple sets of input data to the same test logic, reducing boilerplate code and ensuring consistent coverage across different input cases.
4. Parallel Test Execution
Speed up test execution by running tests in parallel:
- Configure parallelism using the `–procs` flag or programmatically.
- Ginkgo ensures that tests run in isolated environments to prevent conflicts, making parallel execution safe and efficient.
5. Custom Matchers
Extend Ginkgo’s capabilities with Gomega’s custom matchers:
- Create matchers tailored to your application’s domain-specific logic, enabling expressive and meaningful assertions.
- For example, a custom matcher can validate complex JSON structures or specific database query results, making tests more readable and precise.
Best Practices for Using Ginkgo in Go
Ginkgo is a robust testing framework for Go, and following best practices ensures that your tests remain clean, efficient, and maintainable. Here’s a short overview of the best practices for using Ginkgo effectively:
1. Organize Tests with Descriptive Names
Use clear and concise descriptions for `Describe` and `It` blocks to ensure the intent of the tests is easily understood.
2. Keep Test Suites Small and Focused
Avoid large, monolithic test suites. Break them down into smaller, more manageable test files based on the functionality being tested.
3. Leverage Before and After Hooks
Use `BeforeEach`/`AfterEach` for test-specific setup/cleanup and `BeforeSuite`/ `AfterSuite` for global setup/teardown, improving test isolation and reducing code duplication.
4. Use Focus and Pending Tests Sparingly
While `FIt`, `FDescribe`, and `PIt` are helpful for debugging, avoid excessive use in production code. Ensure that pending tests are completed and implemented before finalizing the test suite.
5. Write Table-Driven Tests for Repetitive Scenarios
Use the `Table` and `Entry` constructs for testing multiple input sets with the same logic, reducing boilerplate and improving test coverage.
6. Run Tests in Parallel Where Possible
Use Ginkgo’s parallel test execution to speed up large test suites, but ensure tests are independent and isolated to avoid side effects.
7. Use Custom Matchers for Complex Assertions
Create custom Gomega matchers to handle complex or domain-specific assertions, improving test readability and precision.
8. Write Clear and Comprehensive Descriptions for Test Failures
Ensure that `It` blocks include meaningful descriptions so that when tests fail, the output provides valuable information for debugging.
Conclusion
Ginkgo offers a simple and effective way to test Go applications. By following best practices and making use of its powerful features, developers can create tests that are easy to understand, maintain, and scale, ultimately improving the reliability of the software.
This approach helps ensure that the code is not only high-quality but also adaptable as projects grow.


