Getting Started with Appium and NUnit framework
By Gurudatt S A, Community Contributor - October 30, 2022
Appium is the most popular test framework used for testing native, mobile-web and hybrid applications in Android and iOS mobile operating system. Since Appium provides the library for connecting and interacting with Android and iOS applications, you can integrate this with most popular test runners like JUnit and NUnit.
This article focuses on using Appium for .Net C# and NUnit.
Prerequisites for running Appium Tests with NUnit
Before you start writing your first test in Appium with NUnit, you need below setup to be completed in our System (This article focuses on setting up tools in macOS and similar setup is also possible in Windows)
Visual Studio for Mac setup
Once the installation of Visual studio for mac is completed, open the Visual studio for next setup
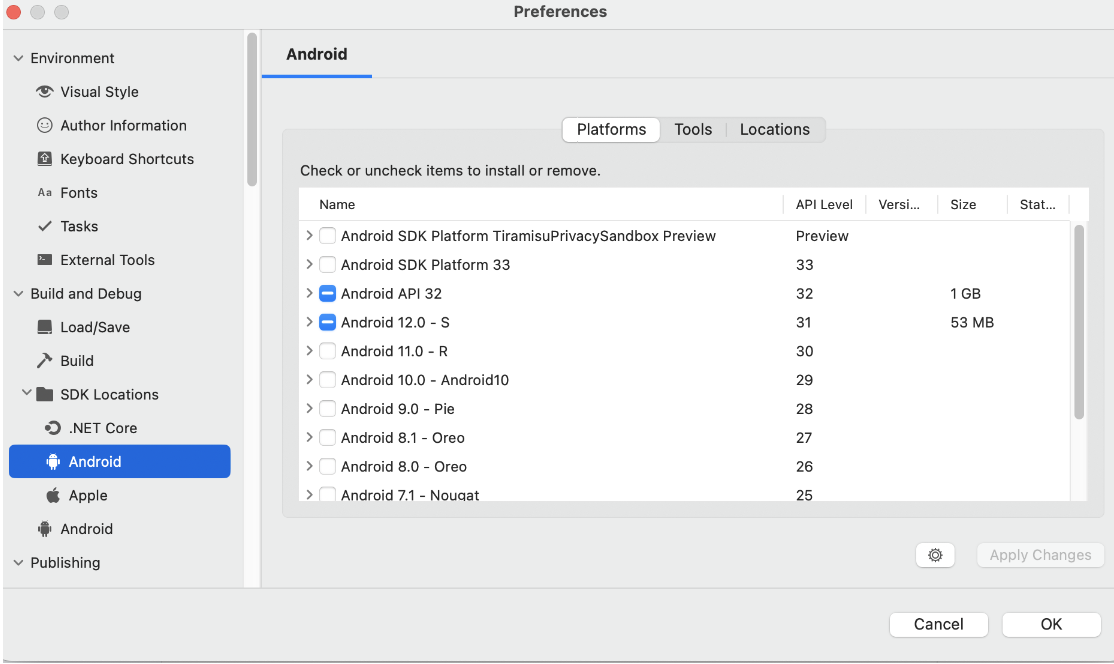
- Click on Tools > SDK Manager
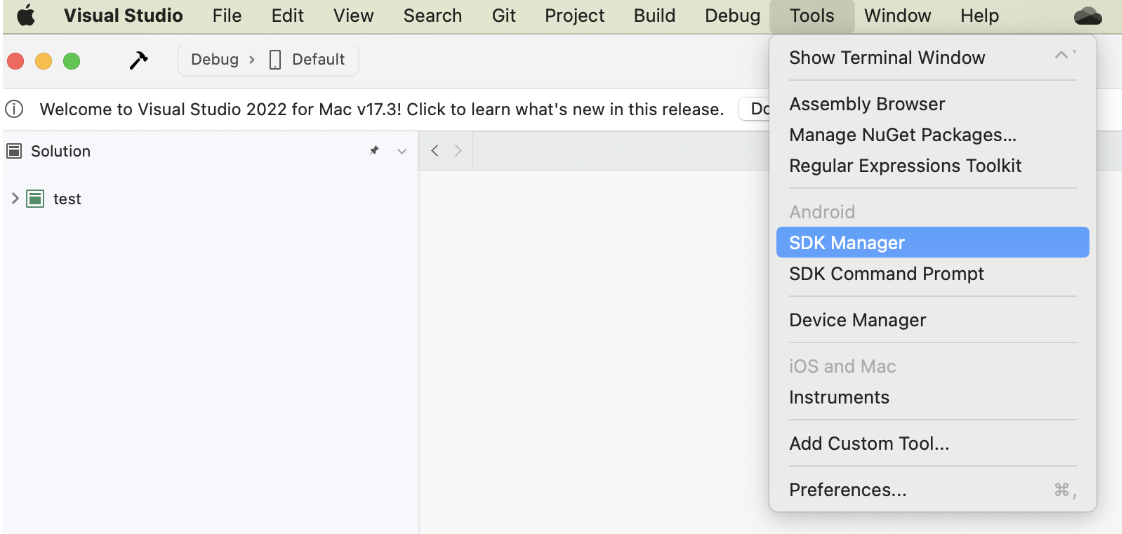
- In the Android Platform, Enable Android API and Android OS, this will download required images for running the Android Virtual Devices. Click on Apply Changes.
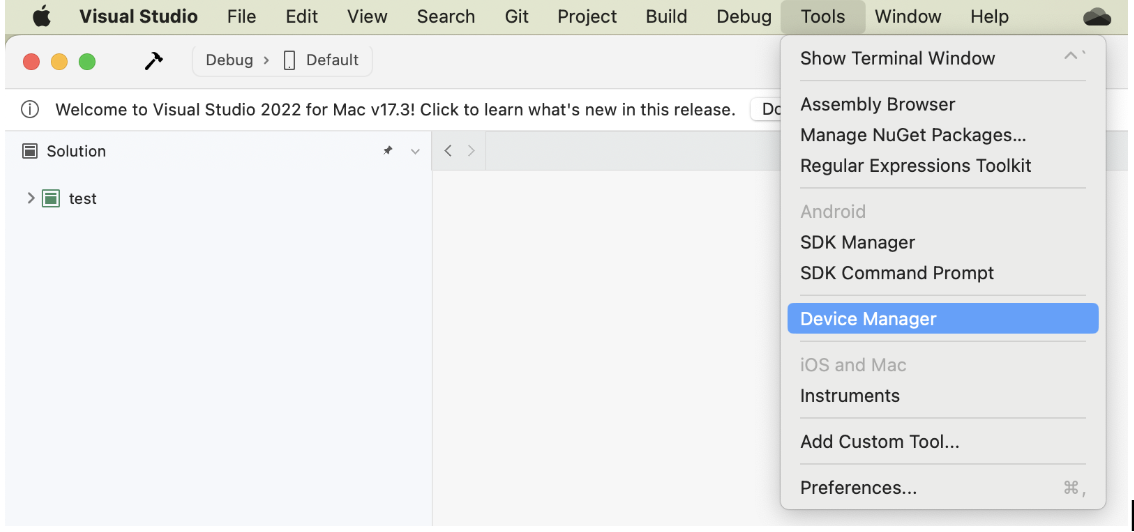
- Next step is to create a Virtual Device. To do that, click on Tools > Device Manager
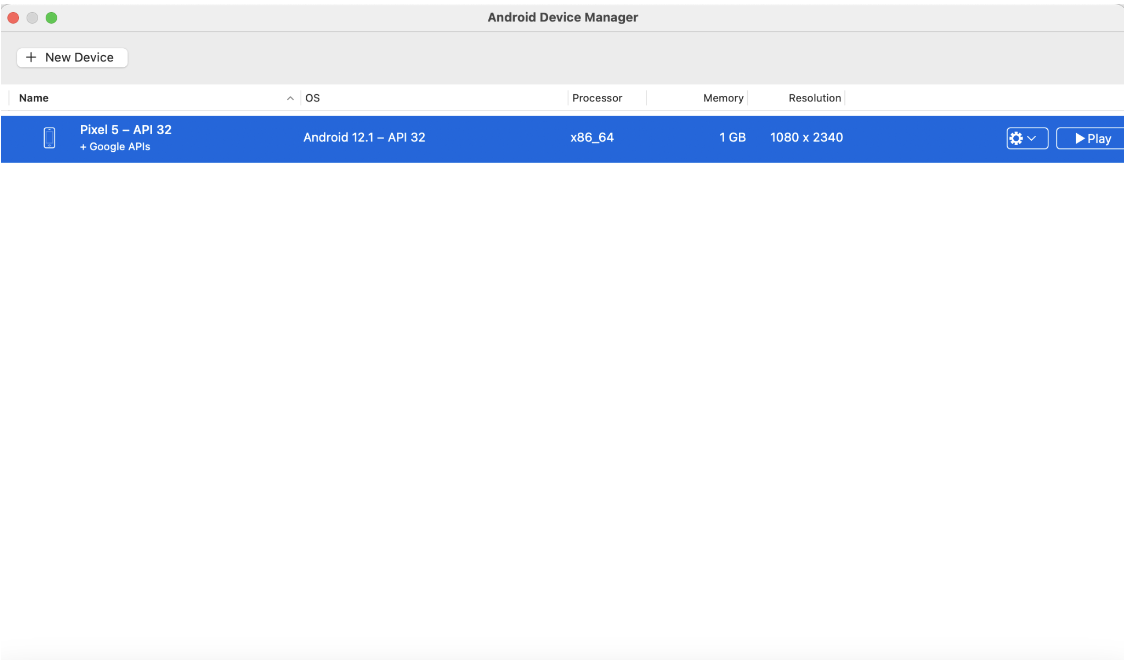
- Android Device Manager window will be displayed like below, you can now create a New Device, or manage Existing Devices.
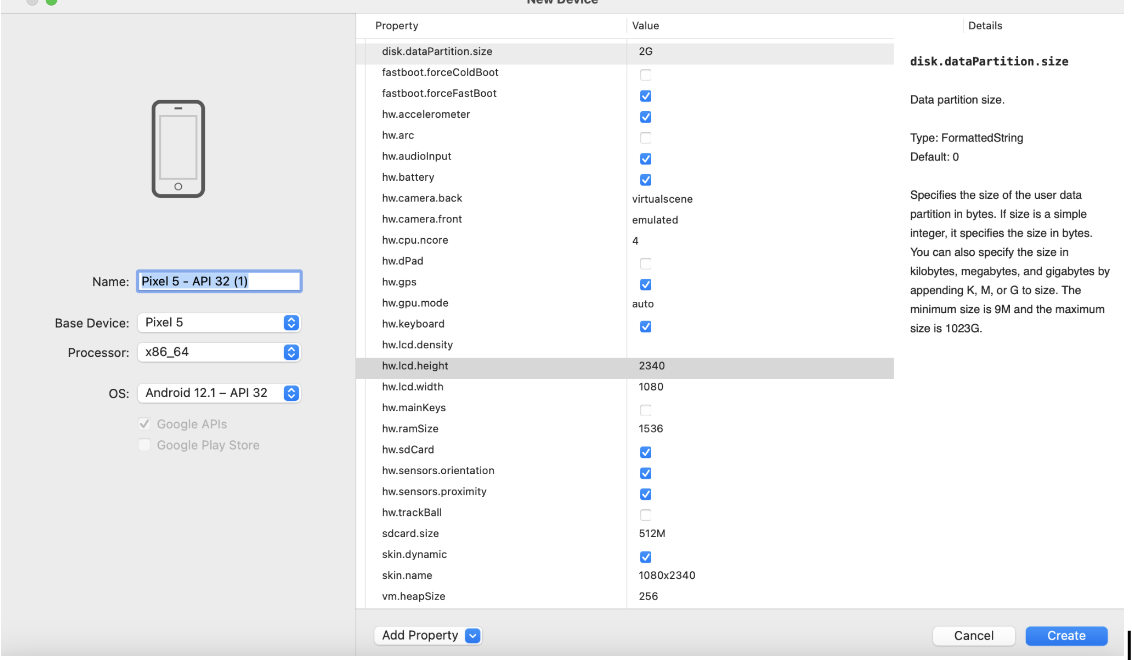
- Upon clicking on the New Device button, you will see below the new Virtual device creation window. Using this you can provide device name and select its Configuration. After selecting configuration, click on Create and this will create a new Virtual device.
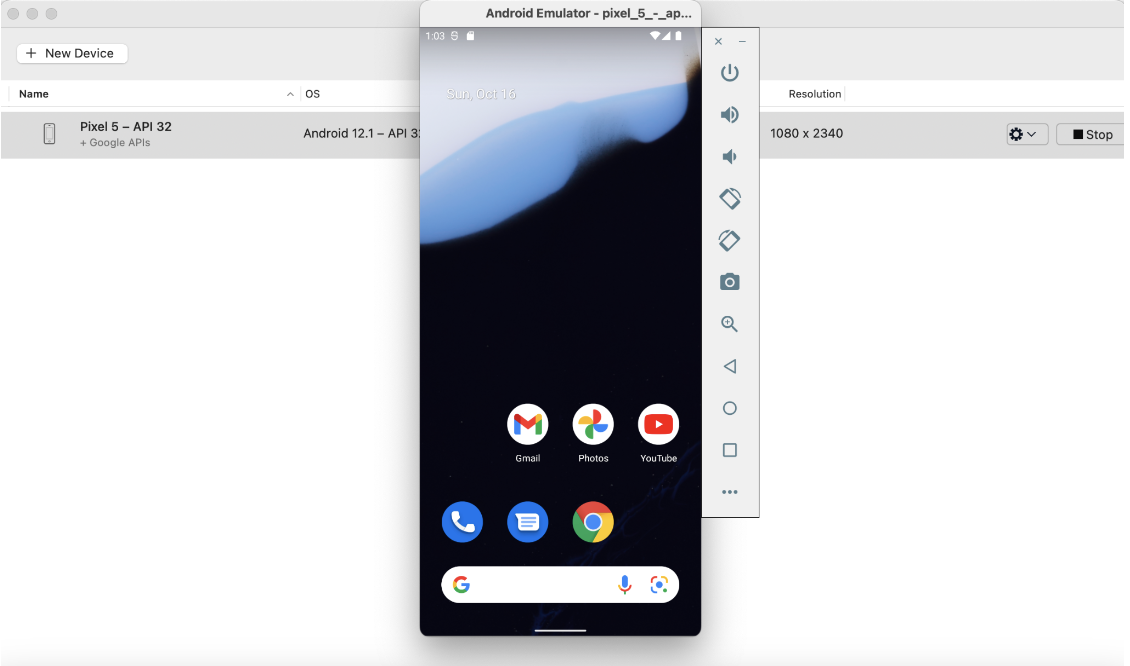
- Once the device is created, it will list in the Android Device Manager window. You can start the Virtual device by clicking on Play button
- Our new Android virtual device will be started and it looks like below
Appium Setup
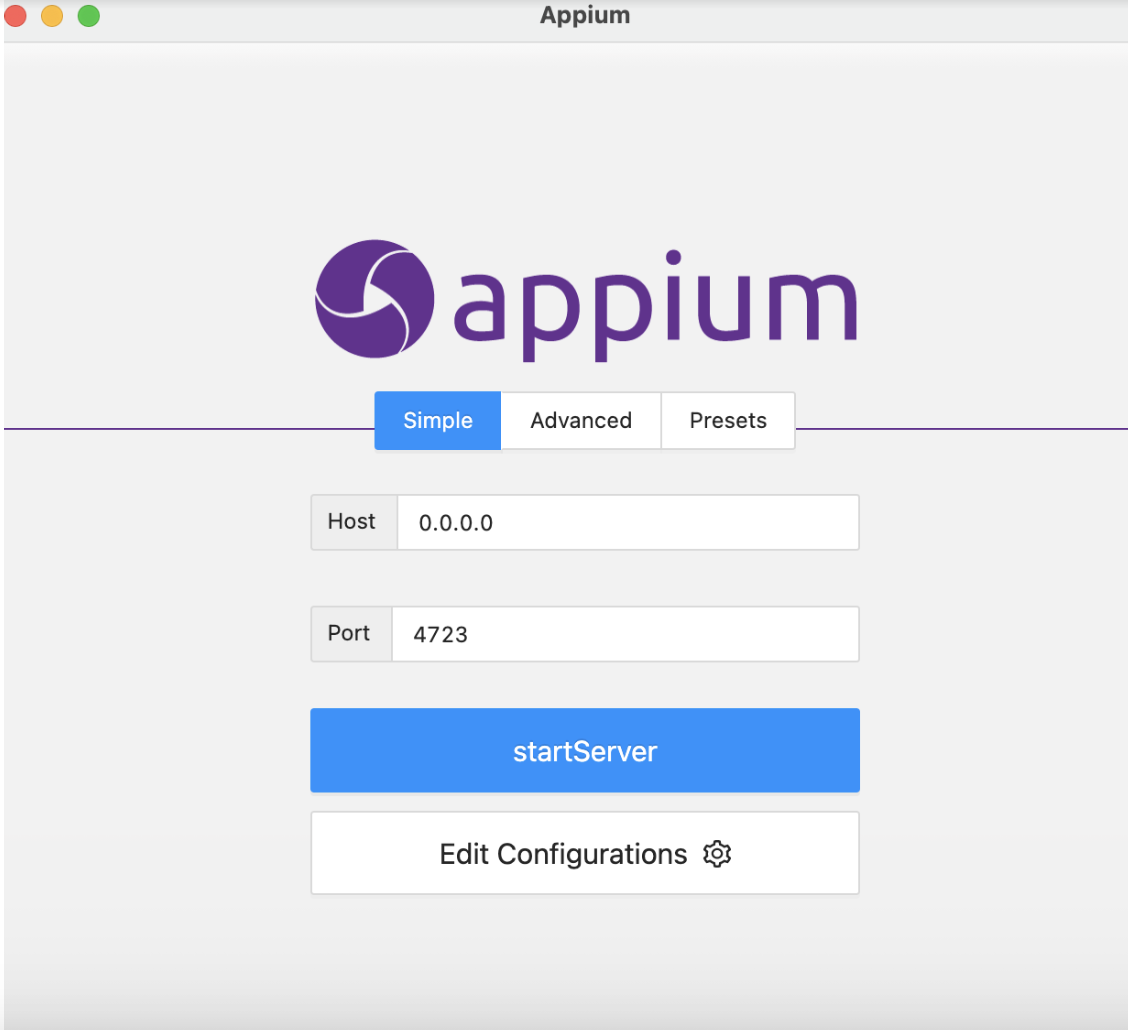
Once the installation is completed, on opening the Appium server, the screen will look like below.
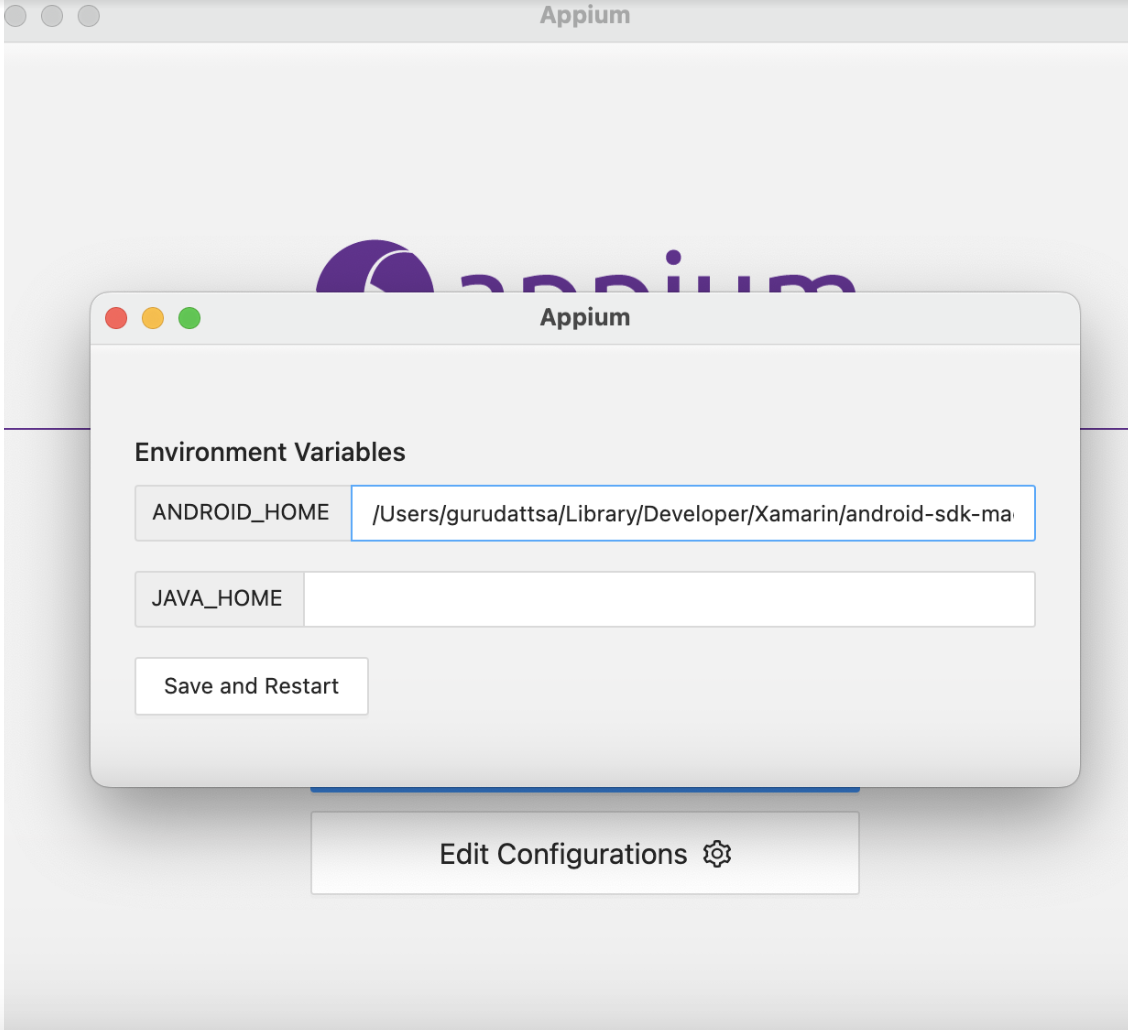
You need to enter the host IP, so let’s enter 127.0.0.1 and before starting the server you need to ensure the ANDROID_HOME variable is defined with the proper path. Enter the android sdk path and click on Save and Restart
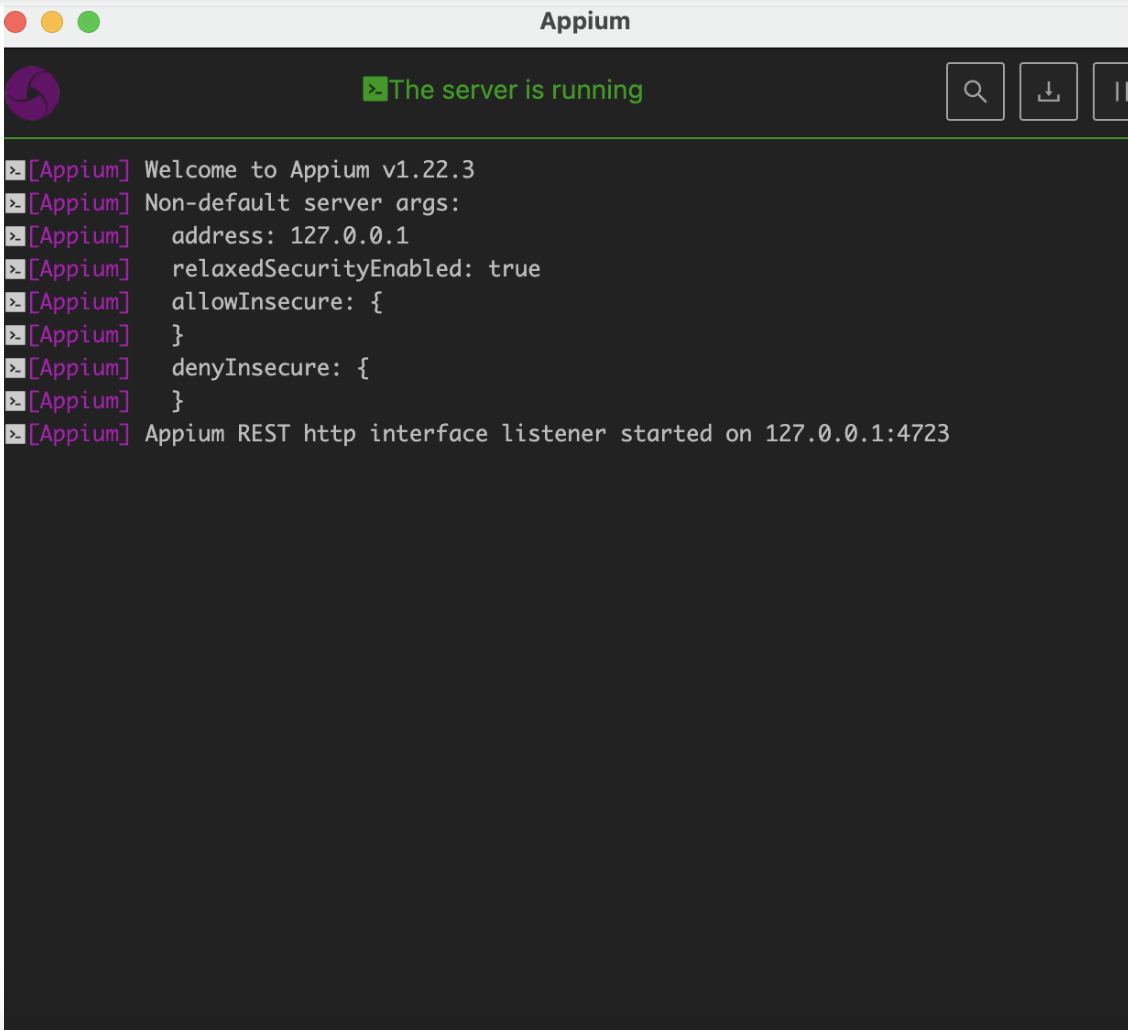
You can now start our Appium server with host IP set as 127.0.0.1
Project setup for running Appium Tests with NUnit
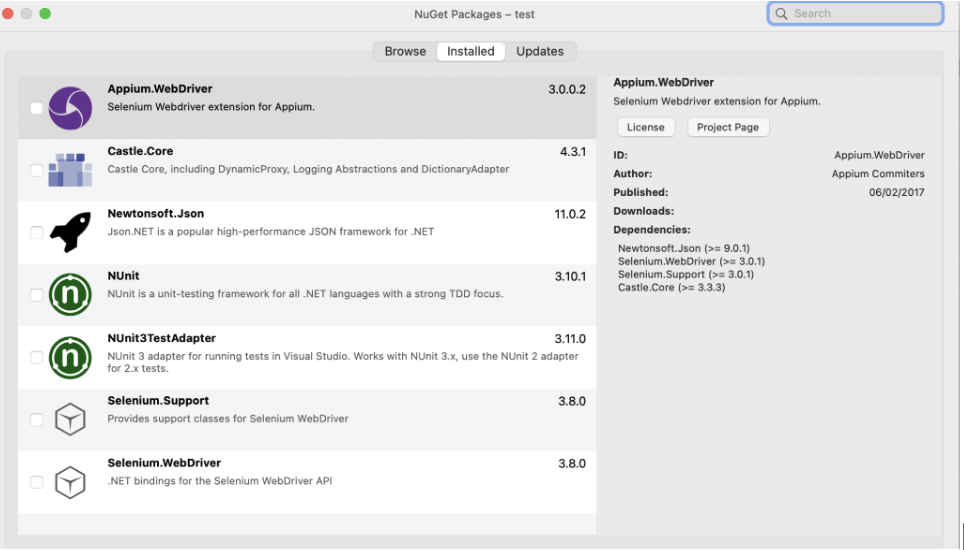
Once you create the NUnit Test Project, you need to install below packages
Once these packages are added, you can start writing our tests and helpers.
Writing first Appium NUnit test
Using the NUnit framework for creating the test which will test the sample Android Application.
The Test class will have
- Setup – To set the Desired capabilities and to create Android Driver
- Test – To perform a Search feature validation in our Android Application
- TearDown – To tear down the Android Driver
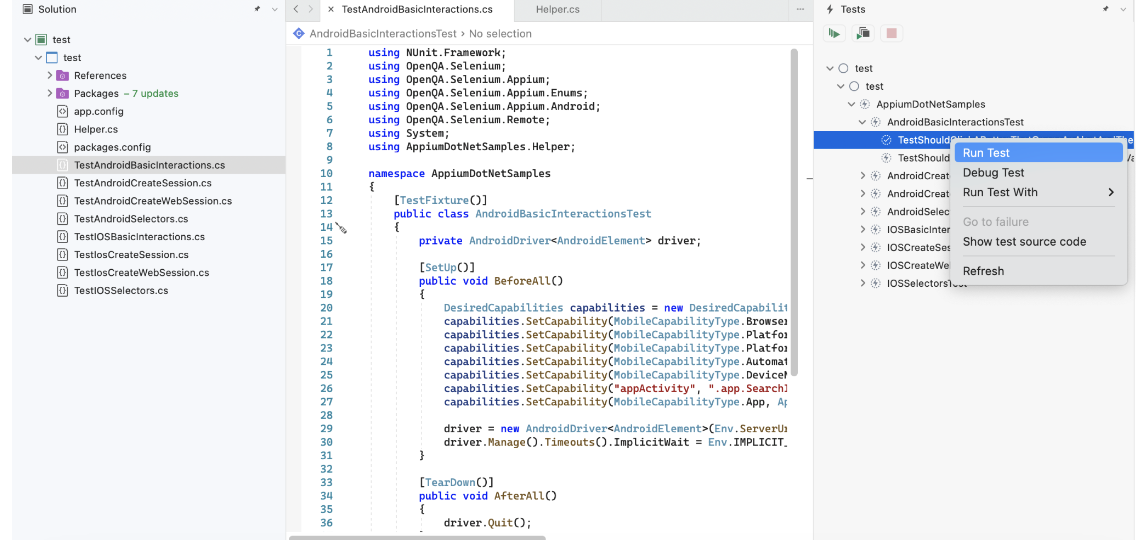
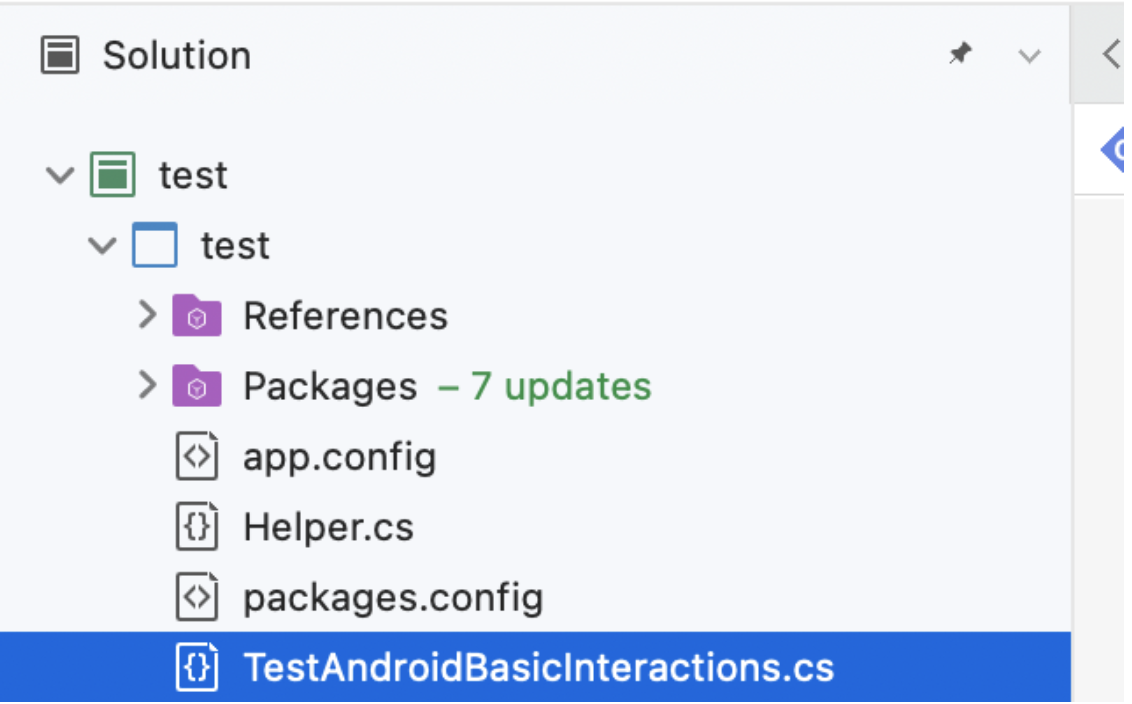
Our Project and Classes will look like below in the Solution
- Environment Details
- Application Details (Whether we need to test IOS/Android application, Application name and path etc.)
Below is the code used in Helper Class
using System;
namespace AppiumDotNetSamples.Helper
{
public static class Env
{
public static String rootDirectory = System.IO.Path.GetFullPath($"{System.AppDomain.CurrentDomain.BaseDirectory.ToString()}/../../../..");

static public bool IsBrowserStack()
{
return Environment.GetEnvironmentVariable("BROWSERSTACK") != null;
}

static public Uri ServerUri()
{
String bsUserName = Environment.GetEnvironmentVariable("BROWSERSTACK_USERNAME");
String bsAccessKey = Environment.GetEnvironmentVariable("BROWSERSTACK_ACCESS_KEY");

return (bsUserName == null) || (bsAccessKey == null)
? new Uri("http://localhost:4723/wd/hub")
: new Uri($"https://cloudURL:80/wd/hub");
}

public static TimeSpan INIT_TIMEOUT_SEC = TimeSpan.FromSeconds(180);
public static TimeSpan IMPLICIT_TIMEOUT_SEC = TimeSpan.FromSeconds(10);
}

public static class App
{
static public String IOSApp()
{
return Env.IsBrowserStack() ? "http://appium.github.io/appium/assets/TestApp7.1.app.zip" : $"{Env.rootDirectory}/apps/TestApp.app.zip";
}

static public String IOSDeviceName()
{
return Environment.GetEnvironmentVariable("IOS_DEVICE_NAME") ?? "iPhone 6s";
}

static public String IOSPlatformVersion()
{
return Environment.GetEnvironmentVariable("IOS_PLATFORM_VERSION") ?? "11.4";
}

static public String AndroidApp()
{
Console.WriteLine(Env.rootDirectory);
return Env.IsBrowserStack() ? "http://appium.github.io/appium/assets/ApiDemos-debug.apk" : $"{Env.rootDirectory}/apps/ApiDemos-debug.apk";
}

static public String AndroidDeviceName()
{
return Environment.GetEnvironmentVariable("ANDROID_DEVICE_VERSION") ?? "Android";
}

static public String AndroidPlatformVersion()
{
return Environment.GetEnvironmentVariable("ANDROID_PLATFORM_VERSION") ?? "12.0";
}
}
}
Let’s see how our Setup/BeforeAll method looks like
[SetUp()]
public void BeforeAll()
{
DesiredCapabilities capabilities = new DesiredCapabilities();
capabilities.SetCapability(MobileCapabilityType.BrowserName, "");
capabilities.SetCapability(MobileCapabilityType.PlatformName, App.AndroidDeviceName());
capabilities.SetCapability(MobileCapabilityType.PlatformVersion, App.AndroidPlatformVersion());
capabilities.SetCapability(MobileCapabilityType.AutomationName, "UIAutomator2");
capabilities.SetCapability(MobileCapabilityType.DeviceName, "Nexus");
capabilities.SetCapability("appActivity", ".app.SearchInvoke");
capabilities.SetCapability(MobileCapabilityType.App, App.AndroidApp());

driver = new AndroidDriver<AndroidElement>(Env.ServerUri(), capabilities, Env.INIT_TIMEOUT_SEC);
driver.Manage().Timeouts().ImplicitWait = Env.IMPLICIT_TIMEOUT_SEC;
}
As seen, all the Desired Capabilities are set and then passed to AndroidDriver for creating a new driver object.
AndroidDriver class constructor accepts three objects
- Server URI – Which will be http://localhost:4723/wd/hub when you run locally
- Desired Capabilities – Which specifies Mobile Capabilities
- Timeout for the commands
As explained earlier, we will be finding an element in the demo app and entering a text for search, and then will validate if the result contains searched text. For this the test class will look like below.
using NUnit.Framework;
using OpenQA.Selenium;
using OpenQA.Selenium.Appium;
using OpenQA.Selenium.Appium.Enums;
using OpenQA.Selenium.Appium.Android;
using OpenQA.Selenium.Remote;
using System;
using AppiumDotNetSamples.Helper;

namespace AppiumDotNetSamples
{
[TestFixture()]
public class AndroidBasicInteractionsTest
{
private AndroidDriver<AndroidElement> driver;

[SetUp()]
public void BeforeAll()
{
DesiredCapabilities capabilities = new DesiredCapabilities();
capabilities.SetCapability(MobileCapabilityType.BrowserName, "");
capabilities.SetCapability(MobileCapabilityType.PlatformName, App.AndroidDeviceName());
capabilities.SetCapability(MobileCapabilityType.PlatformVersion, App.AndroidPlatformVersion());
capabilities.SetCapability(MobileCapabilityType.AutomationName, "UIAutomator2");
capabilities.SetCapability(MobileCapabilityType.DeviceName, "Nexus");
capabilities.SetCapability("appActivity", ".app.SearchInvoke");
capabilities.SetCapability(MobileCapabilityType.App, App.AndroidApp());

driver = new AndroidDriver<AndroidElement>(Env.ServerUri(), capabilities, Env.INIT_TIMEOUT_SEC);
driver.Manage().Timeouts().ImplicitWait = Env.IMPLICIT_TIMEOUT_SEC;
}

[TearDown()]
public void AfterAll()
{
driver.Quit();
}

[Test()]
public void TestShouldSendKetsToSearchBoxThenCheckTheValue()
{
AndroidElement searchBoxElement = driver.FindElementById("txt_query_prefill");
searchBoxElement.SendKeys("Hello World!");

AndroidElement onSearchRequestButton = driver.FindElementById("btn_start_search");
onSearchRequestButton.Click();

AndroidElement seachText = driver.FindElementById("android:id/search_src_text");
Assert.AreEqual("Hello World!", seachText.Text);
}

}
}
To run this test, simply double click on the test name in Tests window or right click on test name and select Run
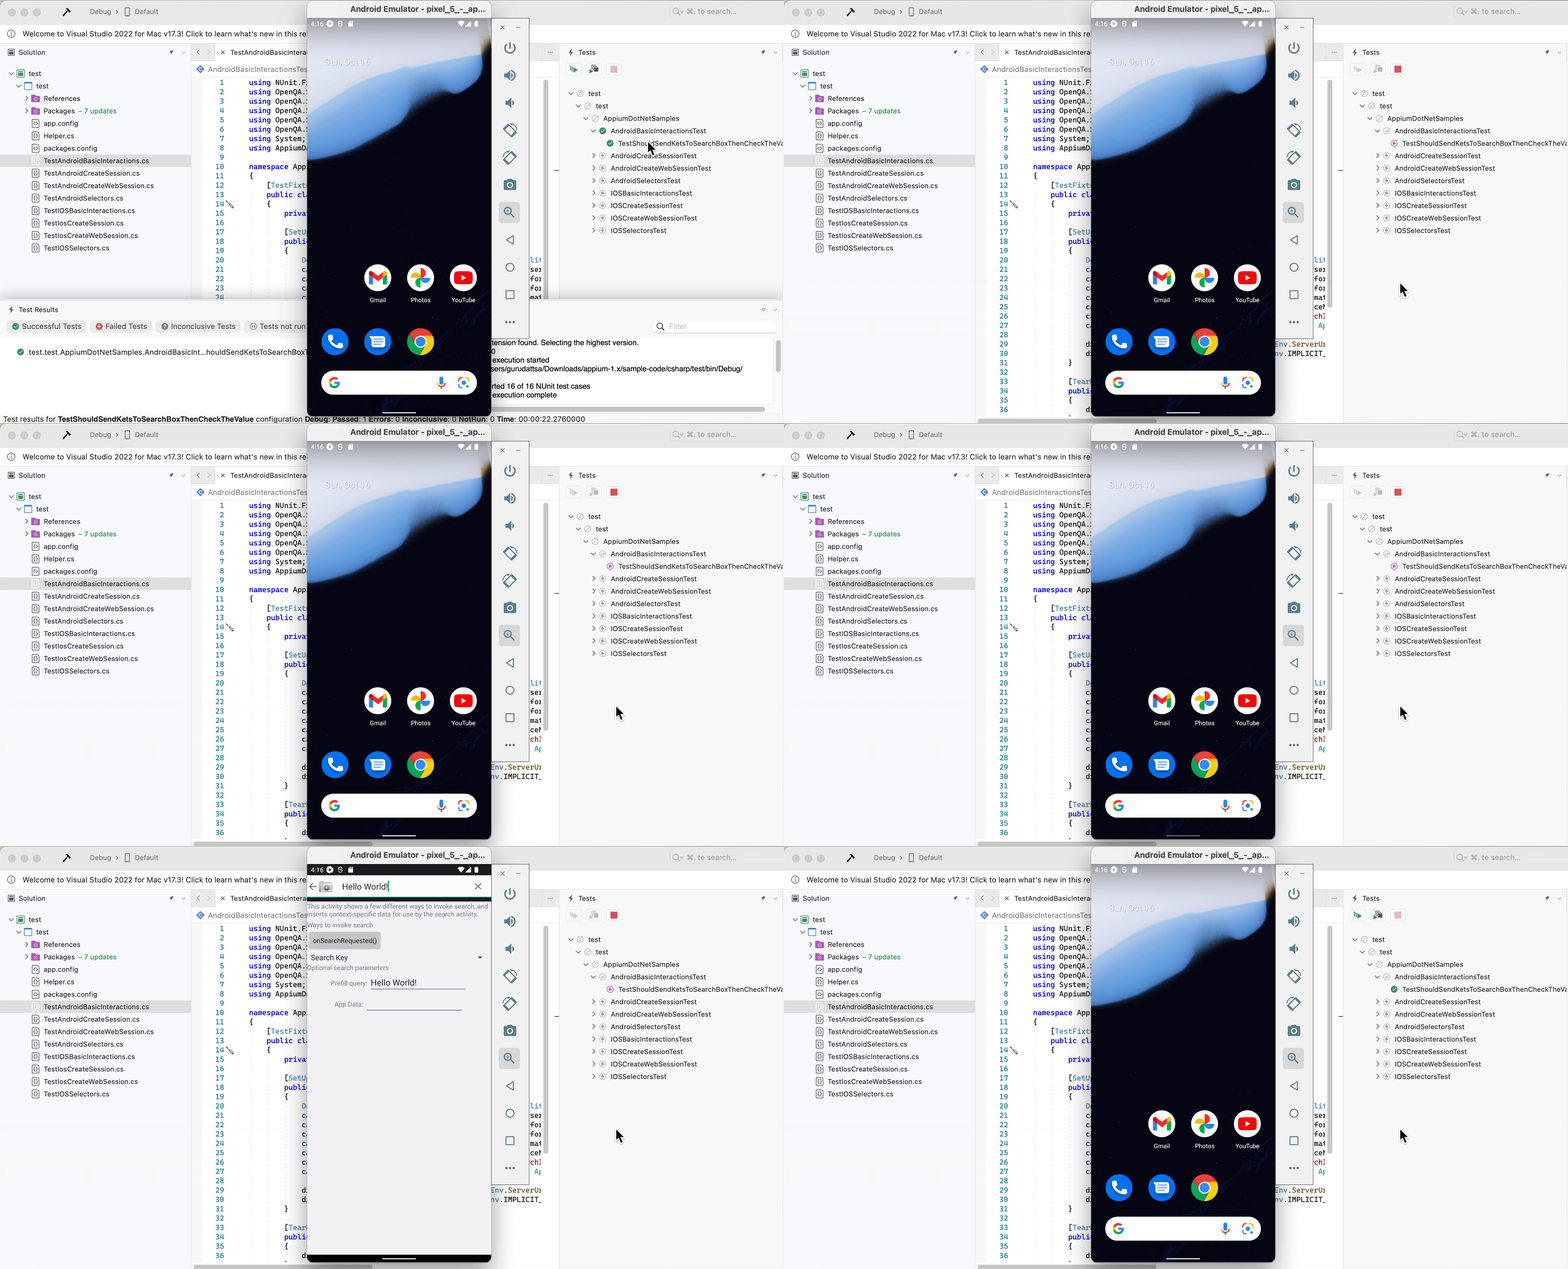
If we execute our test, it will look like below in the Android Emulator
Complete example repository of the code explained can be found here
Test on Real Devices
This article discussed, how to set up the tools required for running Appium tests using NUnit. Appium, an open source test automation framework is very powerful and can be used to test almost all workflows/use cases of Mobile Application across Platforms. Since Appium commands are like Selenium to find elements and interact with them, it will become familiar for a Selenium based tester to switch to Appium with less learning curve.
However, to get more accurate test results, it is suggested to test on real devices. BrowserStack’s real device cloud provides all the mobile devices both latest and older models in the platform.
Check out the Official Documentation to learn how to Run Appium Tests with NUnit using BrowserStack.
Using BrowserStack’s real devices you can also reduce your testing time drastically by leveraging Mobile Test Automation and running parallel tests.
