Appium is one of the most popular open-source automated mobile app testing tools. It allows developers or QA engineers to automate tests for native, hybrid, and mobile web applications. Appium uses the WebDriver protocol to automate iOS, Android, and Windows applications.
To understand the complete architectural implementation, start by setting up the Appium grid while this article aims to demonstrate the fundamental steps to get started with the Appium installation.
What is Appium Server?
Appium Server is the core component of the Appium mobile app testing framework. It acts as an intermediary between your test code and the mobile devices or emulators you’re testing on.
How to Download and Install Appium
Appium enables seamless cross-platform mobile testing, ensuring consistent performance on both iOS and Android devices. Follow these steps to download and install Appium, and get your environment ready for efficient testing.
There are 2 methods to install Appium –
- From the terminal using Node.js
- Directly from the Appium desktop client
Let’s discuss both methods in detail.
Method 1: Install Appium using Node.js
- The first step is to verify whether Node.js is already installed in the system.
To do so, open the terminal and run the following command:
node --version
If Node.js is already installed in the system, it’ll return the Node version, else it throws an error stating – ‘node is not recognized’, which means Node.js is not installed in the system.
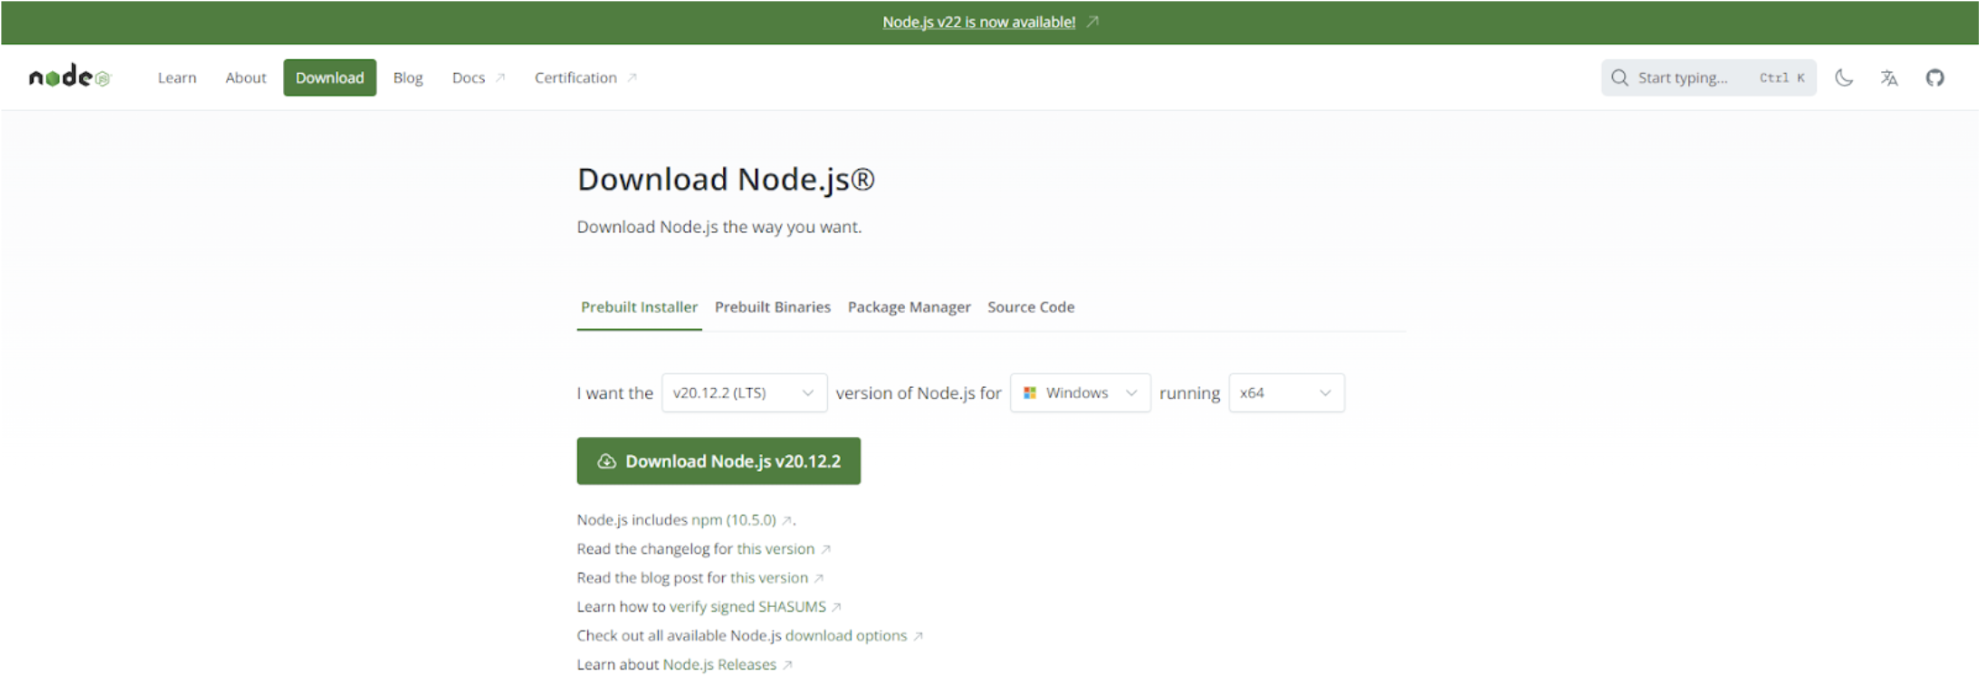
- To install Node.js, visit the official Node.js download section.
- Choose the Node installer per the underlying operating system (Mac or Windows).
- Windows users can verify the bit size (32-bit or 64-bit) by checking computer properties. Download the installer accordingly.
- Once the installer is downloaded, run it and proceed with the installation. Define the path explicitly if required.
- Once the installation is complete, restart the terminal and run the command -> node –version again. It will return the Node version.
This indicates the successful installation of Node.js. The Node.js installation also covers the installation of npm (node package manager).
Mac users can use the node -v and npm -v commands to verify the installation and version details.
- To install Appium, run the following command.
npm install -g appium
The command above will download and install Appium. Once done, verify the Appium installation on macOS or Windows by running the command below:
appium --version
This will return the latest Appium version installed in your system.
- To start the Appium server directly from the terminal, enter “appium” as a command. It will begin on the Appium server on Port number 4723.
Method 2: Install Appium using Appium Desktop Client
Note: The Appium Desktop app is a powerful GUI for developers or QA engineers to run automated mobile tests. It is compatible with macOS, Windows, and Linux. The Appium Desktop app provides an intuitive user interface for controlling and configuring the Appium server.
Refer to this official resource for Appium Desktop to learn more about its features and offerings.
The installation of the Appium Desktop Client is bundled with Node runtime, so users do not need to install Node or npm explicitly.
To get started with Appium Desktop installation, follow the steps below:
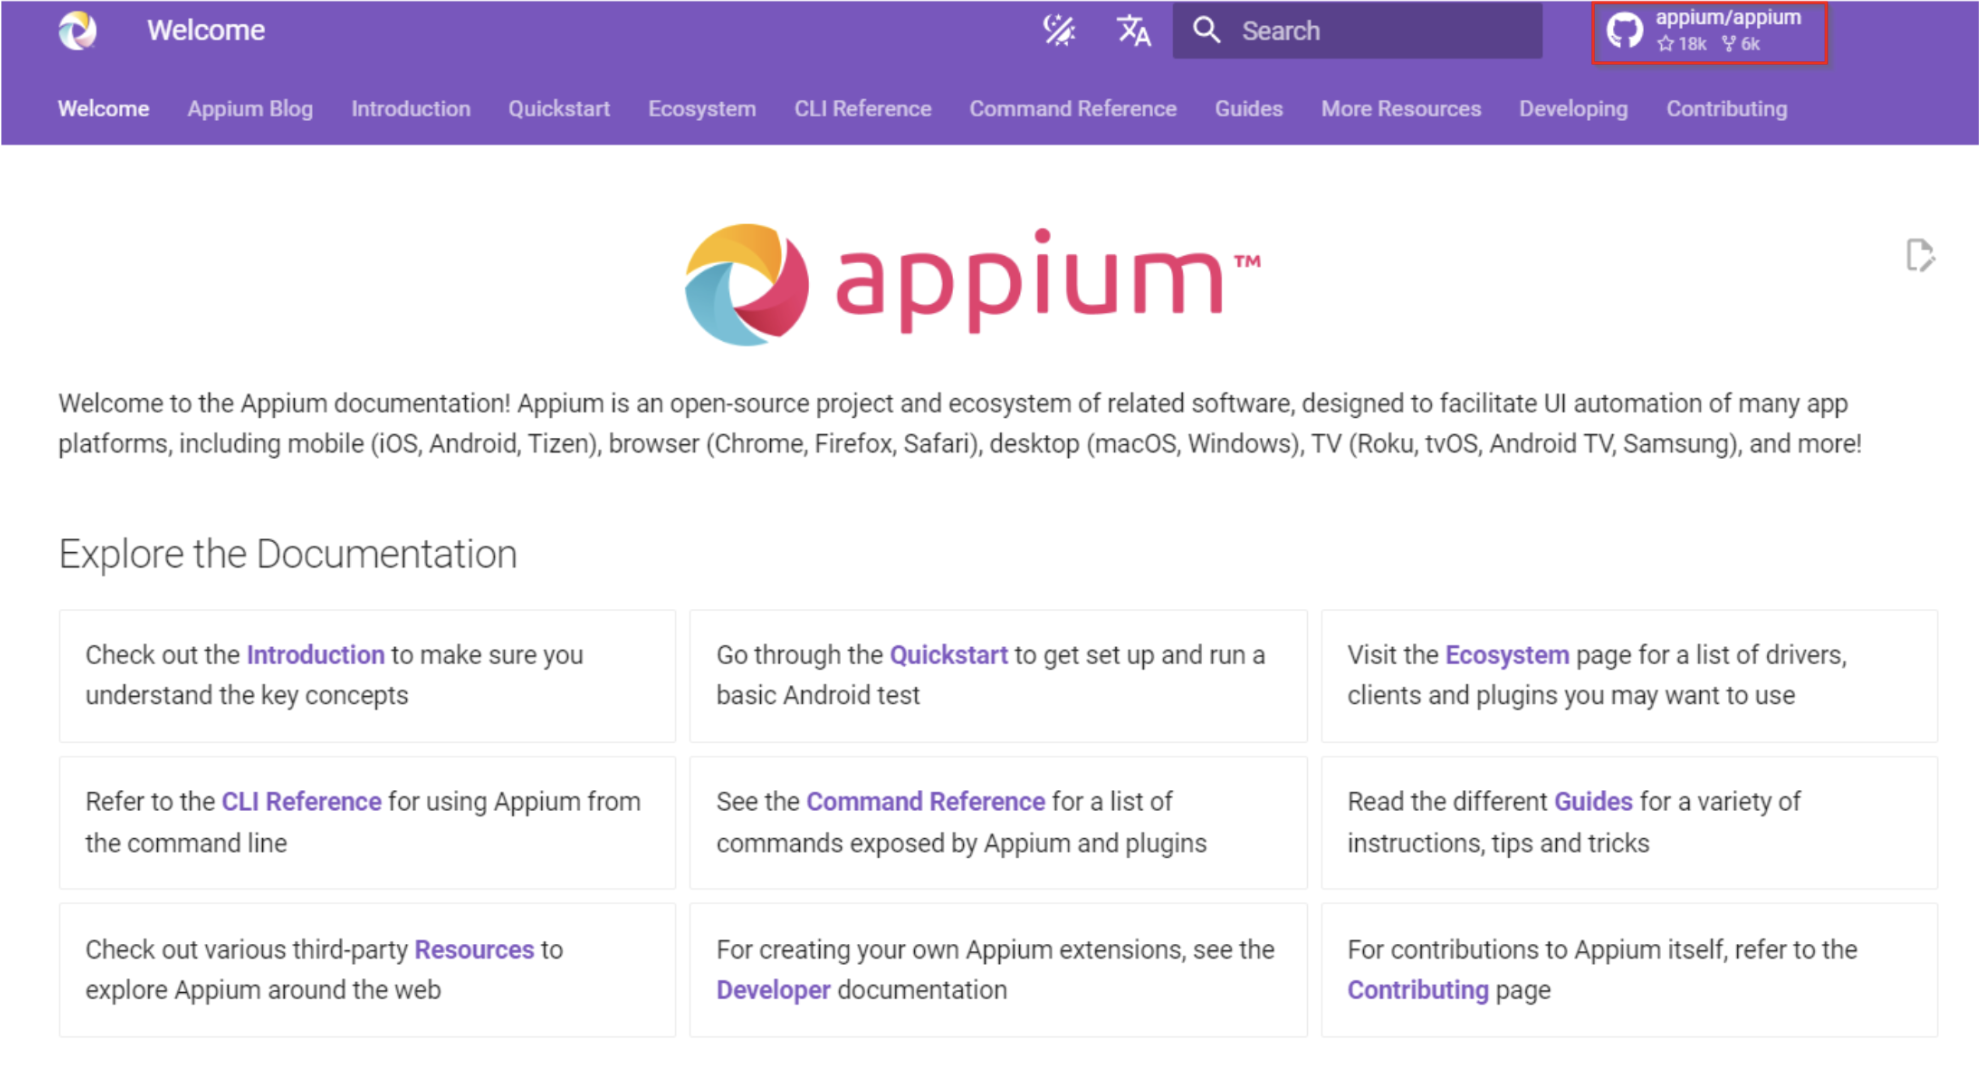
1. Visit the official Appium site and Click on the Download Appium button
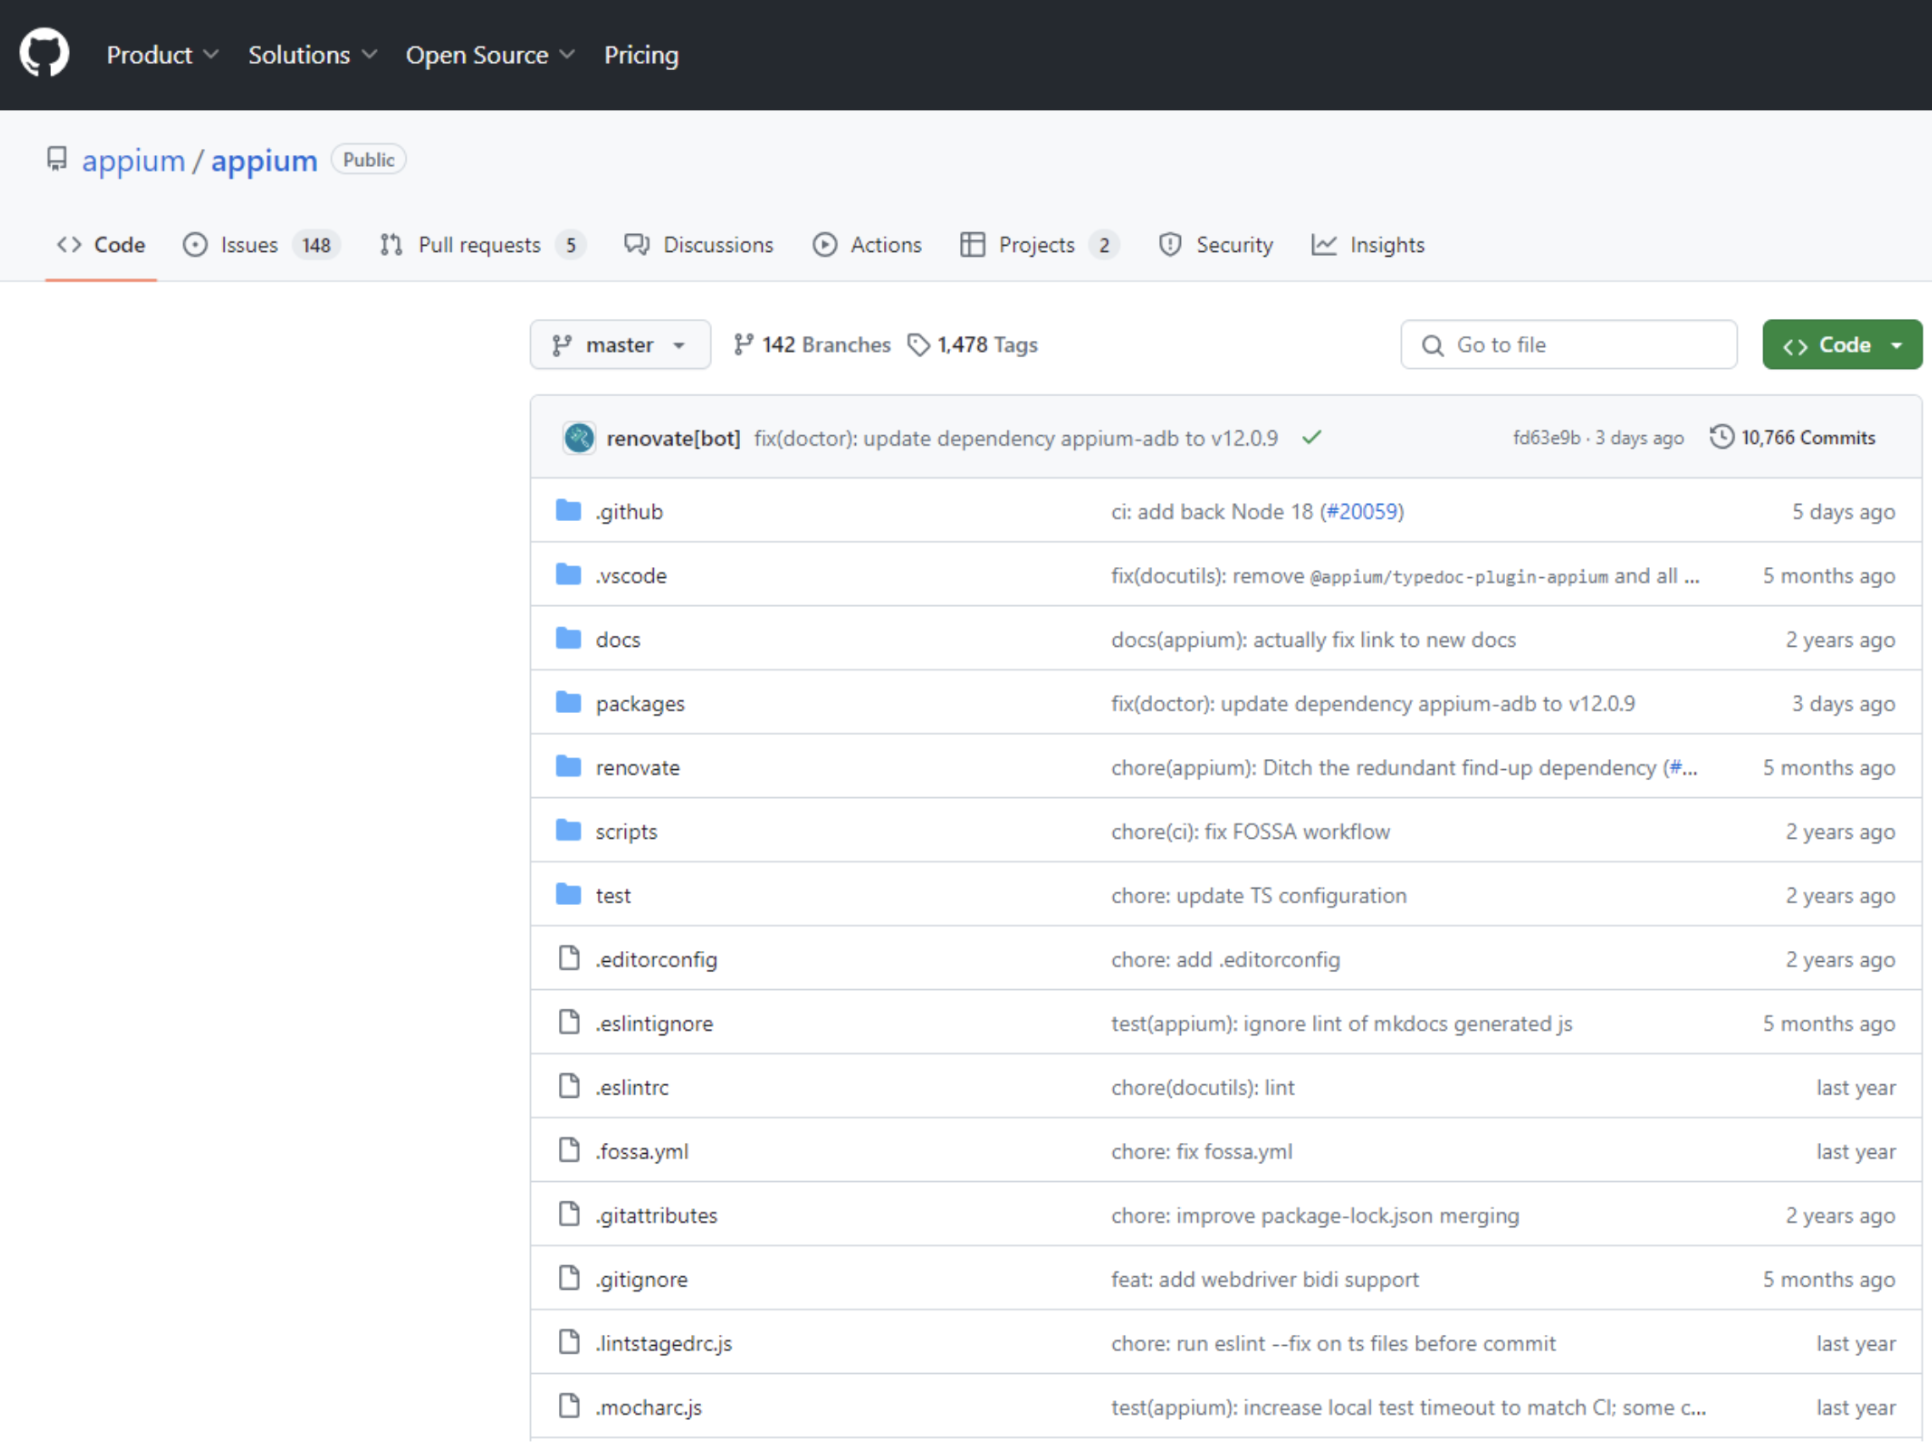
2. The Download button redirects the user to the GitHub page
3. From the GitHub page, Windows users need to download the .exe file, and Mac users need to download the .dmg file.
Clicking on the Appium link present on the top right corner. This directs you to the GitHub page.
4. Once the Appium Desktop file for the respective OS is downloaded, start the installation by double-clicking on that file. Mac users must drag the Appium logo to the Applications folder to initiate the installation.
5. Once the installation is complete, start the Appium Desktop Client.
6. Users can start or stop the Appium server using this user interface.
They can also configure their test environments using the Appium Desktop Client.
Before proceeding with any test scenarios, developers or QAs must consider installing and running Appium doctor. It is a tool that identifies and resolves common configuration issues in Node, iOS, and Android before Appium automation.
- Install Appium Doctor using the following command:
npm install appium-doctor -g
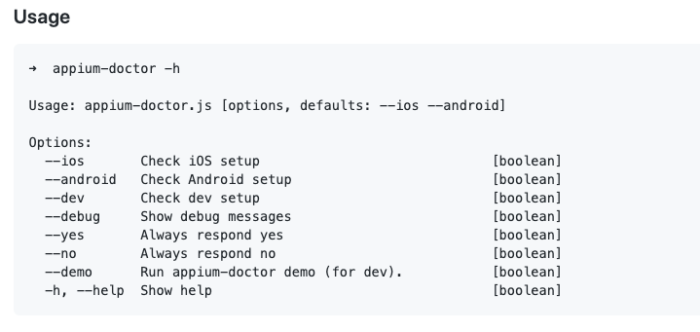
Once the tool is installed, one can view the list of inspections available by running the command below:
appium-doctor -h
The image below represents the available commands one can use to verify the dependencies for a particular test environment before test automation.
For example, before starting with automation on Android devices, QAs must run the command – appium doctor –android. This will display all missing and existing dependencies required for Android automation.
Running Appium Tests on the Cloud
Before test automation on mobile platforms, teams must have all dependencies and tools configured adequately on their systems. The above methods will guide QA engineers and developers seeking to get started with Appium automation on mobile devices.
- Also, teams or individuals must consider leveraging cloud-based platforms like BrowserStack that integrate with Appium.
- This will enable QA engineers to run Appium tests across various mobile devices in real user conditions.
- BrowserStack’s cloud-based infrastructure makes Appium testing on real devices simple, intuitive, and effortless.
Sign up, configure the desired device-OS combination, and start testing.
Run Appium Tests on BrowserStack App Automate to test on Real Devices
Appium tests must be run on real devices to test exact user conditions and verify native features, ensuring the app performs well in real-world scenarios across different operating systems.
There are a few prerequisites which should be considered before executing test cases.
- You need to have a BrowserStack account created with the access key. If not, you can sign up for a free trial.
- Ensure you have Java 8 and above versions. Also, install Maven on your system for CLI commands.
Run a Sample Build Appium Test on BrowserStack App Automate
- As a first step, we can either download the project or use the git clone command to clone the sample repository.
git clone -b sdk https://github.com/browserstack/testng-appium-app-browserstack.git
cd testng-appium-app-browserstack
- Configure your browserstack.yml config file. The browserstack.yml file holds all the required capabilities to run your tests on BrowserStack. In this step, you should set the credentials required to run the project, select the required device to run the test.
- Based on the devices and app selected, cd to the right project, install dependencies, and run a sample test build on BrowserStack using the below command.
- For Android devices, execute the below command.
cd android/testng-examples
mvn test -P sample-test
- Similarly, for iOS devices, run the below command
cd ios/testng-examples
mvn test -P sample-test
- For Android devices, execute the below command.
- As a next step, integrate your test suite with Browserstack App Automate based on the necessary configuration.
- Finally, run the test suite.
Why Run Appium Tests on BrowserStack App Automate?
BrowserStack App Automate offers several features that can be beneficial for mobile app testing. Thus executing Appium tests on BrowserStack App Automate offers a wide range of advantages to the test case as listed below.
- It provides access to a wide range of real iOS and Android devices for testing your app, ensuring more accurate testing results than emulators or simulators.
- It provides parallel testing capability, allowing you to run concurrent tests across multiple devices and significantly speed up your overall testing process.
- If you’re already using Appium for your test automation, you can easily leverage your existing code and expertise within BrowserStack App Automate. It integrates with Appium and other popular frameworks, allowing a smooth transition for your testing process.
- BrowserStack App Automate provides various tools for debugging your app during testing. These include text logs, video recordings, screenshots, and access to native device logs, helping you pinpoint issues quickly.
- You can test your app on internal development and staging environments or behind firewalls without any need for complex setup or configuration on your end.
- BrowserStack App Automate enables you to test your app’s frontend performance.
- It integrates seamlessly with various CI/CD platforms to automate your mobile and web app testing within your development workflow.
In summary, BrowserStack App Automate complements Appium’s automation capabilities by providing a robust cloud-based platform with a vast device pool, faster test execution, improved debugging tools, and simplified internal testing. This combination can significantly enhance your mobile app testing efficiency and effectiveness.
