Cypress is a popular end-to-end testing framework that can test various aspects of web applications, including email functionality. Testing emails with Cypress can ensure that email notifications and other automated email features of web applications are working as expected.
It can be used to verify that the content of email notifications is correct, including subject lines, message bodies, and attachments. In the following sections, let’s learn to ensure the reliability of your email feature along with best practices and common troubleshooting tips.
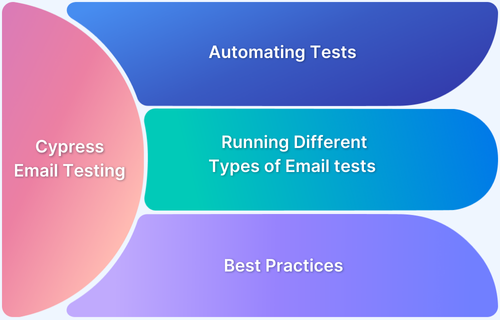
This guide discusses more about the test cases of Cypress Email Testing, along with different commands and tips to improve efficiency.
Why use Cypress for Email testing?
Cypress is one of the most powerful and versatile tools for email testing, that offers robust solutions for modern software development teams. Its unique architecture and advanced features make it an exceptional choice for validating email-related functionalities. With such powerful testing features, it helps to create reliable, efficient email verification strategies that improve overall application quality and user experience.
Read More: How to run Cypress Tests in Chrome and Edge
Setting up Cypress and Email Service Provider
To test email functionality with Cypress, you must set up Cypress automation and integrate it with your email service provider.
Here are the steps to get started:
1. Installing Cypress and any necessary plugins
- Install Cypress: You must install it on your local machine to use Cypress. You can do this by running the command npm install cypress in your terminal.
- Set up Cypress project: Create a new Cypress project by running the command npx cypress open in your terminal. This will open the Cypress Test Runner, where you can create and run new test files.
2. Configuring the Email Service Provider to enable testing
Example – using a test account, configuring SMTP settings, etc
- Create a test email account: Create a separate one specifically for testing purposes. This account will be used to receive test emails sent from your application.
- Enable SMTP settings: To enable sending email notifications from your app to the test email account, you must configure your email service provider’s SMTP settings. SMTP (Simple Mail Transfer Protocol) is a protocol for sending email messages between servers. You can usually find SMTP settings in your email service provider’s documentation or support pages.
- Obtain SMTP credentials: Once you have located the SMTP settings, you will need to obtain the SMTP credentials, which usually include the SMTP server address, port number, username, and password. You can find these credentials in your email service provider’s account settings or documentation.
- Configure your application: In your application’s code, you must configure the SMTP settings and credentials to send test emails to the test email account. Depending on your programming language and framework, there may be different ways to do this.
Writing Tests for Cypress Email Testing
Let’s start by creating test cases for different email testing scenarios such as:
1. User Signs Up
- Write a test case to verify that a user receives a confirmation email after signing up for your application.
- The test case should verify that the email subject line and message body contain the correct information, such as the user’s name and a confirmation link.
2. User receives a Password Reset Email
- Write a test case to verify that a user receives a password reset email after requesting a password reset.
- The test case should verify that the email subject line and message body contain the correct information, such as a link to reset the password and instructions for doing so.
3. User receives a Welcome Email
- Write a test case to verify that a user receives a welcome email after signing up for your application.
- The test case should verify that the email subject line and message body contain the correct information, such as a welcome message, instructions for getting started, and any relevant links or resources.
4. User receives a Notification Email
- Write a test case to verify that a user receives a notification email when certain events occur in your application, such as a new message or comment.
- The test case should verify that the email subject line and message body contain the correct information, such as the event that triggered the notification and any relevant details.
5. Email Unsubscribe functionality
- Write a Cypress test case to verify that users can unsubscribe from emails they no longer want to receive.
- The test case should verify that the unsubscribe link in the email leads to a page where users can confirm their decision and stop receiving emails from your application.
Running Different Types of Email Tests with Cypress [With Examples]
Cypress provides unique features for email testing to help developers validate critical email functionalities through systematic verification techniques.
Types of Email Tests with Cypress:
- Broken Links Testing
- Email Content Validation
- Email Rendering Test
- Email Delivery Verification
- Spam Trigger Check
Some of the key validations in multiple email testing approaches include:
1. Broken Links Testing
Checks the functionality and integrity of hyperlinks within email templates, ensuring all embedded URLs direct users to correct destinations. This test prevents potential user navigation issues and maintains email communication reliability.
describe('Email broken links', () => {

  it('Find all broken links', () => {

cy.visit('emailcontent.html')

cy.get('a').each((link) => {

   if (link.prop('href')) {

     cy.request({

       url: link.prop('href'),

       failOnStatusCode: false

     }).then((response) => {

       if (response.status !== 200) {

         cy.log(`Broken link: ${link.prop('href')}`);

       }

     });

   }

});

  });

});
2. Email Content Validation
Checks all the email content for accuracy, completeness, and appropriate personalization. Verifies the availability of important information, grammatical correctness, etc.
describe('Validating Email', () => {

  it('Validating Email Content', () => {

cy.visit('emailcontent.html')

cy.get('.email-body').then((emailBody) => {

   expect(emailBody.text()).to.contain('Verification Code')

});

  });

});
3. Email Rendering Test
Examines email display consistency across multiple devices, email clients, and screen sizes. Also ensures that the responsive design elements maintain visual integrity and readability, providing a uniform user experience.
describe('Email Rendering', () => {

  it('Test mobile viewport rendering', () => {

cy.viewport(375, 667)

cy.visit('test.html')

cy.get('.email-body')

cy.screenshot('email-mobile-view.png')

  });

});
4. Email Delivery Verification
Confirms successful email transmission through detailed tracking of sending, routing, and inbox placement. It also monitors potential delivery obstacles and validates email communication infrastructure performance.
describe('Message Delivery', () => {

  it('Check email delivery', () => {

 cy.mailosaur('serverId', 'recipient@example.com')

   .then((email) => {


     expect(response.status).to.equal(200)

     expect(response.body).to.have.length.above(0)

   });

  });

});
5. Spam Trigger Check
It checks for email content against spam filter algorithms to prevent messages from being incorrectly categorized. Some of the spam-triggering elements, such as specific keywords, formatting, and structural features, are also analyzed.
describe('Spam Prevention', () => {

  it('should detect potential spam triggers', () => {

const emailContent = 'Special offer for you!'

const subjectLine = 'Exclusive Deal'


const spamTriggers = [

   'free',

   'guarantee',

   'limited offer',

   'click now',

   'urgent',

   'exclusive deal'

]


const hasSpamTriggers = spamTriggers.some(trigger =>

   emailContent.toLowerCase().includes(trigger) ||

   subjectLine.toLowerCase().includes(trigger)

)


cy.wrap(hasSpamTriggers).should('be.false', 'Email contains spam triggers')

  })
Read More: What is Cypress Test Suite?
Using Cypress commands to interact with Email service providers
- Using Cypress commands can help checking for email existence, verifying email content, clicking links in emails, etc
- To interact with your email service provider using Cypress commands, you can use the cy.task() command to execute custom code or scripts.
Here are some examples of how you can use cy.task() to interact with email functionality:
1. Checking for Email existence
You can use the cy.task() command to check if a test email exists in your email service provider’s inbox. You can use a library like imap-simple or nodemailer-imap to connect to your email account and check for new emails.
Here’s an example:
cy.task('checkEmail', {username: 'testuser@example.com', password: 'testpassword'}).then(emails => {
// Perform assertions on the emails array
})
In this example, the checkEmail function is defined in a custom Cypress task and accepts an object with the email account’s username and password. The function returns an array of email objects, which you can then use to perform assertions.
2. Verifying Email Content
Once you have retrieved the email object using cy.task(), you can use standard JavaScript or a library like cheerio or puppeteer to extract the email content and perform assertions.
Here’s an example:
cy.task('checkEmail', {username: 'testuser@example.com', password: 'testpassword'}).then(emails => {
const email = emails[0]
const emailContent = email.html
// Use Cheerio to extract and verify the email content
const $ = cheerio.load(emailContent)
const messageBody = $('body').text()
expect(messageBody).to.contain('Welcome to our app!')
})
In this example, the cheerio library extracts the email body text and verifies that it contains the expected message.
3. Clicking Links in Emails
You can use the cy.visit() command to navigate to a URL from within a test email. To do this, you first need to extract the link URL from the email content using a library like cheerio or puppeteer.
Here’s an example:
cy.task('checkEmail', {username: 'testuser@example.com', password: 'testpassword'}).then(emails => {
const email = emails[0]
const emailContent = email.html
// Use Cheerio to extract the link URL from the email content
const $ = cheerio.load(emailContent)
const linkUrl = $('a[href]').attr('href')
// Use cy.visit() to navigate to the link URL
cy.visit(linkUrl)
})
In this example, the cheerio library is used to extract the URL from the first link in the email, and the cy.visit() command is used to navigate to the URL.
Test Automation and Continuous Integration
Test automation and continuous integration (CI) are important practices that help ensure the quality and reliability of software applications.
To set up test automation to run tests automatically on a schedule or trigger, you can use a combination of Cypress and a Continuous Integration (CI) tool like Jenkins.
Here are the basic steps to get started:
- Set up your Cypress test suite: First, you’ll need to create your test suite using Cypress. Write your tests, set up your test environment, and make sure everything is working as expected.
- Configure your CI tool: Next, you’ll need to configure your CI tool to run your Cypress tests. This will involve setting up a Jenkins job or similar, configuring the job to execute your Cypress tests, and specifying any required configuration or dependencies.
- Set up your schedule or trigger: Once your CI job is configured, you can set up a schedule or trigger to automatically run your tests. For example, you might schedule your tests every night, or set up a trigger to run tests whenever a new code change is pushed to your repository.
- Monitor and analyze your test results: Finally, you’ll want to monitor and analyze any failures or issues that arise. You can use the reporting and analytics features provided by Cypress and your CI tool to gain insights into your test performance and identify areas for improvement.
Teams can can also use BrowserStack with email testing in a few ways:
- Testing emails across different browsers-OS’s: With BrowserStack, you can test your emails across a wide range of browsers and email clients, including popular webmail providers like Gmail and Outlook.
- Testing emails on different devices: In addition to testing across browsers, BrowserStack allows you to test your emails on latest/legacy Android or iOS devices on the cloud. This ensures that your emails are mobile optimized and look good on smaller screens.
- Integration with Cypress: BrowserStack also integrates with Cypress which saves time and resources by allowing you to run Cypress tests in parallel across multiple devices and browsers.
- Continuous testing: Set up continuous testing for your email suite, so that tests are run automatically whenever changes are made to your email templates or code. This can help you catch issues early and ensure that your emails are always functioning as intended.
Start Cypress Testing on BrowserStack
How does BrowserStack enhance Email Testing?
BrowserStack enhances email testing by providing a strong cloud testing platform that enables developers and QA professionals to validate email communications across an extensive range of devices, browsers, and email clients. You can also validate consistent user interfaces in different testing environments.
Some of the other ways in which BrowserStack helps with email testing are:
- Testing emails across different browsers-OSs: With BrowserStack, you can test your emails across a wide range of browsers and email clients, including popular webmail providers like Gmail and Outlook.
Read More: How to write Test Cases for Gmail
- Integration with Cypress: BrowserStack also integrates with Cypress which saves time and resources by allowing you to run Cypress tests in parallel across multiple devices and browsers.
- Continuous testing: Set up continuous testing for your email suite so that tests run automatically whenever changes are made to your email templates or code. This can help you catch issues early and ensure that your emails are always functioning as intended.
Tips for Troubleshooting Common Email Testing Issues
Here are the top seven troubleshooting tips for common email testing issues:
- Check SMTP settings: If you’re having trouble sending or receiving emails, one of the first things to check is your SMTP settings. Ensure sure that your settings are correct and that your email service provider allows testing from your test account.
- Verify email address: Make sure that the email address you are using for testing is correct and that it is able to receive emails. If you’re not receiving emails, try checking your spam or junk folder.
- Wait for emails to arrive: Sometimes emails can take a few minutes to arrive, especially if you’re testing across different email clients or devices. Be patient and wait for a few minutes before assuming that an email has not been received.
- Check email content: When troubleshooting email content issues, make sure to check not just the visual appearance of the email, but also the content itself. Check for typos, broken links, and incorrect information.
- Use console logs and debugging tools: If you’re having trouble with your email testing suite, use console logs and debugging tools to help pinpoint the issue. Cypress provides a variety of debugging tools, such as cy.debug() and cy.log(), that can help you trace issues in your test code.
- Review error messages: When encountering errors, make sure to carefully review error messages and stack traces. This can help you identify the root cause of the issue and take the appropriate action.
- Use a comprehensive test suite: To catch a wider range of issues, use a comprehensive test suite that covers a variety of scenarios and email types. This can help you identify and troubleshoot issues more quickly and effectively.
Best Practices for Writing Effective Email Test
Here are six best practices for writing effective email tests:
- Test Different scenarios: To ensure that your email tests are comprehensive, you should test various scenarios, such as signing up, receiving a password reset email, and receiving a welcome email. This will help you catch issues across all stages of the user journey.
- Test across multiple devices and platforms: To ensure that your emails look and function as intended across a wide range of devices and platforms, you should test your emails on a Real Device Cloud.
- Use realistic data: To ensure that your email tests accurately simulate real-world scenarios, you should use realistic data in your tests, such as real email addresses and names. This will help you catch issues that may not appear with dummy data.
- Verify email content: When testing email content, you should verify not just the visual appearance of the email, but also the content itself. This includes checking for typos, broken links, and incorrect information.
- Use Cypress commands effectively: Cypress provides a variety of commands for interacting with emails, such as cy.task() to retrieve email content, and cy.contains() to search for specific text within an email. Using these commands effectively can help you write more effective email tests.
- Set up continuous testing: To ensure that your email tests are always up to date, you should set up continuous testing so that tests are run automatically whenever changes are made to your email templates or code.
Benefits of Testing Emails with Cypress
Here are some of the core benefits of testing emails using Cypress:
- Testing email delivery: Cypress can simulate email delivery and test that emails are being sent to the correct email addresses and that they are being received promptly.
- End-to-end testing: Testing email functionality with Cypress can be incorporated into a wider range of end-to-end tests, allowing for comprehensive testing of web applications.
- Streamlined testing: With Cypress, email testing can be automated, saving time and effort compared to manual testing.
- Cypress Debugging: Cypress provides tools for debugging email issues, allowing developers to identify and fix issues quickly.
Overall, testing emails with Cypress ensures that web applications function correctly and that users receive important notifications as intended.
Conclusion
By providing comprehensive testing capabilities, Cypress enables development teams to move beyond traditional manual verification methods, offering an efficient, automated testing solution that guarantees email functionality across diverse technological environments.
With the help of Cypress, you can easily validate email content, rendering, and interactive elements with unprecedented precision and efficiency.
To validate the consistency of your email communication across various devices and browsers, you can use tools like BrowserStack along with Cypress.
Useful Resources for Cypress
Understanding Cypress
- Cross Browser Testing with Cypress : Tutorial
- Run Cypress tests in parallel without Dashboard: Tutorial
- Handling Test Failures in Cypress A Comprehensive Guide
- Cypress Test Runner: Tutorial
- Handling Touch and Mouse events using Cypress
- Cypress Automation Tutorial
- CSS Selectors in Cypress
- Performance Testing with Cypress: A detailed Guide
- Cypress Best Practices for Test Automation
- Test React Native Apps with Cypress
- Cypress E2E Angular Testing: Advanced Tutorial
- Cypress Locators : How to find HTML elements
- Maximizing Web Security with Cypress: A Step-by-Step Guide
- Conditional Testing in Cypress: Tutorial
- Cypress Web Testing Framework: Getting Started
- Cypress Disable Test: How to use Skip and Only in Cypress
- What’s new in Cypress 10? How it will change your current testing requirements
Use Cases
- How to Record Cypress Tests? (Detailed Guide)
- How to run your first Visual Test with Cypress
- How to Fill and Submit Forms in Cypress
- How to Automate Localization Testing using Cypress
- How to run Cypress Tests in Chrome and Edge
- How to use Cypress App Actions?
- How to Run Cypress Tests for your Create-React-App Application
- How to Run Cypress Tests in Parallel
- How to handle Click Events in Cypress
- How to Test React using Cypress
- How to Perform Visual Testing for Components in Cypress
- How to run UI tests in Cypress
- How to test redirect with Cypress
- How to Perform Screenshot Testing in Cypress
- How to write Test Case in Cypress: (with testing example)
Tool Comparisons


