How to Create Maven Project in Eclipse
By Ayush Singh, Community Contributor - November 19, 2024
Maven is a powerful build automation tool used by various professionals for Java projects. It enables developers to easily manage project dependencies and build processes and structures.
Eclipse is also one of the most popular Integrated Development Environments (IDEs), which provides excellent support for Maven projects through its plugins.
This article will explain the steps in creating a Maven project in Eclipse.
What is Eclipse?
Eclipse is an open-source IDE widely used for Java development. It offers features like code editing, debugging, and project management capabilities.
It supports various programming languages and provides a flexible environment for developers to build and deploy applications. Also, with a list of plugins, integrating tools like Maven improves its functionality and performance.
Also Read: How to configure Selenium in Eclipse
Prerequisites Integrating Maven and Eclipse
In order to create Maven project in Eclipse, you have to ensure that the below mentioned packages are completely installed:
- Eclipse IDE: Download your system’s latest version of Eclipse IDE for Java developers.
- Maven: Generally, Eclipse has built-in Maven support, but verify that the plugin is properly installed.
- Java Development Kit (JDK): Install the latest JDK and correctly set the JAVA_HOME environment variable.
Step-by-Step Guide on Creating Maven Project in Eclipse
Here are the steps to be followed for creating a Maven project in Eclipse IDE:
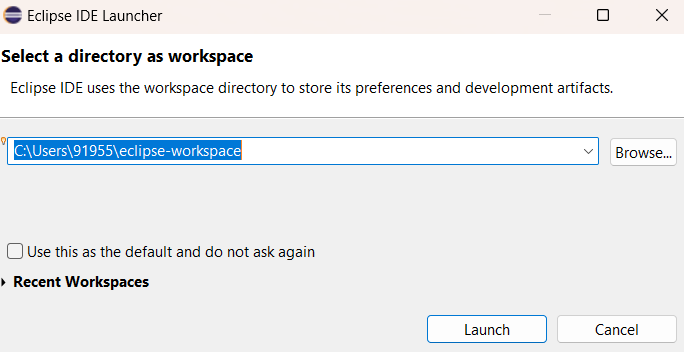
Step 1: Launch Eclipse
- Open the Eclipse IDE in your system.
- Select a workspace where you want to store your Maven project.
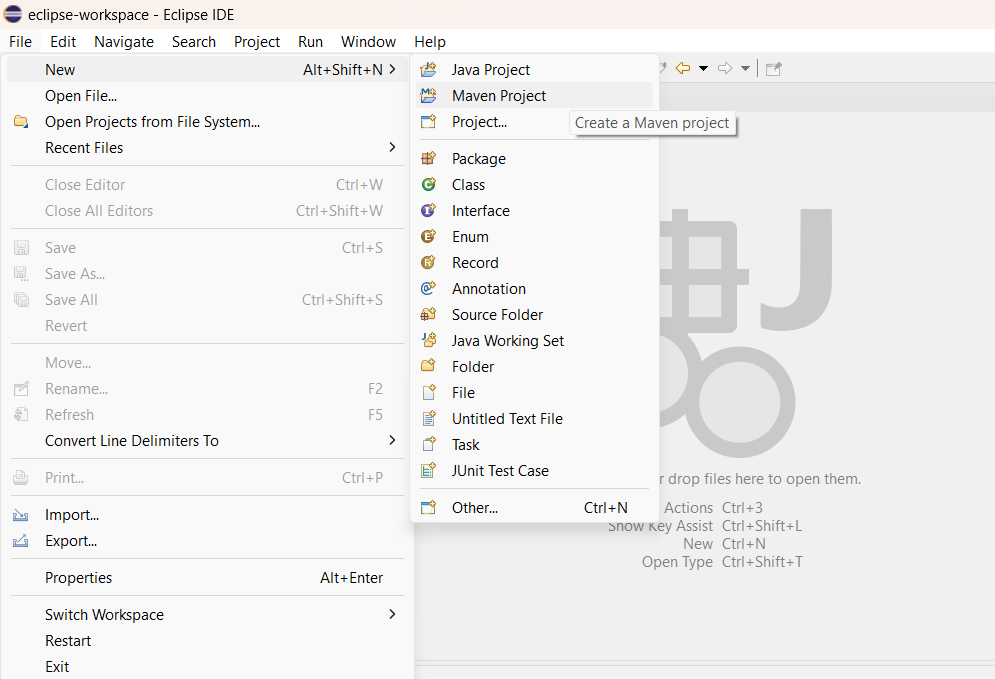
Step 2: Create a New Maven Project
- Go to File > New > Maven Project.
- Select the default workspace location or browse it accordingly. Then, click Next.
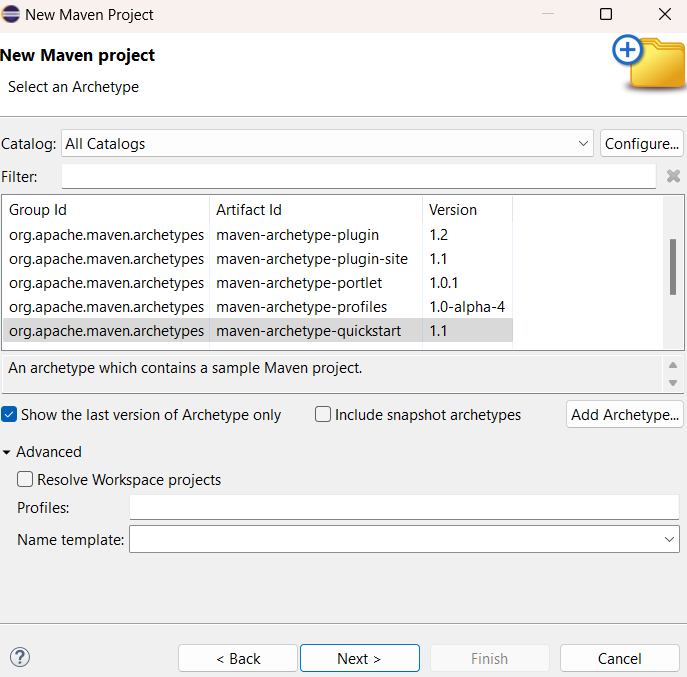
Step 3: Select an Archetype
An archetype is a template for your project structure.
Some of the common ones are:
- maven-archetype-quickstart for a simple Java project.
- maven-archetype-webapp for web applications.
For this example, choose maven-archetype-quickstart and click Next.
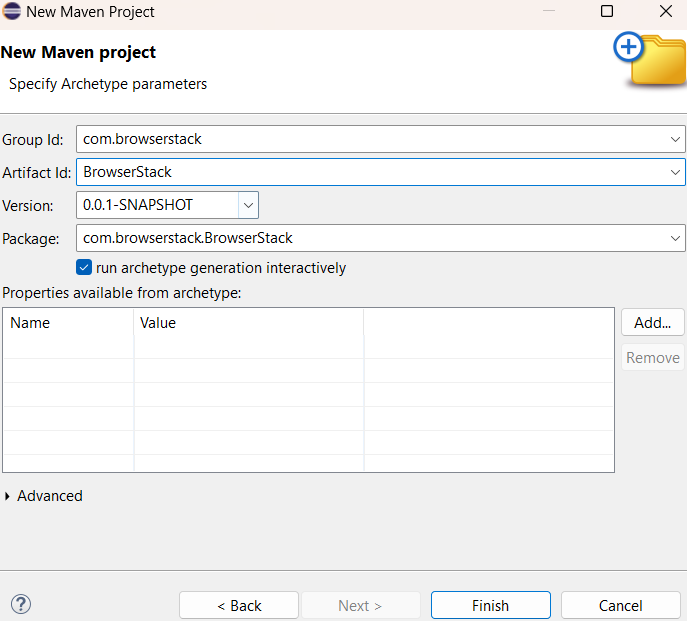
Step 4: Configure Your Complete Project
Certain details need to be inserted as mentioned below:
- Group ID: This is your project’s unique identifier, typically in reverse domain name format (example, com.example).
- Artifact ID: This is the name of your Maven project.
- Version: Select the specific version of your project.
- Package: This is the base package name for your Java classes.
Click on Finish to create your project after entering details.
Step 5: View Your Maven Project Structure
After clicking on the Finish button, the project will start getting created. Provide the confirmation with Y/N to complete it.
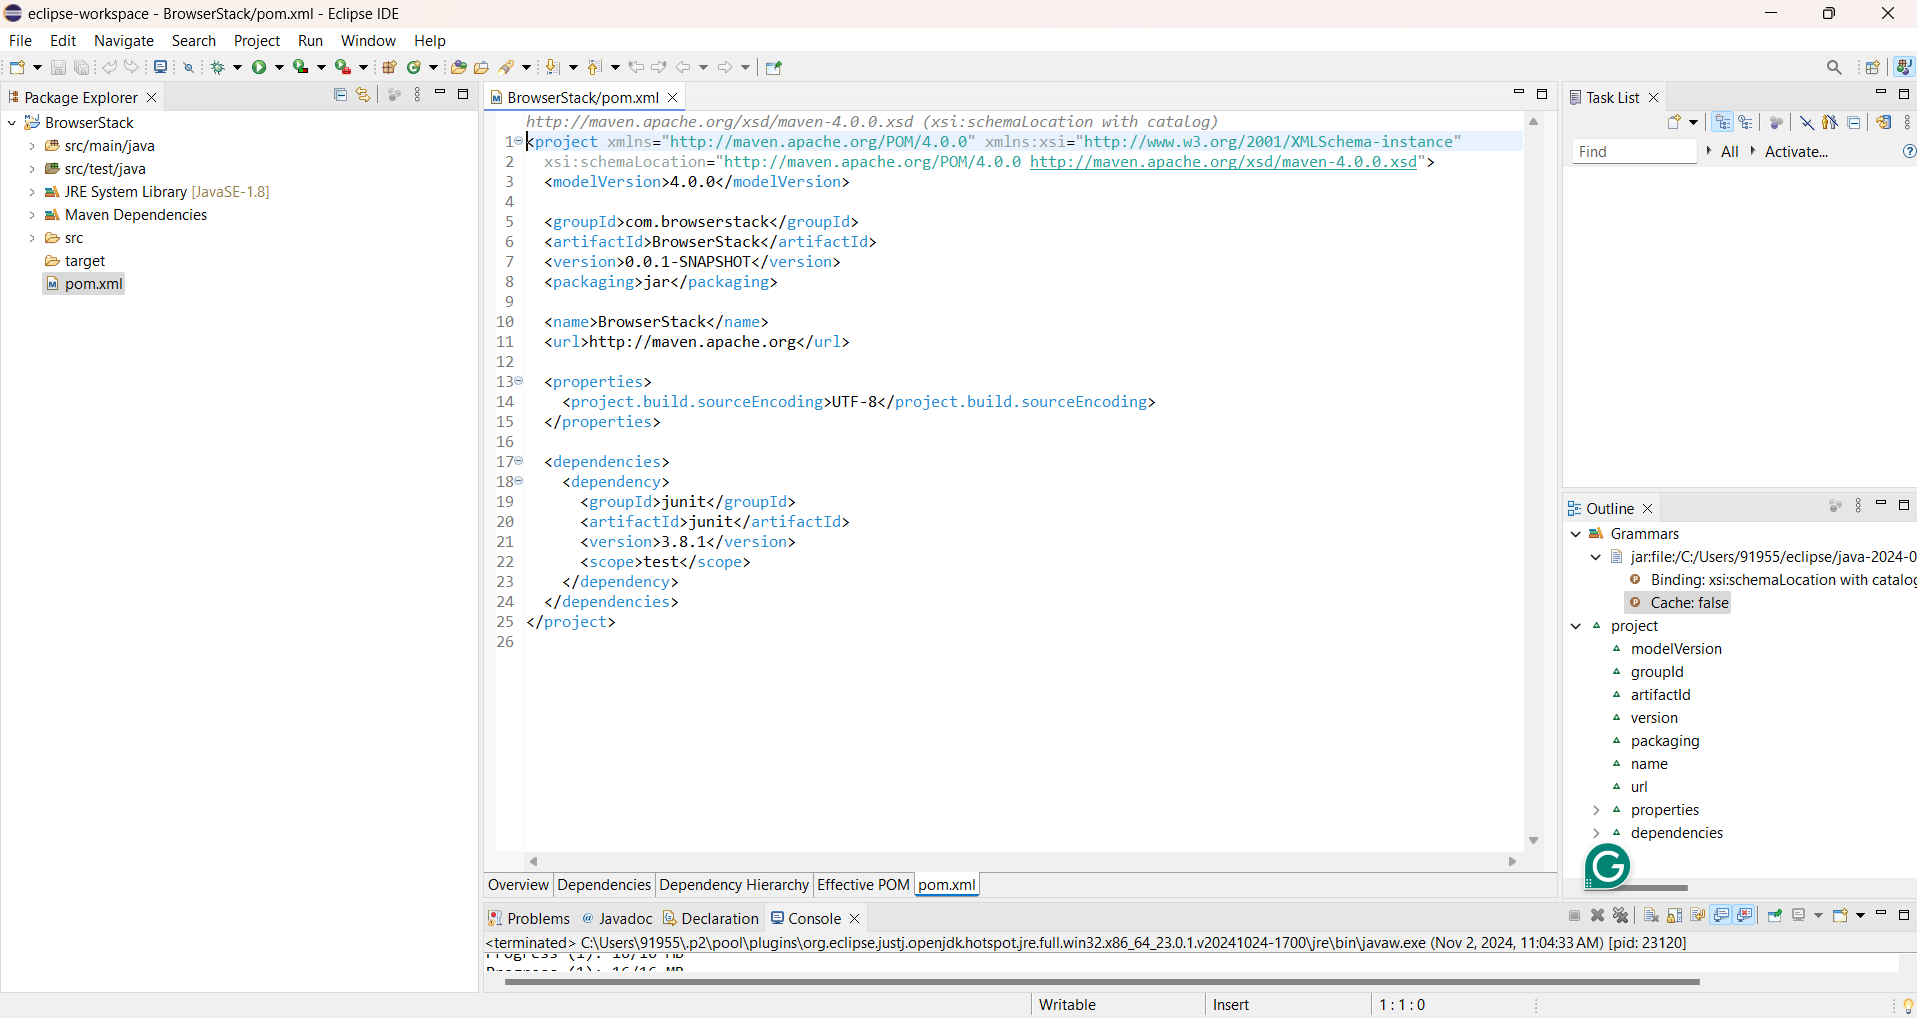
Once it is done, you can see the new Maven project in Project Explorer.
Best Practices for Maven in Eclipse
Some of the best practices for Maven in Eclipse include:
- Always keep your pom.xml under version control to manage changes in dependencies and project configurations.
- Keep All the Dependencies Updated in your pom.xml to avoid security vulnerabilities and integrate new features.
- Consider splitting larger projects into multiple modules for better management and scalability.
- Use Maven profiles for different environments (development, testing, production) to manage configurations more effectively.
Why you should Run Automated Tests on Real Devices
Running automated tests on real devices is important to check that your application performs well across different environments. By testing on actual devices, you can catch issues that would otherwise go unnoticed.
BrowserStack Automate offers a real device cloud platform where you can access over 3500+ different devices, browsers, and OS combinations.
Some of its primary features are:
- Access to Wide Range of Real Devices: BrowserStack allows you to test on the latest models and operating systems without needing physical device management.
- Seamless Integration: It integrates effortlessly with popular testing frameworks like Selenium, Appium, and others, enabling you to incorporate real device testing into your existing CI/CD pipelines.
- Real-Time Testing: With BrowserStack, you can run tests in real-time and get immediate feedback on performance and functionality, speeding up the development process.
- Support of Parallel Testing: Test on multiple devices simultaneously by reducing the time required for complete testing.
- Detailed Reports: BrowserStack provides detailed logs and reports that can help you identify issues quickly, making it easier to find bugs before the launch.
Conclusion
Creating a Maven project in Eclipse IDE enhances the Java development workflow. By following all the essential steps, anyone can easily set up the projects efficiently, manage dependencies, and use powerful tools for building and testing your applications.
With the added benefits of testing on real devices, BrowserStack Automate ensures that your applications are robust and user-friendly.
