Jenkins Continuous Integration Tutorial
By Loveneesh Singh, Community Contributor - March 18, 2023
Continuous Integration is a software development process where a code is continuously tested after a commit to ensure there are no bugs.
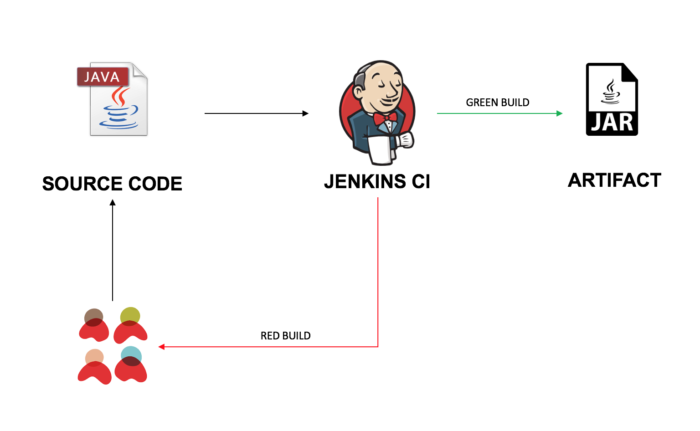
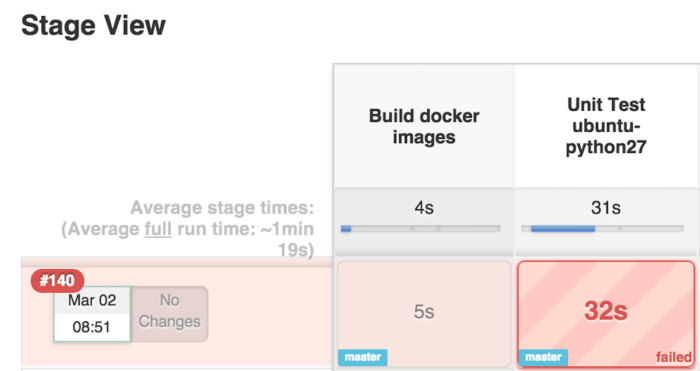
In large teams, many developers work on the same code base. Thus, any of the multiple commits can have a bug. With continuous integration, bugs can be identified early and fixed before pushing changes to production. Any new code is integrated into one executable form, termed a build. The executable artifact can be deployed if the build is green (i.e., all ok). If not, the bug must be fixed, and the new build must be tested.
What is CI in Jenkins?
Jenkins is an open-source implementation of a Continuous Integration server written in Java. It streamlines multiple actions for Continuous Integration (CI) in a software project. Its build server is a tool that provides this functionality.
- It works with multiple programming languages and can run on various platforms (Windows, Linux, and macOS).
- It is widely used as a CI (Continuous Integration) & CD (Continuous Delivery) tool.
- It has vast community support, and many plugins are available for integrating it with other tools like Slack, GitHub, and Docker. Also, anyone can develop a Jenkins plugin and contribute to it.
- By using Jenkins, software companies can accelerate their software development process, as it can automate a build and run tests to ensure the functionality is working fine.
- Jenkins supports the entire SDLC, including building, testing, documenting the software, and deploying.
Automate your Jenkins Pipeline
Let’s see how to get started with Jenkins CI.
How to create a CI Pipeline in Jenkins
1. Declarative Pipeline
The Jenkins pipeline can be written declaratively with the “Jenkins syntax“. Jenkins syntax is a Groovy DSL (Domain Specific Language) used to write the pipeline stages. The DSL internally gets converted into XML to make the Jenkins pipeline. A “stage” in a pipeline is a group of steps to be executed.
Let us consider a stage – “git checkout” that can clone the git repo (step) and tag it with a version (step). A scripted pipeline is easy to create, and with the help of the Jenkins syntax, it can also be effortlessly read.
Sample Jenkins scripted pipeline
pipeline {
agent any
stages {
stage('Git Checkout') {
steps {
echo 'Cloning repository'
sh 'git clone https://github.com/sample.git'
}
}
stage('Build') {
steps {
echo 'Building project'
sh 'gradle clean build'
}
}
}
}
2. Jenkins Job Builder
JJB (Jenkins job builder) is a pipeline creation tool using YAML configuration. The Jenkins pipeline can be written in YAML, and with the help of the JJB tool, it converts the YAML configuration into XML format and pushes it into Jenkins to create pipelines.
- It is comparatively easier to write YAML configuration than full-fleshed code in Jenkins syntax.
- It also enables the use of “Pipeline as Code” so that a pipeline code can be pushed into a git repo, and the pipeline gets created or updated in Jenkins.
- The tool also helps with the templatization of the pipeline code.
Sample Template
- project:
name: project-name
pyver:
- 26:
branch_name: old_branch
- 27:
branch_name: new_branch
jobs:
- '{name}-{pyver}'
Sample Job
- job-template:
name: '{name}-{pyver}'
Benefits of using Jenkins CI
- Reduced Development Cycle – Since every commit is built and tested, it allows releasing new features to the user faster and with fewer errors.
- Shorter Time to Integrate Code – Before the use of Jenkins CI, integration of code was done manually, thus taking a few days. In some cases, it might happen that the code is not running, and it is hard to debug as it might have gone through various commits in the repository. Integrating code after every commit ensures that the functionality is not broken after a commit.
- Faster Feedback Loops – Developers get feedback and improve the code whenever a test breaks during a commit. Otherwise, debugging the issue can be very difficult, given teams would not be sure which commit resulted in the bug.
- Automated Workflow – Teams should not worry about running a manual test for each commit. The Jenkins CI pipeline checks the latest code and builds the code along with the tests. The test can deploy the project in a specific environment if it is green. It can notify the developer by breaking the build.
Concerns while using Jenkins CI
- Cost – Running a Jenkins CI server requires some infrastructure setup, and deploying a Jenkins CI over the cloud is costly.
- Maintenance – Spinning up a Jenkins CI server is time-consuming. In case of adding a stage in the pipeline or upgrading the Jenkins CI server to incorporate new features, Jenkins CI also needs maintenance.
Key Takeaways
- Continuous Integration is the practice of building the code with every commit.
- Jenkins is a popular CI tool that implements a continuous integration pipeline and can be created in Declarative Pipelines and Jenkins Job Builder.
- Jenkins CI helps in test automation, provides faster feedback, reduces the development cycle, and streamlines continuous code integration.
Teams can use a plugin to integrate their Selenium test suites with Jenkins CI on BrowserStack. Moreover, they can test each build on 3000+ real devices and confidently ship.
