CICD with Jenkins
By Sourojit Das, Community Contributor - January 3, 2025
CI/CD (Continuous Integration/Continuous Deployment) with Jenkins automates the software development lifecycle, allowing teams to build, test, and deploy applications efficiently. By leveraging Jenkins, developers can streamline workflows, ensure high-quality code, and reduce manual intervention
This article will explore how to implement Jenkins in CI/CD pipelines effectively.
- What is CI/CD?
- What is Jenkins?
- Benefits of Using Jenkins for CI/CD
- Prerequisites of Building CI/CD Pipeline with Jenkins
- How to Create a CI/CD Pipeline with Jenkins?
- Automated Testing with Jenkins
- Monitoring and Logging with Jenkins
- Challenges in Jenkins CI/CD Pipelines
- Best Practices for CI/CD with Jenkins
- Useful Resources for CI/CD
- FAQs
What is CI/CD?
CI/CD stands for Continuous Integration and Continuous Deployment, two key practices in modern software development that aim to improve the efficiency and quality of software delivery.
Continuous Integration (CI)
Continuous Integration (CI) involves frequently merging code changes from multiple developers into a central repository. This process helps identify issues early by automatically running tests and validating each code update.
By integrating code multiple times daily, CI ensures that bugs and conflicts are caught quickly, minimizing the impact of defects and making it easier to maintain code quality throughout the development cycle.
Continuous Deployment (CD)
Continuous Deployment (CD) extends the principles of CI by automating the delivery of code to production. After successful testing in the CI pipeline, the code is automatically deployed to a live environment with little to no manual intervention. This allows teams to release updates more frequently, ensuring new features and bug fixes reach users quickly while reducing downtime and human error.
Read More: Continuous Delivery vs Continuous Deployment
What is Jenkins?
Jenkins is an open-source automation server that automates various stages of software development, including building, testing, and deploying applications. It provides a rich ecosystem of plugins to support continuous integration and continuous delivery (CI/CD) workflows.
Jenkins simplifies automation, enhances collaboration, and integrates with various tools, improving software quality and delivery speed.
Companies like Netflix, Amazon, and Google rely on Jenkins for their CI/CD pipelines to streamline development processes and accelerate delivery.
Also Read: Jenkins Continuous Integration Tutorial
What is Jenkins Pipeline?
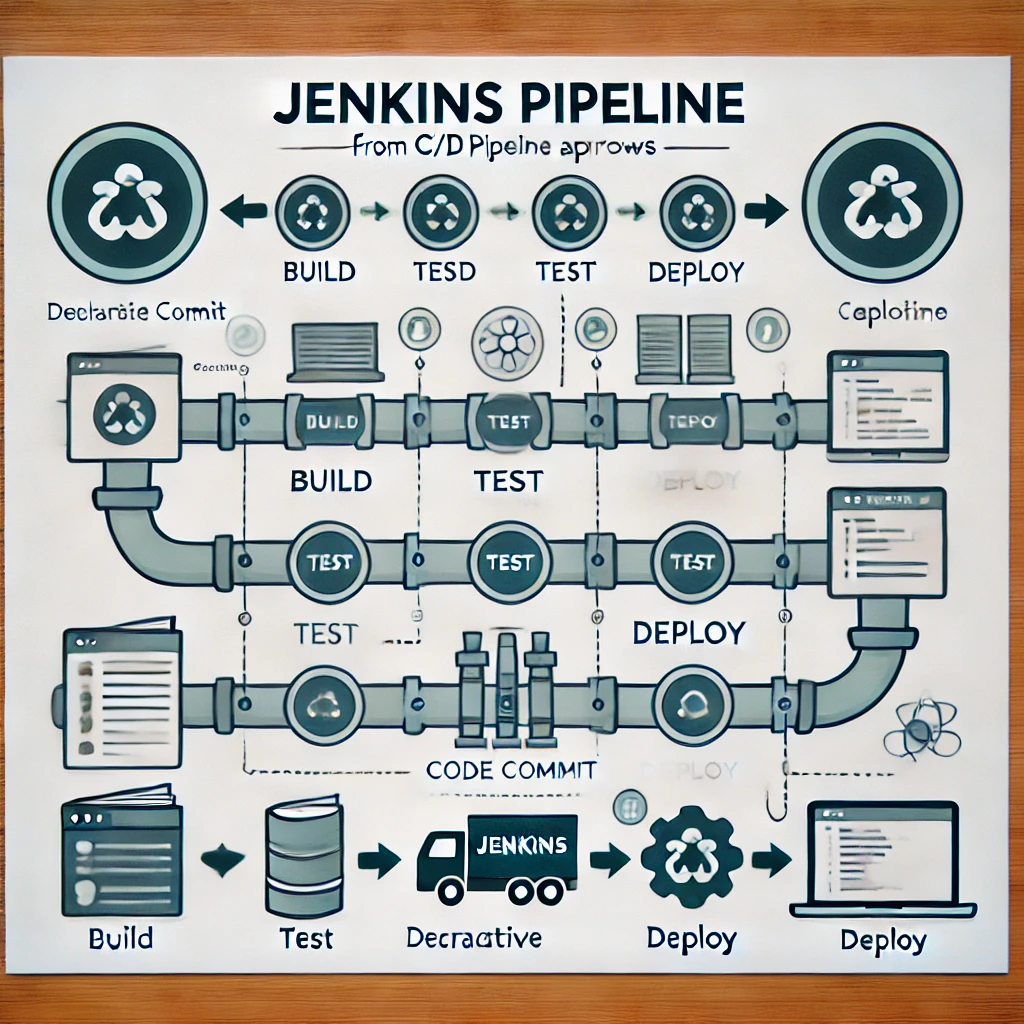
A Jenkins Pipeline is a suite of plugins that automates building, testing, and deploying applications through a defined sequence of steps. It provides a way to define and manage CI/CD workflows as code, making them versionable, reusable, and maintainable.
Pipelines can be scripted or declarative, offering flexibility in how the automation process is designed.
Benefits of Using Jenkins for CI/CD
Jenkins offers several key benefits for automating CI/CD workflows, making it an essential tool for modern software development.
- Automation of Repetitive Tasks: Jenkins automates build, test, and deployment processes, reducing manual errors and saving time.
- Integration with Multiple Tools: It supports many plugins, allowing easy integration with version control systems, testing tools, and deployment platforms.
- Scalability: Jenkins can scale to meet the needs of both small teams and large enterprises, supporting distributed builds and multiple agents.
- Faster Feedback Loop: Jenkins automates tests and deployments, helping teams detect issues early and speeding up the development cycle.
- Extensive Community Support: Jenkins has a large, active community that provides robust documentation, plugins, and solutions for various CI/CD challenges.
Prerequisites of Building CI/CD Pipeline with Jenkins
To build a CI/CD pipeline with Jenkins, some pre-requisites need to be followed –
1. Install Jenkins
Download and install Jenkins from the official website. You can also use Docker to install Jenkins using the following command:
docker run -d -p 8080:8080 jenkins/jenkins:ltsJenkins will be available at http://localhost:8080 after installation.
2. Set Up Jenkins Plugins
Install necessary plugins like Git, Pipeline, or any relevant tools.
3. Configure Source Code Repository (e.g., Git)
To connect Jenkins to git, the simple command is
git clone https://github.com/your-repository.git
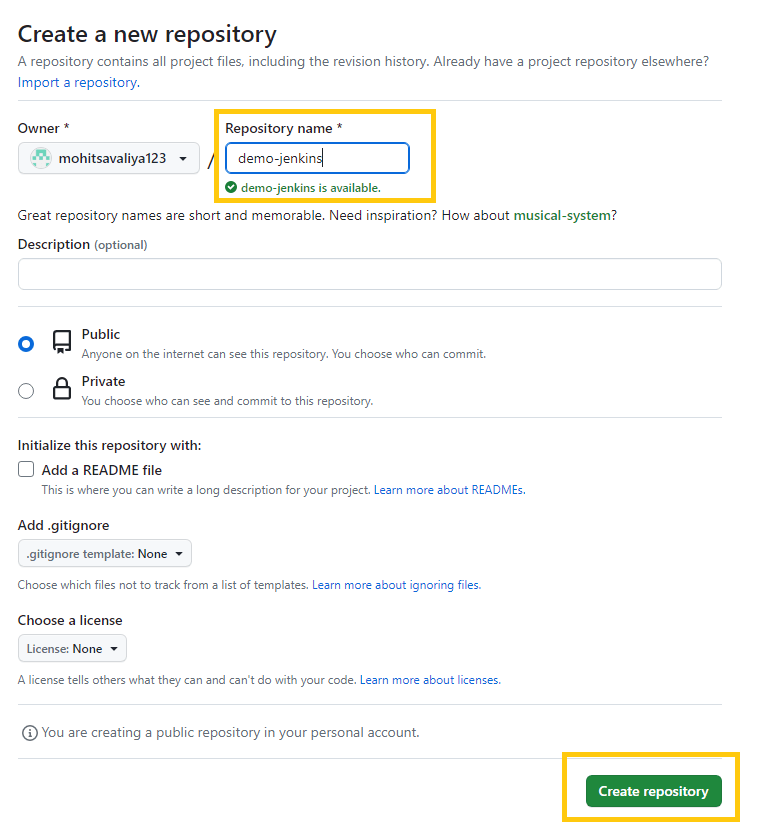
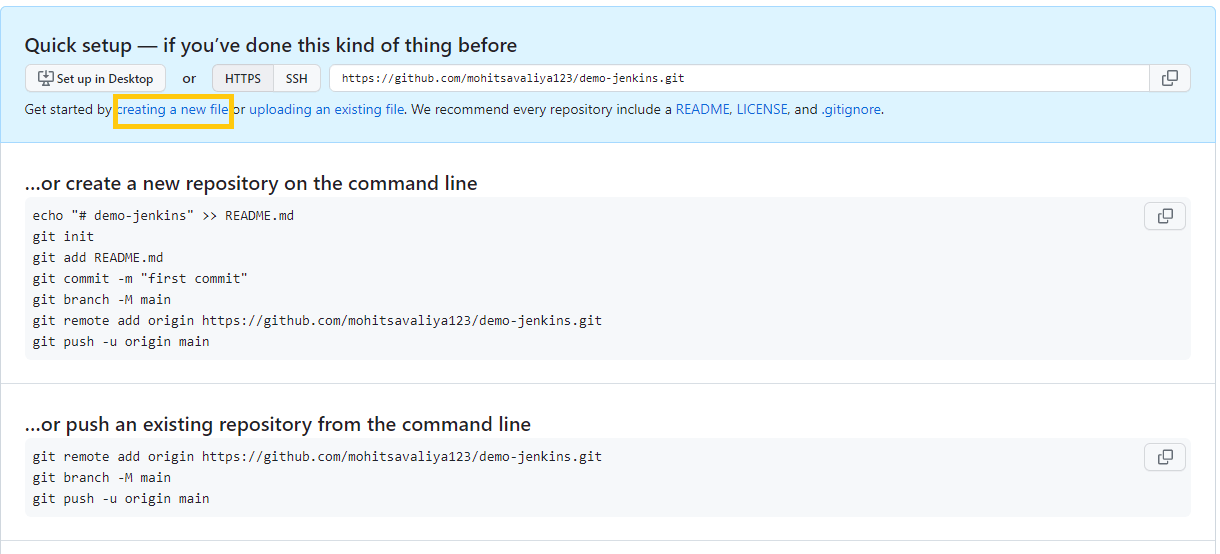
- After signing in, navigate to the GitHub account and open the Repositories section.
- Enter details such as the repository name, description, and other information to create a new repository. Optional fields can be skipped, and the repository’s visibility can be set to public or private. After completing the necessary details, clicking Create Repository will finalize the process.
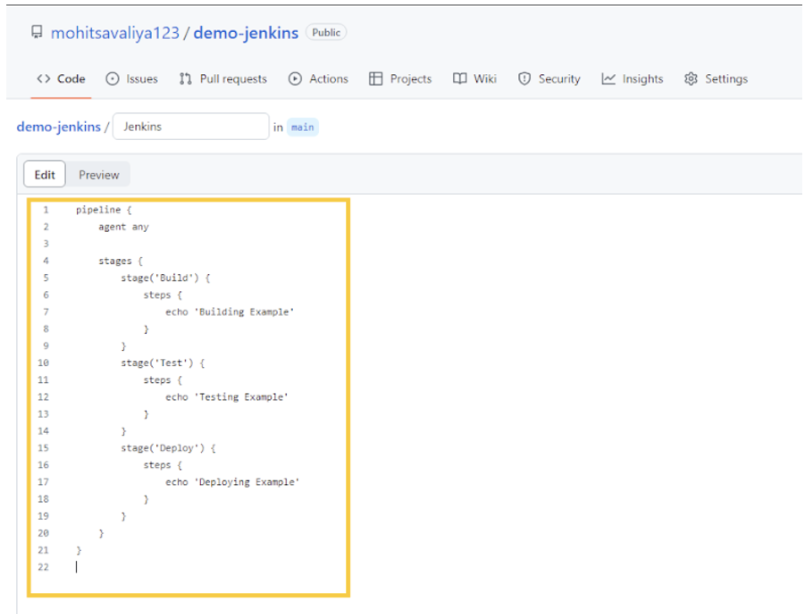
- A new document titled Jenkins should be added to the repository. This file contains the description of the Jenkins pipeline. To create it, navigate to the repository tab, select Add file, and then choose Create new file.
- The script should be copied and pasted into the Jenkins file, which defines the pipeline stages and steps for the project.
pipeline {

    agent any


    stages {

        stage('Build') {

            steps {

                echo 'Building Example'

            }

        }

        stage('Test') {

            steps {

                echo 'Testing Example'

            }

        }

        stage('Deploy') {

            steps {

                echo 'Deploying Example'

            }

        }

    }

}
- Once the code is created, the file will resemble the example below.
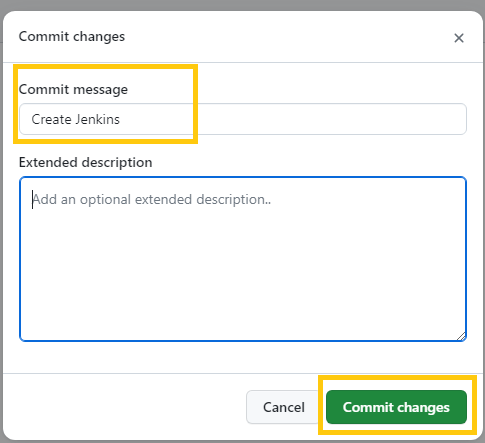
- Scroll to the bottom of the page and click the Commit new file button to save the changes.
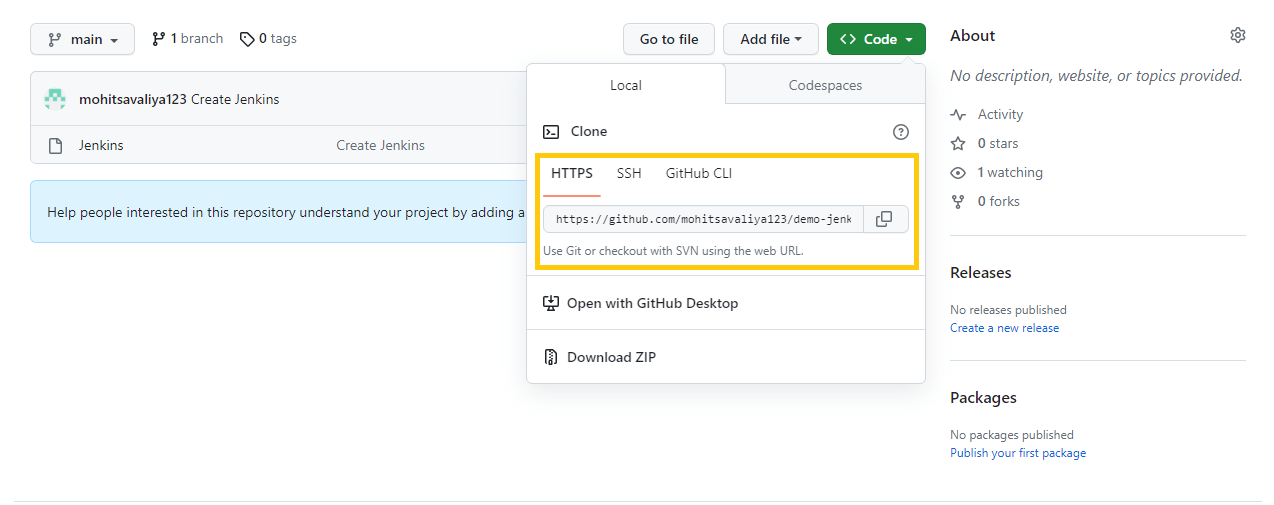
- To copy the GitHub repository URL, click the Code button and tap the copy icon next to the displayed link. You will need this URL to set up the Jenkins CI/CD pipeline.
How to Create a CI/CD Pipeline with Jenkins?
Once the prerequisites have been sorted, follow the below steps to create a CI/CD pipeline with Jenkins.
Creating a Jenkins CI-CD Pipeline
Below are the steps to create a Jenkins CI/CD pipeline
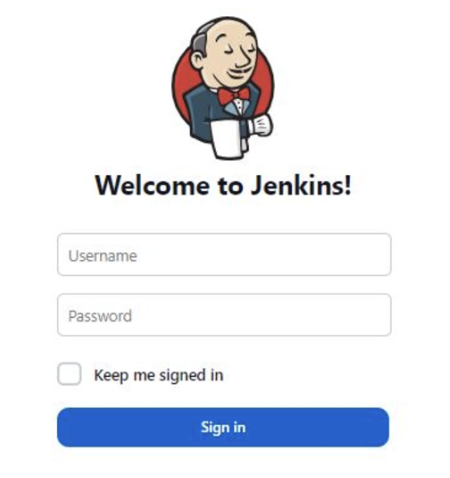
1. Open a web browser to sign in and enter the Jenkins URL (http://localhost:8080/) in the address bar.
2. Use admin as the username, and retrieve the password from the file located at Drive C > ProgramData > Jenkins > .jenkins > secrets > initialAdminPassword.
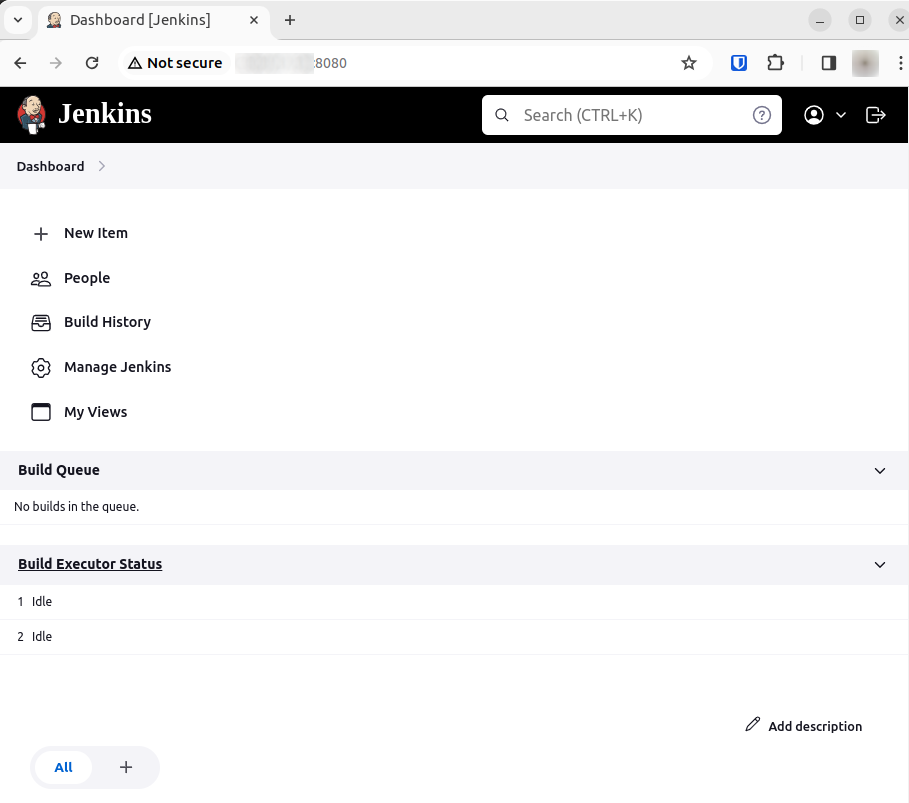
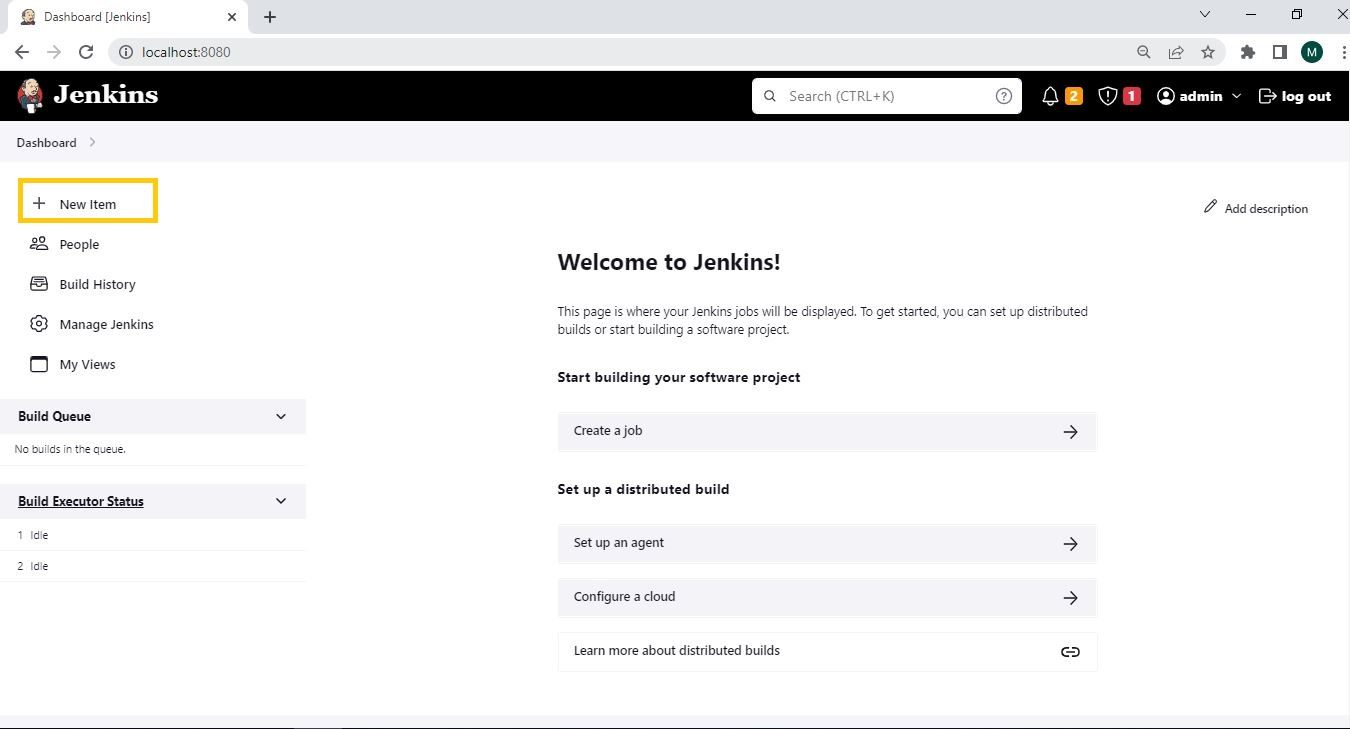
3. To create a new Jenkins job, click the New Item icon on the left side of the Jenkins dashboard.
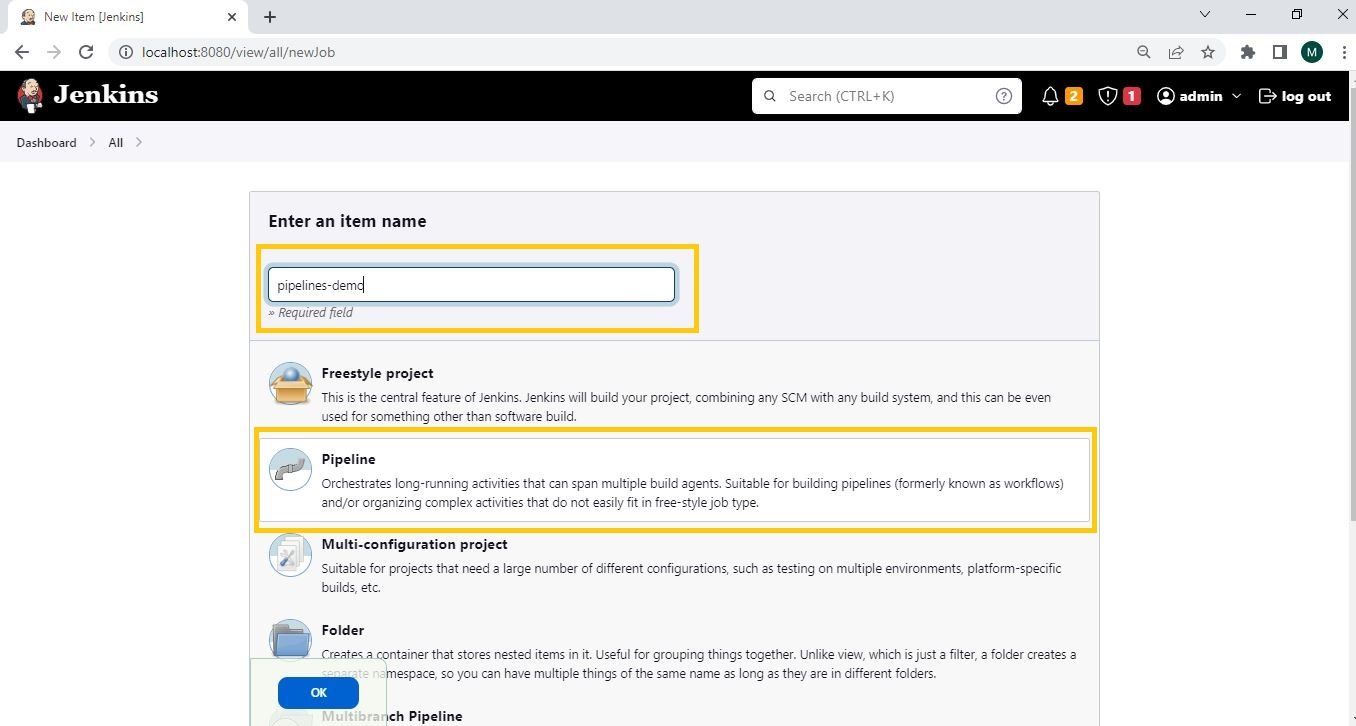
4. To create a new pipeline in Jenkins, enter a title, select the Pipeline template, and label it pipelines-demo. Finally, click OK to confirm. The Pipeline template allows developers to define the complete application lifecycle within Jenkins.
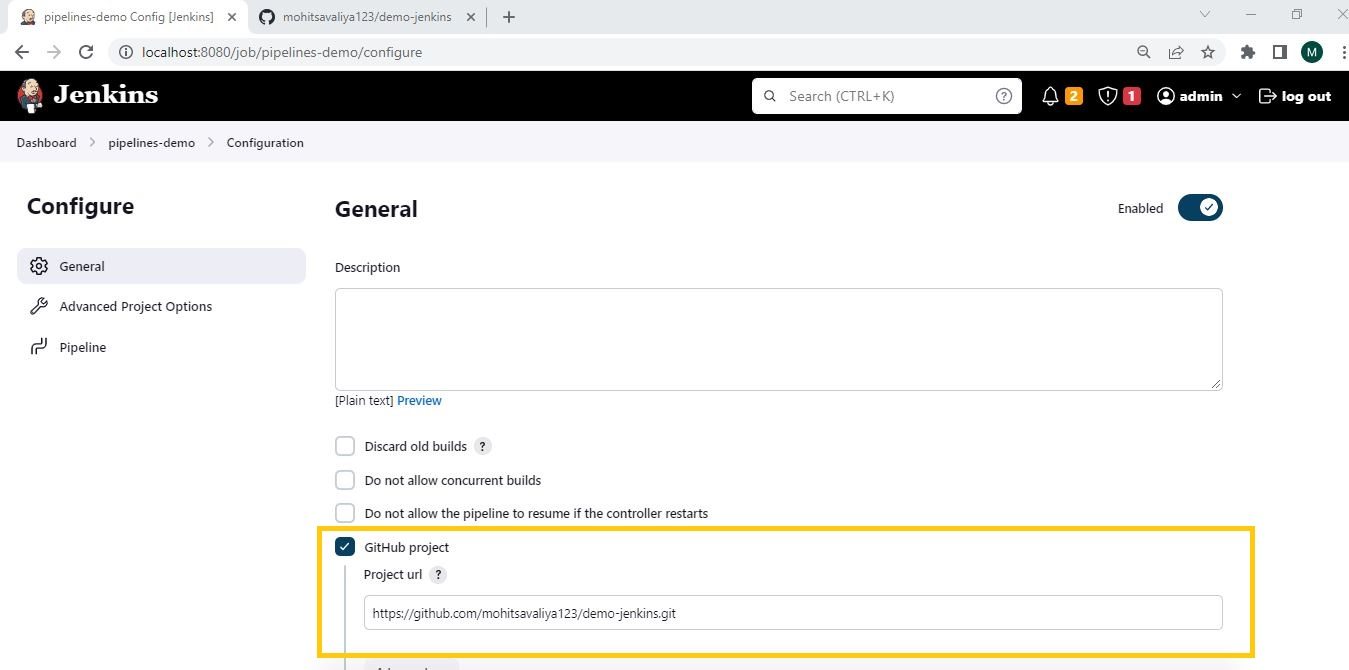
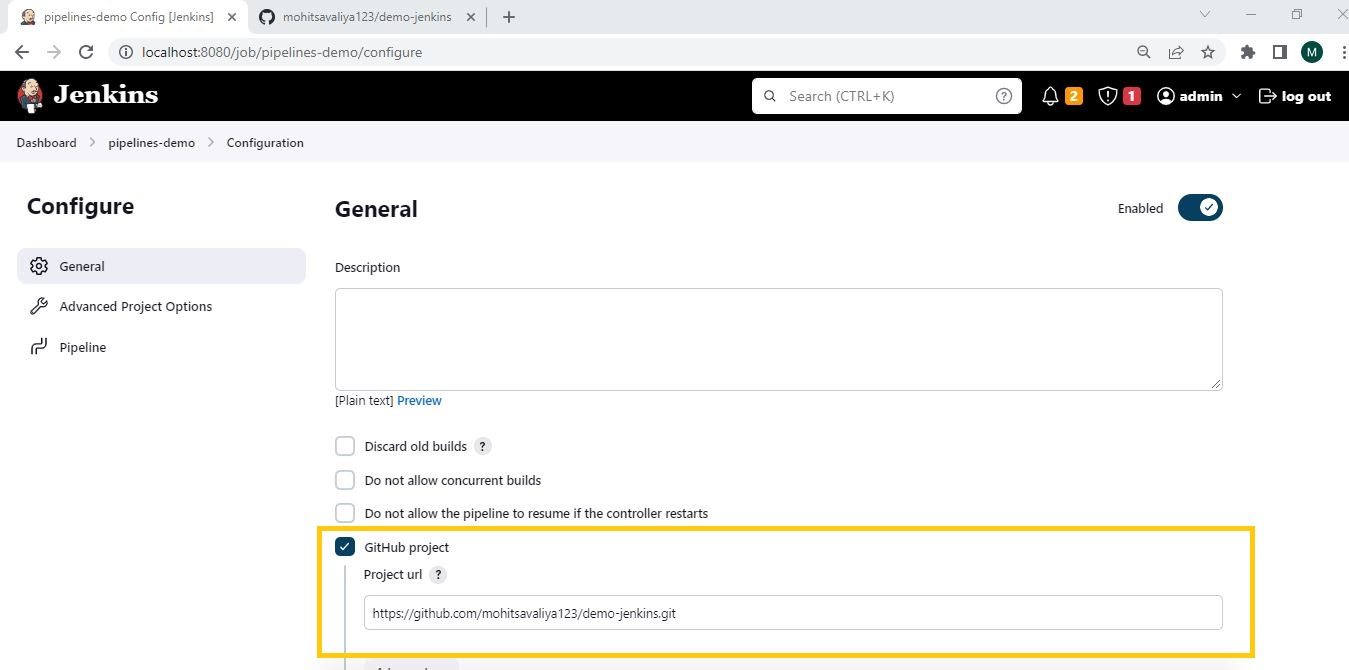
5. On the configuration screen in Jenkins, navigate to the General tab and enable the GitHub project option. Then, update the Project URL field with the repository link previously obtained.
GitHub-Project-URL-Selection
6. In the Build Triggers section of the Jenkins configuration screen, enable the option GitHub hook trigger for GITScm polling to allow Jenkins to respond to changes in the repository.
Build-Triggers
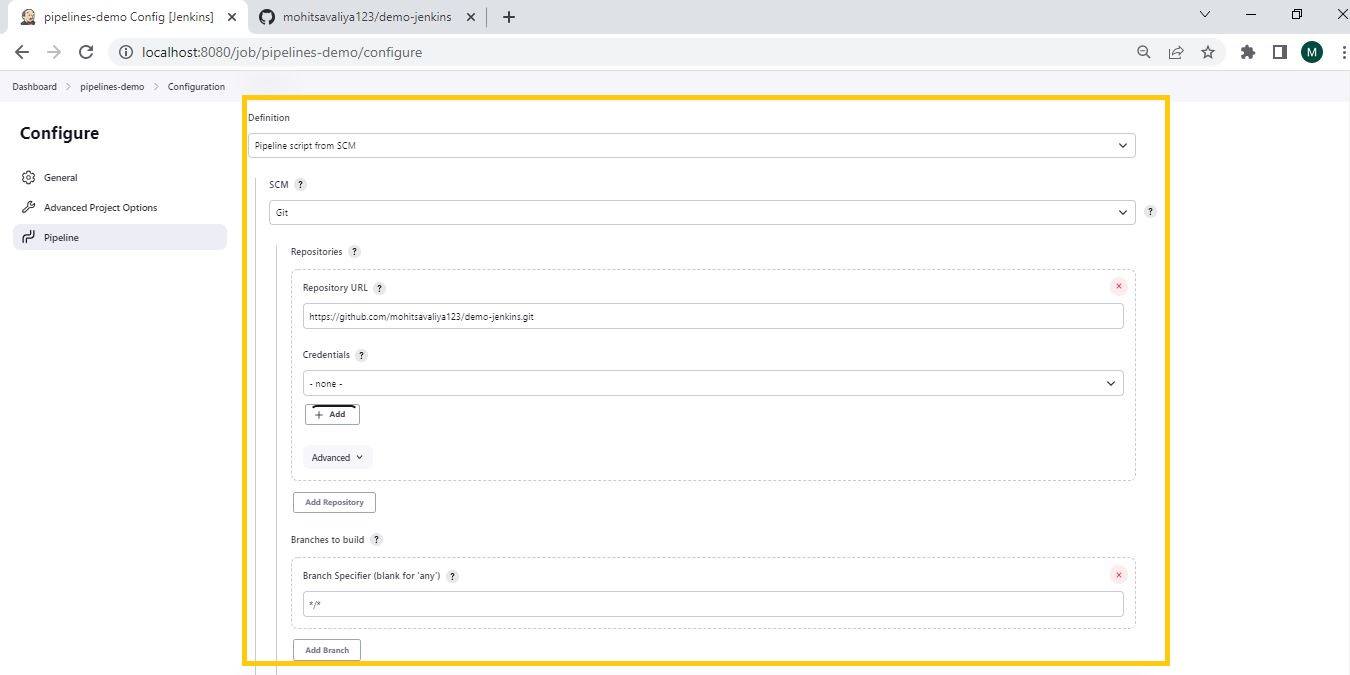
7. To configure a Jenkins pipeline with SCM Script:
- Go to the Pipeline section in the job configuration.
- Set Definition to Pipeline script from SCM.
- Under SCM, choose Git and input your repository URL.
- In Branches to Build, specify the branch as */* for all branches.
- This setup links the pipeline to the Git repository, allowing Jenkins to execute scripts directly from the source.
Pipeline-Job-with-SCMScript
8. In the Script Path field, specify the file name as Jenkins to indicate the pipeline script’s location.
9. Once all configurations are complete, click the Save button to apply the changes and finalize the setup.
Configure-Pipeline
Configuring a Webhook in GitHub
To set up a webhook for Jenkins in your GitHub repository, follow these steps:
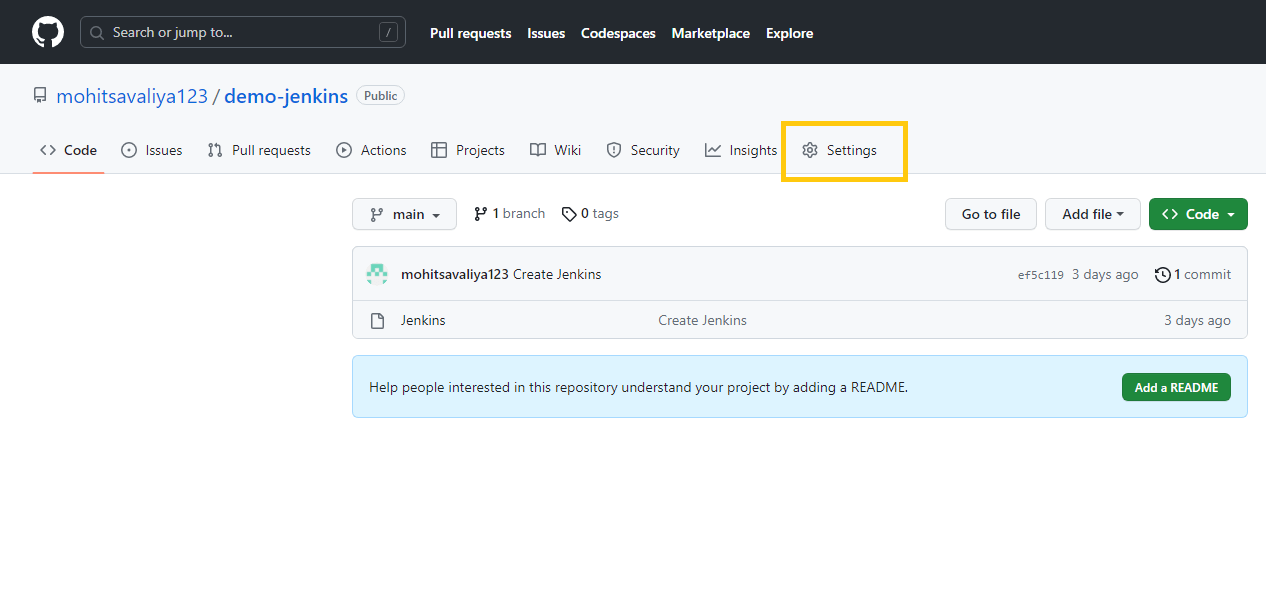
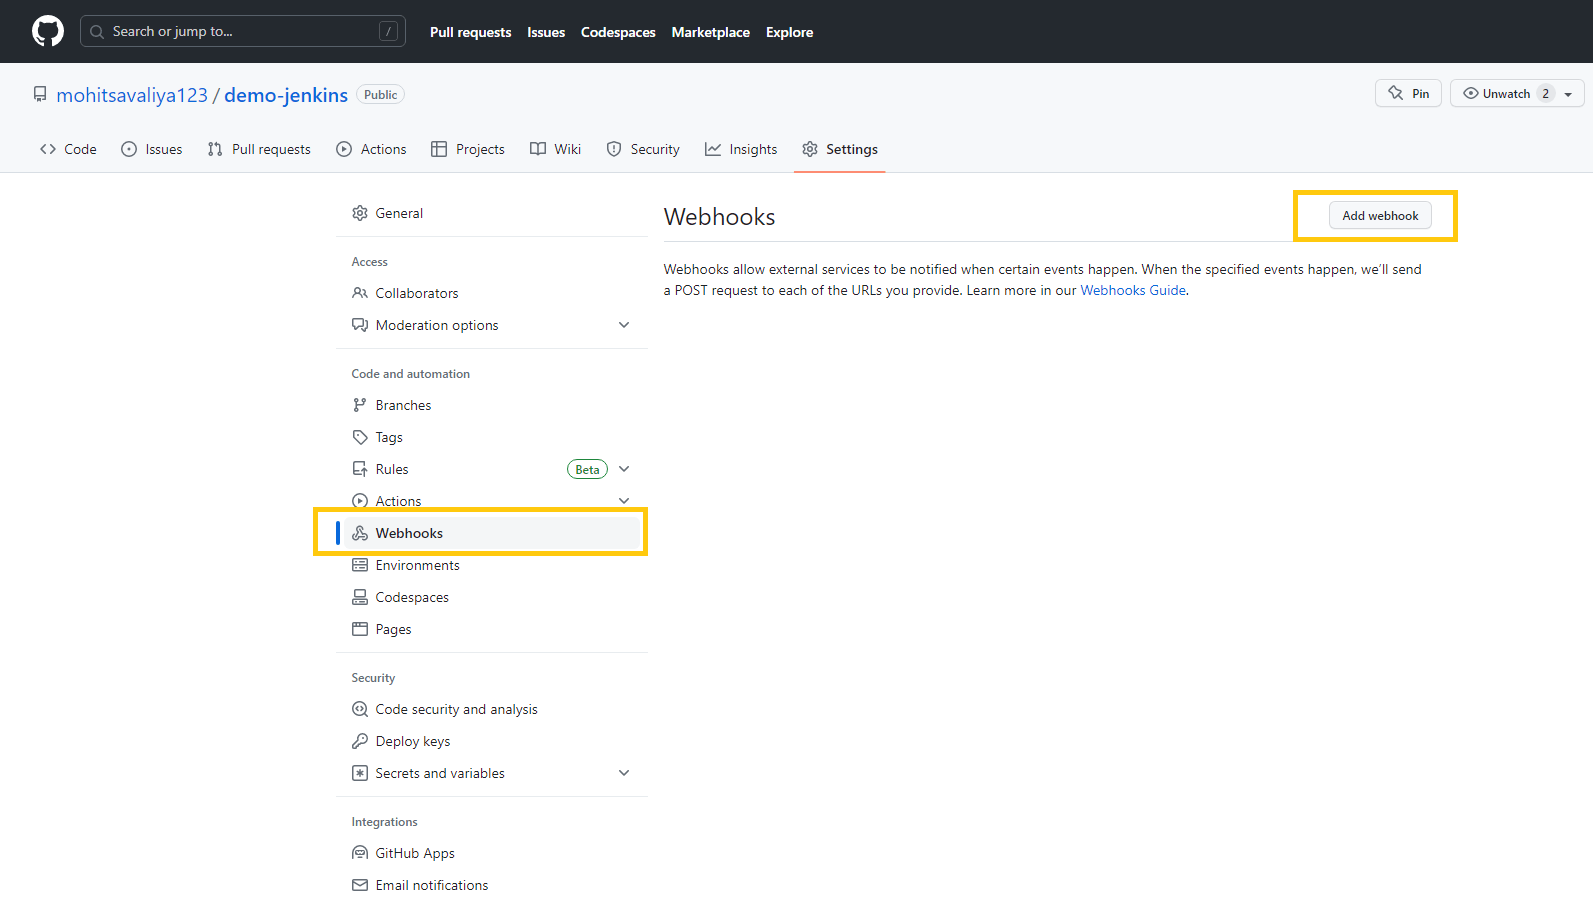
1. Open the repository’s Settings and go to the Webhooks tab.
2. On the “Webhooks” page, click Add webhook to configure the connection.
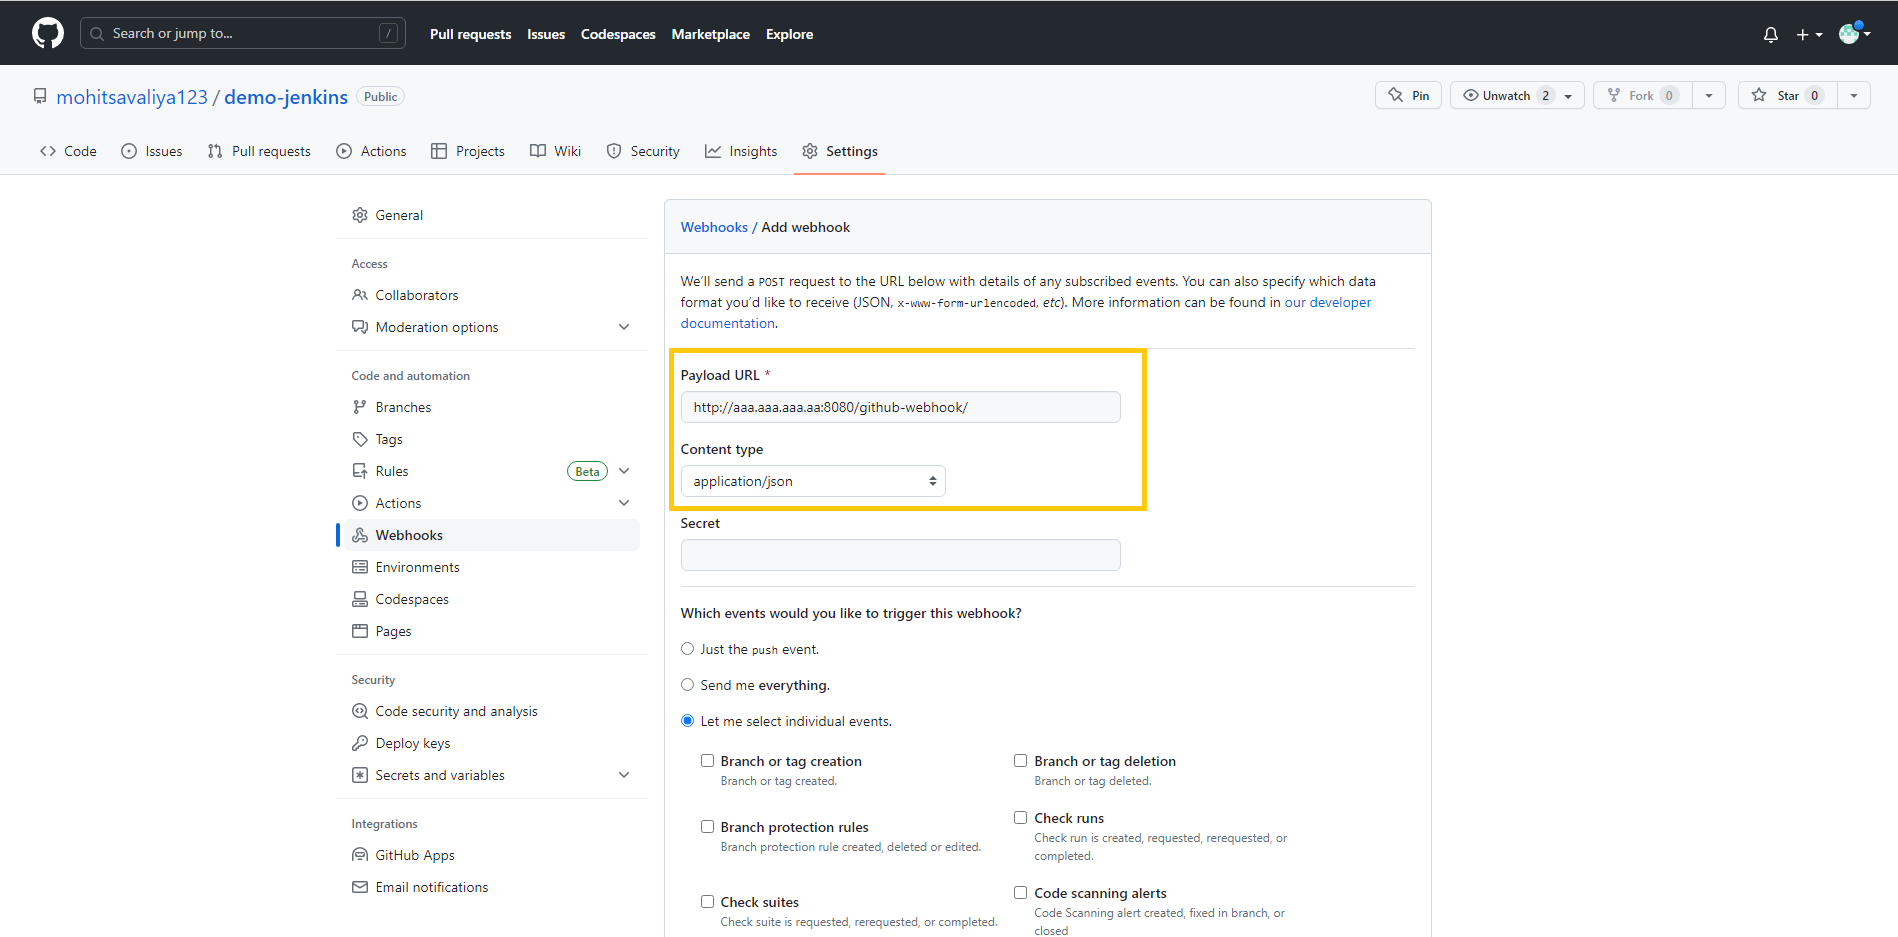
3. To configure the webhook, set the Payload URL to your Jenkins URL followed by `/github-webhook/` (e.g., http://yourJenkinsURL/github-webhook/).
4. Then, change the Content type to application/json to ensure proper communication between GitHub and Jenkins.
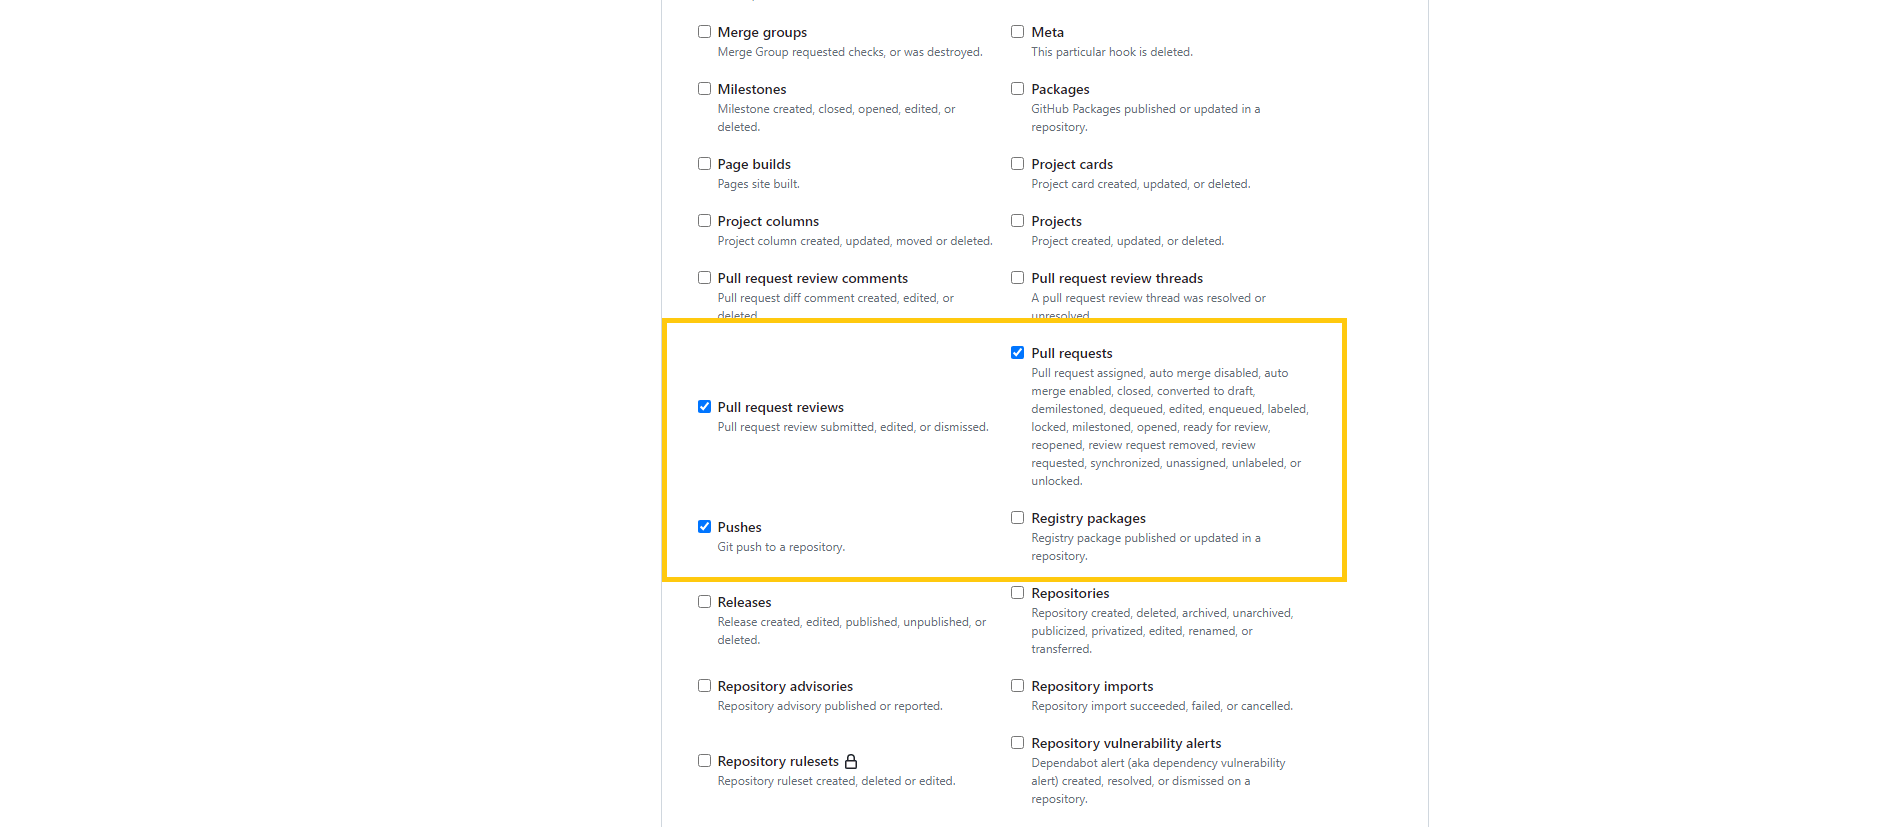
5. To configure webhook events, select Let me select individual events under the Which events would you like to trigger this webhook section.
6. Enable the checkboxes for Pull request reviews, Pushes, and Pull requests. These settings ensure that GitHub notifies Jenkins whenever these specific actions occur.
Executing the Jenkins CI/CD Pipeline Job
Below are the steps to execute Jenkins CI/CD Pipeline Job:
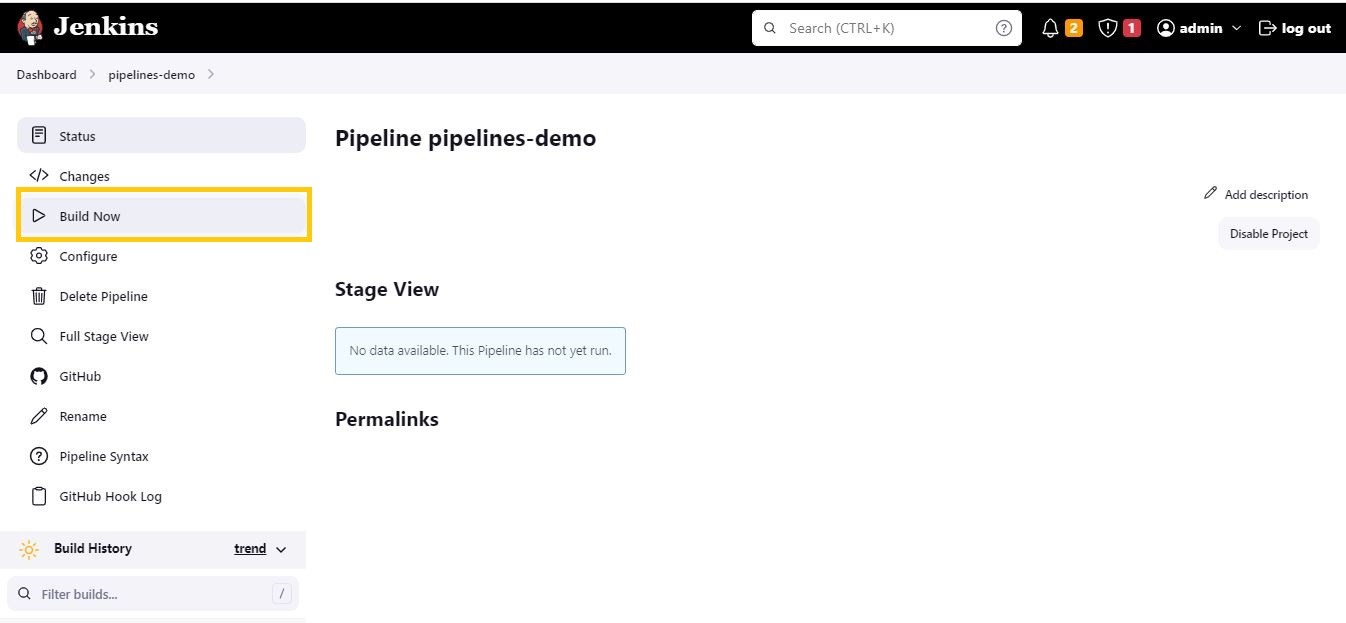
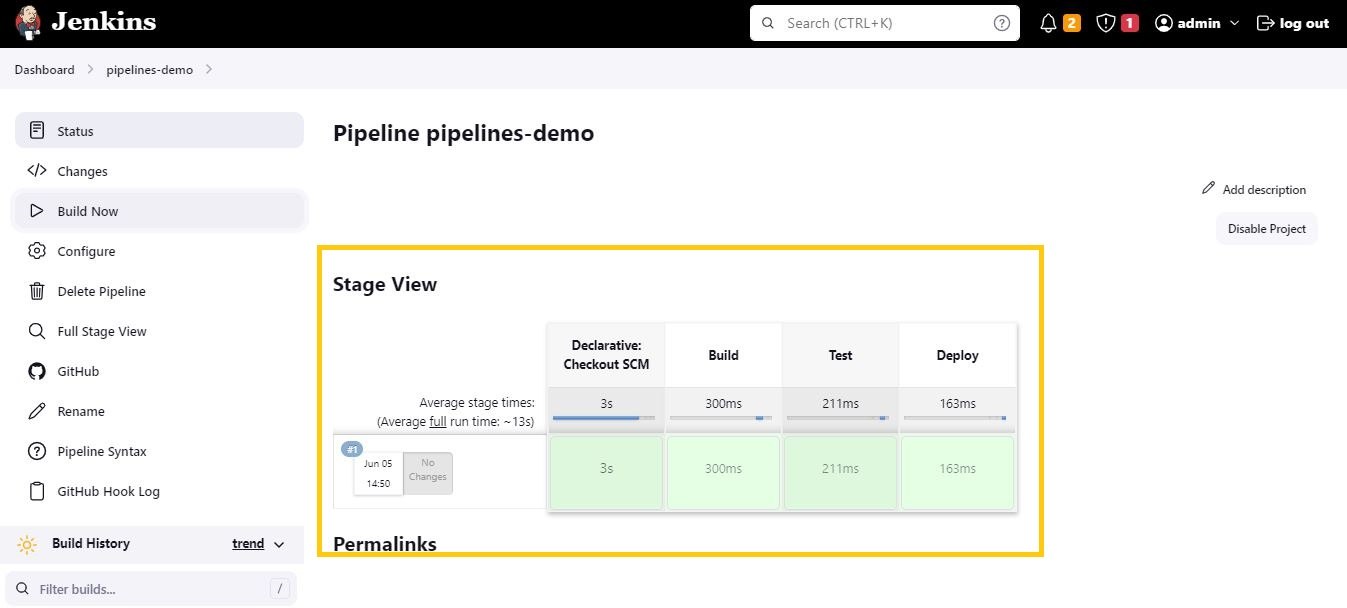
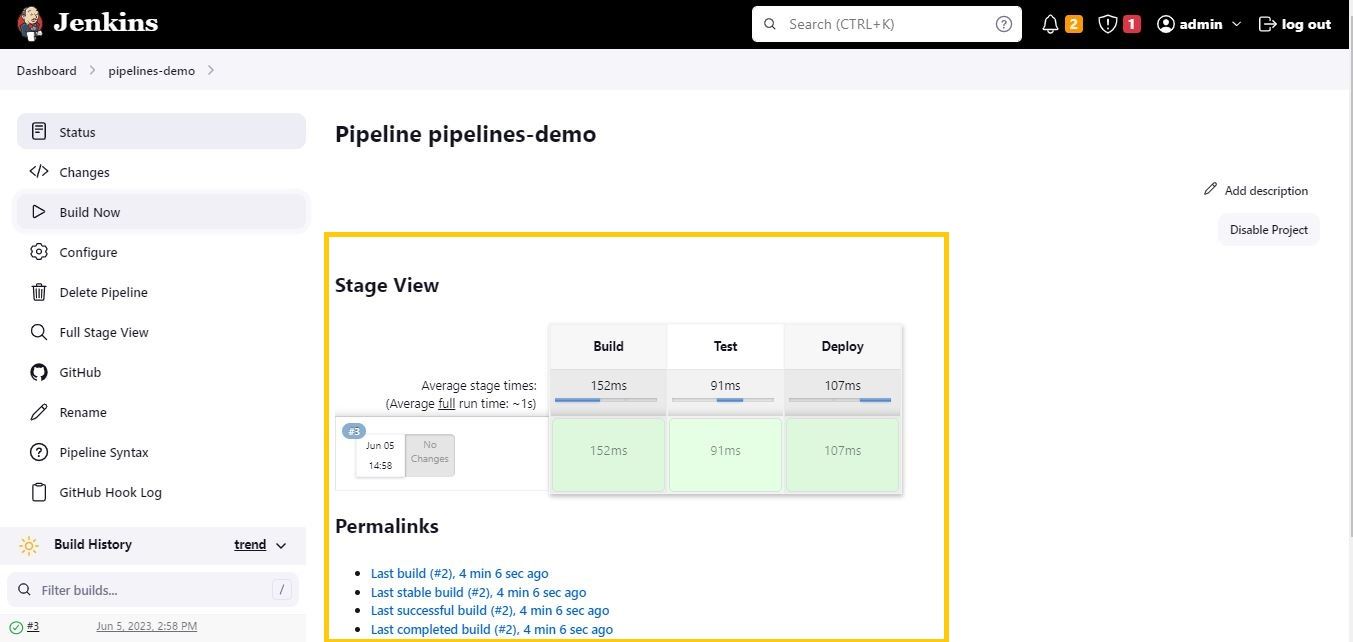
1. Click the Build Now option in Jenkins to start the build process and generate initial build data. This action triggers the pipeline to begin running the configured jobs and creates the initial build output.
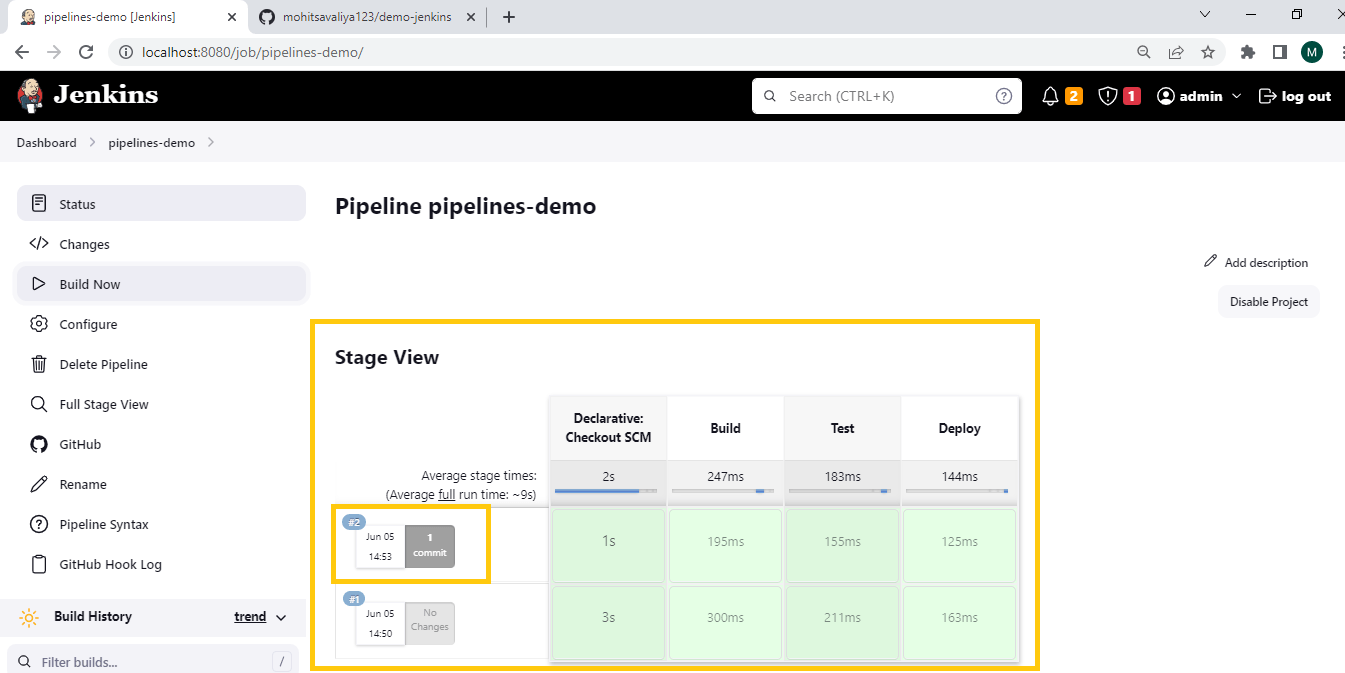
2. To test the pipeline, add a dummy file to the GitHub repository. Go to the repository, click Add file → Create new file, and name it demofile. You can add any demo text to this file. Committing this change will trigger the Jenkins pipeline, allowing you to verify the build process.
3. After adding the dummy file and committing the changes to the GitHub repository, return to the Jenkins pipeline status page. You should see a new build entry corresponding to the commit. This happens when configuring the pipeline job with SCM Script, indicating that Jenkins has detected the change and triggered the pipeline to run accordingly.
4. Clicking the Build Now option will trigger the pipeline when configuring pipeline jobs using a direct script. Any changes made or added to the GitHub repository will be reflected here as a new build entry in Jenkins. This allows for easy tracking of commits and their corresponding builds.
Automated Testing with Jenkins
Automated testing with Jenkins enables continuous integration by automating the execution of test cases as part of the build process. Jenkins can integrate with tools like Selenium and BrowserStack to run tests across various environments, ensuring consistent software quality.
Pro Tip: To optimize your testing, integrate BrowserStack with Jenkins to execute Selenium tests on real devices and browsers in the cloud, which helps automate cross-browser testing efficiently.
Integrate BrowserStack Automate with Jenkins
To integrate BrowserStack Automate with Jenkins for automated testing:
- Install the BrowserStack plugin in Jenkins.
- Configure your BrowserStack credentials (username and access key) in Jenkins as environment variables.
- Set up a build job with Selenium scripts that point to BrowserStack’s cloud grid.
- Use the BrowserStack capabilities in the Jenkins job configuration to specify the desired browsers and devices.
- Trigger the job, and Jenkins will run automated tests on BrowserStack’s real devices and browsers.
Monitoring and Logging with Jenkins
Monitoring and logging with Jenkins ensures the visibility and health of your CI/CD pipeline. Jenkins provides real-time feedback on job execution through console output and logs, helping teams identify errors or failures quickly. These logs are crucial for debugging, performance monitoring, and tracking pipeline progress. Jenkins also supports integrating third-party monitoring tools to enhance visibility into the build and deployment processes.
Challenges in Jenkins CI/CD Pipelines
Jenkins is an essential tool for CI/CD pipelines, but certain challenges can hinder its effectiveness. Addressing these challenges ensures smoother pipeline execution and better management.
1. Pipeline Failures
Challenge: Unexpected errors in the pipeline can lead to failures during builds or tests.
Solution: Implement error handling and retry mechanisms to recover from transient issues.
2. Scalability Issues
Challenge: Jenkins may struggle to handle large workloads or growing projects.
Solution: Utilize Jenkins agents and distributed builds to enhance scalability.
3. Long Build Times
Challenge: Complex pipelines with numerous steps can result in long build times.
Solution: Optimize by running tests in parallel and breaking down jobs into smaller parts.
4. Complex Configuration
Challenge: Managing complex configurations across different teams and projects can become difficult.
Solution: Use shared libraries and templates for standardization across projects.
5. Security Concerns
Challenge: Exposing sensitive data or unauthorized access can compromise Jenkins’ security.
Solution: Implement role-based access control (RBAC) and use secure credential management to safeguard access.
Also Read: 15 CI/CD Challenges and its Solutions
Best Practices for CI/CD with Jenkins
Implementing best practices in Jenkins CI/CD pipelines helps streamline processes, reduce errors, and enhance efficiency.
- Automate Everything: Automate the entire build, test, and deployment process to reduce manual interventions and increase pipeline consistency.
- Use Declarative Pipelines. Declarative pipelines make Jenkins files easier to read, maintain, and scale by clearly defining stages, steps, and conditions.
- Parallelize Jobs: Speed up build times by running tasks like tests in parallel, optimizing resource utilization, and reducing waiting times.
- Maintain Version Control: Store your Jenkins files in version control along with application code, ensuring pipeline definitions are always up-to-date and manageable.
- Monitor and Track Builds: Regularly monitor the build status and maintain logs for all builds, enabling quicker identification and resolution of issues.
Conclusion
In conclusion, Jenkins is crucial for automating CI/CD pipelines ensuring fast, reliable, and consistent testing. By leveraging BrowserStack for real-device testing, teams can further enhance their testing strategies, ensuring applications perform seamlessly across real browsers and devices. This combination streamlines the development process and boosts software quality.
Useful Resources for CI/CD
Understanding CI/CD
- What is CI/CD? (Differences, Benefits, Tools, Fundamentals)
- CI vs CD: Difference between Continuous Integration and Continuous Delivery?
- How to implement a CI/CD Pipeline?
- How to build an effective CI CD pipeline
- 15 CI/CD Challenges and its Solutions
- Continuous Delivery vs Continuous Deployment: Core Differences
- What is Continuous Testing in DevOps
- Continuous Testing Strategy in DevOps
- Continuous Integration in Agile
- Jenkins Continuous Integration Tutorial
- Difference between CI and CD, Agile and DevOps
- Devops CI: Continuous Integration in DevOps
- How to Build an Azure CI/CD Pipeline?
Tools and Comparisons
- Top 18 Continuous Integration Tools in 2024
- Top 15 CI CD Tools for your DevOps project in 2024
- Difference between Jenkins vs Gitlab CI
- Jenkins vs Travis: The War of CI Tools
- CircleCI vs Travis CI: Core Differences
- How CI CD Tools have revolutionised Automation Testing?
Best Practices, Tips, and Tricks
- How to optimize test cases for Continuous Integration
- How to run test on GitLab CI Locally
- Role of Automation Testing in CI/CD
- Is CI/CD Integration with Mobile App Testing possible?
- Moving from CI to CD using Automated Visual Regression Testing
- Accelerate CI/CD pipelines with Parallel Testing
- CI/CD Strategies for Faster Application Releases
FAQs
1. What is the difference between CI and CD?
CI (Continuous Integration) focuses on automatically integrating code changes into a shared repository multiple times daily, followed by automated testing to detect issues early.
CD (Continuous Delivery/Deployment) takes CI a step further by automatically deploying the code to staging or production environments. This ensures that the software is always in a deployable state and streamlines releases.
2. What is the role of Jenkins in CI/CD?
Jenkins plays a central role in CI/CD by automating the building, testing, and deploying applications. It helps developers integrate code changes continuously, execute automated tests, and ensure the application is always deployable. By automating these key stages of the software development lifecycle, Jenkins facilitates smooth collaboration, faster releases, and more reliable software.
