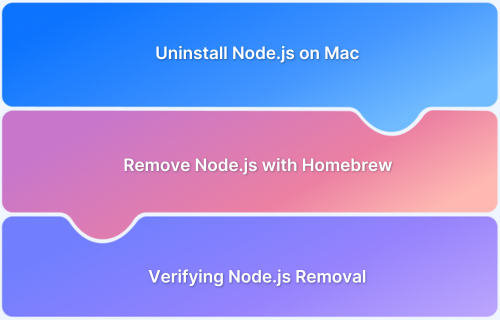
Node.js is a powerful and widely used JavaScript runtime that enables developers to build scalable and efficient applications. However, there may be instances where you need to uninstall it from your Mac.
If you originally installed Node.js using Homebrew, removing it is a quick and straightforward process. This guide will take you through each step to ensure a clean and complete uninstallation.
Steps to Uninstall Node.js on Mac using Homebrew
Follow these steps to completely uninstall Node.js from your Mac using Homebrew:
Step 1: Uninstall Node.js Using Homebrew
To remove Node.js, open the Terminal and run the following command:
brew uninstall nodeThis command will remove Node.js from your MAC system.
Step 2: Verify Node.js Removal
After running the uninstall command, confirm that Node.js has been removed by checking its version:
node -v
If Node.js has been successfully uninstalled, this command will return an error or indicate that the command has not been found.
Step 3: Clean Up Residual Files
Even after uninstalling Node.js, some residual files and configurations may still be present. To remove them, run:
brew cleanupThis command clears unnecessary files and dependencies left behind by Homebrew.
Step 4: (Optional) Remove Dependencies or Global Packages
If you installed global packages using npm, you may want to remove them as well. Run:
rm -rf ~/.npm

rm -rf /usr/local/lib/node_modules
This step ensures that no outdated or unnecessary Node.js related files remain.
Step 5: Verify Complete Uninstallation
To make sure Node.js is fully removed, restart your terminal and check again using:
node -v

npm -v
If you plan to rebuild or test a Node.js application, BrowserStack Automate provides a seamless way to run tests across different browsers and devices without worrying about local environment configurations. This allows you to focus on development while ensuring compatibility and performance across real-user conditions.
Other Methods to Uninstall Node.js on Mac
Here are some other methods to uninstall Node.js:
Uninstall Node.js Using NVM (Node Version Manager)
If you installed Node.js with NVM (Node Version Manager), follow these steps to remove it:
1. Check if NVM is installed
If you don’t have NVM, install it by following the steps on the official NVM GitHub page.
2. Restart your terminal
Open a new Terminal or restart your current one to load NVM properly.
3. List installed Node.js versions
Run this command to see all installed Node.js versions:
nvm ls4. Uninstall Node.js
To remove a specific version, use:
nvm uninstall <version>
Example:
nvm uninstall 14.17.3
Read More: Performing NodeJS Unit testing using Jest
Manual Uninstallation of Node.js
If you installed Node.js manually (not using NVM or Homebrew), follow these steps to remove it completely:
1. Remove Node.js binaries
Open Terminal and run:
sudo rm -rf /usr/local/bin/node

sudo rm -rf /usr/local/include/node

sudo rm -rf /usr/local/lib/node_modules
2. Delete additional Node.js files
Run the following commands to remove any leftover files:
sudo rm -rf ~/.npm

sudo rm -rf ~/.node-gyp

sudo rm -rf /usr/local/share/man/man1/node*
Also Read: Unit testing for NodeJS using Mocha and Chai
Verifying Node.js Removal
After uninstalling Node.js, you can check if it has been completely removed from your MAC system by running:
node -v

npm -v
If Node.js is successfully uninstalled, you should see a “command not found” message for both commands.
Reinstalling Node.js (If Needed)
If you need to reinstall Node.js after uninstalling it, follow these simple steps:
Step 1: Install Homebrew
Homebrew is a package manager for macOS that makes it easy to install and manage any software. To install Homebrew, open the Terminal and run the following command:
/bin/bash -c "$(curl -fsSL https://raw.githubusercontent.com/Homebrew/install/master/install.sh)"
This will install Homebrew on your system.
Step 2: Install Node.js
Once Homebrew is installed, use it to install Node.js by running this command:
brew install nodeThis will download and install the latest version of Node.js on your system.
Step 3: Verify the Installation
To make sure Node.js and npm are installed correctly, run these commands in the Terminal:
node -v

npm -v
You should see the version numbers for both Node.js and npm. If they appear, Node.js is successfully installed.
Conclusion
Uninstalling Node.js on a Mac using Homebrew is quick and easy. Following the steps in this guide, you can remove Node.js and its related files completely. If you ever need to reinstall it, Homebrew makes the process simple.
If you plan to rebuild or test a Node.js application, BrowserStack Automate is an excellent choice for cross-browser testing. It provides access to 3500+ real browsers and devices, allowing you to ensure seamless functionality across different environments without the hassle of local setup.
It supports parallel testing to speed up execution, integrates seamlessly with CI/CD pipelines, and provides in-depth debugging tools. By leveraging BrowserStack, you can ensure your application performs consistently across different platforms, accelerating development and improving overall software quality.


